
A wobbly door or one that won’t close signals it is time to learn how to fix a cabinet hinge properly. Ignoring these signs often leads to stripped screws or permanent damage to your cabinetry.
This guide teaches you to diagnose misalignment, repair ripped-out holes in melamine, and replace broken metal parts. You will discover proven methods to restore full function without replacing the entire unit.
Diagnose Why Your Cabinet Door Won’t Stay Closed
Applying the wrong fix wastes time and can worsen structural damage. You must identify the specific failure mode before grabbing your tools.
Spotting Alignment Versus Structural Damage
Misalignment causes gaps and rubbing, while structural damage involves physical breaks.
* Misalignment: Uneven gaps, sagging doors, or doors that spring open after closing.
* Structural Damage: Screws spinning freely, hinges pulled completely out of the wood, or snapped metal arms.
Visual Cues for Quick Identification
Look closely at the hinge area to determine your next step.
* Check if the gap between doors is wider at the top than the bottom.
* Inspect screw holes to see if the wood around them is shattered or intact.
* Examine European hinges for small metal lips that may have snapped off.
Adjust Screws to Fix Door Alignment Issues
Most cabinet doors simply need precise screw adjustments rather than complex repairs. A Phillips screwdriver is often the only tool required to solve these problems.
Correcting Uneven Top-to-Bottom Gaps
If the gap is wider at the top, the door needs horizontal adjustment.
1. Locate the front screw on the face of the top hinge.
2. Turn the screw clockwise by half a turn to pull the door inward.
3. Close the door to check if the gap is now uniform.
4. Repeat in small increments until the spacing looks even.
Warning: Do not over-tighten the screw, as this causes binding and warps the hinge path.
Eliminating Spring-Back When Closing
A door that rebounds after closing suffers from depth misalignment.
1. Find the back screw hidden behind the hinge body on the top hinge.
2. Loosen this screw counterclockwise two to three turns.
3. Gently pull the door outward until it sits flush with the cabinet frame.
4. Hold the door in place and retighten the back screw to lock the position.
Leveling a Sagging Cabinet Door
When a door sits lower than its neighbors, you must manually reposition it.
1. Loosen both the top and bottom hinge screws slightly to allow movement.
2. Lift the door until it aligns with the adjacent units.
3. Tighten the top screw first while holding the door in position.
4. Test the alignment and adjust the bottom screw if the door remains too low.
Repair Stripped Screw Holes Without Replacing Doors
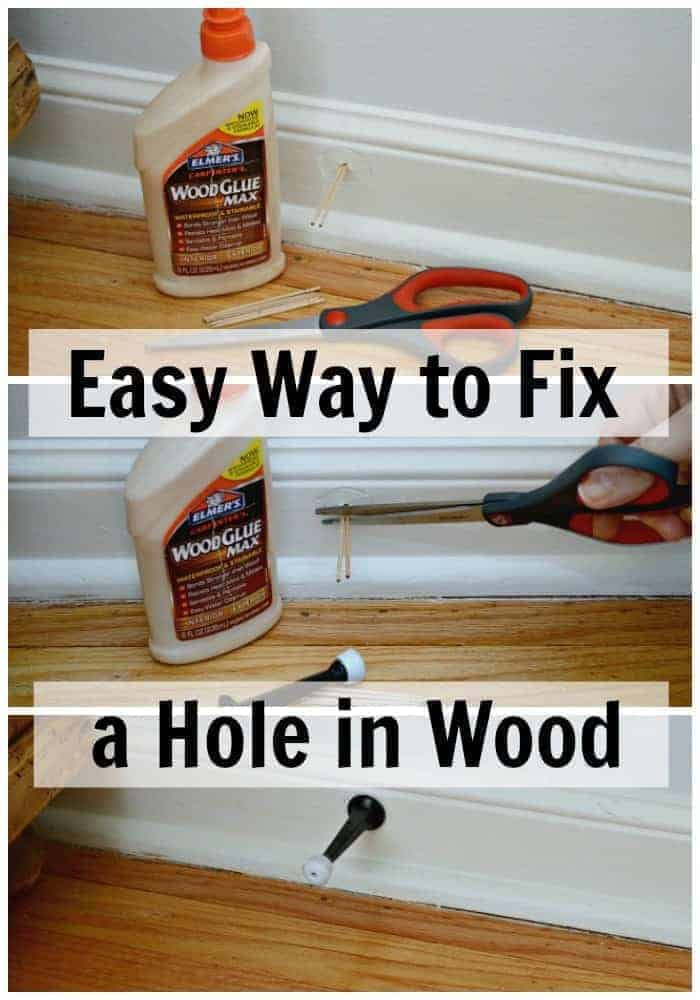
Loose screws that spin in intact wood require filling the hole to restore grip. This method works well for particleboard, MDF, and solid wood.
Using Wood Glue and Toothpicks
This simple technique fixes minor stripping effectively.
* Remove the loose screw and inspect the hole.
* Dip two or three wooden toothpicks in wood glue.
* Pack the glue-coated toothpicks tightly into the hole.
* Break off the excess wood flush with the surface.
* Let the glue dry for 15 to 30 minutes before reinstalling the screw.
Upgrading to Dowels for Severe Damage
Use a wooden dowel if toothpicks fail to provide enough grip.
1. Drill out the damaged hole to match the diameter of a wooden dowel.
2. Apply wood glue inside the hole and on the dowel itself.
3. Tap the dowel in until it is flush with the cabinet surface.
4. Allow the glue to cure overnight for maximum strength.
5. Drill a new pilot hole and reinstall the hinge.
Fix Ripped-Out Hinges in Melamine Cabinets
Standard adhesives often fail when repairing hinges ripped out of melamine. Testing shows that only specific chemical bonds can exceed original factory strength.
Why Common Adhesives Fail Under Load
Many popular repair products cannot handle the daily stress of cabinet doors.
* Bondo: Fails at 12.5 lbs, which is 37.5% weaker than factory standards.
* PC 11 Epoxy: Also fails at 12.5 lbs under stress testing.
* Clear Epoxy: Holds to 17.5 lbs but still falls short of requirements.
* PL Premium: Fails at 17.5 lbs, making it unsuitable for high-use areas.
Applying CA Glue with Activator for Maximum Strength
Cyanoacrylate (CA) glue with an activator creates a bond that holds up to 30 lbs.
1. Apply masking tape around the damaged area to contain the glue.
2. Place the hinge over the damage and mark hole positions with a pencil.
3. Inject CA glue into each ripped hole until it is completely full.
4. Spray immediately with CA activator to harden the glue in seconds.
5. Let the repair cure overnight to form a dense, strong shell.
6. Drill pilot holes at your marked spots and reinstall the hinge.
Replace Broken Metal Parts on European Hinges
:max_bytes(150000):strip_icc()/hinge20chart-b8a2999ed08d46728f5ab6d3d4d242ed.jpg)
European style hinges like Salice have complex metal linkages that sometimes break beyond repair. Identifying the break type saves you from futile repair attempts.
Reconnecting a Slipped Hinge Joint
If the hinge halves separated but no metal is broken, you can fix it.
* Compare the slipped hinge to a working one to understand the geometry.
* Use a flathead screwdriver to pry the joint flat and relieve spring tension.
* Slide the frame piece back into the door-mounted guide carefully.
* Tighten the adjustment screw immediately to lock the joint in place.
Knowing When Replacement Is Necessary
You must replace the hinge if the metal itself is fractured.
* Look for a snapped lip on the frame piece where the tightening screw sits.
* Recognize that no glue can restore structural integrity to broken metal.
* Purchase a replacement hinge for approximately six dollars at hardware stores.
* Match the brand and model number for a seamless installation.
Essential Tools and Materials for Hinge Repairs
Having the right equipment ensures your repair lasts longer and functions smoothly.
Basic Repair Kit Checklist
- Phillips screwdriver for all hinge adjustments
- Flathead screwdriver for prying joints
- Wood glue for filling stripped holes
- Wooden toothpicks or matchsticks
- CA glue and activator spray for melamine
- Drill with small bits for pilot holes
- Masking tape to contain adhesives
Avoid These Common Cabinet Hinge Mistakes
Small errors during repair often lead to recurring problems and further damage.
Over-Tightening Adjustment Screws
Forcing screws causes thread stripping and hinge binding. Always adjust in half-turn increments and test the door after every turn.
Misdiagnosing Broken Metal Components
Tightening a screw on a broken metal lip will not work. Inspect closely for fractures before attempting to tighten or glue the area.
Using Weak Adhesives for Structural Repairs
Avoid Bondo or standard epoxy for ripped-out hinges. These materials lack the long-term strength needed for daily cabinet use.
Maintain Your Cabinet Hinges for Longevity
Prevent future issues by performing simple maintenance tasks regularly.
Periodic Screw Inspection
Check hinge screws every six months for looseness. Tighten them slightly before they strip the wood or cause misalignment.
Lubricating Moving Parts
Apply a tiny drop of silicone lubricant to hinge pivots annually. This prevents stiffness and ensures smooth operation over time.
Decision Guide: Repair or Replace Your Hinge
Use this quick reference to decide the best course of action for your specific problem.
| Condition | Recommended Action | Reason |
|---|---|---|
| Uneven gaps or sagging | Adjust screws | Fully correctable with alignment |
| Loose screws, intact wood | Fill with toothpicks | Quick and permanent fix |
| Ripped-out hole (melamine) | CA glue + activator | Stronger than original factory |
| Broken metal linkage | Replace hinge | Metal cannot be glued effectively |
| Corroded or bent hinge | Replace hinge | Structural integrity compromised |
Frequently Asked Questions About Cabinet Hinge Repair
Can I fix a cabinet hinge without removing the door?
Yes, most alignment issues can be fixed while the door is still attached. You only need to remove the door if you are repairing ripped-out holes or replacing the entire hinge unit.
What is the strongest glue for repairing ripped-out cabinet hinges?
CA glue (cyanoacrylate) with an activator is the strongest option for melamine. Testing shows it holds up to 30 lbs, which exceeds the original factory strength of 20 lbs.
Why does my cabinet door keep popping open after I close it?
This usually indicates a depth misalignment known as spring-back. Adjusting the back screw on the top hinge allows the door to sit flush against the frame.
How do I know if my European hinge needs replacement?
Inspect the metal linkage for cracks or snapped lips. If the metal is physically broken, you must replace the hinge because adhesives cannot fix fractured metal.
Is it worth repairing old cabinet hinges or just replacing them?
Repair is usually worth it for misalignment and stripped holes. However, if the metal linkage is broken or the hinge is severely corroded, replacement is the more cost-effective solution.
Key Takeaways for Fixing Your Cabinet Hinge Successfully
Diagnosing the problem correctly is the most critical step in any repair. Misalignment requires simple screw tweaks, stripped holes need wood fillers, and ripped melamine demands CA glue with activator.
Never attempt to glue broken metal parts, as this will not restore structural integrity. Replace hinges with snapped linkages immediately to avoid further damage to your cabinets.
Start by inspecting your cabinet doors today to identify the specific issue. Apply the appropriate method from this guide to restore smooth operation and extend the life of your cabinetry.