

A standard refrigerator sticking out from your kitchen line often ruins an otherwise cohesive design. Building a custom refrigerator cabinet enclosure hides the appliance and creates a built-in look that elevates your entire space.
This guide explains how to build a sturdy surround using proper ventilation rules and precise measurements. You will learn to cut panels, install trim, and match finishes for a professional result.
Design Your Refrigerator Cabinet for Visual Symmetry
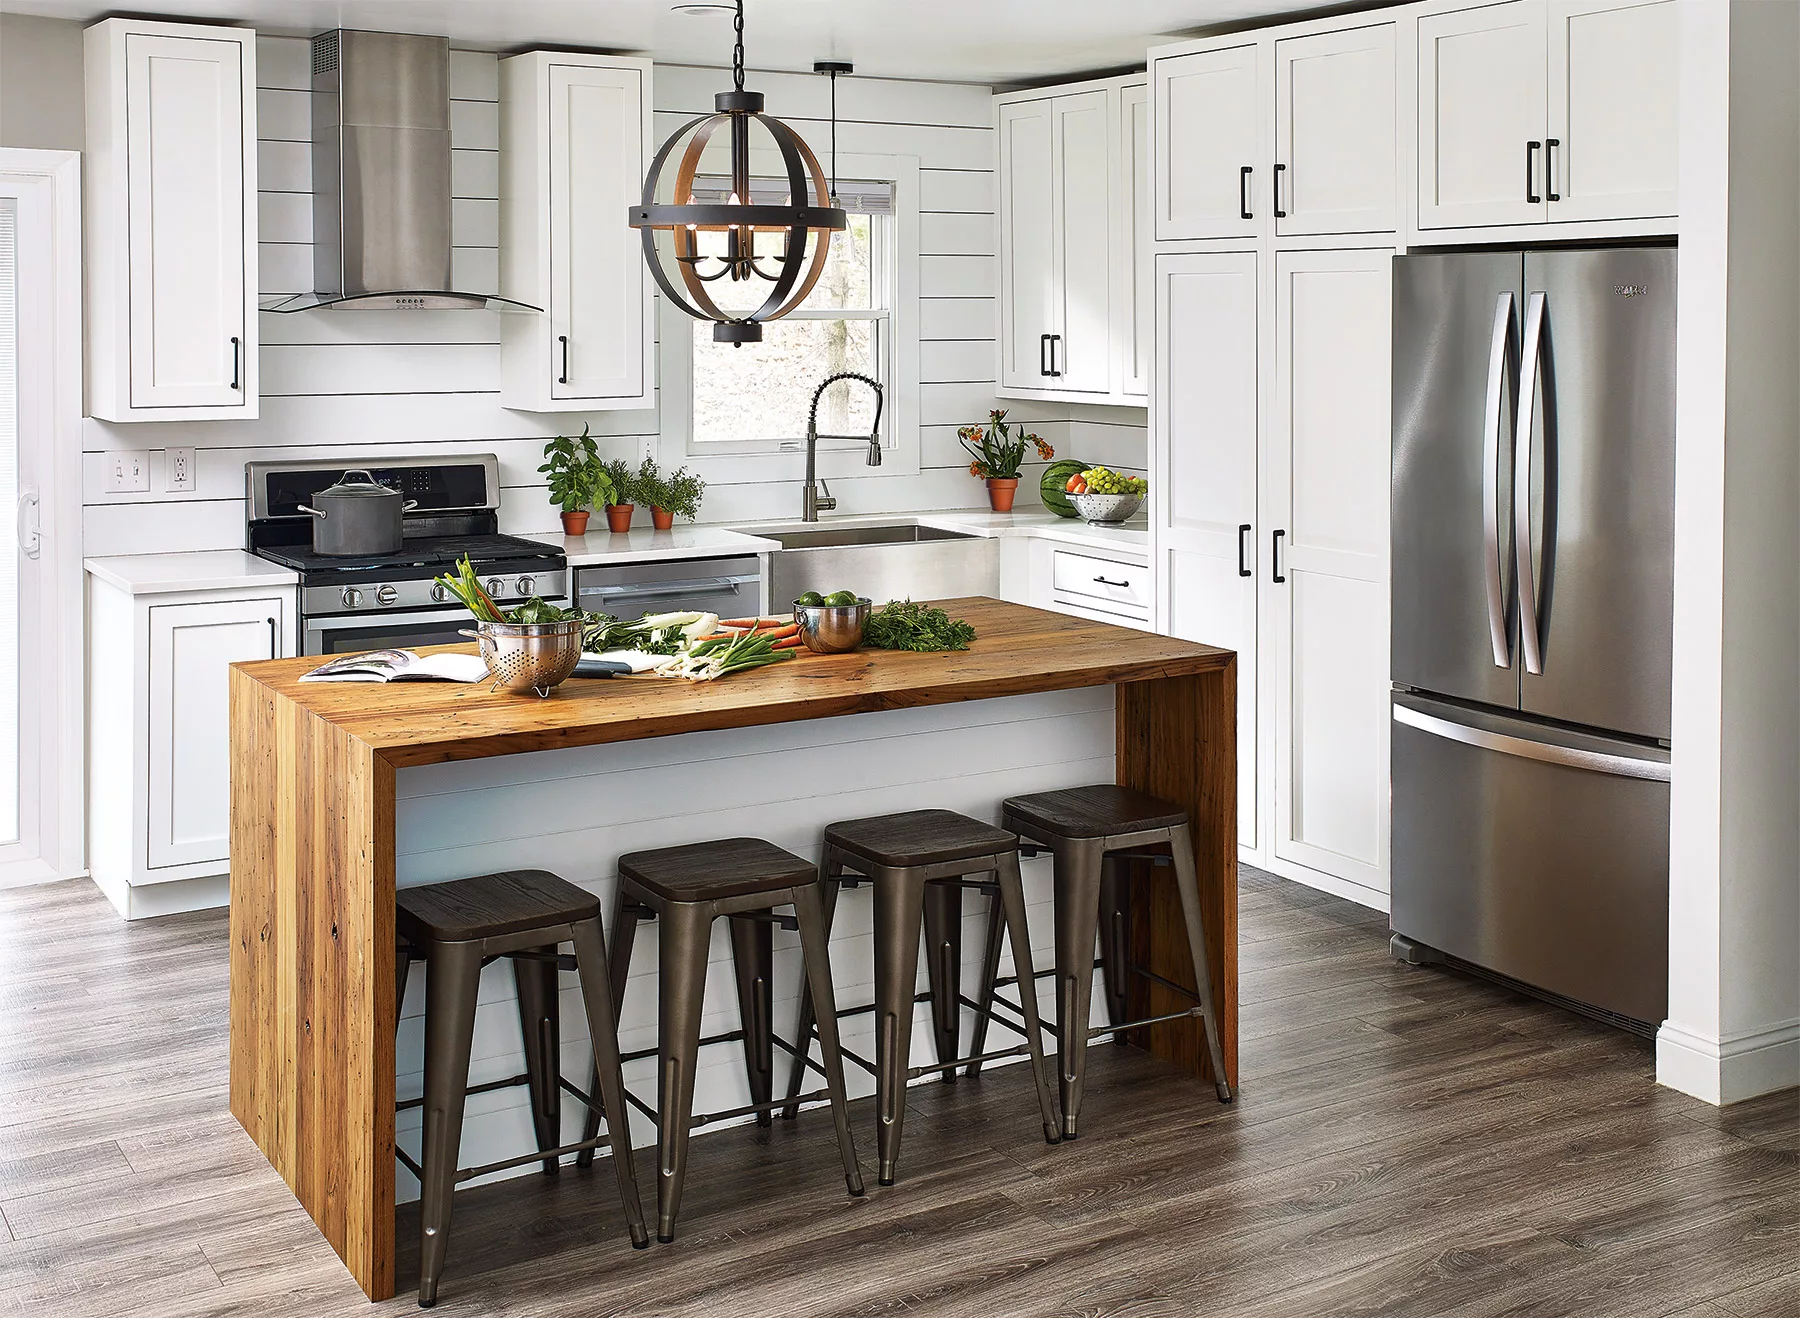
Achieving a built-in appearance requires matching your new enclosure to existing cabinetry depth and style. Align the face frame with adjacent units, typically 24 to 26 inches for counter-depth setups.
Balance Face Frames and Trim Widths
Framing symmetry is critical for a professional look. If one side of the fridge meets a wall casing, the opposite side may need extra width to balance visual weight.
* Mirror the width of existing jambs on the open side.
* Use the same reveal gaps between doors and frames as nearby cabinets.
* Extend baseboards continuously from adjacent units into the new build.
Extend Base and Crown Details
Install a faux toe kick at the bottom to match your current cabinetry line. Add crown molding at the top to bridge the gap between the cabinet and ceiling. These details make the unit feel like original architecture rather than an addition.
Maximize Over-Fridge Storage
Enclose the space above the refrigerator to turn dead air into functional storage. Use this area for seasonal appliances, large serving trays, or decorative baskets to optimize compact kitchen layouts.
Ensure Proper Ventilation and Clearance Standards

Proper airflow is the most critical technical constraint when you build a refrigerator cabinet. Enclosing an appliance without adequate ventilation causes overheating and premature failure.
Maintain Side Clearance Requirements
Keep at least 2.5 inches of space on each side of the fridge, with 3 inches being ideal. When installing trim, leave a ½-inch gap between the fridge side and the cabinet facing to prevent heat buildup.
* Never compress sides tightly against the appliance.
* Ensure trim does not block the airflow path.
* Check manufacturer specs for specific model requirements.
Provide Rear and Top Clearance
Keep 2 inches between the back of the fridge and the wall to protect condenser coils. Allow 1 inch between the top of the refrigerator and the underside of the upper shelf for rising heat.
* Use cleats to mount the cabinet forward if walls are uneven.
* Do not seal the top gap completely with caulk.
* Verify that coils at the bottom or rear remain unobstructed.
Account for Door Swing Arc
Measure the full arc of the refrigerator doors when fully open. Add 2 to 3 inches beyond the maximum swing to avoid interference with adjacent cabinets or walls. Test door movement after installation to ensure smooth operation.
Use Standard Dimensions to Guide Your Build

Start with your specific refrigerator model dimensions and add the necessary clearance values. Use this data to calculate the rough-in size before cutting any materials.
| Fridge Type | Standard Width (in.) | Enclosure Width (in.) | Notes |
|---|---|---|---|
| Compact | 24–30 | 26–32 | Ideal for tight spaces |
| Standard Single | 30–36 | 32–38 | Most common DIY fit |
| French Door | 33–36 | 35–38 | Check door radius |
| Side-by-Side | 36–40 | 38–42 | Requires wide clearance |
Calculate Internal and External Widths
Subtract ¾ inch from your desired internal depth to account for the 1×2 facing. Add ¾ inch plywood thickness to each side when calculating total exterior width.
* Plan height from floor to ceiling for a full-built look.
* Split ceiling-height builds into upper and lower sections.
* Double-check all measurements before cutting plywood.
Gather Materials and Tools for Construction
Select durable, paint-grade materials to ensure your refrigerator cabinet lasts for years. High-quality plywood and proper fasteners create a sturdy frame that supports the structure.
Select Durable Plywood and Lumber
Use ¾-inch cabinet-grade birch plywood for smooth edges and paint readiness. Choose 1×2 pine or poplar for front facing and 1×6 lumber for the top header.
* Install 1×1 plywood strips for wall and shelf cleats.
* Use 1¼” and 2½” wood screws for structural joints.
* Apply wood filler and paintable caulk for seamless finishes.
Equip Yourself with Essential Tools
You need a table saw for panels and a miter saw for precise trim cuts. A Kreg Jig creates strong pocket holes, while a brad nailer speeds up facing installation.
* Use a laser level for high-precision alignment.
* Bring an orbital sander for smooth surface preparation.
* Keep a stud finder handy for secure wall attachment.
Build the Cabinet Frame in Six Phases
Follow this sequential process to construct a square and sturdy enclosure. Each phase builds upon the previous one to ensure structural integrity.
Phase 1: Prepare the Site and Cut Components
Clear the area and remove old trim or cabinets to expose the wall studs. Check floor flatness with a laser level and install blocking if the floor dips significantly.
* Cut ¾-inch plywood for side, top, and bottom panels.
* Cut 1×2 facing and 1×1 cleats to specified lengths.
* Label each piece clearly to avoid confusion during assembly.
Phase 2: Assemble the Frame Structure
Drill pocket holes on the inside edges of side panels and shelf rails. Attach top and bottom panels to sides using 1¼” pocket screws and wood glue.
* Install a center divider if creating dual storage zones.
* Measure diagonals to ensure the box is perfectly square.
* Reinforce all joints with additional screws where needed.
Phase 3: Install Facing and Trim Pieces
Attach 1×2 facing to the front edges of the plywood using wood glue and brad nails. Align the outer edge of the facing with the outer edge of the plywood.
* Let the facing overhang slightly to conceal raw edges.
* Secure nails every 6 to 8 inches along the length.
* Add a 1×6 header across the top front for a finished look.
Phase 4: Mount the Cabinet to Wall Studs
Locate wall studs with a stud finder and attach 1×1 cleats at side and rear locations. Lift the cabinet into place and secure it to the cleats with screws.
* Install blocking between framing members if studs do not align.
* For ceiling-height units, install upper cleats into joists first.
* Ensure the unit is stable before releasing your grip.
Phase 5: Level and Align the Structure
Use a laser level to check plumb from top to bottom. If the cabinet leans, shim between the back and wall to straighten the unit.
* Pin shims with nails before final tightening.
* Scribe the cabinet base to match uneven floor contours.
* Ensure the front is flush with adjacent cabinetry.
Phase 6: Finish for a Professional Look
Fill large corner gaps with backer rod, then apply paintable caulk. Sand all surfaces with 220-grit paper and prime before painting.
* Apply two coats of paint matching your kitchen cabinets.
* Install crown molding at the top and baseboard at the bottom.
* Touch up caulk and paint seams after trim installation.
Optimize Interior Storage and Functionality
Add a shelf above the fridge to maximize utility within your new refrigerator cabinet. Cut plywood to fit inside the enclosure, resting on 1×1 cleats installed at the desired height.
* Attach 1×2 facing to the front edge of the shelf.
* Align the top of the facing with the shelf for a clean overhang.
* Install vertical dividers to separate baking sheets or trays.
Line Interior with Shiplap
For open upper cabinets, line the interior with vertical shiplap planks. This adds texture and matches farmhouse or modern styles effectively. Secure planks with brad nails and caulk seams for a polished look.
Address Common Challenges During Installation

Uneven floors and irregular walls are common obstacles when you build a refrigerator cabinet. Use the scribing method to trace floor contours and cut gaps with a jigsaw.
* Cover gaps with a faux toe kick to hide imperfections.
* Trace wall outlines onto the back panel for a perfect fit.
* Place shims at the back to prevent cabinet pull-back.
Manage Seams in Tall Units
For ceiling-height enclosures, split the cabinet into permanent upper and removable lower sections. Join them with precise framing to hide seams effectively. Aim for a 4-inch visible seam that trim or paint can easily conceal.
Maintain and Troubleshoot Your New Cabinet
Dust can accumulate in side and rear gaps over time, so vacuum clearance areas every six months. Never block vents with stored items to ensure consistent airflow.
* Touch up paint and caulk if hairline cracks appear.
* Avoid overloading shelves with excessively heavy items.
* Distribute weight evenly to prevent plywood sagging.
Maximize Aesthetic Impact
Maintain consistent ¼-inch reveals between doors and frames to match adjacent cabinetry. Use a white painted finish to contrast beautifully with natural wood countertops.
* Update vintage kitchens with open shelving above the fridge.
* Improve small kitchen flow by enclosing the fridge area.
* Create a deliberate shadow line at the crown for depth.
Frequently Asked Questions About Building a Refrigerator Cabinet
How much clearance does a refrigerator need inside a cabinet?
You need at least 2.5 inches on each side, 2 inches at the rear, and 1 inch at the top. These gaps allow heat to escape and prevent the appliance from overheating.
What type of plywood is best for a refrigerator surround?
Use ¾-inch cabinet-grade birch plywood for a smooth, paintable surface. This material offers durability and clean edges that accept paint well without excessive grain raise.
Can I build a refrigerator cabinet that reaches the ceiling?
Yes, but you should split the build into upper and lower sections for easier installation. Secure the top section to ceiling joists and join the lower piece with precise framing.
How do I handle uneven floors when installing the cabinet?
Use the scribing method to trace the floor contour onto the cabinet base. Cut along the line with a jigsaw and cover the gap with a faux toe kick.
Do I need active ventilation fans for the enclosure?
Most modern fridges rely on passive airflow through side and rear gaps. Active fans are only necessary for tight spaces or older models with high heat output.
Key Takeaways for Building Your Refrigerator Cabinet
Building a refrigerator cabinet transforms your kitchen by hiding bulky appliances and creating a seamless design. Success depends on maintaining strict ventilation clearances and using high-quality materials like birch plywood. Focus on details like scribing for uneven floors and matching trim profiles to achieve a professional result.
Start by measuring your specific fridge model and planning your cut list carefully. Gather your tools and materials, then follow the phased construction guide to build a sturdy frame. With patience and precision, you can create a custom enclosure that elevates your entire kitchen aesthetic.


