A drawer that sags in the middle or falls out when you pull it open signals deep structural failure rather than simple annoyance. Whether your kitchen unit features crumbling particle board or a bowed hardboard bottom, learning how to fix cabinet drawers starts with accurate diagnosis of the root cause. Most issues stem from weak materials or broken tracks that require specific repair strategies instead of total replacement.
This guide walks you through precise methods to restore strength and function using the right tools and techniques. You will learn to rebuild weak boxes with MDF, reinforce sagging bottoms with timber battens, and repair broken tracks for smooth operation. From quick plastic wedge fixes to full reconstruction projects, these steps ensure your drawers glide smoothly for years.
Diagnose the Root Cause of Drawer Failure
Before grabbing your tools, you must assess exactly what is broken to avoid wasted effort. Misdiagnosis often leads to temporary fixes that fail within weeks, so use a systematic approach to pinpoint the failure.
Check Joint and Material Integrity
Start by removing the drawer and inspecting all corners for signs of separation or crumbling. Particle board drawers often fail at mitered joints, so look for flaking edges or gaps where screws were once driven. If the front pulls away from the sides with minimal pressure, the joint is compromised and likely needs rebuilding.
Test for Bottom Sag and Collapse
Flip the drawer upside down and place a straight edge across the bottom panel to check for gaps. If there is a dip in the center, especially on IKEA Hemnes models, the hardboard or thin MDF bottom is bowing under load. Check if the back edge has pulled out of its groove, as even slight flexing means reinforcement is needed immediately.
Inspect Tracks and Hardware
Reinsert the drawer and open it slowly to see if it wobbles or lifts up at the front. These are clear signs of track failure, so pull the drawer all the way out by lifting the front slightly. Examine both the drawer-mounted and cabinet-mounted rails for bent metal, missing screws, or worn plastic rollers that prevent secure attachment.
Rebuild Weak Drawer Boxes with MDF
When joints fail and particle board crumbles, a full rebuild is the only long-term fix for your cabinet. This method replaces fragile materials with stronger MDF and robust joinery techniques.
Choose MDF Over Particle Board
MDF is denser and more stable than particle board, making it ideal for drawer box reconstruction. You can salvage usable parts like the front panel and handles while discarding the original box sides and back. This material holds fasteners far better and resists the pulling forces that cause initial failures.
Use Dado and Rabbet Joints
Replace weak miter joints with interlocking dado and rabbet joints to create a rigid box structure. Cut a quarter-inch wide dado on the side panels and a matching rabbet on the front and back panels using a table saw. Widen the cut slightly on the second pass to ensure easier assembly without compromising joint tightness.
Assemble with Glue and Brad Nails
Apply wood glue to all joint surfaces and slide the pieces together securely. Secure each corner with three-quarter inch brad nails to maintain alignment while the glue cures in a warm area. Once dry, install the bottom panel directly into the groove since MDF does not expand like solid wood.
Finish and Reinstall Properly
Paint the new box to match your cabinetry before attaching the slides using pilot holes. Use folded paper shims between the drawer front and cabinet frame to ensure perfect alignment during installation. Mark and drill new handle holes from the back for a clean look that hides fasteners.
Fix Sagging Drawer Bottoms Effectively
:max_bytes(150000):strip_icc()/101855088-2d160890803345f0856119358592286f.jpg)
Sagging bottoms are common in flat-pack drawers, but three repair tiers can match the severity of the damage you face.
Install Plastic Drawer Wedges
For mild sag or loose backs, use plastic fixing wedges to push the bottom panel tightly against the drawer side. Insert the wedge at the back corner and tighten the screw with a Phillips driver until snug. This method requires no glue or disassembly, making it perfect for early-stage sag or renters needing reversible fixes.
Add Timber Batten Supports
When the bottom visibly sags in the center, reinforce it with wood battens cut slightly shorter than the internal width. Position two battens at the front and back thirds of the drawer underside, avoiding the center where flex is worst. Glue and screw only at the back edge to hide fasteners, then clamp and let dry overnight for a rigid support.
Apply MDF Overlay for Severe Bowing
If the bottom is concave or pulled out completely, flatten and reinforce it with a nine millimeter MDF overlay. Re-seat the original bottom in the rear groove, then glue the cut-to-size MDF piece to the underside while supporting the center. Press down firmly and weight it with paint cans or bricks for 24 hours to create a perfectly flat surface.
Avoid These Bottom Repair Mistakes
Do not attempt to disassemble IKEA drawers because their plastic nails break on removal and make reassembly nearly impossible. Avoid overloading drawers to prevent future sag, and always check that added battens do not interfere with slides. Ensuring clearance below the front edge is critical for proper function.
Repair or Replace Broken Drawer Tracks
Even a perfect drawer box fails if the tracks are bent, loose, or stripped, so inspect them carefully.
Remove and Inspect the Slides
Pull the drawer fully open, lift the front slightly, and slide it out to examine both halves of the track system. Look for bent rails, worn rollers, or loose screws that may be causing the drawer to wobble or fall out. Check the cabinet frame for stripped screw holes that prevent secure reattachment of the hardware.
Tighten or Upgrade Fasteners
Tighten all loose screws and replace any stripped ones with longer or thicker versions that bite into fresh material. For particle board cabinets, consider using thread-cutting screws or inserts to achieve a better grip on the frame. This simple step often resolves instability issues without needing new tracks.
Straighten or Replace Tracks
If rails are bent, gently bend them back into shape using pliers to restore smooth operation. For severe damage, remove the old tracks entirely and install new ball-bearing or soft-close full-extension slides. These upgrades offer smoother operation and better weight support for heavy items.
Reinstall and Test Thoroughly
Reattach the drawer and open and close it multiple times to ensure it glides smoothly without wobbling. Apply a drop of silicone lubricant to the rails for long-term performance and reduced friction. Verify that the drawer stays level and does not slide out unexpectedly during use.
Replace Broken Drawer Fronts Quickly
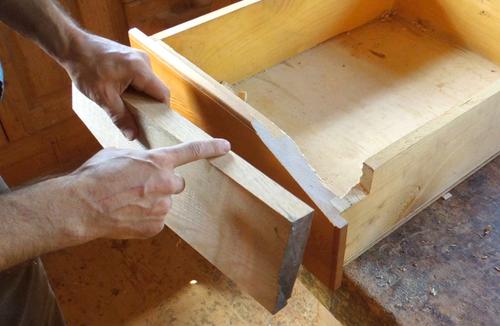
When the front panel is cracked or detached but the box is intact, replacement is fast and effective.
Remove Staples Safely
Use pliers instead of a hammer to remove double-pronged staples without splintering the fragile particle board. Grip each prong individually, wiggle back and forth, and break the staple below the surface. This technique prevents further damage to the remaining structure during removal.
Cut and Attach a New Front
Buy a pine or plywood board and have it cut to match the original front dimensions exactly. Hold the new front in place, pre-drill pilot holes to prevent splitting, and secure it with drywall screws into the box. Fill the holes with white wood putty and sand smooth for a professional finish.
Try the Flip Method
If the back of the drawer is undamaged, remove the slides and flip the entire box 180 degrees. Reattach the slides so the back becomes the new front, hiding damage and saving you time on fabrication. This works well as a quick fix when the rear panel is in better condition.
Decide When to Rebuild Versus Replace
Not every drawer needs a full fix, so match your solution to the extent of the damage observed.
Rebuild If Joints Are Crumbling
Choose a full rebuild if the particle board will not hold screws or if the joints are completely separated. This approach is necessary when the bottom is severely concave and long-term durability is your priority. It ensures the drawer withstands daily use without recurring failures.
Repair If Damage Is Minor
Opt for repair if the bottom sags slightly or if the tracks are loose but fixable with simple adjustments. This is also the right choice if the front is damaged but the box remains sound. These fixes are quick, low-cost, and extend the life of the existing unit significantly.
Replace If Cabinet Frame Is Warped
Replace the entire unit if the cabinet frame itself is warped or if multiple drawers are failing simultaneously. This is also advisable if you are planning a kitchen upgrade or lack the necessary tools for complex repairs. Professional help is recommended for structural cabinet issues.
Prevent Future Drawer Failures
A repair is only as good as its longevity, so adopt smart habits to avoid repeat issues.
Don’t Overload Drawers
Forcing clothes or heavy items causes bottom flex and joint stress, so distribute weight evenly. Use drawer dividers to organize contents and never shove a drawer closed with excessive force. Proper loading prevents the downward pressure that leads to bowing.
Protect from Moisture Damage
Particle board swells and crumbles when wet, so keep sink-area drawers dry at all times. Use liners to protect against spills and wipe up moisture immediately to prevent softening. Keeping the environment dry preserves the structural integrity of the materials.
Upgrade Hardware Proactively
Replace flimsy slides with full-extension ball-bearing models for better support and smoother operation. Lubricate rails annually and check screws every six months to catch loose connections early. Choosing better materials like plywood or MDF during rebuilds also prevents future failures.
Frequently Asked Questions About Fixing Cabinet Drawers
How do I fix a drawer bottom that has sagged in the middle?
You can fix a sagging bottom by inserting plastic wedges for mild cases or adding timber battens underneath for moderate bowing. For severe concave deformation, glue a nine millimeter MDF overlay to the underside and weight it down for 24 hours. These methods restore flatness without replacing the entire drawer box.
Why does my particle board drawer keep falling apart at the corners?
Particle board lacks the density to hold fasteners over time, causing mitered joints to crumble under repeated stress. Moisture exposure accelerates this deterioration, making the material soft and unable to grip screws. Rebuilding with MDF and dado joints provides a much stronger and more durable solution.
Can I repair IKEA Hemnes drawers without taking them apart?
Yes, you can repair them using plastic wedges or timber battens without disassembly, which is crucial because their plastic nails break upon removal. Attempting to take these drawers apart often makes reassembly impossible without causing further damage. Stick to reinforcement methods that work around the existing structure.
What is the best way to fix a broken drawer front?
The best method is to remove old staples carefully with pliers and attach a new pine or plywood board cut to size. Secure the new front with screws driven from the inside and fill the holes with wood putty for a clean look. Alternatively, flip the drawer box if the back panel is undamaged.
How can I stop my drawers from sticking or wobbling on the tracks?
Inspect the tracks for bent rails or loose screws and tighten or replace fasteners as needed to stabilize the unit. Apply silicone lubricant to the rails and ensure the drawer is aligned properly using shims during reinstallation. Upgrading to ball-bearing slides can also eliminate wobbling permanently.
Is it better to rebuild a drawer or buy a new one?
Rebuilding is better if the cabinet frame is sound and you want a custom, durable solution using superior materials like MDF. Replacement is necessary only if the cabinet frame is warped, multiple drawers are failing, or you lack the tools for reconstruction. Rebuilding often costs less and yields a stronger result.
Key Takeaways for Fixing Your Cabinet Drawers
Fixing cabinet drawers requires matching the repair method to the specific failure, whether it is a sagging bottom or crumbling particle board joints. By using MDF for rebuilds, reinforcing bottoms with battens, and maintaining tracks properly, you can restore full function without replacing the entire cabinet. Focus on material strength and correct joinery to ensure your repairs last for years.
Take action today by diagnosing your specific drawer issue and selecting the appropriate repair tier from this guide. With the right tools and techniques, you can save money and extend the life of your kitchen or bedroom storage significantly. Start your repair project now to enjoy smooth-gliding drawers again.