

You need more storage in your workshop, but you do not want to spend weeks sanding and staining wood. The solution is to build a tall cabinet using pre-finished maple plywood for a sturdy result without the long wait.
This guide shows you how to cut precise parts, assemble a strong carcass, and install a custom face frame with a smooth-swinging door. You will learn professional techniques that deliver a durable storage unit using common shop tools.
Cut Cabinet Parts Accurately from Pre-Finished Plywood
Start by breaking down your full sheet of pre-finished maple plywood on an expandable work support. Use foam insulation under the sheet to protect the factory finish from scratches during cutting.
Use a Track Saw for Initial Breakdown
Set your track saw at waist height to gain maximum control over the heavy sheet. Cut off any damaged edges first, then rip your full-height side pieces to width. Save all scraps for future shelves or small jigs.
Trim Widths on the Table Saw
Pass each ripped strip through the table saw to remove the factory edge completely. This step ensures every piece has a clean, consistent width for square assembly. It also eliminates any risk of warping later in the build.
Square Cuts with a Crosscut Sled
Use a crosscut sled on your table saw to cut the top, bottom, and internal shelf. This tool delivers perfectly square and repeatable cuts that are critical for alignment. Ensure all horizontal parts are identical in length before moving on.
Adjust Shelf Depth for Back Panel
Cut the internal shelf depth to exactly half an inch less than the cabinet sides. This specific reduction creates the necessary space for the back panel to sit flush within the rear rabbet.
Cut Dados and Rabbets for Structural Strength
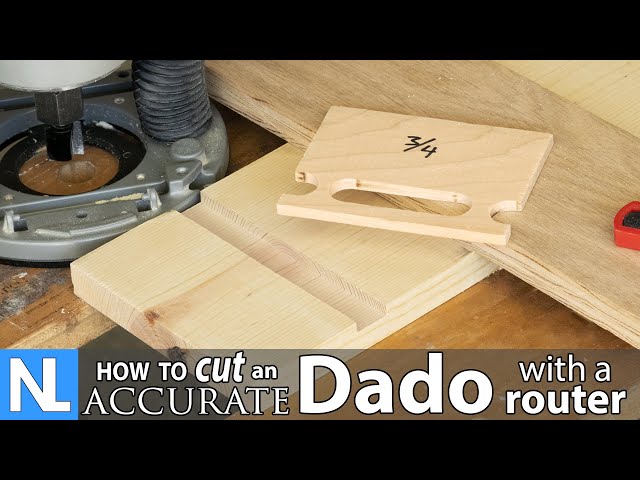
Joinery is the key to a rigid cabinet that holds heavy tools without wobbling or racking. Properly cut dados and rabbets ensure strong mechanical connections between all panels.
Test Fit with Undersized Router Bits
Select router bits designed specifically for plywood, as real plywood is often thinner than its nominal size. Always test your cuts on scrap pieces to verify a snug fit before cutting your good stock. Adjust your fence or bit height until the joint is tight but not forced.
Cut Dados for Shelves and Bottom
Cut one dado near the base of each side panel for the fixed bottom piece. Cut a second dado higher up for the interior shelf, positioning it based on your specific storage needs. Ensure both dados align perfectly at the same height on opposite sides.
Route Rabbets for Top and Back
Route a rabbet along the top inside edge of each side panel to accept the top panel securely. Then, cut a half-inch wide rabbet around the back edges of the sides, top, and bottom pieces. This recess allows the quarter-inch back panel to sit flush with the cabinet rear.
Assemble the Carcass Without Using Glue
Shop cabinets benefit from dry assembly methods that allow for future adjustments or repairs. You can build a incredibly strong frame using only screws and precise joinery techniques.
Screw the Frame Together
Use 1¼-inch black drywall screws for an aggressive grip that holds plywood layers tightly. Pre-drill and countersink all holes to prevent the wood from splitting and to ensure a clean appearance. Clamp the sides to the bottom and shelf, then drive screws through the side panels into the ends of the horizontal pieces.
Install the Back Panel Securely
Cut your back panel from quarter-inch pre-finished plywood to fit perfectly inside the rear rabbet. Pre-drill holes every six to eight inches, then secure the panel with three-quarter inch drywall screws. This step adds significant rigidity and prevents the cabinet from racking.
Attach the Top Panel
Slide the top panel into the rabbets you routed on the side panels earlier. Clamp it firmly in place and drive two screws through the top into each side for stability. This locks the entire upper structure together securely.
Add a Floor Spacer
Attach a small block measuring three-quarters inch by three-quarters inch under the front edge of the bottom panel. This simple spacer lifts the cabinet slightly to prevent moisture absorption and floor scraping. Screw it in from the sides so it remains hidden from view.
Build a Hard Maple Face Frame
A solid wood face frame gives your cabinet a custom, furniture-grade appearance. It also provides a sturdy mounting surface for hinges and adds structural integrity to the front opening.
Prepare Stock on Jointer and Planer
Start with solid hard maple and flatten one edge on your jointer for a perfect reference. Plane the stock to exactly three-quarters inch thick to match the plywood thickness seamlessly. This ensures the frame sits flush with the cabinet carcass.
Rip and Finalize Widths
Rip your frame pieces slightly oversized on the table saw, then plane them to their exact final width. This two-step process guarantees uniform thickness and smooth surfaces on every piece. Cut all parts to length on a miter saw for crisp, accurate ends.
Use a Marking System for Alignment
Draw matching letters and alignment lines on all mating parts before assembly begins. This simple system guarantees perfect positioning when you join the rails and stiles together. It is especially important when using pocket screws to avoid misalignment.
Assemble with Pocket Holes
Use a pocket hole jig to create strong, hidden joints between the rails and stiles. Clamp the frame tightly together and drive the pocket screws to lock the structure. Wipe away any glue squeeze-out immediately before it dries.
Attach Face Frame to Carcass
Securing the face frame requires an adhesive that holds well without running down vertical surfaces. Proper clamping ensures a tight bond between the frame and the plywood carcass.
Use Quick and Thick Wood Glue
Apply Titebond Quick and Thick glue to the front edges of the cabinet carcass. This formula stays in place, resists sagging, and sets quickly to reduce your clamp time. Spread a thin, even layer for the best adhesion results.
Clamp Evenly Across the Frame
Position the face frame carefully on the cabinet front, aligning all edges precisely. Use at least six clamps to apply even pressure across the top, bottom, and sides. Let the glue set for 30 to 45 minutes before removing the clamps.
Build a Frame-and-Panel Door
:max_bytes(150000):strip_icc()/100505204-0b980c080c6f40e1bb9111b5379634ab.jpg)
The door is the focal point of your tall cabinet and requires careful attention to detail. A frame-and-panel design allows for wood movement while maintaining a flat, stable surface.
Select Figure Maple for Visual Appeal
Choose figured maple for the door frame to add elegance and visual interest to your shop. Cut the panel from the same pre-finished maple plywood or use quarter-inch stock for a lighter weight. The contrast in grain adds a professional touch to the piece.
Rout Grooves for the Panel
Set your router to cut a half-inch deep groove in the center of each vertical stile. Match the groove width to your panel thickness, which is typically just under a quarter inch. Use a straight bit with a fence to ensure consistent depth and width.
Cut Tongues with a Tenoning Jig
Cut half-inch long tongues on the ends of the horizontal rails using a tenoning jig. These tongues fit snugly into the grooves of the stiles to form a strong joint. Test the fit to ensure it slides in by hand with slight resistance.
Assemble with Glue and Clamps
Apply glue to the tongues and insert them into the grooves on the stiles. Slide the panel in last, starting with the top groove, then dropping the sides into place. Use a band clamp to apply even pressure and check that the diagonals match for squareness.
Ease Edges for Comfort
Use a block plane to slightly round the front edges of the assembled door. This small detail improves grip and prevents sharp corners from catching on clothing. Focus extra attention on the area where you will grab the door.
Sand and Apply Oil Wax Finish
Sand the door gently to 120 grit, then 180 grit, being careful not to sand through the pre-finished surface. Apply a thin coat of oil wax finish with a lint-free cloth to enhance the grain. Buff it with a clean cloth once dry for a soft, durable sheen.
Install Door with Euro Hinges
Proper hinge selection is critical for a face-frame cabinet to ensure the door hangs correctly. Using the wrong hinge type can lead to alignment issues and poor operation.
Choose Frame-Mount Cup Hinges
Select Euro-style cup hinges specifically rated for face-frame cabinets. Do not use hinges designed for frameless cabinets, as they will not align properly with your frame. Check the packaging for terms like “face-frame” or “partial overlay.”
Mount Hinges on the Door First
Position the hinges two to three inches from the top and bottom of the door. Drill pilot holes and attach them with the supplied screws, setting the cup depth according to manufacturer specs. This usually means drilling to a depth of 5mm or 11mm.
Install Mounting Blocks Inside Frame
Cut small hardwood blocks and glue or screw them inside the face frame where the hinge plates will mount. These blocks provide a solid anchoring point in the plywood structure. Pre-drill holes and use three-quarter inch screws to avoid splitting the wood.
Adjust for Smooth Operation
Hang the door and use the three adjustment screws on each hinge to fine-tune the position. Adjust up and down, in and out, and laterally until the door is flush and swings freely. A perfectly aligned door closes softly and operates reliably for years.
Add Functional Interior Storage
Maximize the utility of your new tall cabinet by adding organized storage solutions inside. Simple hardware additions can keep your safety gear and tools easily accessible.
Mount Hooks for Gear
Install heavy-duty hooks inside the top and bottom sections of the cabinet. Use them to hang hearing protection, aprons, tool belts, and respirators at an easy-reach height. Secure these hooks with screws into the solid frame or back panel.
Install Magnetic Door Catch
Use a recessed magnetic catch to hold the heavy door securely closed when not in use. Install the magnet on the face frame and the strike plate on the door itself. Drill shallow holes to keep all components flush with the wood surface.
Final Touches and Maintenance Tips
Your cabinet is now complete and ready to organize your workshop space effectively. A few final checks ensure it remains functional and attractive for years to come.
Inspect for Square and Finish
Double-check that the cabinet stands flat on the floor and the door operates smoothly. Wipe down all surfaces with a dry microfiber cloth to remove any construction dust. Avoid water or harsh cleaners since pre-finished plywood is sealed but not waterproof.
Prevent Future Damage
Place felt pads under any heavy items you store inside to protect the shelves. Keep the cabinet away from direct heat sources and re-tighten hinge screws every six months. These small actions extend the life of your build significantly.
Customize for Your Shop
This design is adaptable, so feel free to add a second shelf or adjustable pins as needed. You can also install LED strip lighting inside or paint the interior for contrast. Make the storage solution work specifically for your workflow.
Frequently Asked Questions About Building a Tall Cabinet
Can I use regular plywood instead of pre-finished maple?
Yes, you can use regular plywood, but you will need to sand and finish it yourself. Pre-finished maple saves significant time by eliminating the need for staining or sealing after construction.
What type of screws work best for assembling the carcass?
Use 1¼-inch black drywall screws because they grip plywood aggressively and look professional. They provide enough holding power for shop furniture without requiring glue.
How do I ensure my cabinet door hangs straight?
Use Euro-style hinges designed specifically for face-frame cabinets and adjust them using the built-in screws. Proper mounting blocks inside the frame also help achieve perfect alignment.
Is glue necessary when building a shop cabinet?
Glue is not strictly necessary for the carcass if you use screws and proper joinery like dados. However, use quick-setting wood glue when attaching the face frame for a strong, permanent bond.
What is the benefit of a frame-and-panel door?
A frame-and-panel door allows for wood movement without warping, keeping the door flat over time. It also looks more elegant than a simple flat panel and adds structural strength.
Key Takeaways for Building Your Tall Cabinet
Building a tall cabinet with pre-finished maple plywood gives you durable storage without the hassle of finishing. By using precise joinery like dados and rabbets, you create a strong structure that requires no glue for the main frame.
Focus on accurate cutting and proper hinge selection to ensure your door hangs perfectly. With these techniques, you can complete a professional-grade project in a single weekend. Start gathering your materials today to transform your workshop organization.


