

You love the look of glass cabinet doors, but you’re tired of cluttered shelves or mismatched dishware on display. Whether you want privacy, a decorative upgrade, or a way to hide less attractive items, covering glass cabinet doors is a simple and effective solution. The good news? You don’t need to replace the entire cabinet. With the right materials and techniques, you can transform the look of your cabinets in under an hour, no professional help required.
This guide walks you through the best methods to cover glass cabinet doors, from temporary fixes to permanent upgrades. We’ll cover materials, tools, cost, and design ideas that keep your space looking cohesive and organized. Whether you’re staging a home, updating a kitchen, or just craving a fresh look, these solutions will help you achieve style and function without the mess of a full remodel.
Choose the Right Covering Material

The material you pick will determine the look, cost, and longevity of your cabinet transformation. Each option offers different levels of privacy, light filtration, and ease of removal.
Use Frosted or Decorative Window Film
Frosted window film is one of the most popular ways to cover glass cabinet doors. It’s affordable, easy to apply, and instantly adds privacy while still allowing light to pass through.
- Pros:
- Transparent but obscures contents
- Available in patterns (etched glass, geometric, floral)
- Removable and residue-free
-
DIY-friendly with soapy water application
-
Cons:
- Can bubble if not applied carefully
- May peel over time in high-moisture areas
Apply with a squeegee for smooth results. Trim edges with a utility knife for a clean finish.
Install Contact Paper Designs
Decorative contact paper offers bold patterns and textures like marble, wood grain, or stained glass that stick directly to glass.
- Best for: A temporary, colorful update
- Tip: Choose matte finishes to reduce glare
- Durability: Lasts 1 to 3 years depending on humidity
Cut slightly larger than the glass panel, then smooth from center outward to avoid air pockets.
Apply Glass Etching Cream
For a permanent frosted look, glass etching cream creates a professional, etched-glass effect.
-
Process:
1. Tape off areas you don’t want etched
2. Apply cream with a foam brush
3. Wait 5 to 10 minutes
4. Rinse thoroughly -
Safety: Wear gloves and work in a ventilated area
- Result: Elegant, opaque finish that won’t peel
Ideal for a high-end look that lasts.
Use Inserts for a Built-In Look
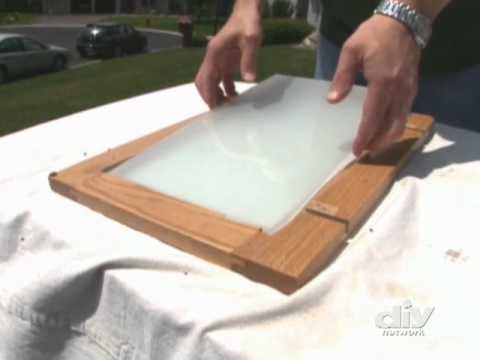
If you want a custom, furniture-like appearance, inserts mimic the look of solid doors while preserving the original frame.
Install Acrylic or Wood Panels
Replace the glass with removable acrylic or thin wood panels cut to size.
- Steps:
- Remove the cabinet door
- Measure the glass opening precisely
- Order custom-cut panels (available at hardware stores)
-
Reinstall with the panel in place of glass
-
Options:
- Frosted acrylic: Light-diffusing, shatter-resistant
- Painted wood: Matches your cabinetry for a seamless look
- Mirrored acrylic: Adds depth and brightness
This method offers a permanent upgrade with maximum design control.
Add Fabric or Paper Inserts
For a soft, vintage touch, glue fabric or decorative paper to a backing board and insert it into the door frame.
- Materials needed:
- Thin cardboard or foam board
- Scrapbook paper, linen, or lace
-
Spray adhesive or double-sided tape
-
How to:
1. Cut board to fit the panel opening
2. Adhere fabric or paper smoothly
3. Let dry completely before inserting
Great for rental homes or quick updates.
Apply Temporary Covers for Rentals
If you’re in a rental or not ready for a permanent change, temporary covers let you decorate without damage.
Use Removable Decals or Stickers
Vinyl decals come in shapes (snowflakes, leaves, dots) or full-door patterns.
- Pros:
- No residue when removed
- Easy to reposition
-
Child-friendly designs available
-
Tip: Clean glass first with rubbing alcohol for better adhesion
Layer decals for a custom look.
Hang Tension Rods with Curtains
Mini tension rods and tiny curtains add charm and full coverage.
- Best for: Kitchen cabinets, bathroom vanities
- Materials:
- 6 to 12 inch tension rods
- Fabric cut to size (lined for opacity)
- Sew or use iron-on hem tape for clean edges
Choose wipeable fabrics like cotton-linen blends for kitchens.
- Pro tip: Use magnetic rods if the frame is metal, no drilling needed.
Enhance with Lighting and Styling
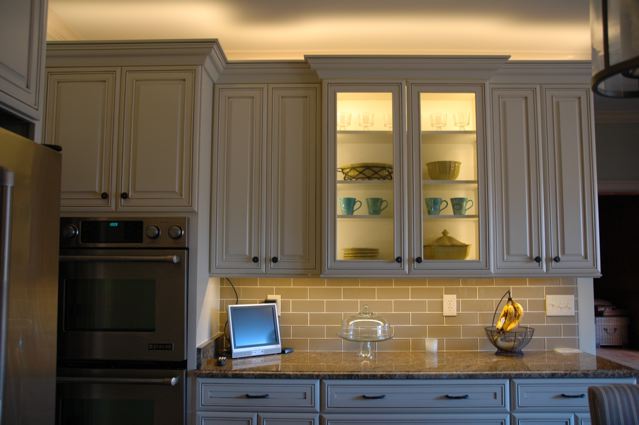
Once covered, use lighting and styling to elevate the visual appeal.
Add LED Strip Lights
Even with opaque covers, internal lighting creates ambiance.
- Install inside the cabinet above or below shelves
- Choose warm white for a cozy glow
- Use motion-sensor strips for convenience
Battery-powered options avoid wiring hassles.
Style the Interior Thoughtfully
Just because the contents are hidden doesn’t mean they can’t be organized.
- Use labeled bins for games or accessories
- Group by color or category for quick access
- Add shelf risers to maximize vertical space
This keeps the inside as functional as the outside is beautiful.
Maintain and Clean Covered Doors
Proper care extends the life of your cabinet covers.
Clean Without Damaging the Surface
- For films and contact paper: Use a soft cloth with mild soap, avoid abrasive cleaners
- For etched glass: Wipe with vinegar-water solution (1:1)
- For fabric inserts: Dust gently or use a handheld vacuum with brush attachment
Never soak edges, as moisture can lift adhesives.
Repair Bubbles or Peeling
- Small bubbles: Use a pin to prick and smooth with a credit card
- Peeling edges: Re-adhere with a tiny amount of double-sided tape
- Torn film: Replace the panel instead of patching
Compare Costs and Time

Choose a method that fits your budget and timeline.
| Method | Cost (per door) | Time Required | Best For |
|---|---|---|---|
| Window film | $5 to $15 | 15 to 30 min | Renters, quick updates |
| Contact paper | $3 to $10 | 15 to 25 min | Bold, temporary style |
| Etching cream | $10 to $20 | 30 to 45 min | Permanent elegance |
| Acrylic inserts | $15 to $40 | 1 to 2 hours | Long-term upgrades |
| Fabric inserts | $5 to $12 | 20 to 40 min | Vintage or crafty looks |
| Mini curtains | $8 to $25 | 10 to 20 min | Charming, reversible fix |
All times assume basic tools and moderate skill level.
Prevent Common Mistakes
Avoid these pitfalls for a flawless finish.
Skipping Surface Prep
Dirty or greasy glass causes poor adhesion. Clean with isopropyl alcohol and let dry completely before applying any film or paper.
Cutting Too Large or Small
Always measure twice. For inserts, subtract 1/8 inch from each dimension to ensure a snug fit without pressure.
Ignoring Cabinet Style
A farmhouse kitchen suits fabric curtains or wood panels. A modern space pairs better with frosted film or solid acrylic. Match the cover to your overall decor.
Frequently Asked Questions About Covering Glass Cabinet Doors
Can I cover glass cabinet doors without damaging them?
Yes. Removable options like window film, decals, and tension rod curtains leave no residue and don’t damage the glass. For a permanent look, etching cream changes the glass itself and cannot be reversed.
What is the cheapest way to cover glass cabinet doors?
Contact paper is the most budget-friendly option at $3 to $10 per door. It’s easy to apply and available in many patterns. You can complete the project in about 15 to 25 minutes per door.
Will window film block the view of cabinet contents?
Frosted window film obscures the view while still letting light through. You’ll see silhouettes and colors but not distinct items. For complete privacy, choose opaque options like wood panels or lined fabric curtains.
How long does glass etching cream last?
Glass etching cream creates a permanent finish that won’t peel, fade, or wear off. The etched effect becomes part of the glass surface itself. This makes it ideal for homeowners who want a lasting solution.
Can I use fabric to cover glass cabinet doors?
Yes. You can glue fabric to a foam board insert or hang mini curtains on tension rods inside the frame. Fabric adds warmth and texture, making it perfect for farmhouse or vintage decor styles.
Do I need special tools to apply window film?
No. You’ll need a spray bottle with soapy water, a squeegee or credit card, and a utility knife for trimming. These basic tools help you apply the film smoothly without bubbles.
Key Takeaways for Covering Glass Cabinet Doors
Covering glass cabinet doors is a fast, budget-friendly way to refresh your space. Whether you choose removable film, elegant etching, or charming curtains, each method offers a blend of privacy and style. Pair your update with smart storage, like labeled bins and shelf risers, to keep the interior as organized as the exterior looks.
Start by assessing your needs. Renters should stick with temporary options like film or decals. Homeowners seeking a permanent change can explore etching cream or acrylic inserts. Measure your glass panels carefully, clean the surface thoroughly, and choose a material that complements your room’s decor.
With these tips, you can achieve a polished, intentional look in just one afternoon. Pick a method that fits your budget and skill level, gather your materials, and transform those glass cabinet doors today.


