
You have a drawer that sits half empty or holds a chaotic mix of cables, papers, and random odds and ends. That wasted space could be solving your paperwork problem. Converting a drawer into a file cabinet gives you a built-in filing solution without buying new furniture or sacrificing floor space. With a few tools and an afternoon of work, you can turn any deep drawer into an organized filing system.
This guide covers everything from measuring and choosing divider types to reinforcing weak drawer bottoms and installing hanging rails. You will learn practical steps for both quick tray-based setups and custom wood builds. By the end, you will have a clear plan to transform that underused drawer into a functional file cabinet that fits your documents and your workflow.
Measure Your Drawer and File Dimensions
Getting accurate measurements first prevents wasted materials and frustrating rework. A mismatch between your files and the drawer space leads to poor organization and wasted effort.
Check Standard File Folder Sizes
Most documents use either letter size (8.5″ x 11″) or legal size (8.5″ x 14″) folders. Hanging file folders add about 1.5 inches to the height because of the metal rails that support them. Your drawer needs at least 10 to 12 inches of interior height to accommodate hanging files comfortably. If you have less than 9 inches, use side-tab folders laid flat instead.
Measure the Drawer Interior
Use a tape measure to record three key numbers:
– Interior width from left to right
– Interior depth from front to back
– Interior height from the bottom to the underside of the top rail
Write these numbers down before shopping for materials. These measurements determine whether prefab trays will fit or if you need custom dividers. Also test how smoothly the drawer glides when partially loaded. Weak glides will struggle with the extra weight of files, so note any resistance.
Choose Your Divider System

The divider type you select depends on your skill level, budget, and how permanent you want the change to be. Both options work well, but they serve different needs.
Use Prefabricated File Trays
For a quick setup with no tools required, prefabricated file trays are the easiest option. These plastic or metal trays come in standard sizes and hold hanging folders upright. Look for adjustable-width models that expand to fit your drawer dimensions. Many office supply brands offer affordable, sturdy versions that you simply place inside the drawer.
Pros of prefab trays:
– Fast installation with zero tools
– Removable and reusable if you change setups
– No permanent modification to your furniture
Cons of prefab trays:
– Less customization for odd-sized drawers
– May not fill the space perfectly, wasting a few inches
Build Custom Wood Dividers
For a seamless, built-in look, construct your own dividers from quarter-inch or half-inch plywood or MDF. This method maximizes every inch of space and can match your furniture style.
Cut two side panels to match the drawer height and depth. Add cross supports to create file slots, typically 9 inches wide for letter-size documents. Assemble with wood glue and brad nails, then sand and paint or stain to match your furniture.
Pro tip: Add a small half-inch lip at the front of the top edge to prevent folders from sliding out when you open the drawer quickly.
Reinforce the Drawer Bottom
Hanging files weigh more than loose items. A flimsy drawer bottom will sag over time, especially with full manila folders pressing down.
Assess the Current Drawer Strength
Pull the drawer out and inspect the bottom panel. Many drawers use thin plywood or cardboard-backed material that flexes under pressure. Press down in the center to test for give. If the bottom bends easily, reinforcement is necessary.
Check for center support rails underneath the drawer. Drawers without central supports are more prone to bowing under heavy loads.
Install Support Cleats or Upgrade the Bottom
For weak drawer bottoms, use one of these reinforcement methods:
– Add cleats: Glue and screw small wood strips (quarter-inch by half-inch) along the front, back, and sides of the drawer interior. These distribute weight to the stronger frame.
– Replace the bottom: Cut a new piece of half-inch plywood to fit the drawer. Secure it with glue and finish nails. This upgrade supports 20 or more pounds of files.
Warning: Do not overtighten screws into thin wood. It splits easily and ruins the drawer.
Install Hanging File Rails for True Cabinet Function
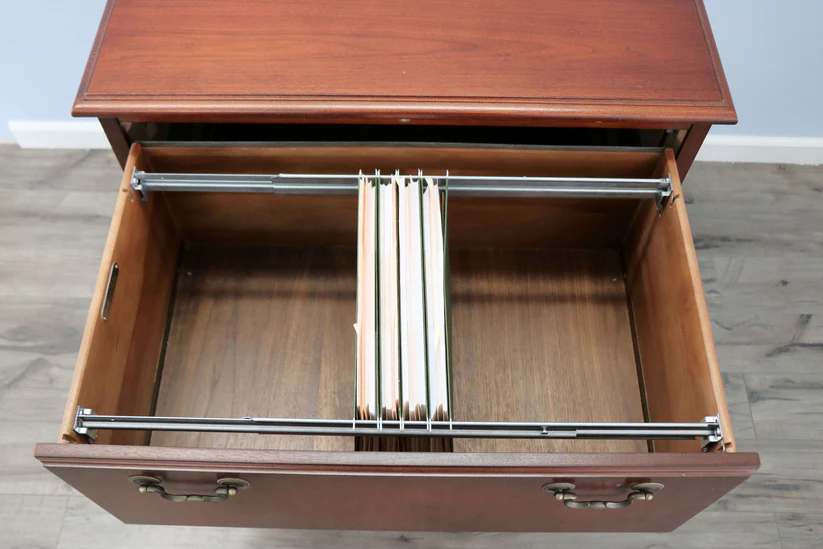
If you want the full file cabinet experience, install hanging file rails. These metal tracks let folders hang vertically just like in an office filing cabinet.
Position the Rails at the Correct Height
Rails must sit 1 to 2 inches above the divider base so folders do not drag on the bottom. Test fit a hanging folder first to confirm the clearance. Mark pilot holes with a pencil before drilling.
Attach Rails Securely with Screws
Use small screws (6mm to 8mm) to secure rails into wood dividers or drawer sides. Pre-drill holes to prevent the wood from splitting. Ensure the rails are perfectly level, because tilted rails cause folders to slide toward one side.
Alternative: Adhesive-backed rails work for lightweight use, but screws provide better long-term durability.
Organize Files Vertically or Flat
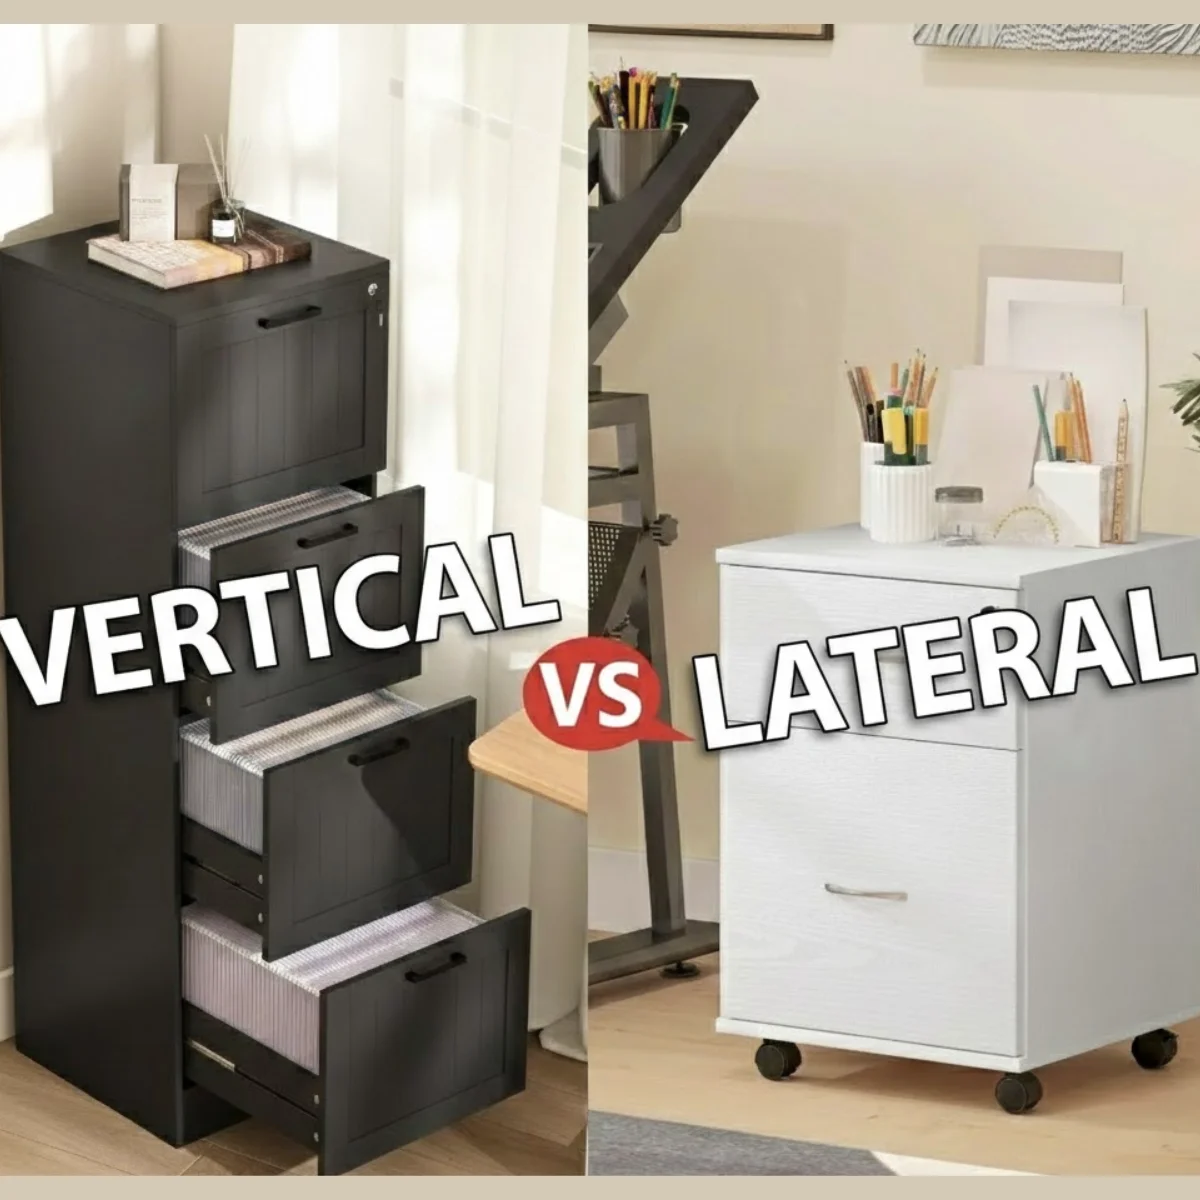
How you store your documents affects both accessibility and protection. Choose based on how often you need to access the files.
Vertical Filing with Hanging Folders
Vertical filing works best for frequent access. Use color-coded hanging folders with tabs labeled by category such as Taxes, Medical, or Utilities. Files stay upright and visible at a glance. This method suits active documents you reference regularly.
Tip: Place your most-used files at the front of the drawer for quick retrieval.
Flat Laying for Delicate Documents
For sensitive papers like blueprints, artwork, or photographs, lay files flat in labeled trays or portfolios. This prevents creasing and bending. Use vertical dividers to separate categories within the flat stack.
This approach works well for archival storage where retrieval happens less frequently.
Secure Loose Items with Organizer Inserts
Not everything fits neatly in a file folder. Small items like sticky notes, USB drives, or paper clips need their own designated space.
Add Small Organizer Trays
Use acrylic or bamboo desktop organizers cut to fit unused corners of the drawer. These sections keep office supplies tidy without blocking access to your files.
Create a DIY Insert
Trace the drawer’s empty space onto a piece of foam board or cardboard. Cut it to size, then divide it into compartments using hot-glued wood strips or repurposed cardboard walls. Cover the finished insert with contact paper for a polished look and added durability.
Finish and Protect the Drawer Interior
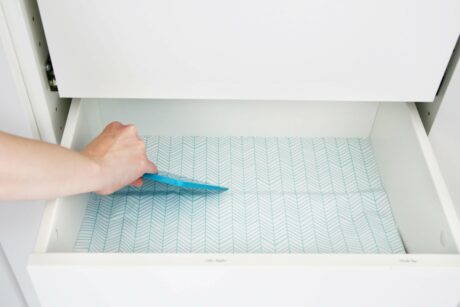
A finished interior makes the converted drawer look intentional rather than makeshift. This step also protects your documents from damage.
Line the Bottom with Shelf Liner or Felt
Apply non-slip shelf liner with a rubber or felt backing to the drawer bottom. This prevents folders from sliding around and reduces noise when opening and closing. Choose neutral colors or patterns that complement your room.
Avoid adhesive-heavy liners that peel over time and leave sticky residue.
Paint or Stain Exposed Wood
If you built wooden dividers, paint or stain them before installation. Use a semi-gloss finish for wipeable surfaces that resist dust. Let everything dry completely to avoid smudging your files.
Test and Adjust the Fit
Even careful planning needs real-world testing. Take time to verify everything works before loading all your documents.
Load Sample Files
Place a few hanging folders or flat documents into the drawer. Open and close it slowly, watching for:
– Rubbing against the sides
– Sagging of the bottom
– Misaligned rails
Make Small Adjustments
If folders stick, sand down the divider edges slightly. If the drawer feels heavy, reduce the file load or upgrade the glides. A smooth glide means your conversion is successful.
Maintain Easy Access Over Time
A converted drawer only works if you actually use it. Set up habits that keep the system functional.
Keep Frequently Used Files Accessible
Store active documents within easy reach. Rotate seasonal files like tax records to the back of the drawer.
Avoid Overfilling the Drawer
Leave 1 to 2 inches of space at the front so you can grip folder tabs comfortably. Overcrowding leads to disorganization and makes retrieval difficult.
Label Everything Clearly
Use a label maker or printed tags on hanging folder tabs. Group by category, date, or project. Examples of useful labels:
– Insurance (Home, Auto)
– Medical (2024, 2025)
– Home Maintenance Log
Troubleshoot Common Conversion Problems
Even well-built conversions face occasional issues. Here is how to fix the most common problems quickly.
Drawer Won’t Close Fully
Cause: Files are too tall or dividers are too high.
Fix: Trim divider height by a quarter inch, or switch to shorter folders.
Folders Tip Over
Cause: Divider width is too wide for the folders.
Fix: Add a temporary cardboard spacer or install an extra divider to narrow the slot.
Drawer Sags When Open
Cause: Weak bottom or overloaded drawer.
Fix: Reinforce with cleats or reduce the number of files stored.
Rails Come Loose
Cause: Poor adhesion or weak screws.
Fix: Remove the rails and reattach with longer screws or wood glue.
Frequently Asked Questions About Converting a Drawer Into a File Cabinet
How deep does a drawer need to be for hanging files?
A drawer needs at least 10 to 12 inches of interior height for hanging file folders. The metal rails add about 1.5 inches to the folder height, so measure carefully before buying supplies.
Can I convert a drawer without power tools?
Yes. Use prefabricated file trays that sit directly in the drawer. No cutting, drilling, or assembly is required. This option takes minutes instead of hours.
What is the best material for drawer dividers?
Half-inch plywood or MDF works best for custom dividers. Both materials are sturdy, easy to cut, and take paint or stain well. Quarter-inch material works for lightweight use but may flex under heavy loads.
Do I need to reinforce the drawer bottom?
Only if the existing bottom flexes under pressure. Test by pressing down in the center. If it bends easily, add cleats or replace the bottom with half-inch plywood.
How many files can a converted drawer hold?
A standard dresser drawer (about 20 inches wide and 16 inches deep) holds roughly 30 to 40 hanging folders. Capacity depends on divider spacing and file thickness.
Will converting a drawer damage my furniture?
Most conversion methods are reversible. Prefab trays and adhesive rails leave no permanent marks. Screwed rails and custom dividers leave small holes but add lasting value to the furniture.
Key Takeaways for Converting a Drawer Into a File Cabinet
Converting a drawer into a file cabinet turns wasted space into a productive storage solution. Accurate measurements and the right divider system are the foundation of a successful conversion. Reinforcing weak drawer bottoms prevents sagging and extends the life of both the drawer and your files.
Choose vertical hanging folders for frequent access or flat storage for delicate documents. Label everything clearly and avoid overfilling to keep the system functional. With basic tools and a weekend afternoon, you can build a filing system that keeps paperwork organized and within reach.
Start by measuring your drawer today. Pick the divider option that matches your skill level, and take the first step toward a clutter-free workspace.


