
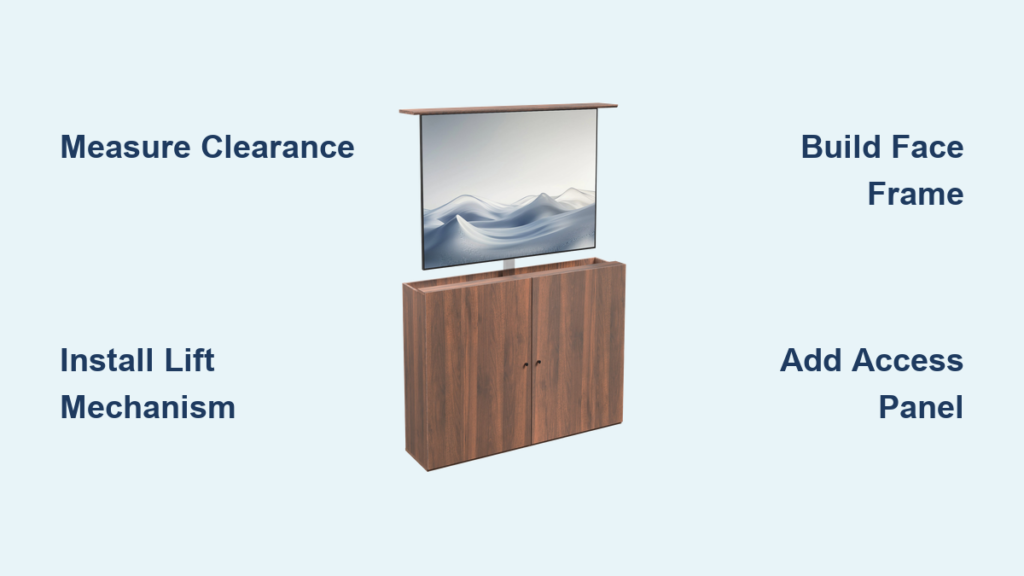
Imagine your television rising silently from a sleek piece of furniture to transform your living space from a minimalist sanctuary into an entertainment hub. Building a TV lift cabinet is the ultimate DIY upgrade for hiding technology in plain sight while combining craftsmanship with modern convenience. Whether you are an intermediate woodworker or a motivated beginner with basic tools, this guide walks you through constructing a custom unit using reliable materials and the popular Whisper Lift 2 mechanism.
You will learn how to build a strong, beautiful cabinet that conceals your TV until needed before smoothly deploying it with quiet precision. We cover everything from selecting the right wood and hardware to assembling the frame, installing the lift system, and finishing with professional details like recessed access panels. By the end, you will have a furniture-quality piece that doubles as a functional tech hub perfect for any room.
Design Your Cabinet Layout for Maximum Functionality

Successful construction begins with precise planning and dimensioning tailored to your specific space. Standard widths range from 48 to 72 inches, but your design must accommodate the lift mechanism footprint with at least 2 to 3 inches of clearance on all sides. The Whisper Lift 2 requires a minimum internal width of 20 inches and roughly 18 inches of height clearance when fully deployed.
Determine Dimensions and Clearance Requirements
Start by measuring your television and deciding exactly where the cabinet will sit in your home. Use digital blueprints or SketchUp plans often available from lift manufacturers to visualize proportions before cutting wood. These tools help you adjust dimensions safely while ensuring the lift travel path does not interfere with ceiling moldings or nearby furniture.
Plan for Dual Purpose Room Division
Build the cabinet with a fully finished back so it can stand freely in the middle of a room as a stylish divider. This approach turns a simple media console into a true furniture centerpiece that separates living and dining areas effectively. Use birch plywood on both sides and match the rear face frame and molding to the front for a cohesive look.
Finalize Material Choices and Aesthetic Style
Decide early whether you want a painted modern look or a natural wood finish to guide your material purchases. For painted cabinets, use poplar for the face frame and ½-inch MDF for doors because both accept paint beautifully and resist warping. Add walnut laminated tops and baseboard molding for warmth and elegance if you prefer a natural aesthetic.
Select Materials and Tools for Structural Integrity

Choosing the correct wood species and hardware ensures your cabinet supports the heavy weight of modern televisions without sagging. Avoid particle board or low-grade plywood since the structure must hold the TV and lift mechanism, which typically weighs between 60 and 100 pounds. Structural integrity is critical for long-term safety and performance.
Choose the Right Wood for Each Component
Select materials based on their specific function within the cabinet structure to ensure durability.
* Cabinet box: ¾-inch birch plywood for strength and clean edges.
* Face frame: Poplar for its smooth grain ideal for painting.
* Doors: ½-inch MDF for a flat, warp-resistant surface.
* Top: ¾-inch birch plywood laminated with walnut for luxury.
* Baseboard and trim: ¾-inch walnut stock for contrast.
* Access panel tray: ¼-inch plywood for lightweight functionality.
Gather Essential Hardware Components
Purchase these key items before starting assembly to avoid delays during construction.
* Whisper Lift 2 by Touchstone for quiet and reliable operation.
* Pocket hole screws for invisible face frame joints.
* 1½-inch and 1⅝-inch wood screws for structural connections.
* Piano hinge spanning the full width to connect the top to the lift.
* Standard hinges for attaching walnut panel doors.
* Nylon glides to let you slide the cabinet for cord access.
* Mounting boards sized 2 inches by 1 inch to reinforce lift attachment.
Prepare Your Tool Kit for Precision Work
You will need specific power tools to achieve professional results with tight joints.
* Table saw for ripping plywood and molding to exact widths.
* Miter saw for cutting stiles, rails, and beveled baseboards.
* Router with roundover bit to soften edges for a modern feel.
* Drill and impact driver for screw installation.
* Nail gun compatible with 18-gauge and brad nails.
* Clamps and squares to ensure square and tight joints.
* Stop block to guarantee identical door rail cuts.
Build the Face Frame and Cabinet Box
The face frame serves as the structural backbone and aesthetic front of your TV lift cabinet. Accuracy here prevents issues with door fitting and lift alignment later in the process. Take your time to ensure every joint is square and every surface is smooth.
Assemble the Face Frame with Pocket Holes
Cut poplar stiles and rails to size using a miter saw and stop block for absolute accuracy. For a standard 36-inch-wide cabinet, cut two stiles at 3½ inches wide by the cabinet height, along with top, middle, and bottom rails. Use a Kreg Jig to drill pocket holes on rail ends, apply wood glue to joints, clamp them to stiles, and drive in pocket screws.
Attach the Cabinet Box to the Frame
Cut birch plywood for two side panels, one bottom panel, and one back panel to form the main box. Pre-drill and countersink screw holes in side panels where they meet the face frame to prevent splitting. Apply wood glue along the edges, position sides onto the face frame, and temporarily secure with 1½-inch nails before reinforcing with screws once dry.
Install Bottom and Back Panels Securely
Slide the bottom panel into place between side panels and tack it with 1½-inch nails to confirm it is level. Secure it permanently with 1⅝-inch screws since this panel must bear significant weight without shifting. Attach the back panel with 1½-inch screws to add rigidity and provide a solid surface for mounting the lift system later.
Soften Edges with a Roundover Bit
Use a router with a ¼-inch roundover bit to soften all exposed edges of the cabinet sides and top. This step includes vertical edges of side panels, the front edge of the top, and the bottom front edge. Routing eliminates sharp corners, enhances safety, and gives a high-end modern look to your TV lift cabinet.
Construct and Install the Doors
Doors must be lightweight yet sturdy with a finish that matches the face frame perfectly. Improperly aligned doors can ruin the visual appeal of an otherwise beautiful piece of furniture. Follow these steps to ensure smooth operation and clean lines.
Cut and Assemble MDF Flat Panel Doors
Cut ½-inch MDF stiles to 3½ inches wide by door height and rails to the same width using a stop block. Assemble using wood glue and 18-gauge 1-inch nails without pocket holes to avoid splitting the material. Let the glue cure for 24 hours before sanding, filling nail holes, and priming for paint.
Install Doors with Precision Alignment
Use a self-centering Vix bit to drill hinge holes for perfect alignment between door and face frame. Position the door so the top edge is flush with the cabinet top while maintaining a 1/8-inch gap around all sides. Drill pilot holes with the Vix bit and secure with screws, adjusting hinges as needed to eliminate binding.
Add Walnut Panel Doors for Luxury Upgrade
Cut walnut stock to 5 inches by ¾ inch by ¾ inch for a high-end contrast option. Bevel the outer edge at 5 degrees using a miter saw to create a floating effect when installed. Attach with standard hinges while ensuring even reveals to catch light beautifully and add modern flair.
Add Molding and Hidden Access Panels
Molding hides raw edges and creates access points for electronics without compromising the clean aesthetic. A well-designed access panel allows you to plug in devices or troubleshoot issues without disassembling the entire unit.
Create a Recessed Access Panel
Hide power cords and electronics with a discreet access panel cut into the back or side of the cabinet. Install a ¼-inch plywood spacer around the opening and place a scrap wood tray behind it at the correct depth. Use a 1/16-inch scribe piece to trace a consistent reveal line before cutting to ensure clean gaps.
Apply Quarter-Round and Top Molding
Use ⅜-inch quarter-round molding to frame the access panel and cover raw MDF or plywood edges. Secure with wood glue and ¾-inch brad nails while wiping away excess glue immediately for a clean finish. Attach ¾ inch by 1¼ inch molding along the front edge of the top using 1¾-inch nails and 1⅝-inch screws at hinge points.
Install Beveled Walnut Baseboard
Add architectural elegance by ripping walnut stock to 3 inches wide and cutting a subtle 6-degree bevel on the bottom edge. Use a roundover bit on the top outer edge to match the cabinet soft profile before attaching to the cabinet bottom. This base elevates the piece from a simple box to fine furniture.
Install the TV Lift Mechanism
Installing the mechanical lift requires careful attention to detail to ensure smooth operation. Proper mounting prevents binding and extends the life of both the mechanism and your television.
Prepare the Cabinet for the Lift
Drill 1⅝-inch holes in the back panel 5 inches from each side and 3¼ inches from the top edge for power cords. Install two 2 inch by 1 inch mounting boards across the interior back wall positioned 19½ inches from each outside edge. Secure these boards with screws and wood glue to support the full weight of the lift and TV.
Mount the Whisper Lift 2
Lift the mechanism slightly off the floor for easier access to attachment points. Attach rear brackets to the mounting boards with two screws and secure the bottom plate to the cabinet floor with five screws. Check level with a bubble level before tightening all screws to prevent uneven lift travel.
Attach the Cabinet Top with a Piano Hinge
Use a full-width piano hinge to connect the top so it pivots freely as the TV rises. Position it along the back edge of the top and use a self-centering Vix bit to drill hinge holes for perfect alignment. Attach one side to the lift frame and the other to the underside of the top, ensuring the hinge is flush.
Finish and Install the TV

Finishing touches protect your investment and enhance the visual appeal of your TV lift cabinet. Proper installation of the television ensures safe and reliable operation for years to come.
Apply Varnish to Walnut Surfaces
Sand walnut top and baseboard with 120 then 220 grit before applying white oil-based varnish. Use a brush or foam pad for even coats and sand lightly between coats with 320 grit. Apply 2 to 3 coats for a durable, water-resistant finish that enhances grain.
Paint the Face Frame and Doors
Prime all poplar and MDF surfaces then sand lightly after priming for a smooth base. Apply 2 to 3 coats of high-quality paint in semi-gloss or satin finish, sanding between coats with 320 grit. Wipe with a tack cloth before the final coat to remove dust particles.
Mount the TV and Test the System
Slide nylon glides onto bottom corners to allow easy movement for cord access. Plug in the lift and test the motor before attaching cross brackets to the lift platform. Confirm VESA pattern compatibility, mount the TV without over-tightening screws, and test the lift cycle 3 to 5 times.
Maintain and Optimize Performance
Regular maintenance ensures your TV lift cabinet continues to operate smoothly. Simple checks can prevent major issues and extend the life of the mechanical components.
Check Screws and Alignment Regularly
Inspect all lift mounting screws every six months and tighten any that have loosened over time. Check the piano hinge for wear and lubricate lift rails if recommended by the manufacturer. Preventative maintenance extends the life of the system significantly.
Keep the Path Clear and Upgrade Controls
Ensure no objects block the TV rise path and maintain at least 6 inches of clearance above the cabinet. Consider installing a low-voltage switch inside a nearby outlet for seamless operation or integrating smart home controls.
Frequently Asked Questions About TV Lift Cabinets
What wood is best for building a TV lift cabinet?
Birch plywood is best for the cabinet box due to its strength, while poplar works well for painted face frames. MDF is ideal for doors because it stays flat, and walnut adds a luxury finish to tops and baseboards.
How much clearance does the Whisper Lift 2 need?
The Whisper Lift 2 requires a minimum internal width of 20 inches and about 18 inches of height clearance when deployed. You should also allow 2 to 3 inches of clearance on all sides for proper operation.
Can a TV lift cabinet function as a room divider?
Yes, if you build it with a fully finished back using birch plywood on both sides. Matching the rear face frame and molding to the front allows it to stand freely in the middle of a room.
How do I access electronics hidden inside the cabinet?
Install a recessed access panel in the back or side using a ¼-inch plywood spacer and scrap wood tray. This allows you to plug in devices or troubleshoot issues without opening the top or disassembling the unit.
What tools are essential for this project?
You need a table saw, miter saw, router with roundover bit, drill, impact driver, and nail gun. A stop block and self-centering Vix bit are also critical for precision and proper hinge alignment.
Key Takeaways for Building Your TV Lift Cabinet
Building a TV lift cabinet combines fine woodworking with modern technology to create a stunning functional centerpiece. Success depends on precise measurements, quality materials like birch plywood and poplar, and correct installation of the Whisper Lift 2 mechanism.
Focus on creating a fully finished back for versatility, installing a recessed access panel for convenience, and maintaining regular checks on mounting screws. With proper care and attention to detail, your custom cabinet will deliver quiet, reliable performance while hiding technology in plain sight. Start by gathering your materials and reviewing your SketchUp plans today.


