
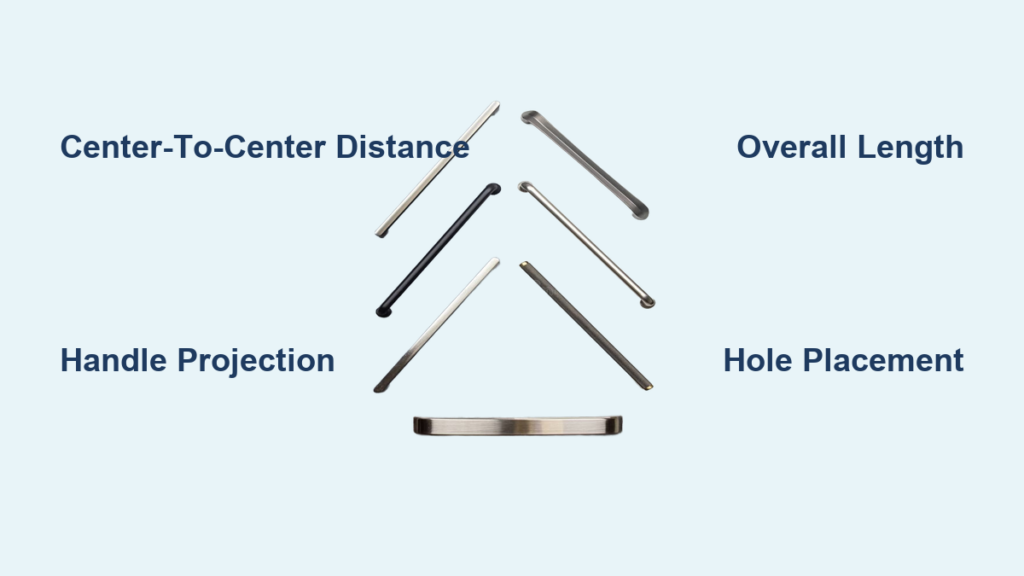
Replacing cabinet handles can completely refresh your kitchen or bathroom, but the process starts with one crucial step: getting the measurements right. If you’ve been searching for how to measure cabinet handles, you’re in the right place. Many homeowners find themselves frustrated when new hardware doesn’t fit existing holes or looks disproportionate on their cabinetry.
This guide breaks down everything you need to know about measuring cabinet handles correctly. You’ll learn the key dimensions that matter, how to determine proper placement, and what mistakes to avoid. By the end, you’ll have the confidence to measure, shop, and install hardware that looks professionally done.
Identify Your Handle Type First
Different handle styles require different measurement approaches. Knowing what you’re working with saves time and prevents ordering errors.
Bar Pulls vs. Cup Pulls
Bar pulls feature two mounting screws and come in various lengths. Cup pulls have a U-shaped design, often used on lower cabinets or drawers. Bar pulls require you to measure the distance between screw holes, while cup pulls need attention to overall depth and clearance from the cabinet face.
Knobs vs. Pulls
Knobs attach with a single screw and require only two measurements: the base diameter and the projection (how far the knob extends from the surface). Pulls need hole spacing measurements. Confirm which type you’re installing before you start measuring.
Measure the Overall Handle Length
The total length of your handle affects both appearance and function. Getting this dimension right ensures your hardware looks balanced on the cabinet.
Record the Full Length
Place a tape measure at one end of the handle and extend it to the other end. Write down this measurement for reference when comparing products online or in stores.
Focus on the Grip Area
Some handles have decorative ends that extend beyond the gripping area. Measure only the portion you’ll actually hold. This prevents choosing a handle that feels awkward or oversized for a small drawer.
Determine the Center-to-Center Distance
This is the most important measurement for any pull with two mounting points. Getting it wrong means your new hardware won’t align with existing holes.
Understanding Center-to-Center
Center-to-center, sometimes called on-center or hole spacing, refers to the distance between the centers of the two screw holes. This measurement determines whether a pull will fit your cabinet’s existing hole pattern.
How to Measure It Correctly
- Use a ruler or caliper for accuracy.
- Place the zero mark at the center of the first screw hole.
- Read the measurement at the center of the second hole.
- Common standard sizes include 3 inches, 4 inches, 96mm, 128mm, and 192mm.
Pro Tip: If you’re replacing existing pulls, measure the hardware itself rather than the holes in your cabinet. Previous installations may have been slightly misaligned, and measuring the current pulls gives you a more accurate target.
Check the Handle Projection

Projection determines how far the handle extends from the cabinet surface. This affects comfort and clearance in tight spaces.
Measure the Extension
Hold a ruler perpendicular to the cabinet surface. Measure from the surface to the farthest point on the handle. This gives you the projection dimension.
Watch for Clearance Problems
Handles with excessive projection can interfere with adjacent drawers, walls, or appliances. If the projection exceeds 1.5 inches, check for potential collisions when cabinet doors open fully.
Mark Proper Handle Placement
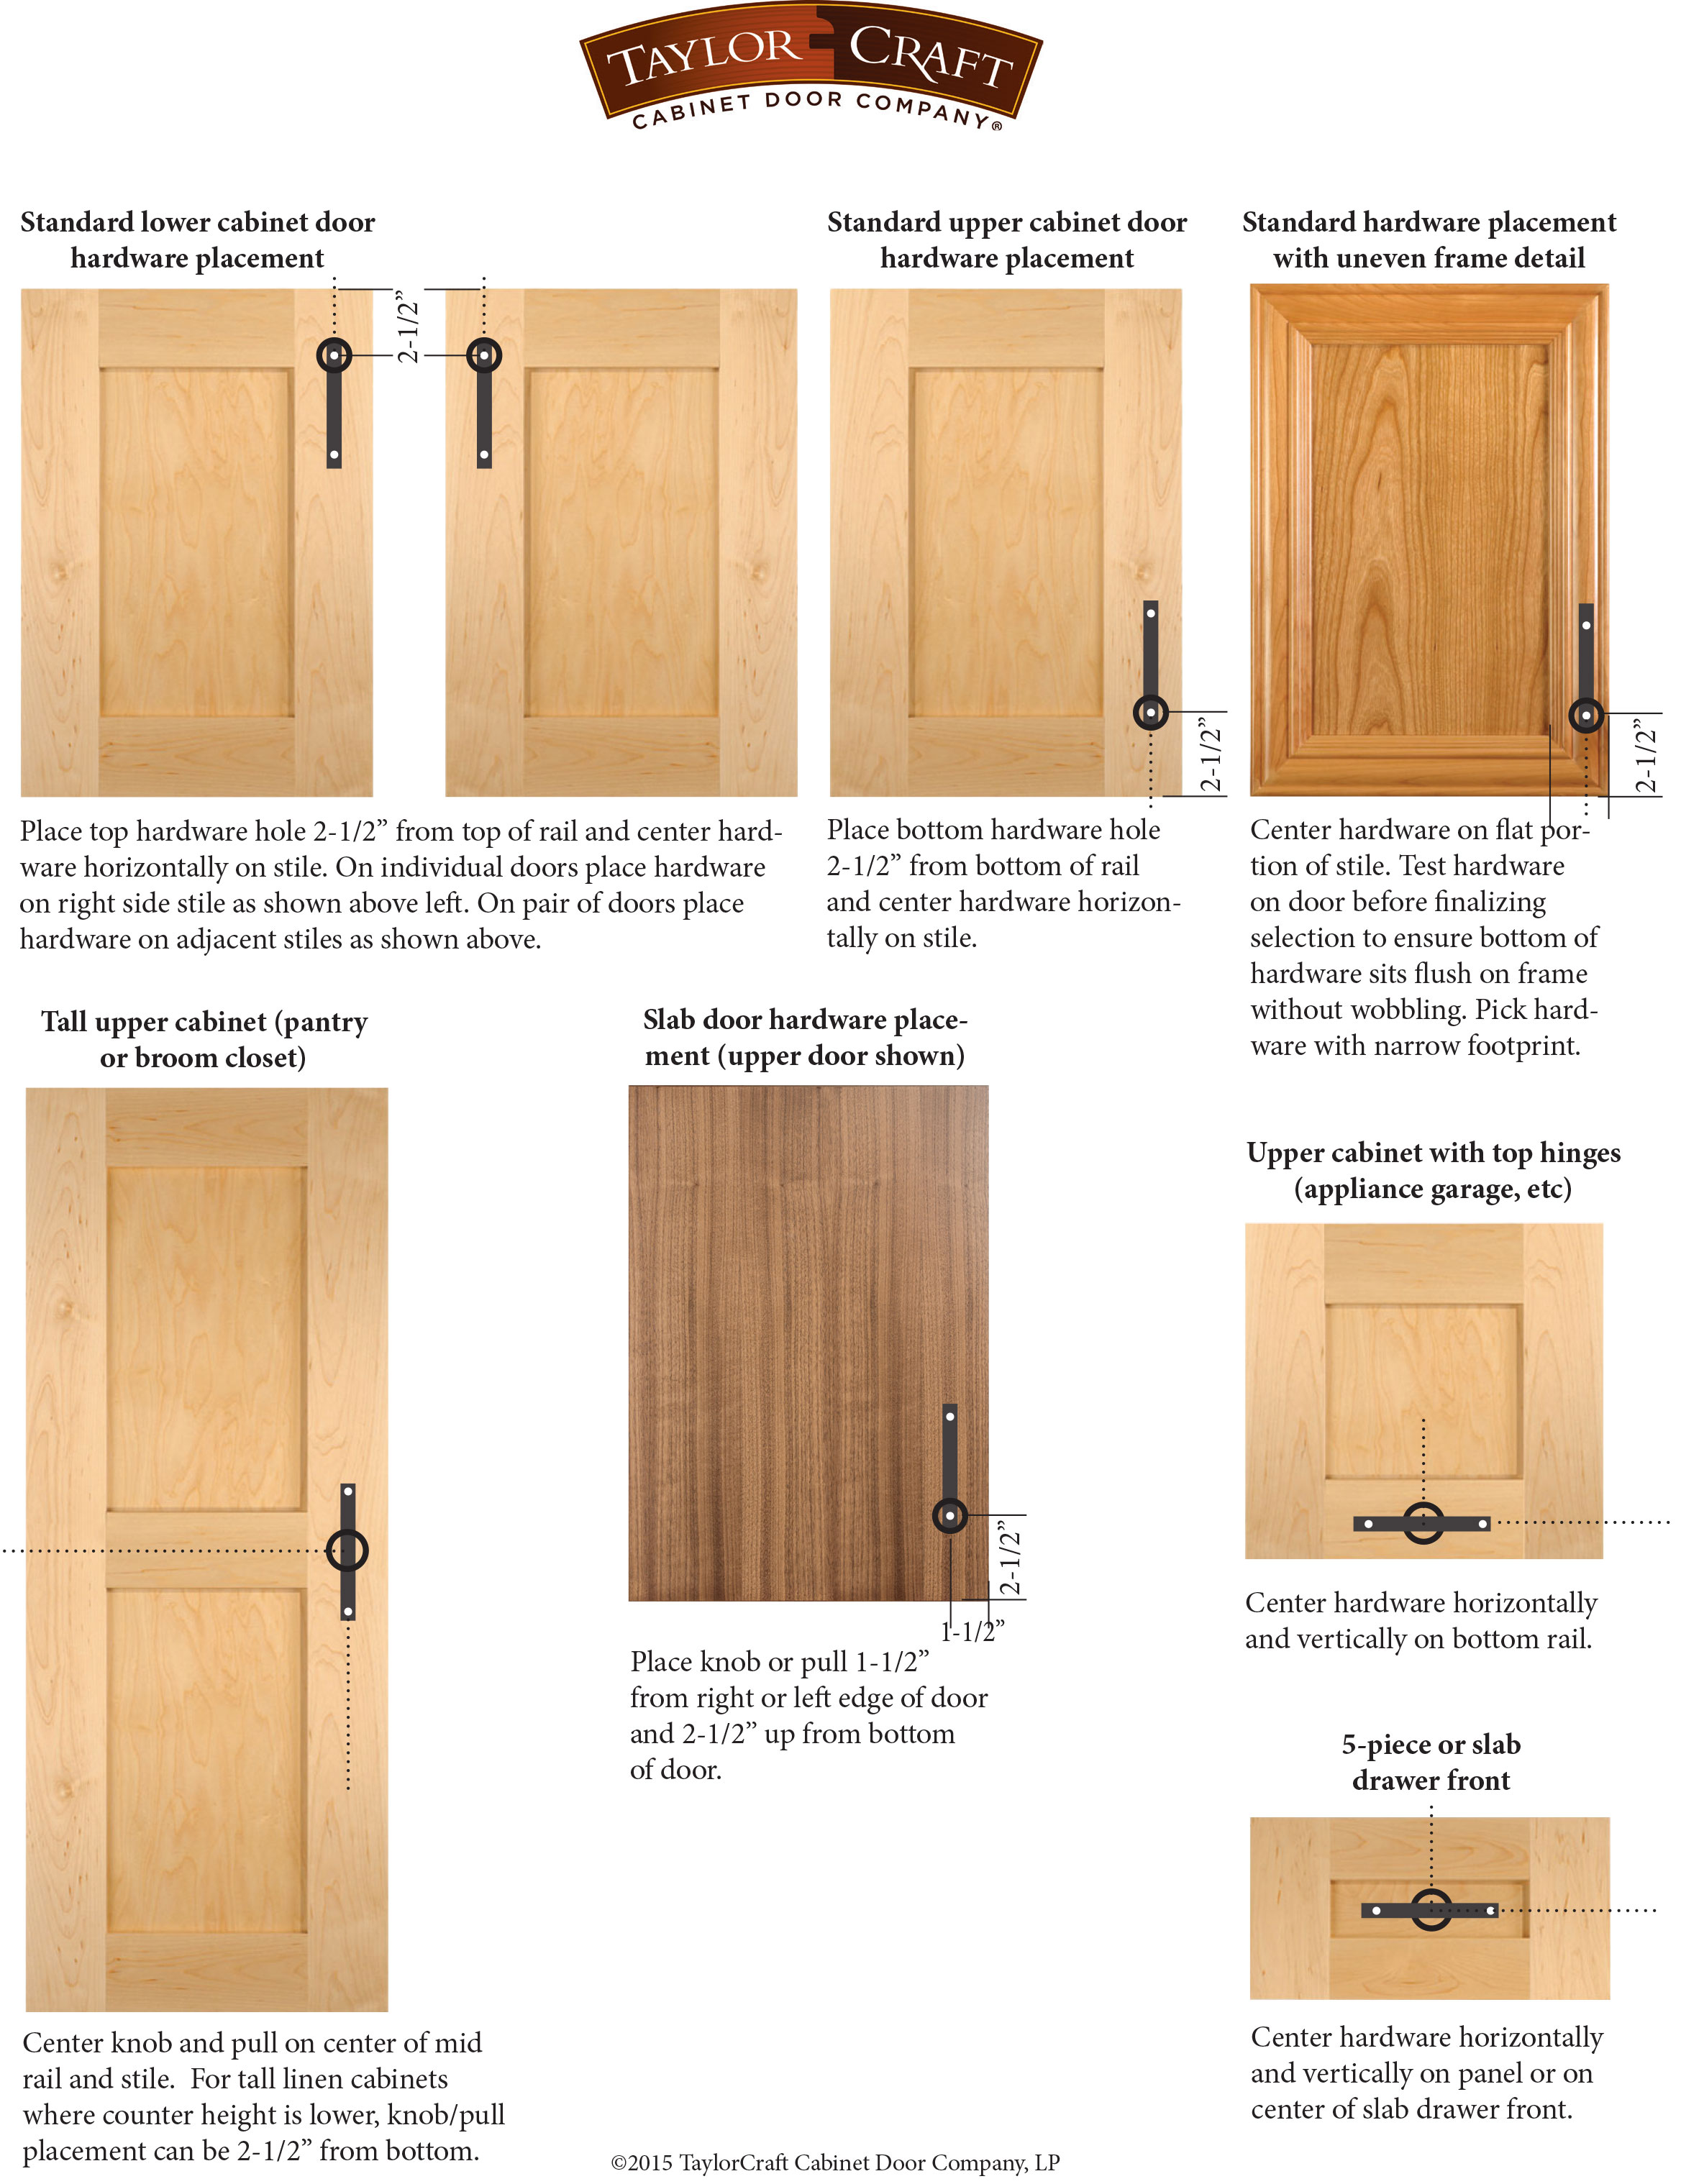
Consistent placement across all cabinets creates a polished, custom look. Taking time to mark positions correctly prevents uneven hardware.
Standard Heights for Drawer Pulls
- Top drawer: Position the handle 1 to 2 inches below the top edge.
- Lower drawers: Center the handle vertically on the drawer face.
- Use a jig or template to ensure identical placement across multiple drawers.
Placement on Cabinet Doors
- Single handle: Center it horizontally and vertically, or align it with the door stile for a cleaner look.
- Two handles on tall cabinets: Place one at one-third down and another at two-thirds down the door height.
Pro Tip: Use painter’s tape to mock up handle positions before committing to drilling. This lets you visualize the layout and make adjustments easily.
Create and Use a Measurement Template
Templates streamline the process when installing hardware on multiple cabinets. They ensure every handle lands in the same spot.
Build a Simple DIY Template
Cut a strip of cardboard or thin plastic to match your center-to-center distance. Mark the screw hole positions clearly with a pen or marker.
Transfer Measurements to Cabinets
Hold the template firmly against the cabinet surface. Mark each screw hole with a pencil. Double-check alignment before drilling to avoid costly mistakes.
Account for Cabinet Material and Thickness
Different cabinet materials require different installation approaches. Knowing your cabinet construction prevents damaged surfaces and improperly fitted screws.
Standard Cabinet Thickness
Most cabinet doors and drawer fronts measure ¾ inch thick. This standard thickness accommodates most hardware screws. Verify your cabinet thickness before ordering to ensure you have the right screw length.
Special Materials
Stone, glass, or metal cabinets require specialized drill bits and anchors. Measure material depth carefully to avoid drilling through the surface or cracking fragile materials.
Match Hardware to Cabinet Size
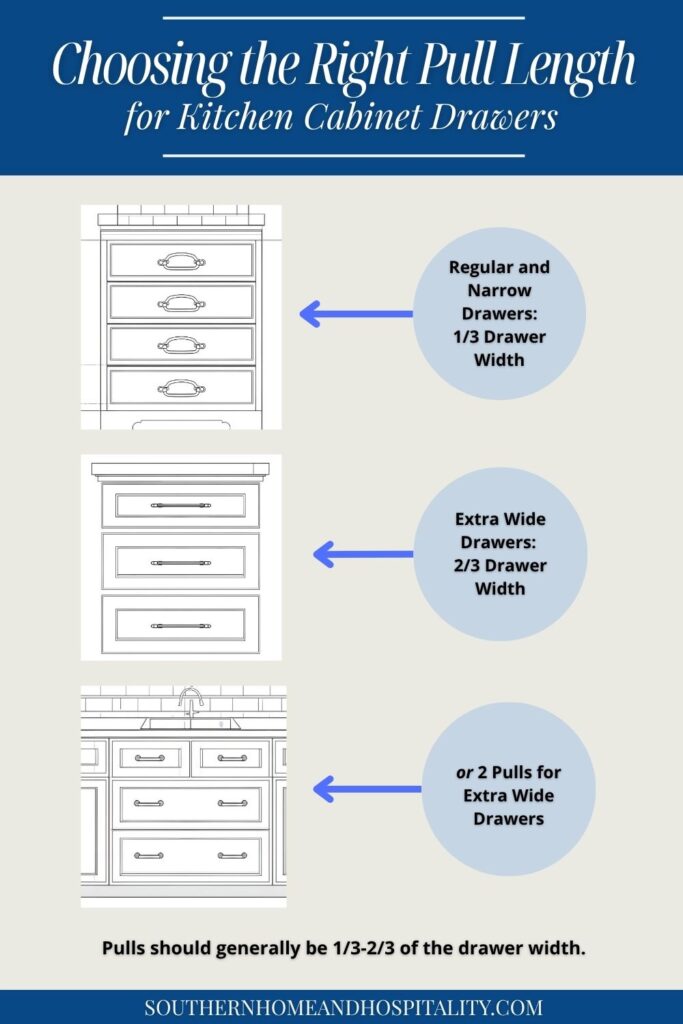
Proportion plays a significant role in how professional your hardware looks. Oversized handles on small drawers appear clunky, while tiny knobs on large doors look lost.
Small Drawers Under 18 Inches
Choose pulls with a 3-inch center-to-center distance or opt for knobs. Avoid handles longer than 4 inches, as they overwhelm smaller surfaces.
Large Drawers Over 24 Inches
Select pulls ranging from 5 to 9 inches, or use two knobs spaced evenly for better balance and functionality.
Tall Pantry or Pull-Out Cabinets
Install two vertical pulls or multiple knobs to provide better grip and easier access to the full height of the cabinet.
Avoid Common Measuring Mistakes
Small errors during measurement can lead to significant installation problems. Being aware of frequent pitfalls helps you avoid them.
Misreading the Ruler
Always measure from the center of one hole to the center of the other. Measuring from edge to edge gives you an incorrect dimension that won’t match product specifications.
Forgetting About Clearance
Check that handles won’t interfere with adjacent doors or drawers when opened. A handle that looks fine on paper may collide with neighboring hardware in practice.
Ignoring Existing Holes
If you’re reusing existing holes, verify they match your new hardware’s spacing. If they don’t, you’ll need hole plugs or cover plates to hide the old holes.
Finalize Your Hardware Selection
Once you have all measurements recorded, compare them carefully against product specifications before purchasing.
Check Product Dimensions
Manufacturers list center-to-center distance, overall length, and projection for each handle. Match these numbers to your recorded measurements to ensure compatibility.
Test Before Committing
Purchase a single handle first and install it on one cabinet. This lets you evaluate the look, feel, and fit before buying hardware for the entire kitchen.
Frequently Asked Questions About Measuring Cabinet Handles
What is the standard center-to-center distance for cabinet pulls?
Common standard sizes are 3 inches, 4 inches, 96mm, 128mm, and 192mm. The most popular choices for kitchen cabinets are 3-inch and 4-inch spacing, though larger pulls work well on bigger drawers and pantry doors.
How do I measure for new handles if I don’t have existing hardware?
Measure the distance between existing screw holes if they’re present. If you’re starting fresh, decide on placement based on cabinet size and personal preference. Mark your desired position, then measure between those marks to determine the center-to-center distance you need.
What tools do I need to measure cabinet handles?
A standard tape measure or ruler works for most measurements. A caliper provides more precision, especially for smaller dimensions like knob base diameter. A pencil and painter’s tape help with marking positions before installation.
How far should cabinet handles be from the edge of the door?
For drawers, position handles 1 to 2 inches below the top edge. For cabinet doors, center the handle horizontally or align it with the door stile. The exact distance depends on personal preference and the overall design of your space.
Can I use the same size handles on all my cabinets?
You can, but mixing sizes often looks more intentional. Use smaller pulls or knobs on upper cabinets and smaller drawers, with larger pulls on lower cabinets and wide drawers. This creates visual interest while maintaining proportion.
What happens if my new handles don’t match the existing holes?
You have a few options. Use hole plugs or cover plates to conceal old holes and drill new ones. Alternatively, choose hardware with adjustable mounting brackets. Some manufacturers offer backplates that cover multiple hole configurations.
Key Takeaways for Measuring Cabinet Handles
Measuring cabinet handles correctly comes down to a few essential dimensions. Focus on center-to-center distance for pulls, projection for clearance, and overall length for proportion. Match these measurements to your cabinet size and material for the best results.
Always verify your measurements twice before ordering. Create a template for consistent placement across multiple cabinets. Test one handle before committing to a full purchase. These small steps prevent costly mistakes and ensure a professional finish.
With accurate measurements in hand, you’re ready to shop for hardware that fits perfectly and elevates your space. Take your time, measure carefully, and enjoy the transformation that new cabinet handles bring to your home.


