
You’ve just lost your file cabinet key, or maybe the lock is worn out and no longer secures your drawers properly. Whatever the reason, a faulty lock compromises both security and convenience. The good news? Replacing a lock on a file cabinet is a straightforward DIY task that takes under an hour and requires only basic tools. Whether you’re upgrading security, replacing missing keys, or maintaining office furniture, this guide walks you through every step—from removing the old lock to installing a new one correctly.
By the end, you’ll know how to identify your lock type, choose a compatible replacement, and avoid common installation mistakes. We’ll cover standard cam locks used in most metal file cabinets, explain tool requirements, and provide pro tips for smooth operation. No prior locksmith experience needed—just follow the steps and you’ll have a secure, functioning lock in no time.
Identify Your Lock Type
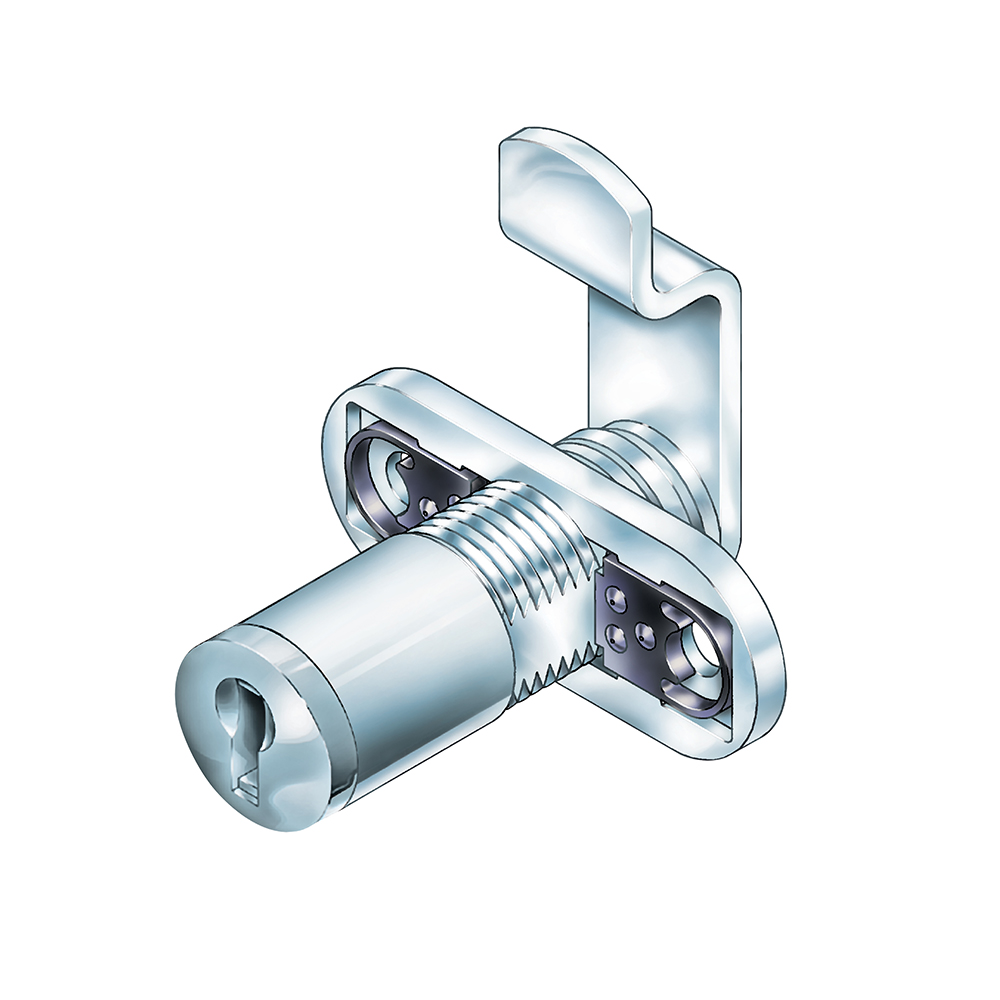
Before buying a new lock, confirm what kind you currently have. Most file cabinets use cam locks, named for the rotating metal piece (the cam) that extends into the cabinet frame to secure the drawer.
Check for a Brand or Model Number
Look at the face of the current lock. Many manufacturers stamp the brand—such as Accuride, Southco, or Master Lock—on the cylinder. If visible, note it down. This helps match the exact replacement. If no brand is visible, measure the lock carefully.
Measure the Lock Cylinder
Use a ruler or tape measure to determine two key dimensions:
- Cylinder length: From the front face to the end of the threaded section (typically ½ inch to 1 inch)
- Cylinder diameter: Usually standardized at about ½ inch (12.7 mm)
Also, observe whether the cam (the metal arm extending from the back) turns clockwise or counterclockwise when unlocking. This affects orientation during installation.
Gather Required Tools

Having the right tools ensures a fast, damage-free replacement. Most jobs require only basic hardware.
Essential Repair Tools
- Screwdriver (flathead or Phillips): To remove mounting screws
- Wrench or pliers: For loosening the retaining nut behind the lock
- Flashlight: To see inside tight spaces
- Replacement cam lock: Must match size and cam orientation
Optional but helpful:
– Needle-nose pliers (for handling small parts)
– Lubricant (like WD-40) to clean old parts or ease new lock operation
Avoid using excessive force—file cabinet metal is thin and dents easily.
Remove the Old Lock
Start by making sure the drawer is unlocked. This positions the cam correctly for removal.
Unscrew the Retaining Nut
Pull the drawer out fully. At the back of the lock cylinder, you’ll find a retaining nut holding it in place. Use a wrench or pliers to loosen and remove this nut by turning it counterclockwise.
If the nut is corroded or stuck:
– Spray a little lubricant and wait 5 minutes
– Tap gently with a hammer to break rust
– Use vice grips if the nut is stripped
Once the nut is off, push the lock forward from the back.
Extract the Lock Cylinder
From the front of the drawer, grasp the lock face and pull it straight out. If it resists:
– Ensure the drawer is unlocked
– Gently wiggle side to side while pulling
Do not force it. Forcing can bend the mounting hole or damage the drawer face.
Set aside the old lock and inspect the cam for wear. A bent or worn cam often causes sticking issues—even with a new cylinder.
Test the Drawer Mechanism
With the lock removed, manually operate the locking mechanism to ensure everything else works.
Verify Cam Path Clearance
Open the cabinet and look at the frame where the cam inserts. Make sure:
– No debris blocks the slot
– The hole isn’t bent or obstructed
– The drawer closes fully without resistance
If the cam path is damaged, repair it before installing the new lock. A misaligned path will cause premature wear.
Confirm Drawer Alignment
Close the drawer and check that it sits flush. Misaligned drawers prevent proper locking. Adjust glides or level the cabinet if needed.
Install the New Lock
Now insert the replacement lock. Match the orientation so the cam rotates correctly when turned.
Insert the Lock Cylinder
From the front, slide the new lock into the hole. Make sure:
– The key turns freely in the unlocked position
– The cam points toward the locking slot
– The lock sits flush with the drawer face
Push it straight through until it contacts the front panel.
Secure with Retaining Nut
From behind, thread the retaining nut onto the cylinder’s threads. Hand-tighten first, then use pliers or a wrench to snug it—do not overtighten. Over-tightening strips threads or warps the drawer metal.
Leave slight play so the lock turns smoothly. If it binds, back off the nut slightly.
Test Lock Operation
Functionality testing prevents future frustration.
Lock and Unlock the Drawer
Insert the key and turn it fully in both directions. As you turn:
– Watch the cam rotate into and out of the cabinet frame
– Listen for grinding or resistance
– Confirm the drawer can’t be opened when locked
Repeat 5–10 times to ensure consistent action.
Check Key Removal Position
Most file cabinet locks only allow key removal in the locked position. If you can remove the key while unlocked, the lock may be installed backward or defective.
If so:
– Remove the lock
– Rotate the cylinder 180 degrees
– Reinstall and retest
Some models require correct cam alignment—refer to the manufacturer’s instructions.
Troubleshoot Common Issues
Even with careful installation, problems can arise. Here’s how to fix them fast.
Lock Binds When Turning
Cause: Retaining nut too tight or misaligned cam
Fix: Loosen the nut slightly and realign the cam. Apply a drop of lubricant to the cylinder.
Drawer Won’t Lock Fully
Cause: Cam too short or drawer misaligned
Fix: Measure cam reach—replace with longer cam if needed. Adjust drawer height or level the cabinet.
Key Sticks or Won’t Turn
Cause: Debris in cylinder or poor-quality lock
Fix: Spray lock lubricant (not WD-40 directly into keyway). Try a different key. Replace with a higher-grade lock if persistent.
Upgrade Your Security
Standard file cabinet locks offer basic protection. But if you store sensitive documents, consider an upgrade.
Choose a Higher-Security Lock
Look for:
– Pick-resistant cylinders
– Restricted keyways (keys not available off-the-shelf)
– Rekeyable models (so all cabinets use one key)
Brands like Medeco, Abloy, or Schlage offer commercial-grade cam locks compatible with many cabinets.
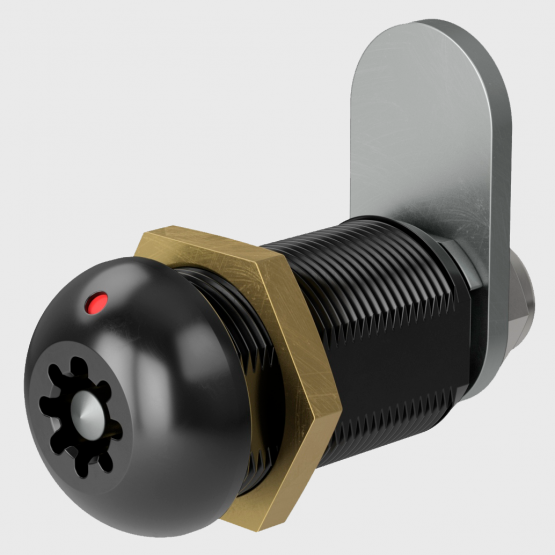
Use Locks with Indicator Marks
Some premium locks have a dot or line on the face that shows lock status—helpful in busy offices. Red when locked, silver when open.
Prevent Future Lock Problems
Maintenance extends lock life and avoids repeat replacements.
Lubricate Annually
Once a year, apply dry graphite lubricant to the keyway and cam pivot. Avoid oil-based sprays—they attract dust and gum up over time.
Keep Spare Keys
Store a spare key in a secure location. Label it clearly. Without it, you may need to drill out the lock later.
Inspect Regularly
Every few months:
– Check for loose retaining nuts
– Test smooth operation
– Look for signs of forced entry
Catching issues early prevents full lock failure.
When to Call a Professional
While most lock replacements are DIY-friendly, some situations require expert help.
You Damaged the Mounting Hole
If the lock hole is stripped or enlarged, a standard lock won’t stay in place. A locksmith can:
– Install a threaded insert
– Fit a larger-diameter lock
– Weld and re-drill if necessary
Need Master Key System
For large offices with multiple cabinets, a master key system allows tiered access. Only a locksmith can set this up properly.
Frequently Asked Questions About Replacing a File Cabinet Lock
How do I know what lock fits my file cabinet?
Measure the cylinder diameter (usually about ½ inch) and the length of the threaded section. Check the face for a brand or model number. Match these specs to a replacement cam lock with the same cam orientation.
Can I replace a file cabinet lock without a locksmith?
Yes. The process involves removing a retaining nut, pulling the old cylinder, and installing a new one. Basic tools like pliers and a screwdriver are sufficient. Most replacements take less than an hour.
What if my file cabinet lock is stuck?
Spray a small amount of lubricant into the keyway and wait 5 minutes. Gently wiggle the key while turning. If the cylinder won’t budge, remove the retaining nut and push the lock out from the back.
Why does my new lock feel loose?
The retaining nut may not be tight enough. Hand-tighten it, then snug with pliers. Avoid overtightening, which can strip threads or warp the drawer face. Slight play is normal for smooth rotation.
Can I use one key for multiple file cabinets?
Yes, if you choose rekeyable locks or buy locks keyed alike. These are sold in sets or can be configured by a locksmith. This simplifies access in offices with several cabinets.
How do I replace a lock if the key is lost?
If the drawer is locked, you’ll need to drill out the cylinder or call a locksmith. Once the drawer opens, remove the remaining lock parts and install a new one. Keep spare keys to avoid this situation.
Key Takeaways for Replacing a File Cabinet Lock
Replacing a lock on a file cabinet is a practical DIY skill that saves time and money. The core steps are straightforward: identify your lock type, remove the retaining nut, extract the old cylinder, and install a compatible replacement. Testing the operation thoroughly ensures the lock works reliably.
- Measure carefully before purchasing a replacement to avoid mismatched parts
- Test the cam rotation during installation to ensure proper locking action
- Maintain regularly with dry graphite lubricant and periodic inspections
Your next step is simple: check your cabinet’s lock measurements and order a compatible cam lock today. With the right tools and this guide, you’ll restore secure storage in under an hour. For high-security needs, consult a professional locksmith to explore advanced options.


