

Painting veneer cabinets offers a budget-friendly way to refresh your kitchen without the expense of a full remodel. Veneer consists of thin layers of real wood bonded over plywood, MDF, or particleboard, and it demands a gentler touch than solid wood. Because veneer is moisture-sensitive and easily damaged by aggressive sanding, the right preparation makes all the difference. This guide walks you through each stage, from cleaning and repair to priming, painting, and reassembly, so your finished cabinets look smooth and professional.
You will discover how to clean veneer safely, scuff surfaces without sanding through, choose the right primer and paint, and apply finishes that hold up to daily wear. Whether you are tackling a dated kitchen or refreshing a bathroom vanity, these steps help you achieve durable, beautiful results. Let’s get started.
Remove Cabinet Doors and Hardware
Label Every Piece for Easy Reassembly
Take off all cabinet doors, drawer fronts, hinges, and handles before you begin painting. Removing these components ensures even coverage and prevents brush marks on hardware. Use masking tape and a marker to number each door and drawer, such as “Door 1” or “Drawer 2.” Place hardware in labeled bags organized by cabinet section, like “Upper Left” or “Island,” so you can find everything later without guesswork.
Set Up a Ventilated Workspace
Choose a dry area with good airflow, such as a garage or spare room, and avoid painting in damp or cold conditions. High humidity can interfere with paint adhesion and drying times. Lay drop cloths on a flat surface and elevate doors on sawhorses or racks so both sides dry evenly.
Clean Veneer Surfaces Thoroughly
Use a Degreaser or TSP Substitute
Kitchen cabinets accumulate grease and grime, especially near handles and along edges. Wipe every surface with a TSP substitute or mild detergent mixed according to label instructions. Use a soft sponge or microfiber cloth and pay extra attention to high-touch zones where oils build up. This step removes contaminants that can prevent paint from bonding properly.
Rinse and Dry Completely
After cleaning, go over all surfaces with a clean, damp cloth to remove any soapy residue. Dry immediately with a lint-free towel, since standing water can cause veneer to swell or delaminate. Allow all pieces to air-dry for at least two hours before moving to the next step.
Repair Damaged Veneer Areas
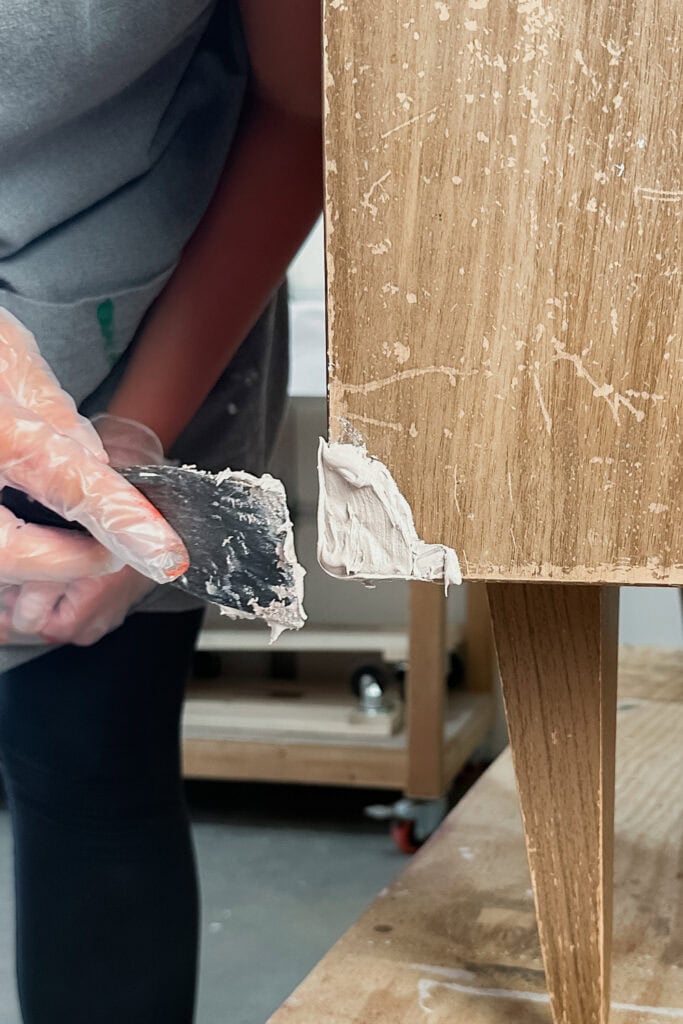
Fill Dents and Cracks with Wood Filler
Inspect each cabinet for chips, dents, or lifting veneer. Use a water-based wood filler to patch small imperfections, pressing it firmly into gaps with a putty knife. Feather the edges so the filler blends seamlessly with the surrounding surface. Avoid oil-based fillers, as they can bleed through paint and ruin your finish.
Let Filler Dry and Sand Smooth
Allow the filler to cure fully, which typically takes two to four hours depending on the product. Lightly sand the filled areas with 220-grit sandpaper until they are flush with the cabinet surface. Wipe away dust with a tack cloth. For large veneer tears or bubbling, consider replacing the panel or using a veneer patch kit instead of attempting a filler repair.
Sand Veneer Gently for Adhesion
Scuff with 220-Grit Paper
Sanding creates a rougher surface that helps paint stick, but veneer is thin, so use light pressure only. Use 220-grit sandpaper or a sanding sponge to scuff glossy factory finishes. Your goal is to create a “toothy” texture, not to remove material. Focus on flat panels and stiles, but be careful around edges where veneer is most vulnerable to sanding through.
Wipe Away All Dust
After sanding, remove fine particles with a tack cloth or dry microfiber rag. Dust causes bumps and poor adhesion, so do not skip this step. Avoid using water for cleanup, and use a vacuum brush attachment for crevices if needed.
Apply a Bonding Primer

Choose the Right Primer Type
A high-adhesion primer is essential for veneer surfaces. Zinsser Bulls Eye 1-2-3 works well as a versatile water-based option, while Zinsser BIN Shellac-Based Primer is excellent for covering stains, tannins, or dark wood. Shellac primer blocks bleed-through effectively but has strong fumes, so work in a ventilated space.
Roll and Brush for Even Coverage
Apply primer with a high-quality synthetic brush for edges and a foam roller for flat surfaces. Work in sections and maintain a wet edge to prevent lap marks. Use thin coats, as thick primer can drip or raise the grain. Let the primer dry for two to four hours, following the manufacturer’s instructions.
Lightly Sand Between Coats
Once the primer is dry, lightly sand with 320-grit paper to smooth any raised fibers or brush marks. Wipe clean with a tack cloth. A second primer coat may be necessary for deep colors or stained veneer, especially if the original finish was dark.
Select the Best Cabinet Paint
Pick a Durable Finish
Semi-gloss is the ideal finish for veneer cabinets because it is durable, moisture-resistant, and easy to clean. Avoid flat or matte finishes, which stain easily and do not hold up in kitchens. High-gloss looks sleek but highlights imperfections, so only choose it if your prep work is flawless.
Choose Paint Type: Acrylic vs Oil
Acrylic latex enamel, such as Benjamin Moore Aura or Sherwin-Williams Duration, offers excellent durability, low odor, and easy water cleanup. It dries quickly and resists yellowing, making it a great choice for most DIYers.
Oil-based paint delivers a harder, longer-lasting finish with a smooth, professional look. It works best for high-traffic kitchens but requires mineral spirits for cleanup and longer drying times of eight to twenty-four hours. Choose oil-based only if you can manage the fumes and extended cure period.
Consider Timeless or Trendy Colors
Popular cabinet colors include:
– White or off-white shades like Swiss Coffee and Simply White, which brighten small spaces
– Soft grays such as Agreeable Gray and Repose Gray for a modern, neutral look
– Bold hues like navy or deep green to add character and contrast
Test paint samples on a cabinet door first and view them in both natural and evening light before committing.
Paint with Brush and Roller
Use the Right Tools
A 2-inch angled sash brush provides precision on edges and corners. For flat panels, use a small foam roller between four and six inches wide to avoid stipple marks. Load tools evenly and avoid overloading with paint to prevent runs and drips.
Apply Thin, Even Coats
Start with doors and drawer fronts, painting frames first and then panels. Use the brush for edges and rails, then roll flat areas in one direction. Work from top to bottom to catch drips early. Maintain a wet edge and do not let paint dry between sections.
Allow Proper Drying Time
Wait at least two to four hours between coats, and longer for oil-based paint. Do not rush this step, as paint needs time to cure between layers. Most projects require two to three coats for full coverage and depth.
Sand Lightly Between Coats
After each coat dries, lightly scuff with 320-grit sandpaper to remove dust nibs or brush strokes. Wipe clean with a tack cloth. This step ensures a glass-smooth final result.
Add a Protective Topcoat
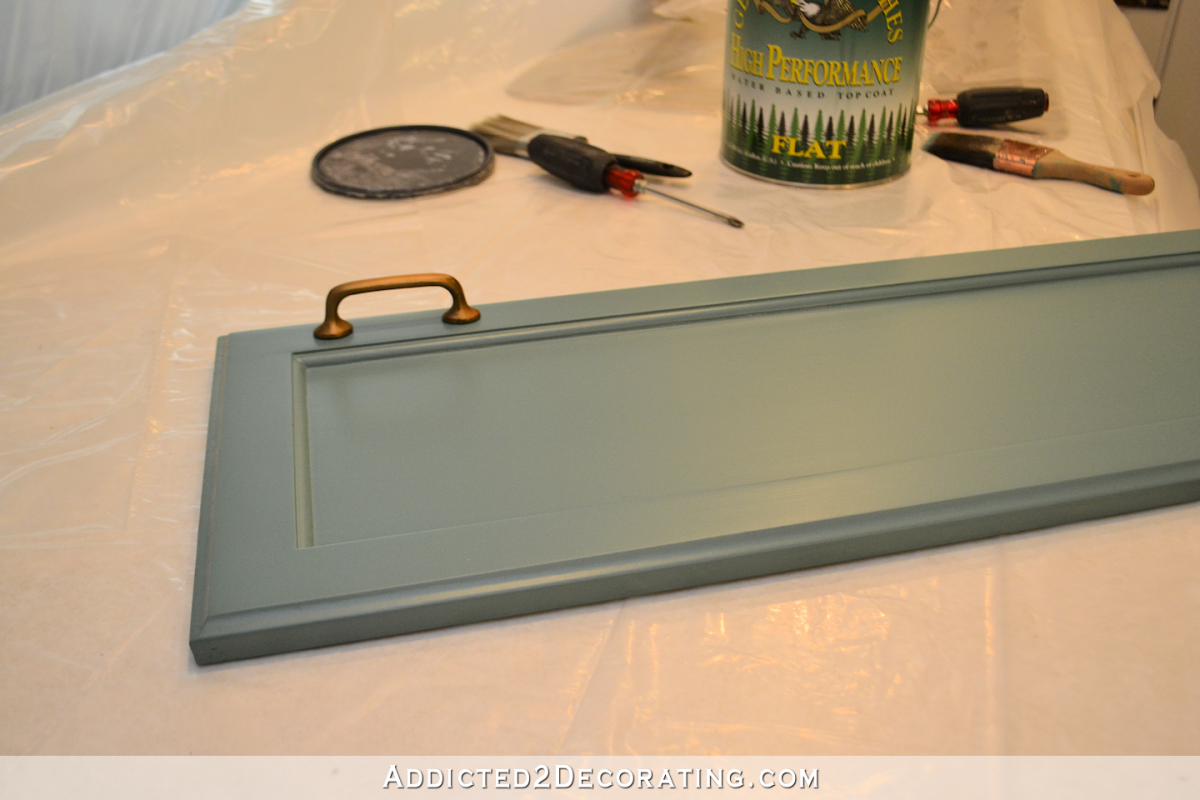
Apply Clear Polyurethane for Durability
In high-use kitchens, a water-based polyurethane topcoat adds extra protection against scratches and moisture. Choose a satin or semi-gloss finish that matches your paint. Apply with a foam brush or lint-free roller in thin, even coats, and let dry four to six hours between coats. Two coats maximum is sufficient.
Avoid Yellowing with Water-Based Products
Oil-based polyurethane yellows over time, especially on white cabinets. Stick with water-based clear coats like Minwax Polycrylic to keep colors true and finishes clear.
Reassemble Cabinets with Care
Wait 24 Hours Before Rehanging
Even if paint feels dry, it is still curing. Wait at least 24 hours before reattaching doors and hardware, and 48 hours for oil-based paint or polyurethane. This prevents sticking, smudging, or chipping during reassembly.
Check for Touch-Ups
Once reassembled, inspect for missed spots or handling marks. Use a small brush to fix imperfections, and keep leftover paint for future repairs.
Allow Full Cure Time
Paint takes five to seven days to fully cure. Avoid heavy use, hanging mugs on doors, or leaning objects against drawers during this period. After curing, clean gently with a damp cloth and avoid harsh scrubbing.
Frequently Asked Questions About Painting Veneer Cabinets
Can I paint veneer cabinets without sanding?
Sanding is strongly recommended because it creates the texture paint needs to bond. Skipping this step can lead to peeling and poor adhesion. At minimum, scuff glossy surfaces with 220-grit sandpaper.
What is the best primer for veneer cabinets?
A high-adhesion bonding primer like Zinsser Bulls Eye 1-2-3 works well for most projects. For dark or stained veneer, Zinsser BIN Shellac-Based Primer provides superior stain blocking.
How long should I wait between paint coats?
Wait at least two to four hours between coats for water-based paint, and longer for oil-based options. Always follow the manufacturer’s drying instructions for best results.
Can I use a roller on veneer cabinets?
Yes, a small foam roller works well on flat surfaces. Use a brush for edges and corners, then roll panels in one direction for a smooth, even finish.
Will polyurethane yellow over time?
Oil-based polyurethane can yellow, especially on white cabinets. Water-based clear coats like Minwax Polycrylic keep colors true and are the safer choice.
How long does cabinet paint take to fully cure?
Most paints take five to seven days to fully cure. Avoid heavy use during this time to prevent dents, smudges, or chipping.
Key Takeaways for Painting Veneer Cabinets
Painting veneer cabinets can give your kitchen a fresh, high-end look without the cost of replacement. The key to success lies in gentle prep, proper primer, and thin, even paint layers. Avoid moisture, sand lightly, and never skip the primer step.
With the right materials and patience, you will achieve a smooth, long-lasting finish that stands up to daily wear. Whether you choose crisp white, warm gray, or a bold color, your newly painted cabinets will transform your space for years to come. Start with one door to test your technique, then tackle the rest with confidence.


