

Shaker cabinets are beloved for their clean lines and timeless appeal, but their signature recessed panel design creates deep grooves and tight crevices that trap dust, grease, and grime. If you’ve ever tried wiping them down only to find stubborn buildup lingering in the corners, you’re not alone. The gap where the frame meets the center panel is a magnet for kitchen splatter and everyday debris, especially on lower cabinets near the stove. Without the right tools and technique, cleaning these areas becomes frustrating and ineffective.
The good news? With a few household items and a systematic approach, you can restore your shaker cabinets to like-new condition without damaging the finish. This guide breaks down the most effective methods, tools, and maintenance routines used by homeowners and professionals. Whether you’re tackling light dust or years of baked-in grease, you’ll learn how to clean shaker cabinets thoroughly, safely, and efficiently. Let’s dive into the step-by-step process that actually works.
Essential Cleaning Tools
Must-Have Tools for Crevices
To reach the narrow gaps in shaker cabinets, standard cloths won’t cut it. You need tools that fit into tight spaces without scratching. An old toothbrush with soft bristles is ideal for scrubbing along the groove where the frame meets the panel. Cotton swabs allow precision cleaning in the smallest corners. For debris packed deep in the crevice, use a bamboo skewer or toothpick. They’re firm enough to dislodge gunk but soft enough to avoid gouging wood.
Plastic scrapers help lift sticky buildup without marring the surface. Never use metal tools, as they can leave permanent scratches. A vacuum with a narrow nozzle attachment is a game-changer: it removes loosened dust instead of pushing it deeper. Pair it with canned compressed air to blow out hidden particles before vacuuming.
Best Wipes and Cloths
Use microfiber cloths for final wiping. They trap dust and don’t leave lint. Keep a damp cloth handy for applying cleaning solutions, but always follow with a dry cloth to prevent moisture damage. Never use paper towels on finished wood; they can scratch and leave fibers behind.
Recommended Cleaning Solutions
Safe, Effective Cleaners
Start with gentle solutions to protect your cabinet’s finish. A vinegar and water mix (1:1 ratio) works well for light grime. Dip a cotton swab in the mixture and run it along the crevice. Dish soap and water tackle heavier grease: add one drop of dish soap to a cup of warm water and apply with a damp cloth or toothbrush.
For a residue-free wipe, use rubbing alcohol on a microfiber cloth. It evaporates quickly and cuts through oil without harming most finishes. Mild all-purpose cleaners are acceptable for general surfaces, but avoid anything with ammonia or bleach, which can degrade wood finishes over time.
Critical Safety Tips
Always test any cleaner on a hidden area first, like the inside of a door or a less-visible corner. Wait 5 to 10 minutes to check for discoloration or damage. Never oversaturate the wood. Apply solution to your cloth or tool, not directly to the cabinet. And dry immediately. Lingering moisture can warp wood or cloud finishes.
Step-by-Step Cleaning Process
Prepare the Area
Remove items from shelves and countertops. Clear hardware if possible, or protect nearby appliances. Gather all tools and solutions before starting to avoid mid-clean interruptions. This ensures a smooth, efficient process.
Dry Dust First
Begin with compressed air: blast it into the crevices to loosen dust. Immediately follow with the vacuum’s narrow nozzle to suck out the debris. This two-step dry method prevents smearing grime when you apply liquid cleaners later.
Dislodge Stubborn Debris
Use a toothpick or bamboo skewer to gently pry out compacted dirt from the groove corners. Work slowly along the frame, especially at the top and bottom edges where dust accumulates. Don’t force it. Gentle pressure is enough. If you hear a crackling sound, that’s dried grease breaking loose.
Scrub the Crevices
Dip an old toothbrush into your chosen cleaner (vinegar mix, soapy water, or rubbing alcohol). Scrub the entire groove line, focusing on corners. For ultra-tight spots, switch to a cotton swab. Work section by section. Don’t rush. You’ll see dark residue appear on your tools, confirming the grime is lifting.
Wipe and Dry Surfaces
Use a microfiber cloth dampened with cleaner to wipe the entire cabinet face. Pay extra attention to areas around knobs and hinges. These collect oils from hands. Then, go over everything with a dry microfiber cloth. Let cabinets air dry for 5 to 10 minutes before closing doors to ensure no trapped moisture.
Weekly Maintenance Routine
Quick 3-Minute Dusting
Prevent buildup with a weekly routine: use compressed air on all cabinet crevices, then vacuum with the narrow nozzle. Wipe surfaces with a dry microfiber cloth. This takes less than three minutes per door and keeps grime from hardening.
Prevent Future Buildup
Wipe spills immediately, especially near the stove. Consider cabinet liners for interiors to catch crumbs and splashes. For display cabinets, glass doors reduce dust exposure. Avoid heavy cooking oils if possible, as they create sticky residue that’s hard to remove later.
Monthly Deep Cleaning
Full Door Treatment
Once a month, perform a complete clean using the full step-by-step method. Focus on lower cabinets near cooking zones. They collect the most grease. Inspect crevices for any remaining buildup and re-treat if needed. Check hinges and hardware for grime that can impede door function.
Hardware Care
Remove knobs or pulls if possible and soak them in warm, soapy water. Dry thoroughly before reattaching. For metal hardware, a light polish keeps them looking new. Tighten any loose screws to prevent misalignment.
Troubleshooting Common Issues
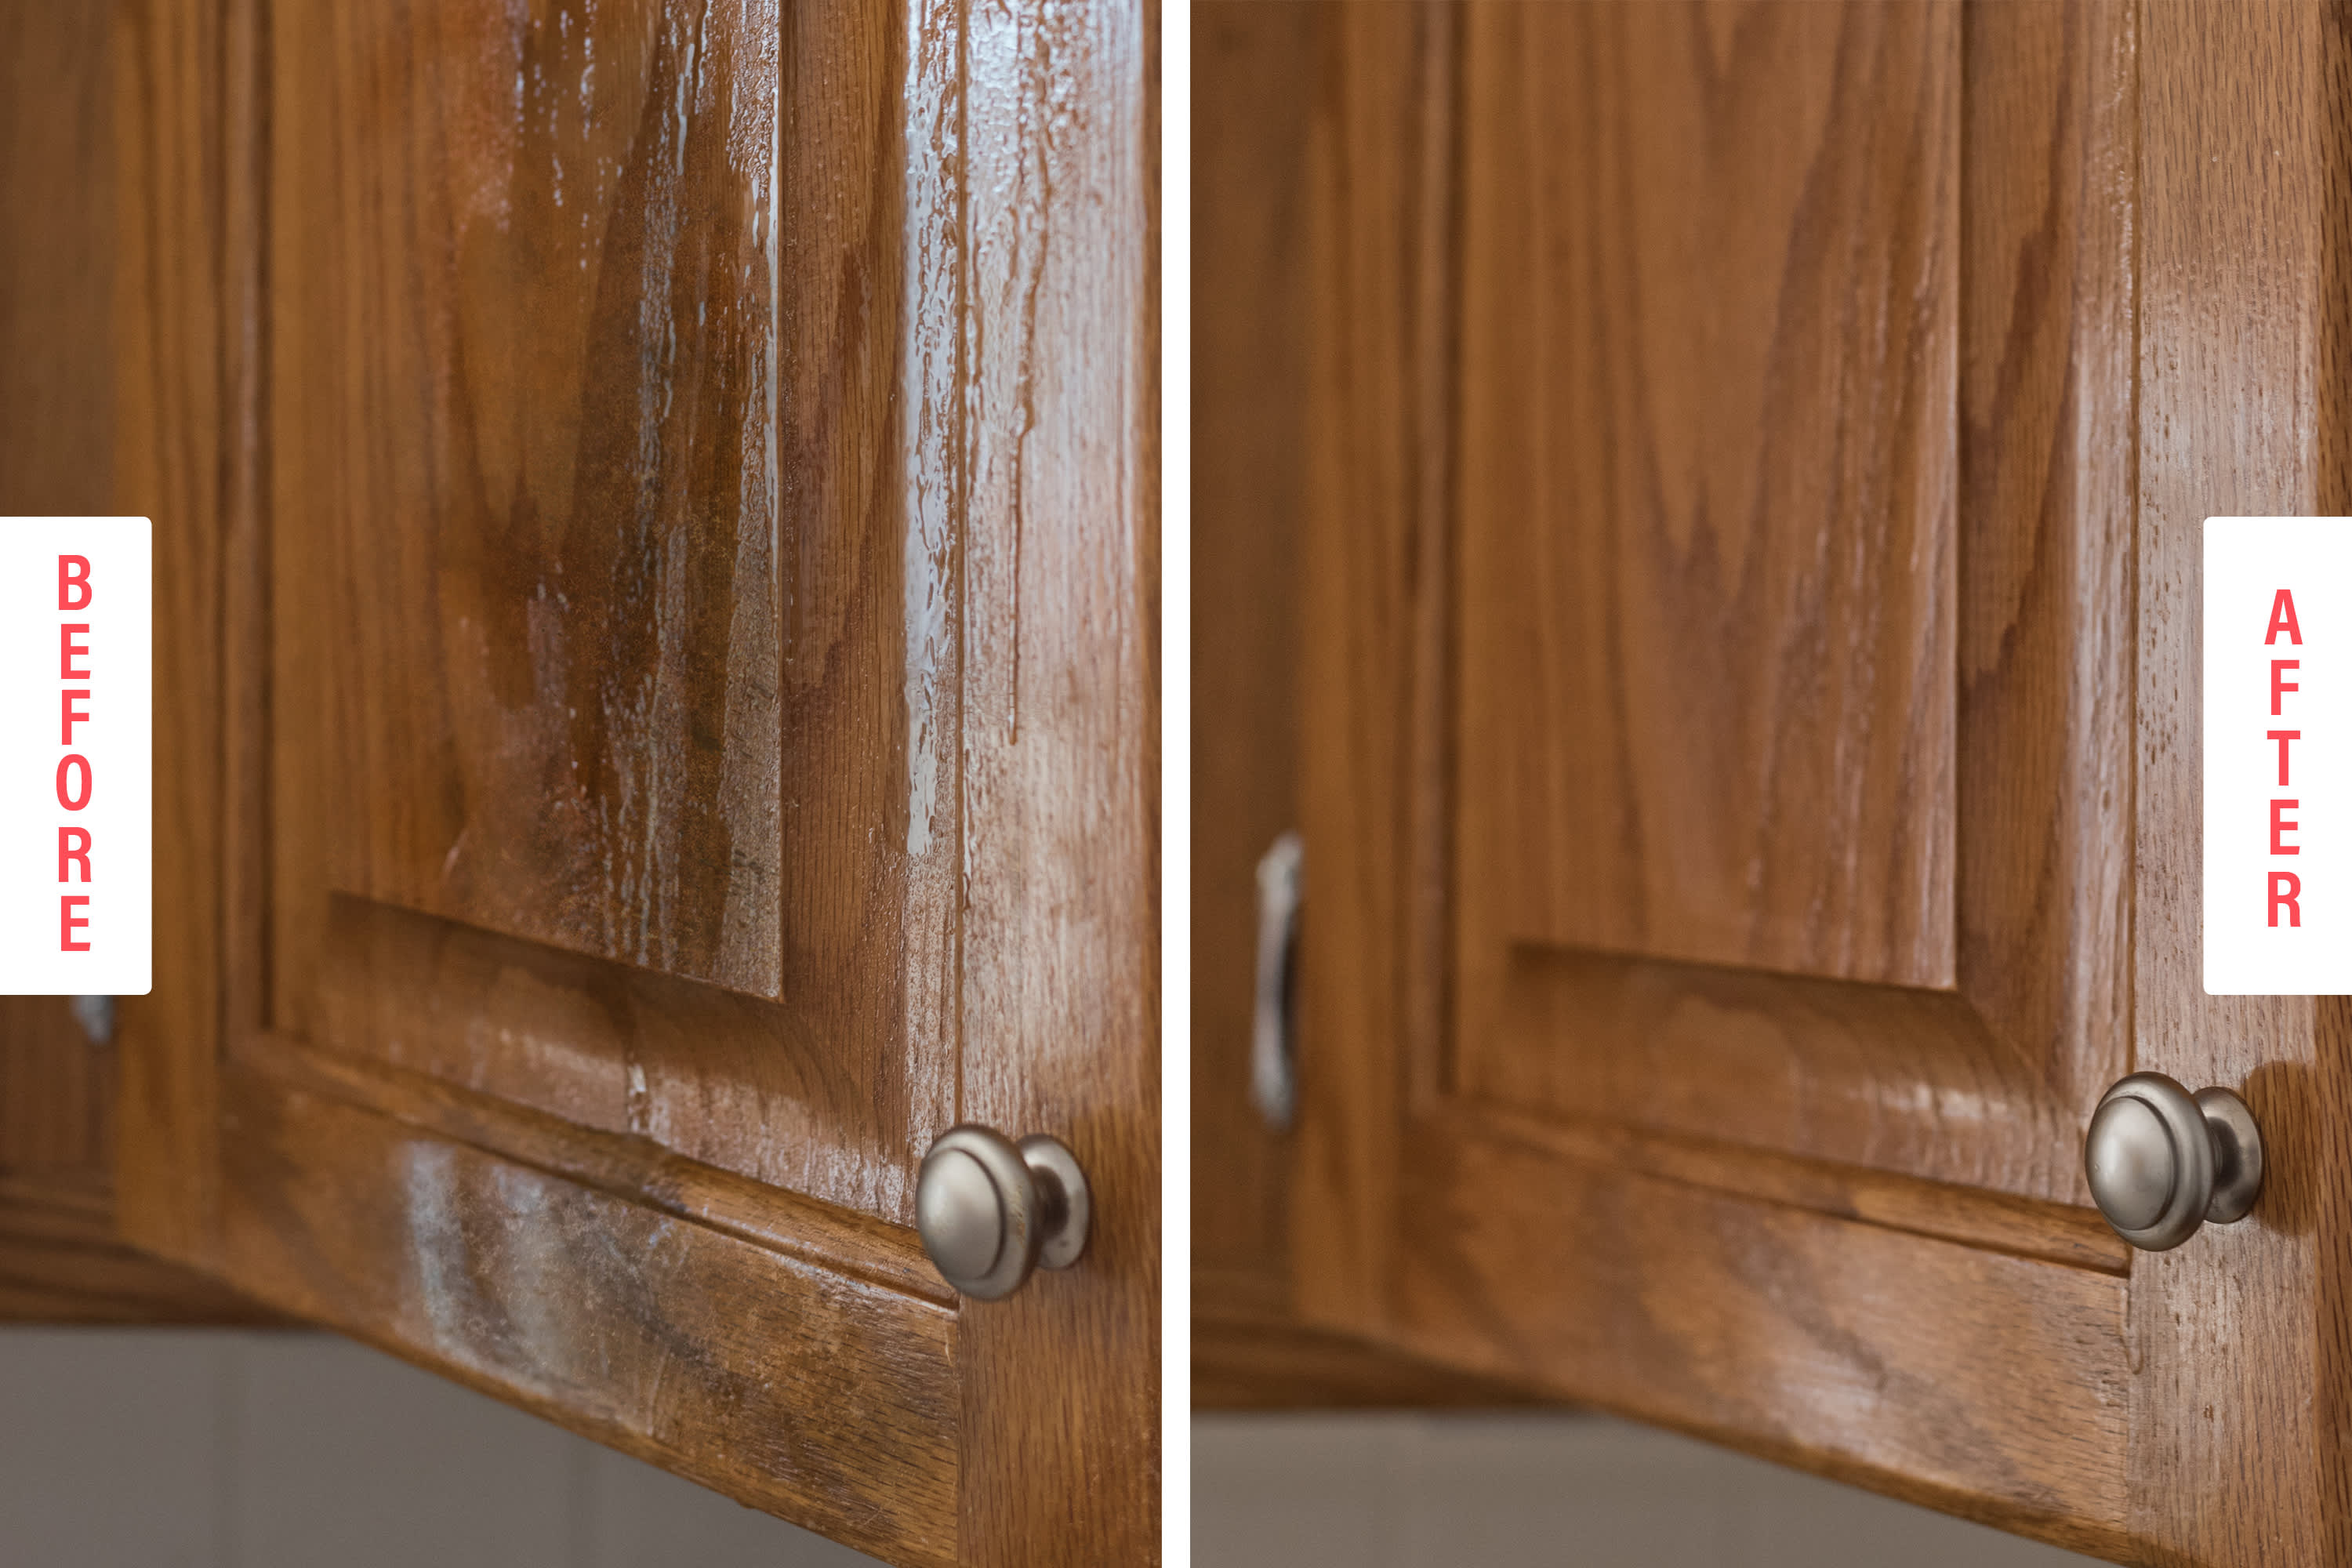
Grime Won’t Come Out?
If crevices still look dirty, try letting the cleaning solution sit for 2 to 3 minutes before scrubbing. This softens stubborn grease. For extreme cases, repeat the process twice in one session. Avoid harsh abrasives. They’ll damage the finish.
Scratches Appear?
Stop using sharp tools. Switch to bamboo skewers and soft brushes. If minor scratches occur, use a wood touch-up pen that matches your cabinet color. For deep gouges, consult a professional refinisher.
Streaks or Residue?
You may be using too much cleaner. Dilute further and wipe with a barely damp cloth. Finish with a second dry microfiber cloth. For streak-free shine, buff gently in the direction of the wood grain.
Water Stains After Cleaning?
You left moisture too long. Always dry immediately. For existing water spots, try rubbing gently with a cloth dampened with mayonnaise or toothpaste. Wipe off after 1 to 2 minutes. If stains persist, professional refinishing may be needed.
Long-Term Cabinet Care
Seasonal Deep Inspection
Twice a year, do a full cabinet check. Look for:
– Warping or swelling (signs of moisture damage)
– Loose hinges or misaligned doors
– Worn finish in high-touch areas
Address small issues early to avoid costly repairs. Reapply a protective wood polish if recommended by the manufacturer.
When to Call a Pro
Seek professional help if you notice:
– Deep cracks in the wood
– Blistering or peeling finish
– Persistent grime despite repeated cleaning
– Structural weakness in doors or frames
A cabinet specialist can refinish, repair joints, or suggest modifications to reduce crevice depth, though this may alter the classic shaker look.
Pro Tips from Cabinet Experts
Use the Swab-and-Vacuum Combo
One user’s top hack: “Dip a cotton swab in vinegar water, run it along the groove, then vacuum right after. The grime comes out like magic.” This combo loosens and extracts in one flow.
Keep Compressed Air Handy
Store a can of compressed air under the sink. A 30-second blast weekly keeps crevices clear, especially helpful in homes with kids or frequent cooking.
Avoid Common Mistakes
- Don’t use steel wool or scouring pads. They scratch.
- Never soak the wood. Even water-resistant finishes aren’t immune.
- Skip the steam cleaner. Excess heat and moisture can warp joints.
Frequently Asked Questions About Cleaning Shaker Cabinets
What is the best way to clean shaker cabinet grooves?
The most effective method combines compressed air to loosen dust, a vacuum with a narrow nozzle to extract it, and an old toothbrush dipped in a vinegar and water solution to scrub remaining grime. Finish with a dry microfiber cloth to prevent moisture damage.
Can I use vinegar to clean shaker cabinets?
Yes. A 1:1 mixture of vinegar and water is safe for most finishes. Dip a cotton swab or toothbrush into the solution and scrub the crevices. Always test on a hidden area first and dry the surface immediately after cleaning.
How often should I clean shaker cabinets?
Perform a quick weekly maintenance routine using compressed air and a vacuum nozzle to prevent buildup. Do a full deep cleaning monthly, or more frequently if your cabinets are near cooking surfaces where grease accumulates faster.
Why is there so much dust in my shaker cabinet crevices?
The recessed panel design creates natural grooves where the frame meets the center panel. These narrow gaps trap airborne dust, cooking grease, and debris. Regular dusting with compressed air prevents this buildup from becoming stubborn grime.
Will a steam cleaner damage shaker cabinets?
Yes. Steam cleaners expose wood to excess heat and moisture, which can warp joints and damage finishes. Stick to gentle solutions like vinegar water, mild dish soap, or rubbing alcohol applied with soft tools.
How do I remove grease from shaker cabinets near the stove?
Use a damp cloth with one drop of dish soap in warm water to cut through grease. Scrub crevices with an old toothbrush. For heavy buildup, let the solution sit for 2 to 3 minutes before scrubbing, then dry immediately.
Key Takeaways for Maintaining Clean Shaker Cabinets
Cleaning shaker cabinets doesn’t have to be a chore. With the right tools, like a toothbrush, cotton swabs, and a narrow vacuum nozzle, you can conquer the crevices in minutes. Stick to a weekly dust-and-vac routine and a monthly deep clean, and your cabinets will stay fresh for years.
The key is consistency. A little effort now prevents a major scrub later. Keep this guide handy, and you’ll always know exactly how to clean shaker cabinets the right way. Start with the dry dusting method today, and you’ll notice the difference immediately.


