
Are your builder grade cabinets looking tired, dated, or just plain boring? You’re not alone. These standard, entry-level cabinets come with most new homes and budget renovations, but they often lack style and durability. The good news is that painting builder grade cabinets is one of the most cost-effective ways to completely transform your kitchen or bathroom without the expense of a full remodel.
With the right preparation, quality materials, and a bit of patience, you can achieve a professional-looking finish that lasts for years. This guide walks you through every step, from removing doors to choosing the best primer and paint, so your cabinets look like custom pieces. Whether you’re aiming for a crisp white Shaker style or a bold navy modern look, painting gives you full control over color, finish, and design.
Remove Doors and Hardware First
Label Each Piece for Easy Reinstallation
Start by taking off all cabinet doors, drawers, knobs, pulls, and hinges. Use a screwdriver or drill to carefully remove hardware without stripping screws. As you go, label every door and drawer with painter’s tape and a number that matches its cabinet opening. This prevents confusion later when reinstalling.
Take photos of the original setup before disassembling. These visual references help ensure everything goes back in place correctly. Store screws and small parts in labeled ziplock bags, grouping them by cabinet section like “upper left” or “island.” Keep hinges and pulls organized in compartments so nothing gets lost.
Pro tip: Lay doors flat on a protected surface or hang them on a temporary rack to avoid warping during painting.
Prepare Your Work Area
Clear out your kitchen or bathroom as much as possible. Cover countertops, floors, and appliances with drop cloths or plastic sheeting. Since you’ll be working on multiple cabinet parts, set up a staging area where doors and drawers can dry safely after each coat.
If you’re painting in a garage or basement, make sure the space is clean, dry, and well-ventilated. Dust and humidity are enemies of a smooth paint job. Having a dedicated workspace keeps everything organized and reduces the risk of accidental damage.
Clean All Surfaces Thoroughly

Eliminate Grease and Grime
Builder grade cabinets, especially in kitchens, accumulate years of cooking grease, dust, and grime. Wipe down every surface, including fronts, backs, edges, and interiors, with a strong degreaser. Mix TSP (Trisodium Phosphate) according to package directions or use an eco-friendly TSP substitute for safer handling.
Use a sponge or soft cloth to scrub all areas, paying extra attention to spots near stoves, microwaves, and sinks. Don’t skip drawer interiors or the frames inside the cabinets. Rinse with clean water afterward to remove any cleaning residue, then let everything dry completely. Moisture left behind can ruin paint adhesion.
Pro tip: For stubborn sticky film, use a deglosser or liquid sandpaper. It cleans and slightly etches the surface for better primer bonding.
Sand for Maximum Adhesion
Use 120 to 150 Grit Sandpaper
Even if the factory finish looks smooth, it’s likely glossy or sealed, making it hard for paint to stick. Lightly sand all surfaces with 120 to 150 grit sandpaper to create a “tooth” that helps primer grip. Use a sanding block on flat panels to keep pressure even and avoid gouging soft materials like MDF.
For detailed areas like raised panels or moldings, hand-sand with folded paper for precision. Always sand in the direction of the grain when possible to minimize scratches. If the surface is very glossy, consider using a deglosser instead of sanding for laminate finishes.
Pro tip: Don’t over-sand. Your goal is texture, not bare wood. The surface should feel slightly rough, not raw.
Remove All Sanding Dust
After sanding, wipe every piece with a tack cloth to pick up fine dust. Follow up with a vacuum using a brush attachment for crevices and corners. For a final pass, use a slightly damp microfiber cloth, then let it dry completely. Any leftover dust will show up under paint and ruin the smooth finish.
Skip this step, and you’ll end up with a bumpy, uneven surface. Cleanliness is non-negotiable for a flawless result.
Prime with Bonding Primer
Choose a High-Quality Bonding Primer
Primer is the foundation of a durable paint job, especially on builder grade materials. Skip it, and you risk peeling, chipping, and uneven color. Use a high-adhesion bonding primer like Zinsser Bulls Eye 1-2-3, Zinsser B-I-N, or INSL-X Stix. These formulas are designed for slick, difficult surfaces and block stains from bleeding through.
For MDF edges, which absorb more than other areas, apply an extra coat to prevent swelling and ensure consistent coverage.
Apply Primer with Roller and Brush
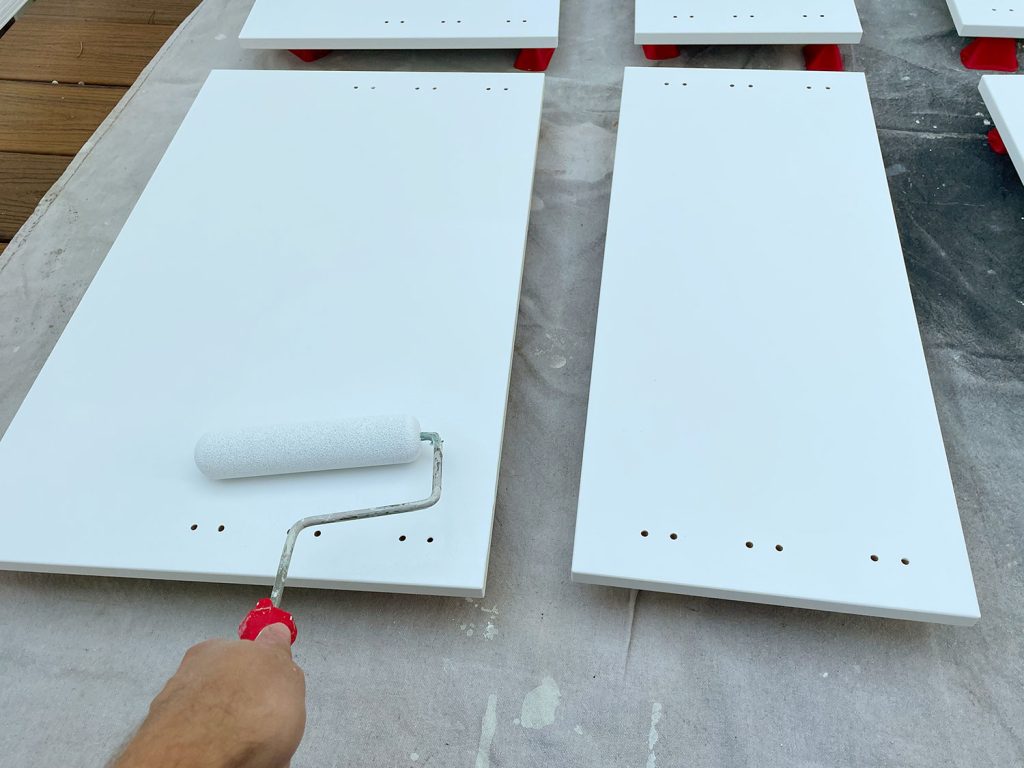
Use a high-quality foam roller for flat surfaces and a fine synthetic brush for edges, corners, and details. Apply in thin, even coats to avoid drips. Work section by section, maintaining a wet edge to prevent lap marks.
Let the first coat dry completely, usually 1 to 2 hours for water-based primers. Inspect for missed spots or porous areas, then apply a second coat if needed. Once dry, lightly sand with 220-grit paper for a glass-smooth base.
Pro tip: If you’re using shellac-based primer like B-I-N, work fast. It dries quickly and can clog brushes if not cleaned immediately.
Select Durable Cabinet Paint
Pick Semi-Gloss or Satin Finish
When it comes to kitchen cabinets, durability matters more than aesthetics. Choose semi-gloss or satin paint. They resist moisture, stains, and cleaning better than flat finishes. Semi-gloss is slightly shinier and easier to wipe down, making it ideal for high-traffic kitchens. Satin offers a softer sheen and hides minor imperfections well.
Avoid matte finishes unless the cabinets are in a low-use bathroom or decorative space.
Use Cabinet-Grade Paint Only
Never use regular wall paint. It’s not hard enough for cabinet surfaces and will wear quickly. Instead, choose paint specifically made for cabinets or trim. Look for brands like Benjamin Moore Advance, Sherwin-Williams Emerald Urethane, or Behr Alkyd Semi-Gloss. These are waterborne alkyd or hybrid formulas that cure to a tough, furniture-like finish.
Pro tip: These paints self-level as they dry, reducing brush marks for a near-spray finish.
Apply Paint in Thin Coats
Use a Foam Roller for Smooth Finish
Painting technique is just as important as the product. Load a foam roller with paint, then roll off excess to avoid drips. Apply in long, smooth strokes following the wood grain. Use a high-quality 4-inch foam roller for large panels and a 1 to 2 inch angled brush for edges and recessed details.
Work in sections. Start with the center panel, then move to stiles and rails on Shaker doors. Keep a wet edge to prevent lap marks. Don’t go back over paint that’s starting to dry.
Apply 2 to 3 Thin Coats
One thick coat leads to runs and long drying times. Instead, apply 2 to 3 thin coats, letting each dry fully, usually 2 to 4 hours. Lightly sand between coats with 220-grit sandpaper and wipe with a tack cloth. This “de-nibbing” removes dust specks and creates a flawless surface.
Pro tip: If you see brush marks after the first coat, switch to a higher-quality brush or roller. A microfiber mini roller can also help.
Consider a Protective Topcoat
Apply Water-Based Polyurethane
Even with durable paint, a clear topcoat adds extra protection, especially in homes with kids, pets, or heavy kitchen use. Use 2 coats of water-based polyurethane in satin or matte sheen. It dries fast, stays clear, won’t yellow, and resists wear.
Oil-based polyurethane is tougher but takes longer to dry and adds an amber tint. Best avoided on white or light cabinets.
Pro tip: Only use topcoat if your paint isn’t already ultra-durable, like Sherwin-Williams Urethane. Some modern cabinet paints don’t need it.
Reinstall Doors and Hardware
Wait 24 to 48 Hours Before Reassembly
Paint may feel dry, but it’s still curing. Wait at least 24 hours, 48 is better, before reinstalling doors and hardware. Touching or twisting knobs too soon can pull off paint or leave fingerprints.
Handle doors by the edges with clean gloves during reinstallation.
Match Labeled Pieces Correctly
Use your numbered labels and photos to put everything back in place. Reattach hinges first, then hang doors. Tighten screws just enough to hold. Over-tightening strips particleboard holes. Replace old or worn hardware, or upgrade to modern finishes like matte black, brushed brass, or nickel.
Once installed, check door alignment and adjust hinges if needed. Drawers should open and close smoothly.
Avoid Common Painting Mistakes
Never Skip Sanding or Priming
Cutting corners on prep is the number one reason painted cabinets fail. Skipping sanding or primer leads to peeling, especially around edges and high-touch areas. Spend 70% of your time on prep, cleaning, sanding, priming, and only 30% on painting.
It’s tedious, but it’s what separates a DIY job that lasts from one that flakes in six months.
Don’t Rush Drying Times
Impatience kills paint jobs. Applying a second coat too soon causes wrinkling. Reinstalling hardware early can cause adhesion failure. Full cure takes 7 to 30 days, depending on the paint. During this time, open and close doors gently and avoid heavy use.
Pro tip: Mark your calendar with reassembly dates to stay on track.
Choose a Timeless Color Scheme
Go for White, Gray, or Navy
Color choice impacts resale value and daily enjoyment. Soft white and greige, which is gray-beige, are timeless and brighten small spaces. Light gray offers a modern neutral. For drama, navy blue or forest green adds sophistication without overwhelming.
Matte black is trendy but shows smudges easily. Best for lower-touch upper cabinets.
Try a Two-Tone Cabinet Design
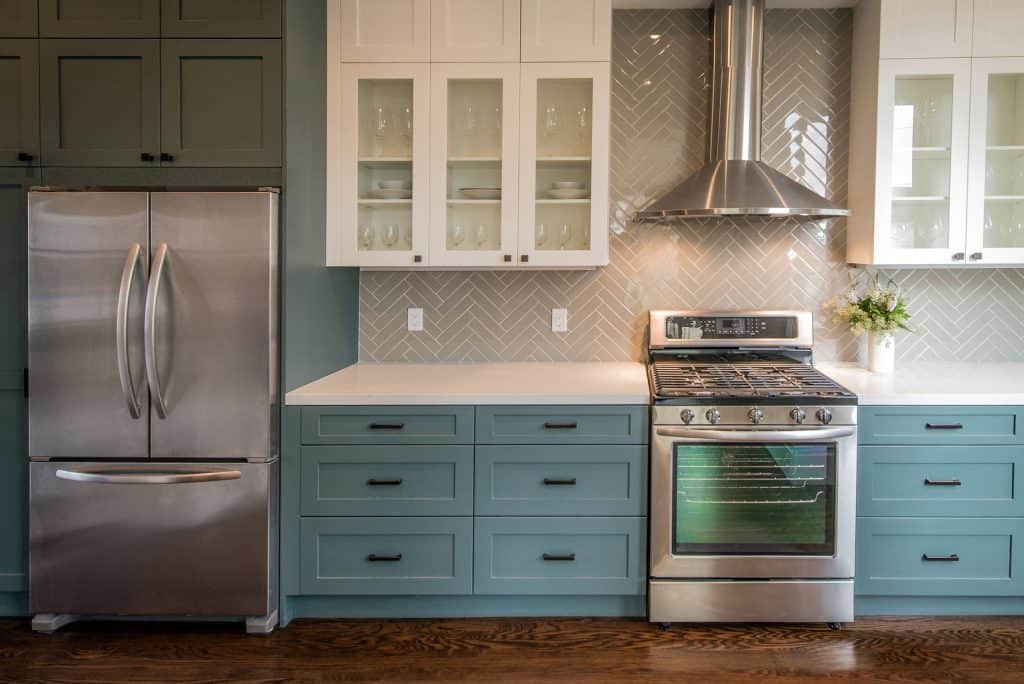
Create visual interest with a two-tone look. Paint base cabinets a darker color like navy or charcoal, and uppers white or light gray. Or go bold with a painted island and neutral perimeter. This adds depth and modern flair.
Pro tip: Use lighter colors on uppers to keep the room feeling open.
Maintain Painted Cabinets
Clean with Mild Soap and Water
Once cured, clean cabinets with a soft cloth and mild dish soap. Wipe up spills quickly, especially near sinks. Dry surfaces after cleaning to prevent moisture damage.
Avoid abrasive cleaners, ammonia, or scrubbing pads. They scratch and dull the finish.
Touch Up When Needed
Keep leftover paint in a labeled jar for touch-ups. Use a fine brush to fix chips or scuffs. For best results, lightly sand the area, clean, and apply 2 thin coats.
Reapply topcoat every few years in high-wear zones if needed.
Frequently Asked Questions About Painting Builder Grade Cabinets
Can I paint over laminate builder grade cabinets?
Yes, but you need extra preparation. Clean thoroughly, then use a deglosser or liquid sandpaper instead of traditional sanding. Apply a high-adhesion bonding primer designed for slick surfaces. This creates a surface the paint can grip.
How long does it take to paint kitchen cabinets?
Plan for 5 to 7 days total for a DIY project. This includes removal, cleaning, sanding, priming, multiple paint coats, and drying time. Rushing the process leads to poor results. Good prep takes 70% of the time.
What is the best paint finish for kitchen cabinets?
Semi-gloss is the best choice for most kitchens. It’s durable, easy to clean, and resists moisture. Satin is a good alternative if you prefer a softer sheen. Avoid matte finishes in high-traffic areas.
Do I need to sand before painting cabinets?
Yes, sanding is essential. It creates a rough texture that helps primer and paint adhere. Use 120 to 150 grit sandpaper for the initial sanding. Skip this step, and your paint may peel or chip quickly.
Can I use regular wall paint on cabinets?
No. Regular wall paint isn’t hard enough for cabinet surfaces. It will wear and chip quickly. Use paint specifically formulated for cabinets or trim, like Benjamin Moore Advance or Sherwin-Williams Emerald Urethane.
How long should I wait before putting doors back on?
Wait at least 24 to 48 hours after the final coat. The paint may feel dry, but it’s still curing. Full chemical resistance takes 7 to 30 days. Handle doors by the edges with clean gloves during reinstallation.
Key Takeaways for Painting Builder Grade Cabinets
Painting builder grade cabinets is a high-impact, low-cost upgrade that can completely change your kitchen’s look. The key to long-lasting results is meticulous prep, quality materials, and patience. Never skip cleaning, sanding, or priming, and always use cabinet-grade paint for durability.
Invest in quality bonding primer and durable paint. Apply multiple thin coats rather than one thick coat. Allow proper drying and curing time before reinstalling hardware. Choose a timeless color scheme that matches your style and complements your space.
Now that you have the complete guide, it’s time to get started. Gather your supplies, clear your schedule, and transform those builder grade cabinets into custom-looking pieces. Your kitchen will thank you.


