
Painting your cabinets is one of the most cost-effective ways to transform your kitchen or bathroom. But skipping proper prep? That’s a fast track to peeling, chipping, and an uneven finish—no matter how high-quality your paint is. The secret to a smooth, durable, professional-looking result lies in how to prep cabinets for paint the right way. From removing hardware to sanding and cleaning, every step matters.
This guide walks you through a complete, step-by-step process to prep your cabinets for painting, ensuring long-lasting results. You’ll learn essential techniques like degreasing, sanding, filling imperfections, and priming—all tailored to cabinetry. Whether you’re tackling wood, laminate, or thermofoil cabinets, these methods work across materials. By the end, you’ll know exactly what tools to use, what mistakes to avoid, and how to create a flawless surface ready for paint.
Remove All Hardware and Doors
Before any sanding or cleaning, take everything off the cabinets. This includes doors, drawer fronts, hinges, knobs, and pulls. Working on flat, detached pieces gives you better access and a smoother finish.
Take Off Doors and Hinges
Start by labeling each door and its corresponding cabinet location using painter’s tape and a marker. This prevents confusion during reassembly. Use a screwdriver or drill with a bit to remove hinges and hardware carefully. Store screws in labeled bags to match them later.
Pro tip: Lay doors flat on a protected surface like cardboard or foam to avoid warping or scratches during the prep process.
Organize Hardware for Reuse
If you plan to reinstall original knobs or pulls, clean them with soapy water or a metal polish. For a fresh look, consider upgrading to new hardware. Keep all parts in a secure container to prevent loss.
Clean Surfaces Thoroughly

Cabinets collect years of grease, grime, and cooking residue—especially in kitchens. Skipping cleaning leads to poor paint adhesion and visible dirt under the finish.
Use a Degreasing Cleaner
Mix a solution of TSP (trisodium phosphate) and water (1/4 cup TSP per gallon of warm water), or use a TSP substitute if you prefer a less harsh option. Wear gloves and work in a ventilated area.
Apply the solution with a sponge or microfiber cloth, focusing on greasy areas like around stovetops and handles. Rinse with clean water and a fresh cloth to remove residue. Let surfaces dry completely—this can take 1–2 hours.
Spot-Treat Stubborn Stains
For sticky spots or dried-on spills, use a soft scrub pad with the cleaner. Avoid steel wool or abrasive pads that can scratch. For water stains or discoloration, spot-prime later with a stain-blocking primer.
Repair Dents and Damage
A smooth paint job starts with a smooth surface. Address dings, holes, and loose joints before moving forward.
Fill Gaps and Holes
Use a wood filler for dents, screw holes, or chipped edges. Apply with a putty knife, press firmly, and smooth flush with the surface. Let it dry according to the product instructions.
For laminate or thermofoil cabinets, use a lightweight spackling compound or two-part filler designed for smooth surfaces.
Fix Loose Joints or Edges
If cabinet corners or veneers are lifting, apply wood glue underneath with a small brush or syringe. Clamp or tape in place until dry (usually 1–2 hours). Wipe away excess glue with a damp cloth before it hardens.
Sand for Better Adhesion
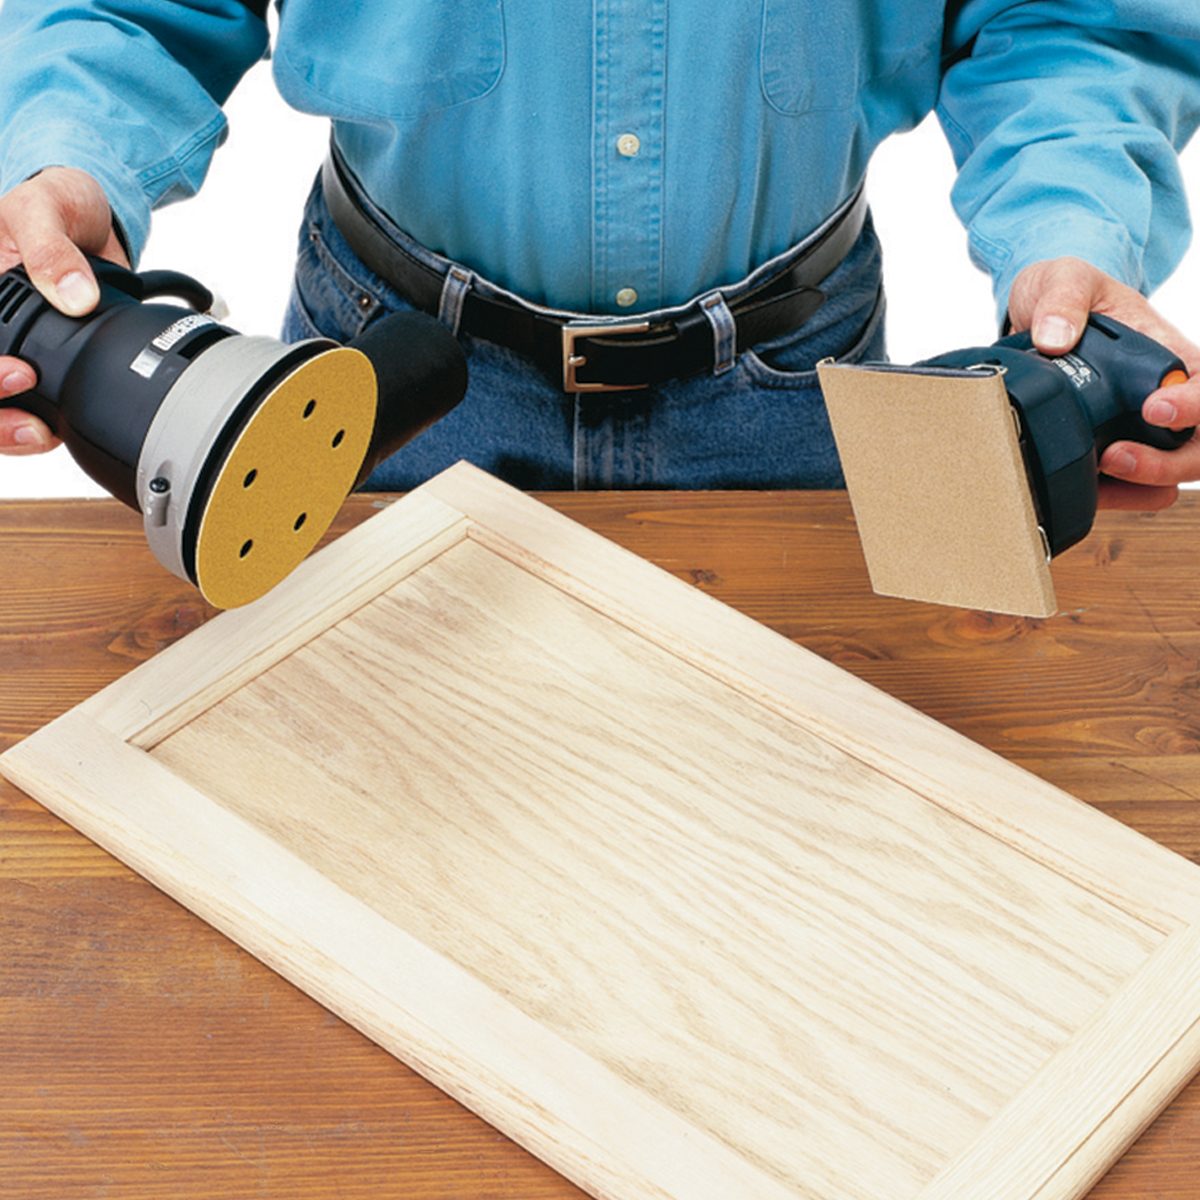
Even if your cabinets look smooth, sanding is non-negotiable. It roughs up the glossy surface so paint can bond properly.
Choose the Right Grit
Use 120-grit sandpaper for initial sanding. For finer smoothing after filler, switch to 220-grit. For laminate or melamine, 120-grit is ideal to break the slick surface.
Use a sanding block or orbital sander—avoid hand-sanding only, as it leads to uneven results.
Sand All Surfaces Evenly
Go over every surface you plan to paint: fronts, edges, frames, and inside edges of door openings. Focus on high-gloss or shiny areas, which need more texture for adhesion.
Don’t over-sand—your goal isn’t to remove wood, just to dull the shine. Wipe down with a tack cloth afterward to remove all dust.
Prime for Long-Lasting Results
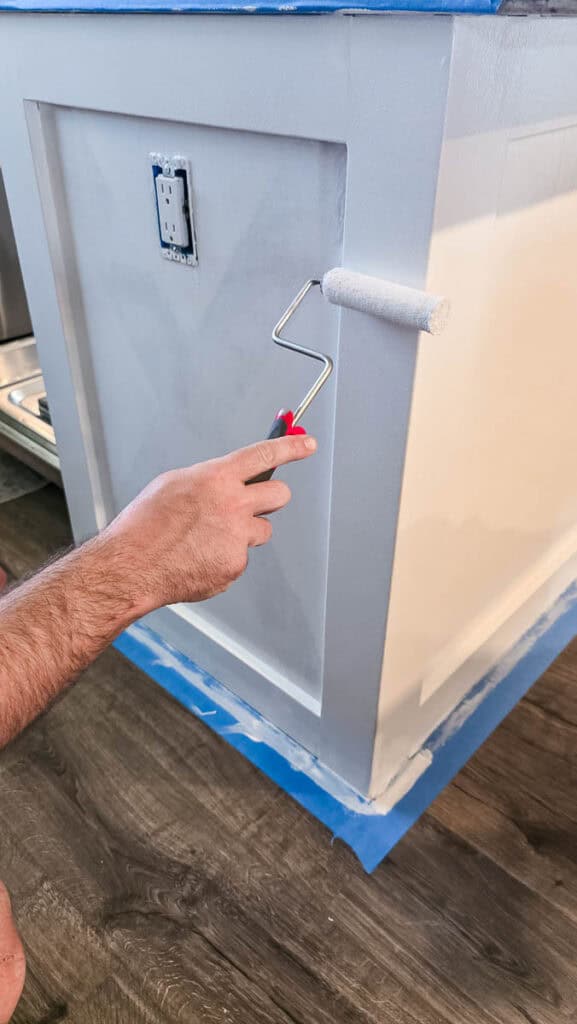
Primer seals the surface, blocks stains, and ensures even paint coverage. Skipping primer leads to uneven color, blotchiness, and early wear.
Select the Right Primer
For wood cabinets: oil-based or bonding primer (like BIN Shellac-Based or Zinsser Cover Stain).
For laminate or thermofoil: bonding primer (such as INSL-X STIX).
For previously painted cabinets: all-surface bonding primer.
Apply with a high-quality brush or mini roller to avoid brush marks.
Apply Primer in Thin Coats
Stir (don’t shake) the primer to prevent bubbles. Apply in thin, even layers. Let dry completely—usually 2–4 hours—then lightly sand with 220-grit paper and wipe with a tack cloth.
If you see bleed-through or uneven coverage, apply a second coat.
Protect Surrounding Areas

Even with doors removed, cabinet boxes remain in place. Protect countertops, floors, and walls from dust and drips.
Cover Countertops and Floors
Lay down plastic sheeting or canvas drop cloths on countertops. Use painter’s tape to secure edges. For floors, use rosin paper or plastic to prevent slips.
Mask Off Non-Target Areas
Use painter’s tape to protect backsplashes, walls, and any adjacent surfaces. Remove tape while the paint is still slightly wet to avoid peeling.
Use the Right Tools and Supplies
Having the correct materials makes prep faster, cleaner, and more effective.
Essential Tools List
- Screwdriver or drill with bits
- Labeling tape and marker
- TSP or degreaser
- Microfiber cloths or sponges
- Sandpaper (120 and 220-grit)
- Orbital sander or sanding block
- Tack cloths
- Wood filler or spackling
- Putty knife
- Paintbrushes and foam rollers
- Primer and paint
- Drop cloths and painter’s tape
Optional but Helpful
- Cabinet door rack (holds doors for drying)
- Vacuum with brush attachment (removes dust before wiping)
- Face mask and safety goggles (for sanding)
Avoid Common Prep Mistakes
Even small errors can ruin your finish. Watch out for these frequent issues.
Skipping the Cleaning Step
Grease is invisible but deadly to paint adhesion. Always clean, even if cabinets look clean.
Incomplete Sanding
Glossy spots left unsanded will repel paint. Sand every inch, especially around handles and edges.
Painting Without Priming
Primer isn’t optional. It ensures durability and a uniform finish, especially on dark or glossy cabinets.
Rushing Drying Times
Allow full drying time between cleaning, sanding, priming, and painting. Rushing causes bubbling, peeling, or dust sticking.
Frequently Asked Questions About Prepping Cabinets for Paint
Do I need to sand cabinets before painting?
Yes, sanding is essential. It creates texture so the primer and paint can bond properly. Even glossy or previously painted cabinets need a light sanding with 120-grit paper to dull the surface.
Can I paint over laminate cabinets without sanding?
You should still sand laminate cabinets lightly with 120-grit paper to break the slick surface. Then apply a bonding primer designed for laminate to ensure proper adhesion.
What happens if I don’t use primer on cabinets?
Skipping primer can lead to uneven color, blotchy spots, and paint that peels or chips quickly. Primer seals the surface and blocks stains from bleeding through.
How long should I wait between cleaning and painting cabinets?
Wait at least 1–2 hours for cleaned surfaces to dry completely. Then sand, wipe away dust, and apply primer. Rushing this step can trap moisture and ruin the finish.
Can I use a regular cleaner instead of TSP for degreasing?
TSP is the most effective for cutting grease, but a TSP substitute or a strong degreasing dish soap works too. The key is to remove all oily residue before sanding and priming.
Do I need to remove cabinet doors to paint them?
Removing doors and hardware is highly recommended. It gives you better access, prevents drips and smudges, and allows for a cleaner, more even finish on all edges.
Key Takeaways for Prepping Cabinets Like a Pro
Properly prepping cabinets for paint takes time, but it’s the foundation of a lasting, beautiful result. By removing hardware, cleaning thoroughly, repairing damage, sanding, and priming, you create a surface that holds paint for years. Avoid the common pitfalls of skipping cleaning, incomplete sanding, or rushing drying times. Follow these steps, and you’ll achieve a finish that looks like it was done by a professional.
Once your cabinets are fully prepped, you’re ready to move on to painting with confidence. Take your time, use the right materials, and your kitchen or bathroom will look brand new. Start with the prep work today, and enjoy the transformation tomorrow.


