
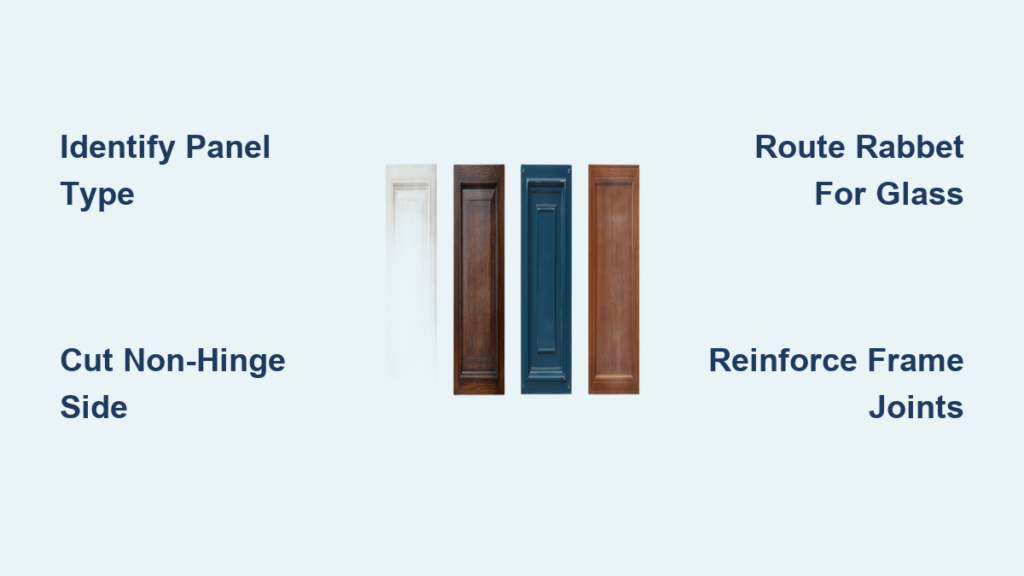
Replacing a wood panel with frosted glass can transform the look of your kitchen cabinets, especially in corner upper cabinets where light and visibility matter. If you’re wondering how to remove a panel from a cabinet door, you’re not alone. Many homeowners want to update their cabinet doors with glass inserts for a more open, decorative feel. The good news? It’s entirely doable with basic woodworking tools and a careful approach.
Most cabinet doors use a frame-and-panel design, where the wood panel fits into grooves cut into the surrounding frame (stiles and rails). These panels are usually floating, meaning they aren’t glued or nailed in, so they can expand and contract with humidity. That makes removal easier, but it requires precision to avoid damaging the frame. Whether you’re installing frosted glass with a nature-inspired design or just upgrading the style, this guide walks you through the safest, most effective ways to remove the panel and prepare the door for glass installation.
Identify Panel Type First
Before any tool touches the door, confirm how the panel is installed. This determines your removal method.
Check for Floating Panels
Most solid wood cabinet doors use floating panels set into 1/4″ grooves. Look for a slight gap around the panel edge, and it should move slightly when gently pried. No nails or staples? It’s likely floating.
Spot Stapled or Nailed Panels
Some manufactured or MDF doors secure panels with brad nails or staples along the back. Flip the door over and inspect. If fasteners are present, removing them comes first.
Confirm Glass Readiness
Glass needs a flat, even recess to sit securely. Since wood panels are thicker than glass, you’ll need to modify the groove into a rabbet or add a new frame later. Plan for this step early.
Remove Non-Hinge Side Joints
Start by cutting the panel free on the side opposite the hinges. This minimizes stress on the working side.
Cut Along Stile-Panel Joint
Use a thin-bladed backsaw or fine-tooth flush-cut saw to slice through the wood where the panel meets the stile. Make vertical cuts down both edges of the panel on the non-hinge side.
Pro Tip: Score the cut line with a utility knife first to prevent tear-out.
Work slowly and keep the saw perpendicular to avoid cutting into the groove wall. You only need to cut about 1/4″ deep, which is the depth of the groove.
Slide Out the Panel
Once the side joints are severed, gently push the panel toward the hinge side. It should slide out of the remaining grooves.
If it sticks, don’t force it. Use a thin chisel or putty knife to tap it loose. For stuck panels, check for hidden nails or finish buildup.
Alternative: Route a New Rabbet from Back
If you’re planning to install glass, you may want to remove the entire back lip instead of just freeing the panel.
Use a Flush Trim Bit
Mount a flush-trim router bit in a base. Clamp a straight edge or use a template to guide the router along the back of the frame.
You’ll need:
– Router with 1/4″ flush-trim bit
– Clamps and straight edge guide
– Safety glasses and dust mask
Route the entire inner perimeter from the back side. This removes the groove lip uniformly, creating space for glass and glazing strips.
Square Corners with Chisel
Routers leave rounded inside corners. Use a sharp 1/4″ chisel to square them out so glass fits flush.
Test-fit the glass before final assembly. Adjust depth if needed, and the glass should sit slightly below the front surface.
Clean and Prepare the Frame
Now that the panel is out, clean up the cavity for glass installation.
Remove Debris and Old Finish
Brush out sawdust and loose particles. If adhesive or sealant remains, scrape it gently with a cabinet scraper or the 90° corner of a chisel.
Inspect Frame Integrity
Check for cracks or weak joints. Reinforce loose stiles or rails with wood glue and clamps before proceeding.
Let dry 24 hours if repairs are needed.
Sand Smooth
Lightly sand the rabbet and surrounding areas with 180-grit paper. Wipe clean with a tack cloth.
Install Glass Panel Safely
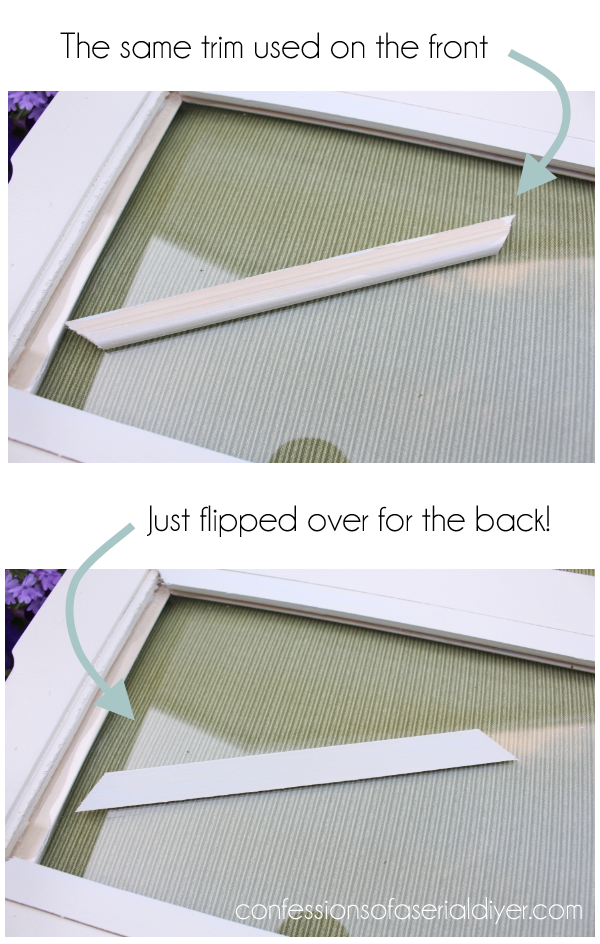
With the frame ready, it’s time to insert your frosted glass.
Cut Glass to Size
Have glass cut slightly smaller than the opening, typically 1/16″ under on each side, to allow for expansion and easy fit.
For frosted designs: Specify sandblasted or acid-etched borders, such as a cardinal motif, when ordering.
Choose Retention Method
Option 1: Glazing and Beads
Use thin wood glazing beads nailed or glued around the perimeter. This mimics traditional window installation.
Steps:
1. Place glass into recess
2. Apply thin bead of clear silicone at contact points
3. Nail or pin glazing strips in place
4. Paint or stain to match
Option 2: Floating Frame Overlay
Build a new outer frame with a center cutout, then sandwich the glass between the original door and the new frame.
This avoids modifying the original groove and adds decorative flair.
Fix Frame Joints if Needed
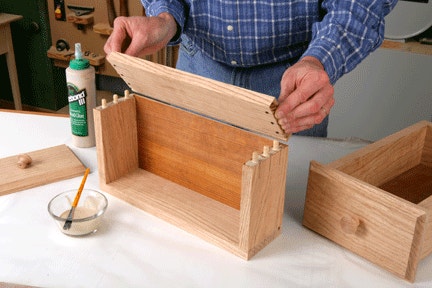
After panel removal, reassemble weak joints for long-term durability.
Use Floating Tenons
Insert loose tenons, like Miller Dowels, at rail-to-stile corners.
Process:
1. Drill aligned holes across joint
2. Apply glue and insert dowel
3. Clamp until set
This strengthens the frame without visible screws.
Reinforce with Biscuits or Splines
Alternative methods include biscuit joints or spline slots cut with a router. All provide solid alignment and added strength.
Avoid Common Mistakes
Even simple projects can go wrong without proper care.
Don’t Cut Too Deep
When sawing out the panel, stay within the groove depth. Cutting deeper damages the frame and weakens the door.
Skip Aggressive Power Tools
Avoid using a circular saw unless you’re experienced. These tools can splinter edges or cut too far.
Never Glue the Panel
Original panels float for a reason, and the same applies to glass. Never glue glass in place; allow for seasonal movement.
Don’t Ignore Backside Finishing
The back of the door will be visible once glass is installed. Sand, prime, or paint it for a clean look.
Tools You’ll Actually Need
Keep your kit simple and effective.
Essential Tools List:
- Flush-cut saw or backsaw
- Chisels (1/4″, 1/2″)
- Router with flush-trim bit (optional)
- Clamps
- Utility knife
- Safety glasses
- Tape measure
- Square
Optional but Helpful:
- Rabbet plane (for hand-tool purists)
- Cabinet scraper
- Glazing points (for glass retention)
- Silicone caulk gun
When to Start Over
Sometimes, modifying old doors isn’t worth the effort.
Consider New Doors If:
- Frame is warped or cracked
- Finish is damaged beyond repair
- Groove is too shallow or irregular
- You want consistent results across multiple doors
Custom cabinet shops can build glass-ready doors with decorative borders, matching your vision exactly.
But for one or two doors, retrofitting is cost-effective and satisfying.
Frequently Asked Questions About Removing Cabinet Door Panels
Can I remove a cabinet door panel without damaging the frame?
Yes, if you use a thin-bladed backsaw to cut along the stile-panel joint and work carefully. Score the cut line first with a utility knife to prevent tear-out, and cut only about 1/4″ deep to stay within the groove.
What tools do I need to remove a wood panel from a cabinet door?
You’ll need a flush-cut saw or backsaw, chisels, a utility knife, clamps, safety glasses, and a tape measure. A router with a flush-trim bit is optional but helpful if you plan to install glass.
How do I install glass after removing the wood panel?
Turn the groove into a rabbet using a router with a flush-trim bit, then square the corners with a chisel. Place the glass in the recess, and secure it with thin wood glazing beads or a floating frame overlay.
Do I need to reinforce the frame after removing the panel?
Yes, especially if the door has loose joints. Use floating tenons like Miller Dowels, biscuits, or splines at the rail-to-stile corners to restore strength.
Can I use a circular saw to remove the panel?
It’s possible, but not recommended unless you’re experienced. A circular saw can splinter edges or cut too deep. A backsaw or router offers better control.
What should I do if the panel is stapled or nailed in place?
Remove all fasteners first. Flip the door over and inspect the back for brad nails or staples. Once removed, the panel should slide out of the grooves.
Key Takeaways for Removing Panels from Cabinet Doors
Removing a panel from a cabinet door doesn’t require advanced skills, just patience and the right technique. Whether you cut the panel free with a backsaw, route a new rabbet, or rebuild the frame, each method leads to a beautiful glass upgrade.
Remember these essential points:
– Identify whether your panel is floating or fastened before starting
– Cut along the non-hinge side first for easier removal
– Convert the groove into a rabbet for proper glass installation
– Reinforce loose joints with floating tenons or biscuits
– Never glue glass in place, as it needs room for seasonal movement
With frosted glass and a personal touch like a frosted cardinal design, your kitchen gains both charm and character. Now that you know how to remove the panel safely, you’re ready to let the light in. Start with one door, and before long, your corner cabinets will become a stunning focal point in your kitchen.


