

Installing cabinets can transform a kitchen or bathroom, but the key to a professional, long-lasting result lies in how well you connect them. If you’re wondering how to screw cabinets together, the answer involves more than just driving a screw into wood. Proper alignment, the right hardware, and careful technique ensure your cabinets stay flush, sturdy, and gap-free for years.
Screwing cabinets together isn’t just about strength—it’s about precision. Misaligned cabinets lead to uneven doors, visible seams, and frustration down the line. Whether you’re assembling face-frame or frameless cabinets, using the correct method prevents splitting, ensures a seamless joint, and supports the weight of countertops and contents. This guide walks you through every essential step, from choosing fasteners to achieving a perfectly aligned cabinet run.
By the end, you’ll know exactly which screws to use, where to place them, and how to avoid common mistakes that ruin both appearance and durability.
Choose the Right Screws for Cabinet Joining
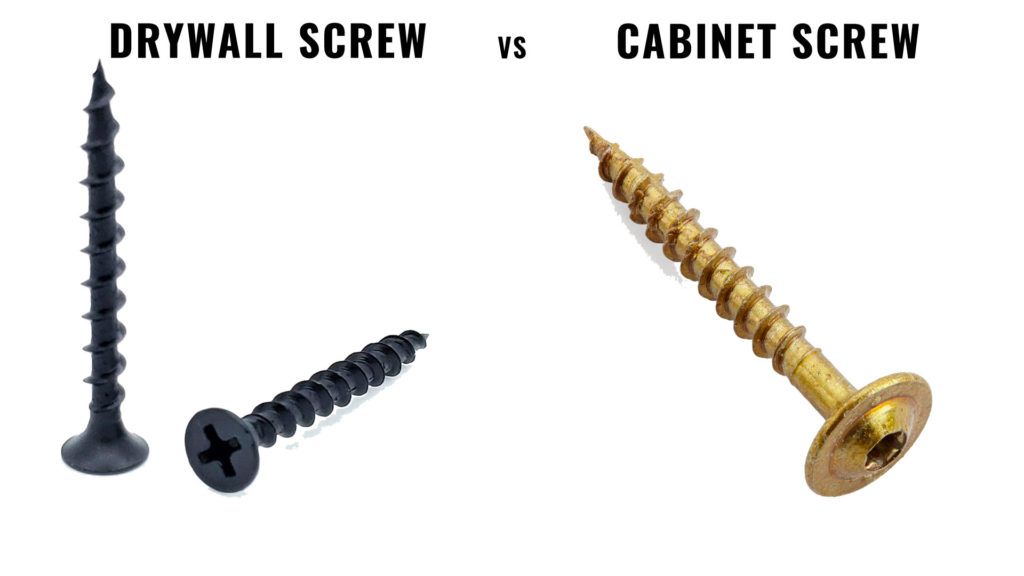
Use Cabinet Connector Screws
For most installations, number 8 or number 10 cabinet screws (2 to 2.5 inches long) are ideal. These are typically coated for better grip and resistance to stripping. Look for pan-head or bugle-head screws designed specifically for cabinet assembly—they sit flush without splitting the wood.
Avoid drywall screws. They’re brittle and prone to snapping under stress. Instead, use particleboard screws or cabinet assembly screws with coarse threads for soft materials and fine threads for solid wood frames.
Consider Cam Locks for Frameless Cabinets
In modern, frameless (European-style) cabinets, cam locks and dowels are often used. These consist of a threaded cam dowel inserted into one cabinet and a connecting bolt screwed into the adjacent unit. When twisted, the cam locks pull the cabinets tightly together.
While not traditional screws, cam systems provide a clean, internal connection. Always follow manufacturer instructions when using these fasteners.
Prepare Cabinets Before Joining
Remove Doors and Hardware
Before connecting cabinets, take off doors, drawers, and hardware. This makes them lighter and easier to handle. It also prevents damage during alignment and screwing.
Set doors aside carefully, and mark each one to its corresponding cabinet with tape to simplify reinstallation later.
Clean and Inspect Edges
Check the cabinet edges that will be joined. Wipe away dust, debris, or factory residue. Look for dents or warping—any imperfections can throw off alignment.
If cabinets have a veneer edge, be cautious not to chip it during handling or clamping.
Align Cabinets Perfectly
Position Cabinets on a Level Surface
Start by placing the cabinets side by side on a flat, level floor or countertop. Use a 4-foot level across the tops to confirm they sit evenly.
If the floor isn’t level, adjust the base cabinets using leveling legs or shims before joining. Never rely on wall mounting alone to correct misalignment.
Clamp Cabinets Together
Use bar clamps or quick-grip clamps to pull cabinets tightly together. Place clamps across the top and bottom edges to ensure even pressure.
Check that the faces are flush—no gaps, no overhangs. Even a 1/16-inch misalignment is visible once installed. Adjust as needed before drilling.
Drill Pilot Holes First
Mark Screw Locations Accurately
On face-frame cabinets, screws go through the side of one cabinet’s stile (the vertical frame piece) into the adjoining cabinet’s end stile.
Standard placement:
– One screw about 2 inches from the top
– One about 2 inches from the bottom
– A third in the middle if cabinets are over 30 inches tall
Use a pencil to mark these points precisely.
Drill Proper Pilot Holes
Use a drill bit slightly smaller than the screw’s core diameter. For a #8 screw, a 1/8-inch bit works well.
Drill straight through the side cabinet’s frame into the mating cabinet. The hole should be deep enough to penetrate at least 1 inch into the receiving frame.
Drilling pilot holes prevents wood splitting and guides the screw for a tight fit.
Drive Screws Securely
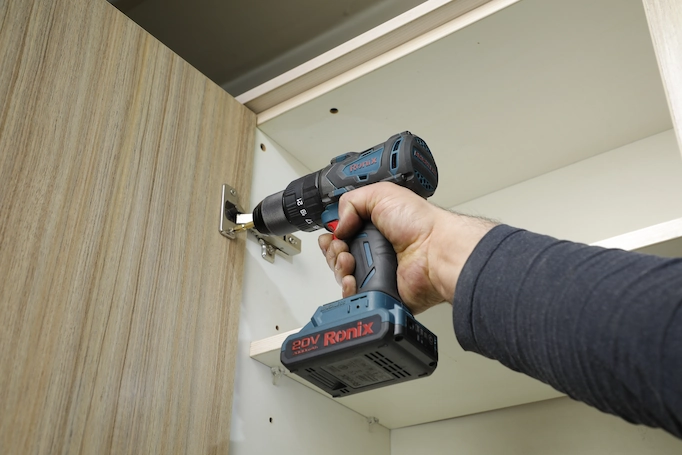
Fasten with a Screwdriver or Drill
Use a screwdriver bit in a drill or impact driver for consistent torque. Set the clutch low to avoid over-tightening and stripping.
Drive each screw slowly and watch the joint. As the screw tightens, the cabinets should pull flush. Stop once the connection is solid—don’t force it.
Check Alignment After Each Screw
After driving a screw, recheck alignment with a level and straightedge. If one cabinet shifts, loosen slightly and re-clamp.
For extra stability, drive screws at opposing angles—this creates a “pocket screw” effect and increases holding power.
Reinforce Tall or Overhead Units
Add Interior Bracing
For tall pantry cabinets or wall-mounted units, insert L-brackets or angle braces inside the top corners after joining. These prevent racking (twisting under load).
Attach with short wood screws into the cabinet frame or back panel.
Secure to Wall Studs
Even tightly joined cabinets must be anchored to wall studs. Use 2.5-inch wood screws through the cabinet’s top and bottom rails into the studs.
This step supports the entire run and keeps cabinets from pulling away under weight.
Fix Common Joining Mistakes

Cabinet Faces Aren’t Flush
If one cabinet sticks out, it’s usually due to uneven clamping or missing pilot holes. Loosen the screws, re-clamp, and realign before re-tightening.
For permanent fixes, fill old holes with wood filler and toothpicks, then re-drill in corrected positions.
Screws Won’t Seat Properly
Stripped holes or angled drilling can prevent screws from seating. Use a slightly larger screw or fill and redrill.
Alternatively, insert a dowel coated in wood glue into the hole, let it dry, then re-drill the pilot hole.
Split Wood at Connection Point
This happens when pilot holes are too small or missing. Always drill pilot holes in solid wood or particleboard.
If splitting occurs, reinforce with wood glue and clamps, then add an L-bracket for support.
Install Countertops with Confidence
Joined Cabinets Support Countertops
Properly screwed cabinets form a solid base for granite, quartz, or laminate countertops. Ensure all seams are flush—any height difference shows under stone or solid surfaces.
Use countertop brackets or supports along the back and front edges if required by material type.
Seal Gaps Between Units
Once cabinets are joined and secured, use paintable silicone caulk to seal gaps between cabinets and walls. This prevents moisture intrusion and gives a finished look.
Choose a color that matches your caulk or paint for seamless results.
Maintain Structural Integrity
Avoid Overloading Cabinets
Even well-joined cabinets can sag under excessive weight. Distribute heavy items like appliances or dishes evenly.
Never hang excessive weight from a single cabinet door or drawer.
Check Screws Periodically
Over time, wood can settle or shift slightly. Every 1 to 2 years, inspect connecting screws and tighten if needed.
This quick check prevents long-term misalignment or joint failure.
Final Note: Screwing cabinets together correctly ensures a seamless, durable installation. By choosing the right screws, drilling pilot holes, aligning carefully, and reinforcing when necessary, you create a strong, professional-grade cabinet run. Whether you’re a DIYer or a pro, these steps guarantee results that look built-in and last for decades.


