

You are upgrading your kitchen cabinets or replacing old drawer pulls, but one of the screws has snapped off, leaving a stubborn metal stub stuck in the wood. It happens more often than you think, especially with older cabinetry where screws have corroded or weakened over time. The good news is that you don’t need to replace the entire cabinet or call a professional. With the right tools and techniques, you can safely remove a snapped screw and continue your hardware upgrade without delay.
This guide covers practical, step-by-step methods to extract broken screws from cabinet hardware mounting points. Whether the screw head sheared off during removal or it broke under pressure, we will explore proven solutions using common household and workshop tools. From using screw extractors to drilling out remnants, each method is designed for precision and minimal damage to your cabinetry.
By the end of this article, you will know how to assess the severity of the break, choose the best removal technique, and finish with a clean repair. Your new hardware will install smoothly, and your cabinets will look as good as new.
Assess the Screw Break Level
Before grabbing any tools, take a close look at the broken screw. The depth and condition of the remaining shaft determine which extraction method will work best for your situation.
Exposed Shank Visible
If part of the screw shank sticks out from the wood, removal becomes significantly easier. Use pliers or locking grips to twist it counterclockwise. Clamp down firmly on the metal and apply steady rotational force. This method avoids drilling and preserves the surrounding wood.
Pro tip: Apply a few drops of penetrating oil around the threads to loosen any rust or old finish that might be gripping the screw.
Flush or Below Surface Break
When the screw breaks flush or sinks below the surface, gripping tools will not work. In this case, you will need to either drill a removal hole or use an extractor bit. These techniques require precision to avoid enlarging the pilot hole or splitting the wood.
Warning: Never force tools beyond their limit. This can damage the mounting area and make reinstallation of new hardware difficult.
Use Pliers or Locking Grips
For screws with even a small portion protruding, this is the fastest and safest method to try first.
Grab and Twist Technique
- Clean debris from around the screw
- Open needle-nose pliers or vice grips wide enough to clamp the shank
- Squeeze tightly and turn counterclockwise
If the screw resists, gently wiggle it back and forth while turning to break free any seized threads.
Common mistake: Using dull or slippery pliers. Always ensure your tool grips metal securely. Worn teeth may round off the shaft, making future extraction harder.
Apply Penetrating Oil First
Rusted or overtightened screws benefit from lubrication before extraction. This simple step can save you time and frustration.
Soak Before You Pull
- Spray penetrating oil directly onto the screw base
- Wait 10 to 15 minutes for the fluid to work into the threads
- Reapply if the screw appears corroded
This approach reduces friction and increases your chances of clean removal. It is especially helpful in older homes where finishes and moisture have degraded metal over time.
Expert note: Avoid excessive oil near finished wood surfaces. Wipe away runoff immediately to prevent staining.
Drill a Pilot Hole for Extraction
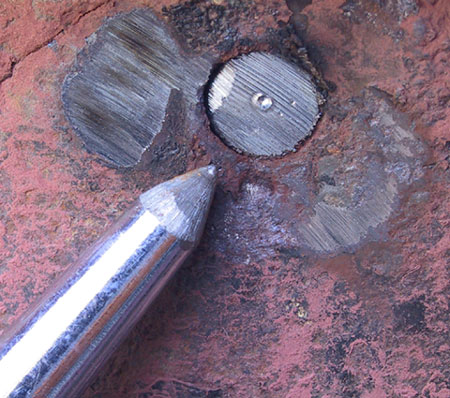
When no grip is possible, drilling prepares the screw for removal tools. This method requires care and precision.
Mark and Center the Bit
Use a center punch or nail to create a small dent in the center of the broken screw. This prevents the drill bit from wandering off course.
Choose a drill bit slightly smaller than the screw’s core diameter. Typically, 1/8 inch works well for standard cabinet screws.
Drill Straight and Steady
- Clamp the cabinet door or drawer front if it wobbles
- Hold the drill perpendicular to the surface
- Drill 3/8 to 1/2 inch deep into the screw
Visual cue: Stop when you feel a change in resistance. This often means you have reached the full depth of the screw.
Insert a Screw Extractor Bit
Also known as a left-hand tap or easy out, this specialized tool grabs and removes broken screws with minimal effort.
Tap and Twist Method
- Select an extractor bit matching your pilot hole size
- Tap it lightly into the hole with a hammer
- Attach a T-handle or wrench and turn counterclockwise
The tapered design bites into the metal as it turns, pulling the screw out of the wood.
Pro tip: Apply downward pressure while turning to keep the bit engaged. If it slips, stop and re-tap the extractor.
Common Issues with Extractors
- Bit slips out: Caused by incorrect pilot depth or poor alignment
- Extractor breaks: Usually due to excessive force or using the wrong size
If the extractor fails, switch to the drilling-out method described below.
Drill Out the Broken Screw
:max_bytes(150000):strip_icc()/194AskWOOD3-2d42915ecb874b478819319990249c27.jpg)
As a last resort, you can remove the entire screw by drilling it out. This method destroys the screw but clears the path for new hardware.
Choose the Right Removal Bit
Use a left-hand drill bit slightly larger than the screw core. These bits often unscrew the metal as they cut.
Alternatively, use a standard bit to drill through the center of the screw. This destroys it but clears the mounting hole.
Step-by-Step Removal
- Center the bit on the screw remains
- Drill slowly and steadily
- Stop when the screw separates from the threads
- Use tweezers or pliers to remove fragments
Caution: Stay aligned with the original hole to preserve surrounding wood for new hardware installation.
Repair Damaged Wood Surrounding Hole

After extraction, the mounting hole may be enlarged or cracked. Proper repair ensures your new hardware installs securely.
Fill and Reinforce the Area
Mix wood filler with sawdust to match your cabinet color. Press it into the hole and let it dry completely.
For added strength, insert a wooden dowel coated in wood glue:
- Cut a 1-inch dowel slightly longer than the hole depth
- Insert and tap it flush with the surface
- Let it cure overnight before redrilling
Time estimate: Allow 24 hours for full bond strength.
Reinstall New Cabinet Hardware
Once the area is repaired, you can proceed with your upgrade. This step requires patience and attention to detail.
Redrill the Mounting Hole
Use a drill bit matching the new screw size, usually 3/32 inch or 1/8 inch.
Drill straight and clean, avoiding old filler material that could clog the bit.
Attach Hardware Securely
Insert screws by hand first to avoid cross-threading. Tighten gently until snug. Over-tightening risks future breakage.
Prevention tip: Use brass or stainless steel screws for better durability and corrosion resistance.
Prevent Future Screw Breakage
Avoid repeating this issue with proper practices and quality materials.
Use Correct Tools and Technique
Always use a screwdriver bit that fits snugly in the screw head. Stripped heads lead to increased torque and breakage.
Apply steady pressure while turning. Never force the screwdriver.
Pre-Soak Old Screws
Before removing vintage or long-installed hardware, apply penetrating oil and let it sit for 10 to 15 minutes.
This softens old finishes and reduces thread friction, making removal easier.
Replace Weak or Corroded Screws
Inspect screws during removal. If they show signs of rust, pitting, or weakness, discard them.
Install new, high-quality screws designed specifically for cabinetry.
Frequently Asked Questions About Removing Snapped Screws
Can I remove a snapped screw without special tools?
Yes, if part of the screw shank protrudes from the wood, you can use pliers or locking grips. For flush breaks, you will need a drill and extractor bit.
What is the fastest way to remove a broken screw?
Using pliers on an exposed shank is fastest. If the screw is flush, a screw extractor bit works quickly once you drill a pilot hole.
Will drilling damage my cabinet?
Drilling can damage wood if you are not careful. Use a center punch to guide the bit and drill straight. Repair any damage with wood filler or a dowel.
How do I know which extractor bit size to use?
Match the extractor bit to your pilot hole size. Start with a small pilot hole and increase if needed. The extractor should fit snugly without forcing.
Can I reuse the same mounting hole after extraction?
Yes, if the hole is not damaged. If it is enlarged or cracked, fill it with wood filler or a dowel, then redrill for new screws.
What type of screws should I use for cabinet hardware?
Use brass or stainless steel screws for better durability and corrosion resistance. These materials are less likely to break during installation or removal.
Key Takeaways for Removing Snapped Screws from Cabinet Hardware
Removing a snapped screw from cabinet hardware does not require expensive tools or professional help. Start by assessing the break level to choose the right method. Use pliers for exposed shanks, and switch to extractors or drilling for flush breaks.
Always apply penetrating oil to loosen rusted threads before extraction. Repair any damaged wood with filler or dowels to ensure your new hardware installs securely. Finally, use high-quality screws and proper technique to prevent future breakage.
With these strategies, you can complete your cabinet upgrade efficiently and maintain the integrity of your cabinetry. Your new hardware will look great and function perfectly for years to come.


