

Cabinet lighting can transform your kitchen from purely functional to genuinely impressive, but the wiring process often feels intimidating. Whether you’re installing under-cabinet task lighting or illuminating glass-front display cabinets, knowing how to wire cabinet lights correctly determines both safety and performance. Many homeowners assume this project requires a professional electrician, yet with careful planning and the right approach, it’s a DIY task you can complete over a weekend.
This guide covers every stage of the process, from selecting the appropriate lighting system to making secure electrical connections and passing local inspections. You’ll discover the differences between plug-in and hardwired options, learn how to route wires discreetly, and understand how to avoid the common mistakes that cause flickering or failed circuits.
Select the Right Lighting System
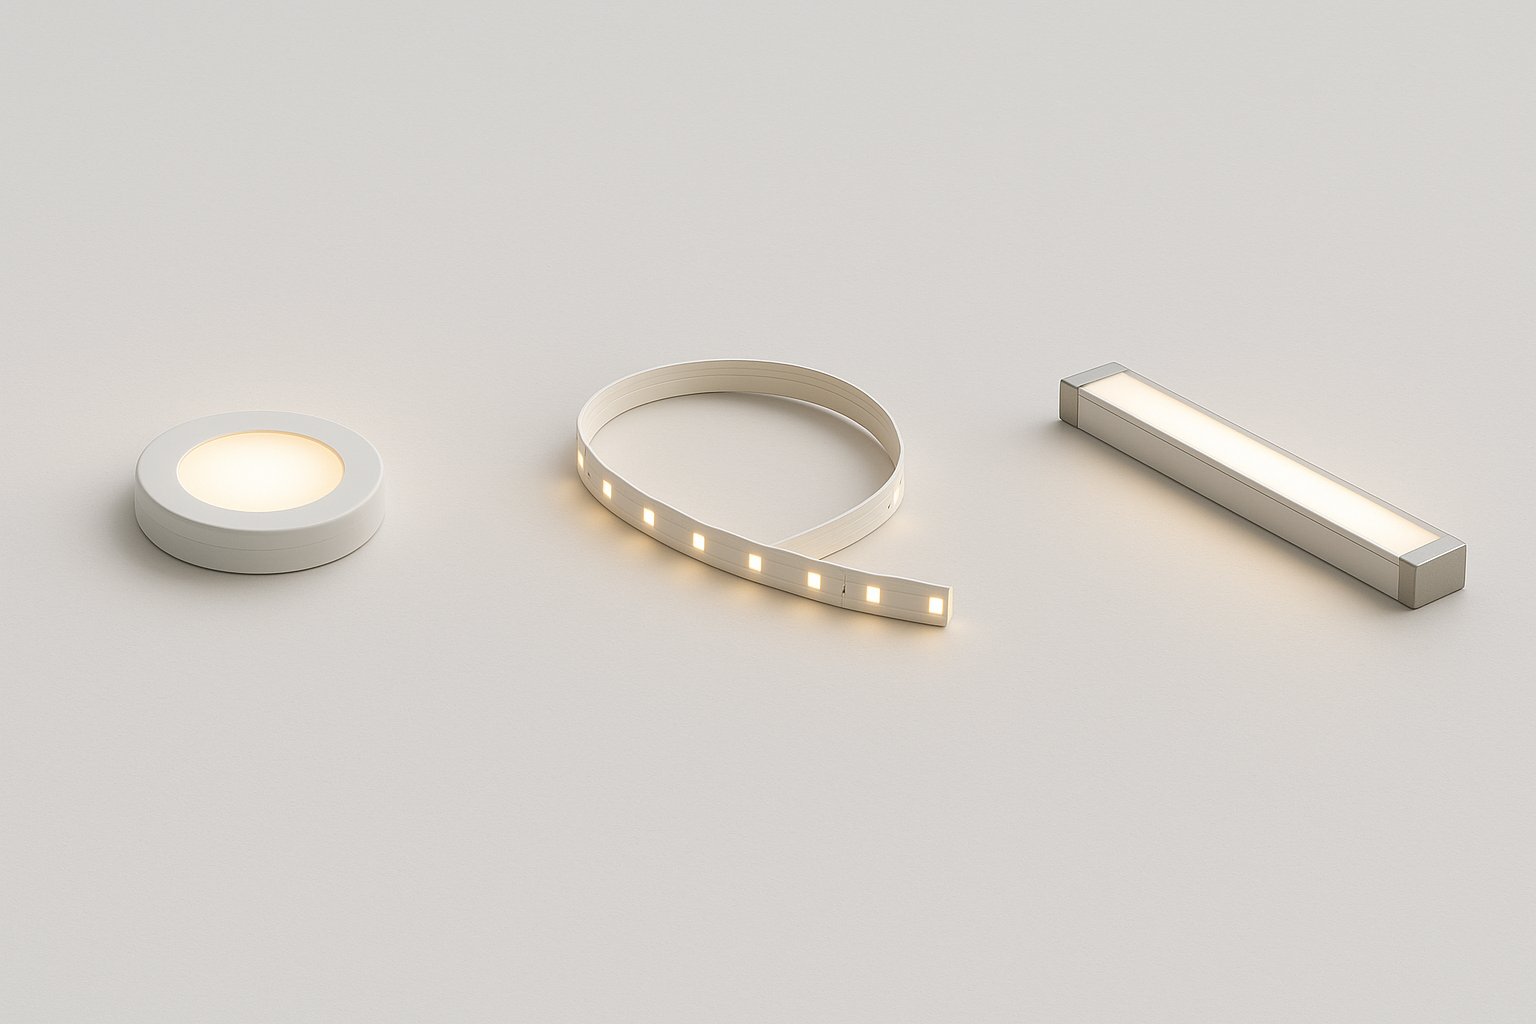
Your choice of lighting type shapes the entire installation process, so evaluate your options before purchasing anything.
LED Strip Lights for Versatile Placement
LED strips offer flexibility that other fixtures can’t match. These low-profile lights run on 12V or 24V power and require a transformer to step down household current. You can cut them at marked intervals to fit your exact cabinet dimensions, and their minimal heat output makes them safe for enclosed spaces. Most strips include adhesive backing for quick mounting, though clips provide extra security.
Puck Lights for Focused Illumination
Puck lights deliver concentrated pools of light, making them ideal for task areas like food prep zones. They come in battery-powered, plug-in, and hardwired configurations. Hardwired pucks connect to a junction box and suit renovation projects where walls are already open. Battery versions avoid wiring entirely but require frequent replacement, so weigh convenience against long-term costs.
Linear Fixtures for Modern Aesthetics
Linear lighting systems produce continuous, even illumination that feels premium and contemporary. These fixtures typically require hardwiring and include built-in drivers or connect to a central transformer. They work exceptionally well in modern kitchens with minimalist design, though installation demands more planning than simpler options.
Evaluate Power Source Options

The power source you choose determines how much electrical work you’ll perform and whether you need permits.
Plug-In Systems for Simple Installation
Plug-in cabinet lights connect to standard outlets and eliminate direct wiring entirely. This option works perfectly for renters or anyone wanting a quick upgrade without touching household circuits. The main drawback involves visible cords, which you can minimize with cord covers or by routing cables through cabinet interiors.
Hardwired Systems for Clean Results
Hardwired lighting connects directly to your home’s electrical system, offering a seamless appearance and higher capacity for larger installations. This approach requires more skill, permits in many jurisdictions, and careful attention to electrical codes. The payoff includes a professional finish and no visible plugs or adapters.
Low-Voltage Wiring Flexibility
Low-voltage systems operating under 50V fall under Class 2 wiring classifications. This designation provides more routing freedom and reduces conduit requirements compared to line-voltage wiring. Transformers convert standard 120V household current to safe low voltage, and these wires can run alongside other cables without special shielding.
Plan Your Lighting Layout
Proper planning prevents uneven illumination and frustrating mid-project discoveries.
Measure and Mark Fixture Positions
Use a tape measure and level to mark exact locations for each light. For under-cabinet installations, position fixtures 1 to 2 inches back from the front edge. This placement reduces glare and creates pleasant ambient bounce off the countertop. Space puck lights 8 to 12 inches apart, adjusting based on their brightness rating.
Locate Your Power Source
Identify the nearest outlet or junction box before cutting any holes. For hardwired installations, verify that your chosen circuit has available capacity. Calculate the total wattage of all connected lights and compare it against the circuit’s amperage rating to prevent overloads.
Gather Tools and Materials
Having everything ready before you start keeps the project moving and maintains safety.
Essential Tools for the Job
- Wire stripper and cutter
- Non-contact voltage tester
- Drill with assorted bits
- Phillips and flathead screwdrivers
- Fish tape for routing through walls
- Level for alignment
- Utility knife for cutting drywall or adhesive
- Electrical tape for insulation
Electrical Supplies You’ll Need
- NM cable (14/2 or 12/2 gauge, depending on circuit)
- Wire nuts or lever-nut connectors
- Junction boxes rated for your application
- Cable clamps to secure wires
- LED driver or transformer for low-voltage systems
- Mounting clips or adhesive backing
Install the Power Supply
For low-voltage systems, the transformer serves as the heart of your lighting setup and requires proper installation.
Mount the Transformer Securely
Place the transformer in an accessible, dry location such as an adjacent cabinet, attic space, or closet. Never bury it behind drywall or insulation where heat can accumulate. Secure it with screws or manufacturer-approved mounting hardware to prevent movement.
Connect Input Wires Correctly
Run the 120V supply cable from your junction box to the transformer location. Strip the wire ends and make these connections:
- Black wire connects to the Line or Hot terminal
- White wire connects to the Neutral terminal
- Bare copper ground wire connects to the Ground terminal
Tighten terminal screws or secure connections with wire nuts. Tuck all wires neatly into the box before mounting the transformer in place.
Route Wiring Through Cabinets
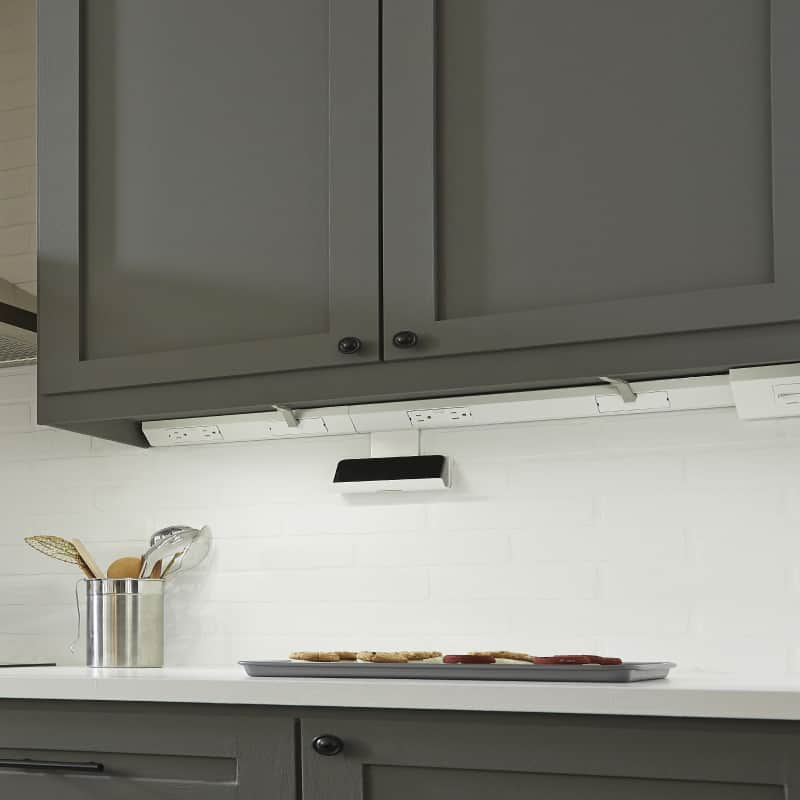
Clean wire routing keeps your installation looking professional and protects cables from damage.
Drill Access Holes Strategically
Drill ½-inch holes through cabinet back panels or wall studs to pass wires between locations. Keep holes at least 1¼ inches from stud edges to avoid interference with nails or screws. Use fish tape to pull cables through tight spaces without damaging insulation.
Conceal Wires Along Cabinet Undersides
Adhesive wire channels or raceways hide cables effectively along cabinet bottoms. Alternatively, route wires through cabinet interiors and drop down at each fixture location. This approach keeps everything hidden while maintaining access for future maintenance.
Connect Your Light Fixtures
Now you’ll link each light to the power source, paying close attention to polarity and connection quality.
Wire LED Strips Properly
Cut LED strips only at the marked cut lines to avoid damaging internal circuits. Attach connector clips or solder wires to the exposed copper pads. Connect the red wire to the positive terminal and the black wire to negative. Use crimp connectors or solder joints, then insulate with heat shrink tubing to prevent shorts.
Link Multiple Puck Lights
Daisy-chain puck lights using the included wiring or extension cables. Follow the manufacturer’s polarity markings carefully, since reversed polarity prevents operation. Use waterproof connectors in areas exposed to moisture, such as above sinks or dishwashers.
Make Secure Electrical Connections

Every wire splice must reside inside an approved junction box for safety and code compliance.
Use Approved Junction Boxes
Never bury wire connections inside walls or cabinets. Install a junction box wherever wires meet, even for low-voltage systems if local codes require it. Mount boxes flush with the surface or use surface-mounted designs depending on accessibility.
Secure Connections with Wire Nuts or Wagos
Strip ½ inch of insulation from each wire end. Twist same-color wires together clockwise, then screw on wire nuts until snug. Alternatively, use lever-nut connectors for tool-free, vibration-resistant joints that simplify future changes.
Test Your Installation
Always verify operation before closing up walls or securing final mounts.
Power On and Inspect Performance
Turn off power, complete all connections, then restore power at the breaker. Flip the switch and observe each light. Do all fixtures illuminate? Are there flickers or dim spots? If problems appear, cut power again and recheck polarity and connection tightness.
Troubleshoot Common Problems
- No lights at all: Check the power supply, circuit breaker, fuse, and wire polarity.
- Flickering lights: Tighten all connections and verify the transformer has adequate capacity.
- Partial lighting: Inspect daisy-chain continuity, since one failed puck can interrupt the circuit.
Mount Fixtures Permanently
Once testing confirms everything works, finalize the installation.
Adhesive vs. Screw Mounting
Most LED strips and puck lights include 3M adhesive backing. Clean the mounting surface with alcohol first to ensure proper adhesion. For heavy fixtures or vibration-prone areas, add small screws or mounting brackets for extra security.
Align for Even Light Distribution
Ensure every fixture sits level and evenly spaced. Misaligned lights create uneven shadows or bright spots that detract from the overall effect.
Follow Safety and Code Requirements
Electrical work demands respect for safety protocols and local regulations.
Always Turn Off Power First
Shut off the circuit at the breaker panel and verify it’s dead using a voltage tester before touching any wires. Label the breaker clearly to prevent someone from accidentally restoring power while you work.
Check Permit and Inspection Requirements
Hardwired lighting installations may require permits and inspections, particularly in kitchens. Contact your local building department before starting. Improper work can fail inspection or affect your homeowner’s insurance coverage.
Maintain Your Cabinet Lighting
Regular care extends the life of your investment and keeps your kitchen bright.
Clean Fixtures on a Schedule
Dust and grease accumulate quickly in kitchens, reducing light output. Wipe LED strips and puck lights monthly with a dry or slightly damp cloth. Avoid abrasive cleaners that can scratch lenses or damage finishes.
Replace Drivers and Pucks as Needed
LEDs typically last 25,000 to 50,000 hours, but drivers may fail sooner. Keep spare pucks or drivers on hand for quick swaps. Replacing a single puck takes only minutes, just disconnect the old unit and plug in the replacement.
Frequently Asked Questions About Wiring Cabinet Lights
Can I wire cabinet lights to an existing switch?
Yes, you can connect hardwired cabinet lights to an existing switch circuit, provided the circuit has adequate capacity. Calculate the combined wattage of existing fixtures and your new lights to avoid overloading. You may need to upgrade the switch to handle the additional load.
Do I need a permit to install hardwired cabinet lights?
Many jurisdictions require permits for any new hardwired electrical work, including cabinet lighting. Check with your local building department before starting. Some areas allow homeowners to pull their own permits, while others require licensed electricians.
What gauge wire should I use for cabinet lighting?
Use 14/2 NM cable for circuits protected by 15-amp breakers, or 12/2 cable for 20-amp circuits. Low-voltage systems use thinner wires specified by the manufacturer, typically 18 to 22 gauge depending on current draw.
How do I hide wires for plug-in cabinet lights?
Use adhesive cord channels that match your cabinet color, or route cords through cabinet interiors using small access holes. Cord covers paint to match your walls or cabinets for a virtually invisible finish.
Can I connect LED strips directly to household wiring?
No, LED strips require a driver or transformer to convert 120V household current to the low voltage they need. Connecting them directly will destroy the LEDs and create a fire hazard. Always install the appropriate driver between the power source and the strips.
Why do my cabinet lights flicker after installation?
Flickering usually indicates loose connections, an undersized transformer, or incompatible dimmers. Tighten all wire connections, verify the transformer matches your total wattage, and confirm your dimmer is rated for LED loads.
Key Takeaways for Wiring Cabinet Lights Successfully
Wiring cabinet lights becomes manageable when you break the project into logical stages. Start by selecting the right lighting type and power source for your needs, then plan your layout carefully before cutting any holes. Always prioritize safety by turning off power, using approved junction boxes, and verifying your work with a voltage tester.
The most successful installations share common traits: proper planning, quality materials, and attention to connection details. Whether you choose plug-in convenience or hardwired permanence, following these guidelines ensures your cabinet lighting performs reliably for years. If you encounter anything beyond your comfort level, don’t hesitate to call a licensed electrician. A professional consultation costs far less than correcting faulty wiring later. With this knowledge, you’re ready to tackle your cabinet lighting project with confidence.


