
You just unboxed your new shoe cabinet and now face a puzzle of panels, screws, and an instruction sheet that seems written in another language. Don’t worry, shoe cabinet assembly is a straightforward DIY project that most people can complete in under an hour with the right approach. This guide breaks down every step, from sorting your hardware to anchoring the finished unit safely.
By following this walkthrough, you’ll learn how to identify each component, use basic tools effectively, and sidestep the most common mistakes that lead to wobbly shelves and stripped screws. We’ll cover everything from frame construction to door alignment, plus practical maintenance tips to keep your cabinet looking great for years. Let’s turn that pile of parts into a functional piece of furniture.
Unbox and Inventory Every Component

Before you even think about picking up a screwdriver, take time to lay out all the pieces and verify what came in the box. A typical shoe cabinet kit includes side panels, top and bottom boards, interior shelves, a thin back panel, doors if applicable, and a collection of small hardware.
Review the Instruction Manual Thoroughly
The printed assembly guide is your best friend during this process. Most manuals include a detailed parts list with labels or numbers that match markings on the actual panels. Cross-reference each item against the list to confirm nothing is missing or damaged during shipping.
If you discover missing parts, contact the manufacturer’s customer service before starting. Building with incomplete hardware leads to structural weakness and frustration later.
Sort Hardware by Type and Size
Use small bowls, a muffin tin, or empty egg cartons to separate different fasteners. This simple organization step saves enormous time during assembly.
- Wood dowels: Small cylindrical pegs that align panels
- Cam locks and cam screws: Interlocking connectors common in flat-pack furniture
- Metal brackets or L-braces: For reinforcing corners
- Plastic caps or cover plugs: To hide screw heads after assembly
Label each container if you have multiple similar-looking items. This prevents the dreaded “which screw goes where” confusion mid-build.
Prepare Your Tools and Workspace
Most shoe cabinets require only basic household tools. Gathering everything beforehand keeps your momentum going once you start.
Essential Tools for the Job
- Phillips screwdriver or electric drill with adjustable torque settings
- Rubber mallet for tapping joints without damaging surfaces
- Measuring tape to verify alignment
- Level to ensure the cabinet sits straight
- Pencil for marking adjustments
If using a drill, keep the torque setting low. High-speed tightening strips cam locks and cracks particleboard, which is the most common material in budget-friendly shoe cabinets.
Choose the Right Assembly Area
Work on a soft, flat surface such as carpet, a rug, or a foam exercise mat. This protects the cabinet’s finish from scratches during assembly.
Clear enough space to walk around all sides of the cabinet as it takes shape. You’ll need access to both the front and back as you connect panels and install shelves.
Build the Main Frame Structure
The frame is the backbone of your shoe cabinet. Getting this part right makes everything else easier.
Connect the Bottom Panel to Side Panels
Align the wooden dowels on the bottom panel with the corresponding holes on one side panel. Push them together gently until snug, then tap with a rubber mallet for a firm fit.
Insert the cam locks into their designated holes on the side panel and tighten them clockwise using a screwdriver. Repeat this process with the second side panel.
Pro Tip: Insert dowels only halfway at first. This makes it easier to align all panels before fully seating them.
Install the Top Panel
Once both sides and the base are connected, add the top panel using the same dowel and cam lock method. Check that all corners are square by measuring diagonally from corner to corner with your tape measure.
Both diagonal measurements should match. If they don’t, loosen the cam locks slightly, adjust the frame, and retighten.
Install Interior Shelves and the Back Panel
Internal supports organize your shoes and prevent shelves from sagging under weight.
Fixed Versus Adjustable Shelves
Some cabinets come with fixed shelves that screw or glue directly into the frame. Others use small metal pins that fit into pre-drilled holes, allowing you to customize shelf height.
For adjustable models:
1. Insert pins into your desired holes on both side panels
2. Place the shelf on top of the pins
3. Press down firmly to ensure the shelf sits flush
Warning: Place heavier shoes like boots on lower shelves. Overloading upper shelves causes sagging and weakens the structure.
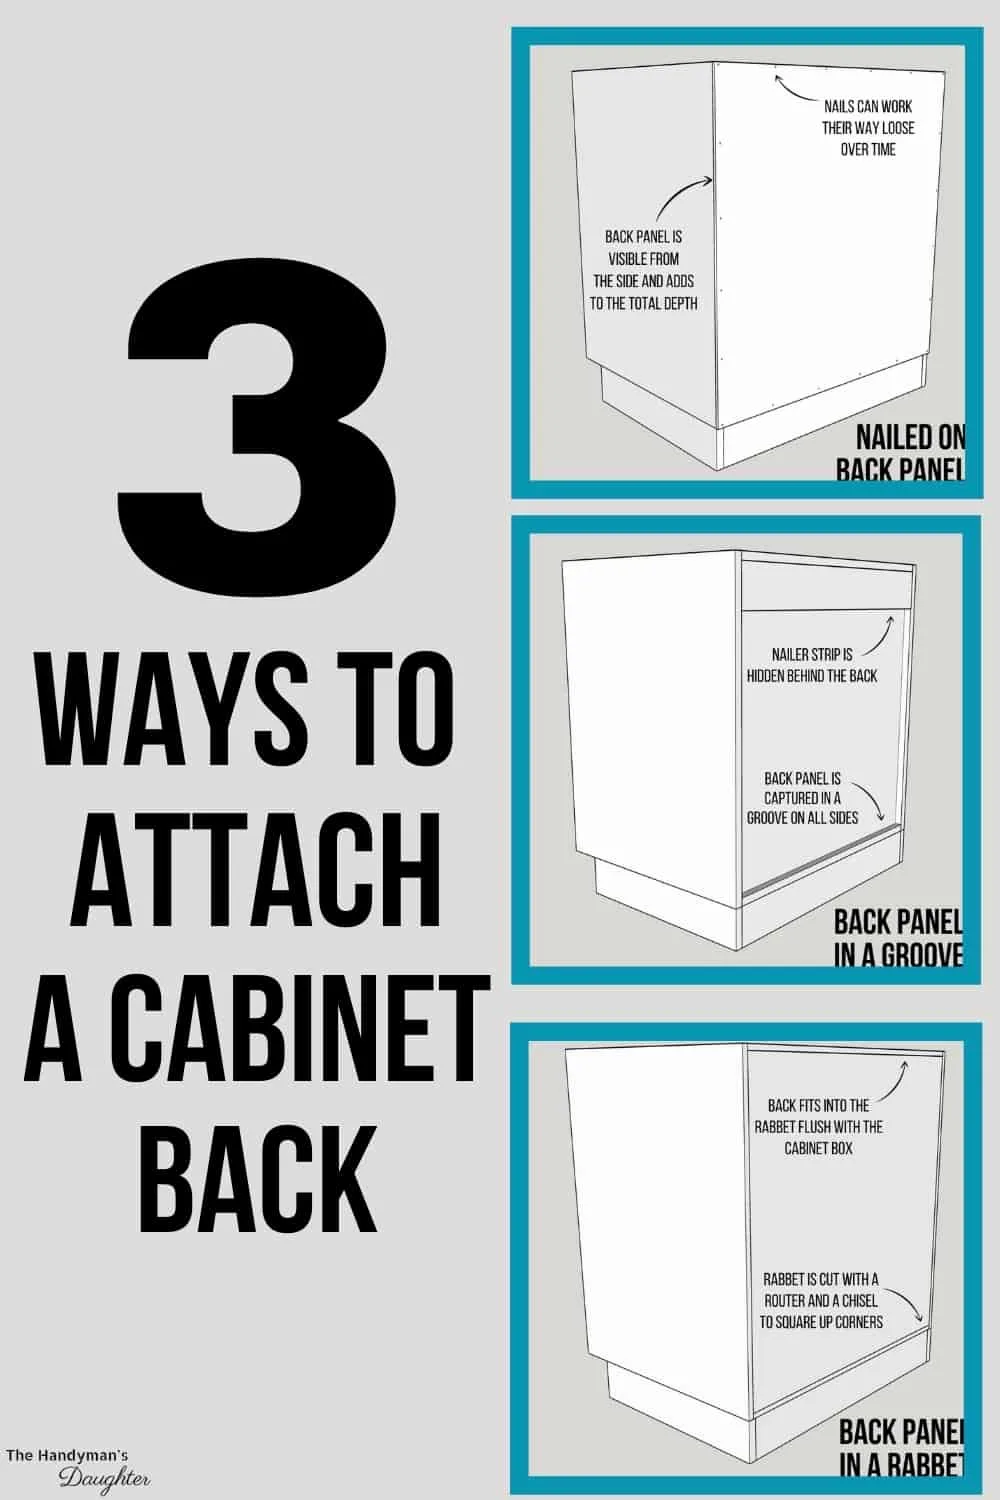
Attach the Back Panel for Stability
The thin fiberboard back panel is crucial for structural integrity, even though it looks flimsy. It prevents the cabinet from racking or leaning sideways.
Align the panel with the grooves or pre-drilled holes on the back of the frame. Secure it with the small nails or screws provided, working your way around the entire perimeter.
Use a level to check that the cabinet isn’t leaning before fully securing the back.
Mount Doors and Hardware
If your shoe cabinet includes doors, installation requires patience for proper alignment.
Install Hinges Step by Step
- Mark hinge locations using the paper template if one is included
- Screw hinges onto the door first, not the frame
- Attach the door to the cabinet frame, starting with the top hinge
- Check for even gaps around all edges of the door
If a door drags or sits unevenly, loosen the hinge screws slightly and reposition. Tighten once the alignment looks correct.
Attach Handles or Knobs
Mark drill points with a pencil, using a level to keep them even. Use a hand drill or electric screwdriver to attach the handles securely.
Pro Tip: Place painter’s tape on your drill bit to limit depth and prevent drilling completely through the door panel.
Test Stability and Secure the Cabinet
A wobbly cabinet is both unsafe and unattractive. Take a few extra minutes to verify everything is solid.
Check for Wobble
Place the cabinet in its intended location. Gently rock it from side to side and front to back.
If you feel movement:
– Adjust the leveling feet if your model has them
– Place furniture shims under the base
– Re-tighten all cam locks and screws
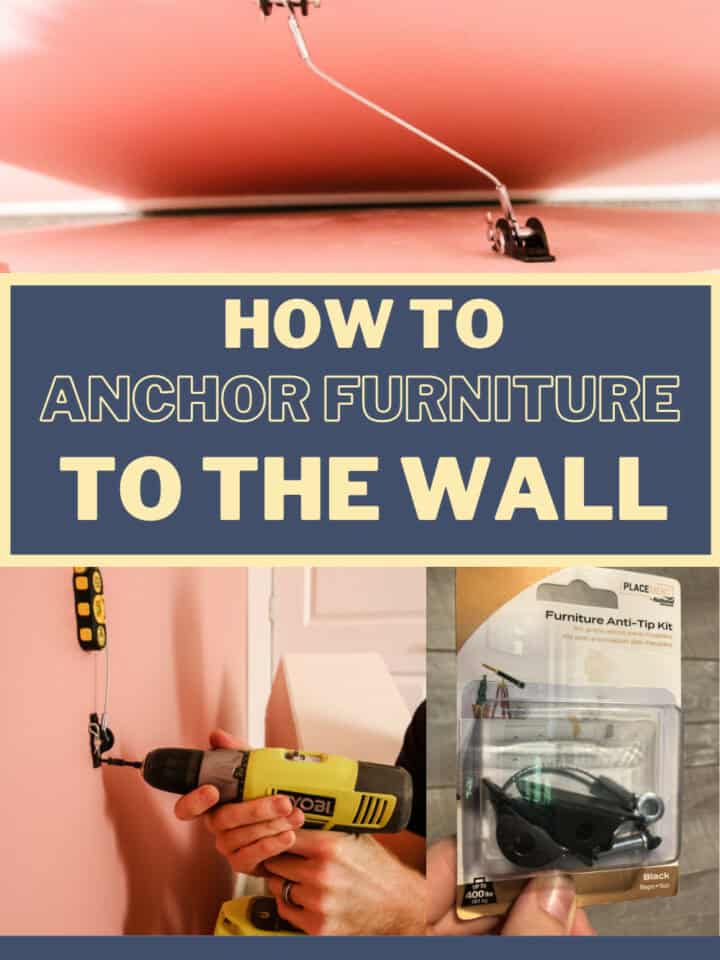
Anchor Tall Cabinets to the Wall
Narrow or tall shoe cabinets can tip forward, especially when doors are open. Use the anti-tip bracket included with most models to secure the top of the cabinet to wall studs.
Safety First: This step is essential in homes with young children or pets who might climb or pull on the furniture.
Avoid These Common Assembly Mistakes
Even experienced DIYers make errors. Knowing what to watch for saves time and frustration.
Skipping Dowels or Cam Locks
Small parts may seem optional, but skipping them weakens the entire structure. Double-check every connection before moving to the next step.
Overtightening Screws
Particleboard strips easily when you force screws. Stop turning as soon as you feel resistance increase, and never use high drill speed for final tightening.
Installing Panels Upside Down
Always reference the instruction manual. Installing the top panel as the base is a surprisingly common error that ruins the finished look.
Speed Up Your Assembly Process
These expert tips shave minutes off your build without sacrificing quality.
Lay Out Panels Face-Down
Assemble the cabinet upside down on your soft work surface. This protects the front finish and gives you better access to screw holes and cam lock slots.
Pre-Insert All Dowels First
Before connecting any panels, insert all dowels into their holes. This prevents constant interruptions during the main assembly.
Recruit a Helper
Having someone hold panels steady while you secure connections improves accuracy and reduces physical strain. Even a child can help hold a lightweight panel in place.
Maintain Your Cabinet After Assembly
Keep your shoe cabinet looking new with minimal ongoing effort.
Dust Regularly
Wipe surfaces weekly with a microfiber cloth. Avoid harsh chemical cleaners that can damage laminate or veneer finishes.
Tighten Screws Periodically
Vibrations from opening doors and foot traffic loosen connections over time. Check and tighten all visible screws every six months.
Rotate Shoe Placement
Switch which shelves hold which shoes every few months. This prevents uneven wear and keeps all shelves in good condition.
Frequently Asked Questions About Shoe Cabinet Assembly
How long does shoe cabinet assembly typically take?
Most standard shoe cabinets take between 30 and 60 minutes to assemble. Larger units with multiple doors or drawers may require up to two hours for a first-time builder.
Do I need special tools to assemble a shoe cabinet?
No, basic household tools work for most models. You need a Phillips screwdriver, a rubber mallet, and possibly a level. An electric drill speeds things up but isn’t required.
What should I do if parts are missing from my shoe cabinet?
Contact the manufacturer’s customer service department with your model number and a list of missing parts. Most companies ship replacements free of charge within a week.
Can I assemble a shoe cabinet by myself?
Yes, most shoe cabinets are designed for single-person assembly. However, having a helper makes connecting larger panels easier and reduces the risk of scratching surfaces.
How do I fix a wobbly shoe cabinet after assembly?
Check that all cam locks are fully tightened first. Then adjust the leveling feet or add shims under the base. If wobbling persists, verify the back panel is properly secured.
Is it necessary to anchor my shoe cabinet to the wall?
For tall or narrow cabinets, yes. Anti-tip brackets prevent the unit from falling over, which is critical in homes with children or pets.
Key Takeaways for Successful Shoe Cabinet Assembly
Shoe cabinet assembly becomes a manageable project when you approach it systematically. Start by inventorying all parts and sorting hardware, then build the frame before adding shelves and doors. Always secure tall units to the wall and avoid overtightening screws on particleboard materials.
The most successful builds come from careful preparation and patience. Lay out your workspace properly, use the right tools, and don’t rush the alignment steps. With this guide, you’ll have a sturdy, attractive cabinet ready to organize your footwear in about an hour.
Now that your cabinet is assembled and anchored, step back and enjoy your clutter-free entryway. You’ve completed a practical DIY project that adds both function and style to your home.


