

Opening your Weston White Shaker cabinet boxes can feel overwhelming, especially when you see dozens of panels, dowels, and cam locks spread across your kitchen floor. But assembling ready-to-assemble (RTA) shaker cabinets is far simpler than it looks, and you can complete most units in under 40 minutes with the right approach. These cabinets use intuitive joinery and clear labeling, making them ideal for confident DIYers who want to save money on installation costs.
This guide walks you through every step of shaker cabinet assembly, from identifying parts to installing specialty units like lazy Susans and trash cabinets. You’ll learn which tools you need, how to avoid common mistakes, and when to call in a professional. By the end, you’ll have the knowledge to assemble shaker cabinets with clean, sturdy results that look professionally installed.
Base Cabinet Assembly
Identify All Base Cabinet Parts
Before you start connecting panels, lay out every component from the labeled packaging. A standard Weston White Shaker base cabinet includes:
- Left and right side panels
- Top and bottom panels
- Back panel made of thin plywood
- Doors with hinges and screws
- Interior shelving if included
Check for part numbers on stickers or etched markings that match the assembly diagram. Most panels connect using cam locks and wooden dowels, so no glue is required for the main structure.
Attach Sides to Top and Bottom
Align the side panels with the top and bottom pieces using the pre-drilled dowel holes. Insert wooden dowels into one panel, then fit the mating piece securely over them. Tighten each cam lock by turning the round plastic bolt clockwise with a 5mm Allen wrench until snug.
Pro Tip: Avoid overtightening cam locks. They only need about a quarter to half turn after making contact. Over-tightening strips the plastic threads and weakens the entire joint.
Install the Back Panel
Slide the back panel into the routed groove along the cabinet’s rear edges. It should sit flush with the outer edge of the side panels. Secure it with half-inch pin nails or brad nails every 6 to 8 inches along the perimeter. Some models use screws through the back into the rear frame instead.
Check that the cabinet is square before fastening. Measure diagonally from corner to corner with a tape measure. Both measurements should match exactly. If they don’t, gently twist the cabinet until they align.
Wall Cabinet Assembly
Prepare Panels for Upright Build
Wall cabinets follow the same construction method as base units but are lighter and often smaller. Start by identifying these components:
- Side, top, bottom, and back panels
- Interior shelf if included
- Mounting rails for secure wall hanging
Lay the cabinet face-down on a soft surface to protect the finish during assembly.
Assemble Frame and Insert Shelf
Connect the side, top, and bottom panels using dowels and cam locks just like the base cabinet. Then install the fixed interior shelf by inserting dowels and locking them in place. Wall units may use thinner material than base cabinets, so handle panels gently to avoid cracking edges.
Secure the Back and Add Mounting Hardware
Slide in the back panel and fasten it with pins or screws. Then attach any included metal mounting rails to the top and bottom rear edges. These rails allow the cabinet to hook securely onto wall-mounted brackets later.
Visual Cue: Look for pre-drilled holes in the top and bottom backs of the cabinet. These align with the mounting rail screws.
Oven Cabinet Construction
Reinforce for Heavy Loads
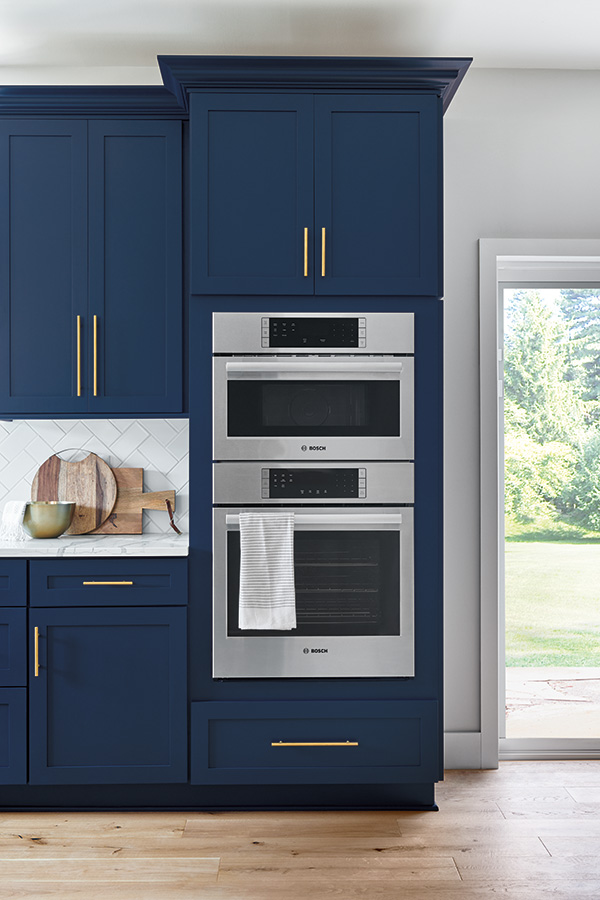
Oven cabinets are built sturdier than standard bases because they support significant weight. Confirm your model includes:
- Thicker side and shelf panels
- Center support rail or vertical divider
- Adjustable feet for leveling
Assemble the main box first using cam locks and dowels. Then insert the center support, which runs vertically between the top and bottom panels to prevent sagging under the oven’s weight.
Install Oven Shelf and Level Base
Once the frame is secure, slide in the oven platform, which is a thick reinforced shelf. Adjust the cabinet’s feet so it sits level on the floor. Use a 2-foot level across the top edges to verify.
Warning: Never mount an oven until the cabinet is perfectly level and braced against adjacent units.
Pantry Cabinet Setup
Build Tall Unit in Sections
Due to their height, pantry cabinets are often assembled in two sections: a lower box and an upper box. Assemble each separately, then stack and connect them using alignment pins and top-to-bottom fasteners.
Stack the lower unit first, ensuring it’s square and stable. Then carefully place the upper box on top, aligning dowels and cam locks. Lock them together from inside the cabinet.
Add Interior Accessories
Pantry cabinets often include pull-out baskets, dividers, or adjustable shelves. Install these only after the main structure is complete and secured to nearby cabinets or walls.
Sink Cabinet Reinforcement
Strengthen for Wet Environment
Sink cabinets hold heavy loads and face constant moisture exposure. After assembling the main box, check for these features:
- Pre-installed thick bottom panel that resists water damage
- Additional bracing or corner gussets
If your model includes a sink support rail or cross brace, install it across the bottom before placing the countertop.
Seal Edges if Needed
While the cabinet itself is moisture-resistant, consider applying silicone sealant along interior seams beneath the sink area, especially if you’re using a drop-in sink.
Corner Wall Cabinet Installation
Assemble Blind Corner Unit
These cabinets maximize corner space in your kitchen. Assemble the main box like a standard wall cabinet, but note the asymmetrical side panel, which is shorter on one side to fit the corner.
Attach the included mounting bracket or hinge plate for the rotating corner mechanism if your unit is part of a swing-out system.
Test Swing Clearance
Before mounting the cabinet, dry-fit it in place to ensure the door opens fully without hitting adjacent walls or cabinets.
Lazy Susan Cabinet Assembly
Install Rotating Corner Kit
Lazy Susans require a central pivot system. Assemble the cabinet box first, then install the metal or nylon pivot post into the center of the bottom panel.
Attach shelves with pre-cut circular cutouts, securing them to the pivot. Ensure smooth rotation before final mounting.
Pro Tip: Pack items evenly on both sides of the lazy Susan to maintain balance and prevent wobbling during rotation.
Spice Rack Integration
Assemble Rack Separately
Spice racks are often standalone inserts that you build before installing. Construct the small framed unit using the provided dowels and cam locks. It typically fits inside a narrow cabinet or between shelves.
Mount Inside Cabinet
Once assembled, secure the spice rack to the inside of the door or to a fixed shelf using screws or clips. Confirm it doesn’t interfere with door closure.
Trash Cabinet Build
Install Dual Bin Frame
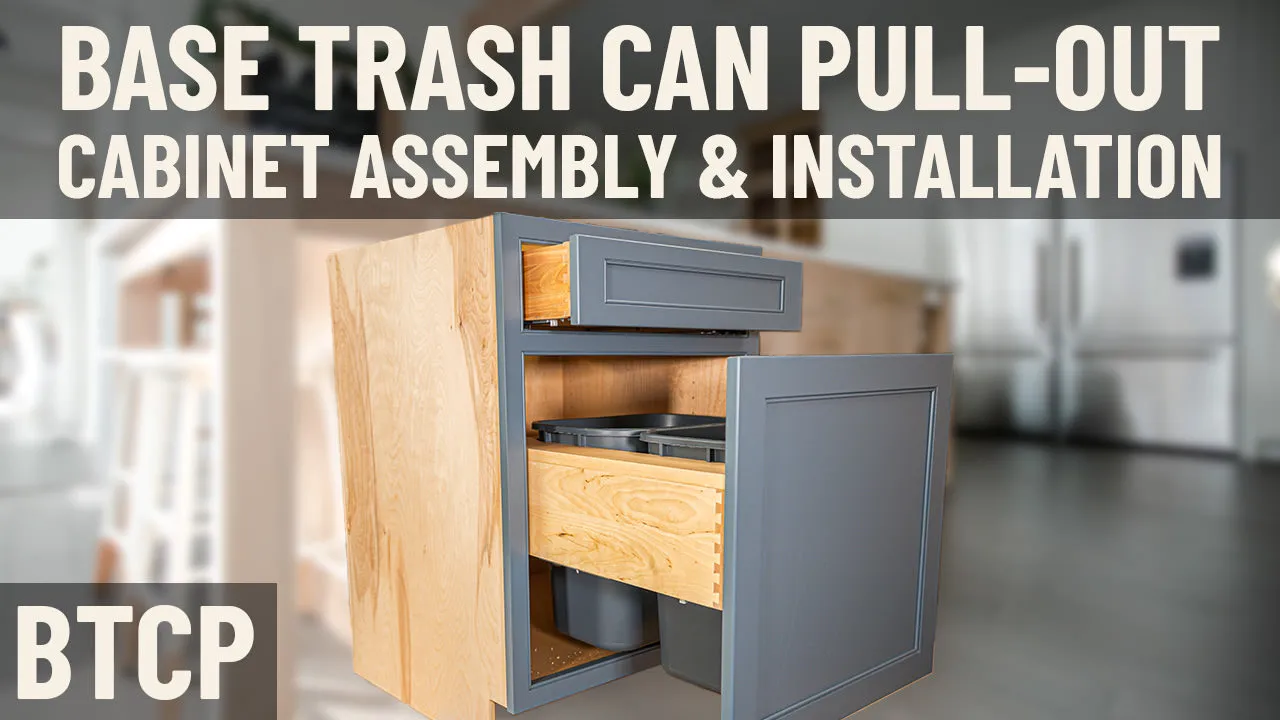
The Trash Cabinet Base includes a pull-out dual-bin frame. Assemble the outer box first, then slide in the metal trash drawer rails.
Attach the plastic bins to the rails and test the glide action. Adjust rollers if binding occurs.
Conceal Mechanism
Once functional, ensure the door aligns flush with the cabinet front. Most trash cabinet doors include a soft-close hinge for quiet operation.
Vanity Cabinet Variants
Choose Correct Base Type
Vanity drawers and double-door combos come in several configurations. Identify your model:
- Vanity Drawer Base: single drawer, often with backsplash
- Double Door Vanity: two doors with interior shelf
- Open Shelf Vanity: no doors, exposed storage
Assemble using the standard cam-lock method, laying the unit face-down for protection.
Attach Countertop and Sink
After assembly, set the countertop if included. For drop-in sinks, apply silicone around the rim before placing it in the cutout.
Roll-Out Tray Installation
Assemble Tray First
Roll-out trays are typically pre-built or come as slide-in kits. If assembling, connect the wooden frame with cam locks, then attach metal glides to the sides.
Mount Glides in Cabinet
Insert the tray into the cabinet and align the glides with mounting points on the side walls. Secure with screws. Test the extension and retraction.
Common Mistake: Misaligned glides cause jamming. Double-check that both sides are level and parallel before tightening.
Wine Rack Insert
Build Rack Frame
Wine racks use slotted shelves to cradle bottles securely. Assemble the U-shaped frame using dowels, then insert the angled shelf pieces that form bottle holders.
No fasteners are needed because gravity and friction hold the bottles in place.
Fit Into Cabinet
Place the completed rack inside a base or pantry cabinet. Some models clip to the floor or back panel to prevent shifting.
Knee Drawer Cabinet Setup
Assemble Pull-Out Drawer
This narrow, deep drawer fits under countertops for concealed storage. Build the drawer box with cam locks, then attach soft-close metal slides.
Insert into the cabinet from the front, clicking the slides into wall-mounted brackets.
Adjust for Smooth Operation
If the drawer sticks, loosen the slide screws slightly, realign, and retighten. Most slides allow micro-adjustments for perfect alignment.
Final Assembly Checks
Verify Square and Stability
After assembling all units, check each cabinet with a carpenter’s square. Corners should be at exactly 90 degrees. Use a level on top edges to confirm flatness.
Pre-Drill for Wall Anchors
When mounting wall cabinets, pre-drill holes through the back or mounting rails to hit wall studs. Use 2.5-inch screws for secure anchoring.
Common Assembly Mistakes to Avoid
Skipping the Layout Phase
Never assemble cabinets without first measuring your space and planning placement. Mark stud locations and note obstructions like outlets or pipes.
Forcing Misaligned Parts
If cam locks won’t turn or panels don’t fit, don’t force them. Disassemble and realign the dowels. Misalignment causes weak joints that fail later.
Overtightening Fasteners
Cam locks and drawer slides are made of plastic or lightweight metal. Overtightening strips threads or cracks components permanently.
Ignoring Cabinet Leveling
Base cabinets must be perfectly level before installing countertops. Use adjustable feet and shims under corners as needed.
Tools You’ll Need

Basic Toolkit for RTA Cabinets
Have these items on hand before starting:
- 5mm Allen wrench, included in most kits
- Phillips and flathead screwdrivers
- Power drill with clutch setting
- Hammer or nail gun
- Tape measure and level
- Carpenter’s square
- Soft padding to protect cabinet finishes
Time Estimate: Allow 20 to 40 minutes per cabinet depending on complexity.
Speed Up Assembly: Pro Tips
Work in Batches
Assemble all base cabinets first, then move to wall units. This reduces setup changes and speeds up repetitive tasks.
Label Each Cabinet
Use painter’s tape to mark which cabinet goes where, such as “Left of Sink” or “Corner Upper.” This prevents confusion during installation.
Watch the Assembly Video
RTA Cabinet Store provides video guides for the Weston White Shaker line. Watching once before starting cuts assembly time by up to 30%.
When to Call a Professional
While RTA cabinets are DIY-friendly, consider hiring help if:
- You’re installing more than 10 cabinets
- Your layout includes complex corners or soffits
- You’re uncomfortable with plumbing or electrical adjustments
A professional installer ensures perfect alignment and saves hours of labor.
Frequently Asked Questions About Shaker Cabinet Assembly
How long does it take to assemble one shaker cabinet?
Most Weston White Shaker cabinets take 20 to 40 minutes each. Base cabinets with doors and shelves take longer than simple wall units. As you gain experience, assembly time decreases significantly.
Do I need special tools to assemble RTA cabinets?
You need a 5mm Allen wrench, screwdrivers, a power drill with clutch setting, hammer or nail gun, tape measure, level, and carpenter’s square. Most kits include the Allen wrench.
Can one person assemble shaker cabinets alone?
Yes, most base and wall cabinets can be assembled solo. Tall pantry and oven cabinets are easier with a second person to hold panels while you align dowels and tighten cam locks.
What is a cam lock and how does it work?
A cam lock is a plastic fastener with a round head and a slot. You insert the bolt into a pre-drilled hole, then turn it clockwise with an Allen wrench to pull two panels together tightly.
Should I use glue when assembling shaker cabinets?
No, Weston White Shaker cabinets use cam locks and dowels for the main structure. Glue is not required and can make future disassembly difficult.
How do I fix a cabinet that isn’t square?
Measure diagonally from corner to corner. If measurements differ, gently twist the cabinet until they match, then secure the back panel to hold the square shape.
Key Takeaways for Assembling Shaker Cabinets
Assembling shaker cabinets is a straightforward process when you follow the right sequence. Start by identifying all parts and using the included cam locks and dowels for a secure fit. Check squareness before installing the back panel, and avoid overtightening fasteners to protect the joints.
Specialty units like lazy Susans, trash cabinets, and wine racks follow the same basic principles with a few extra components. Take your time, watch the assembly videos, and work in batches to speed up the process.
Ready to start your kitchen project? Contact RTA Cabinet Store’s design team at 800-580-5535 or design@rtacabinetstore.com for free quotes and expert advice. Their team is available Monday through Saturday from 8am to 8pm EST and Sunday from 10am to 6pm EST.


