

You’re tired of bending down to take out the trash. The cluttered corner of your kitchen with a standalone trash can is inefficient, unattractive, and awkward to access. What if you could convert unused cabinet space into a sleek, pull-out trash drawer? It’s easier than you think. Turning a cabinet into a trash drawer transforms awkward storage into a functional, space-saving solution, perfect for small kitchens or modern upgrades.
This guide walks you through every step: choosing the right cabinet, selecting a trash drawer kit or DIY method, installing slides, building or mounting the bin frame, and finishing with a clean, seamless look. Whether you’re a weekend DIYer or tackling your first project, you’ll gain a smarter kitchen layout in just a few hours.
Choose the Right Cabinet
Not every cabinet works for a trash drawer conversion. Location, size, and accessibility matter.
Pick an Accessible Base Cabinet
Select a cabinet under the countertop that’s easy to reach, ideally next to the sink or prep area. Avoid corners unless using a specialized slide. Make sure there’s no plumbing, electrical, or structural obstruction behind or beneath the cabinet. Test by removing the shelf and inspecting interior space.
Measure Cabinet Interior Width
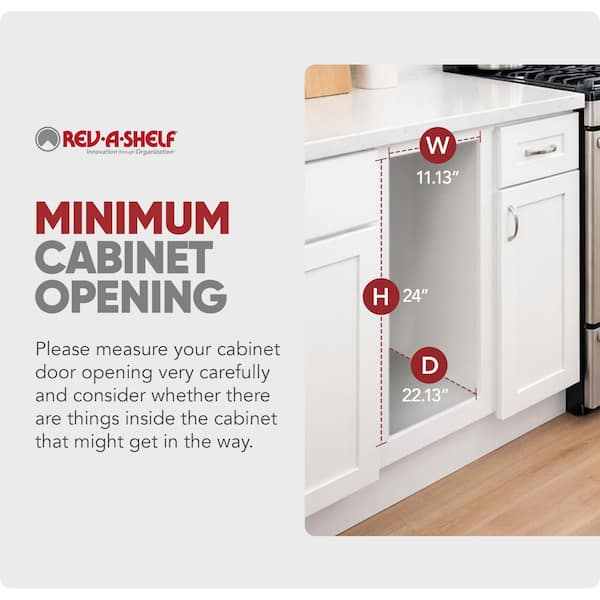
Use a tape measure to check the inner width at the top, middle, and bottom. Base cabinets vary slightly, so use the smallest measurement. Standard widths are 15, 18, 21, or 24 inches, but never assume. Subtract 1 inch to allow clearance for drawer slides.
Confirm Full-Extension Slide Clearance
Full-extension drawer slides need depth and vertical space. Measure from the front edge to the back of the cabinet. Most slides require at least 18 inches of depth for full bin access. Ensure there’s 1.5 to 2 inches of vertical room below the cabinet floor for mounting undermount slides, or use side-mount if needed.
Select a Trash Drawer Kit or DIY Build
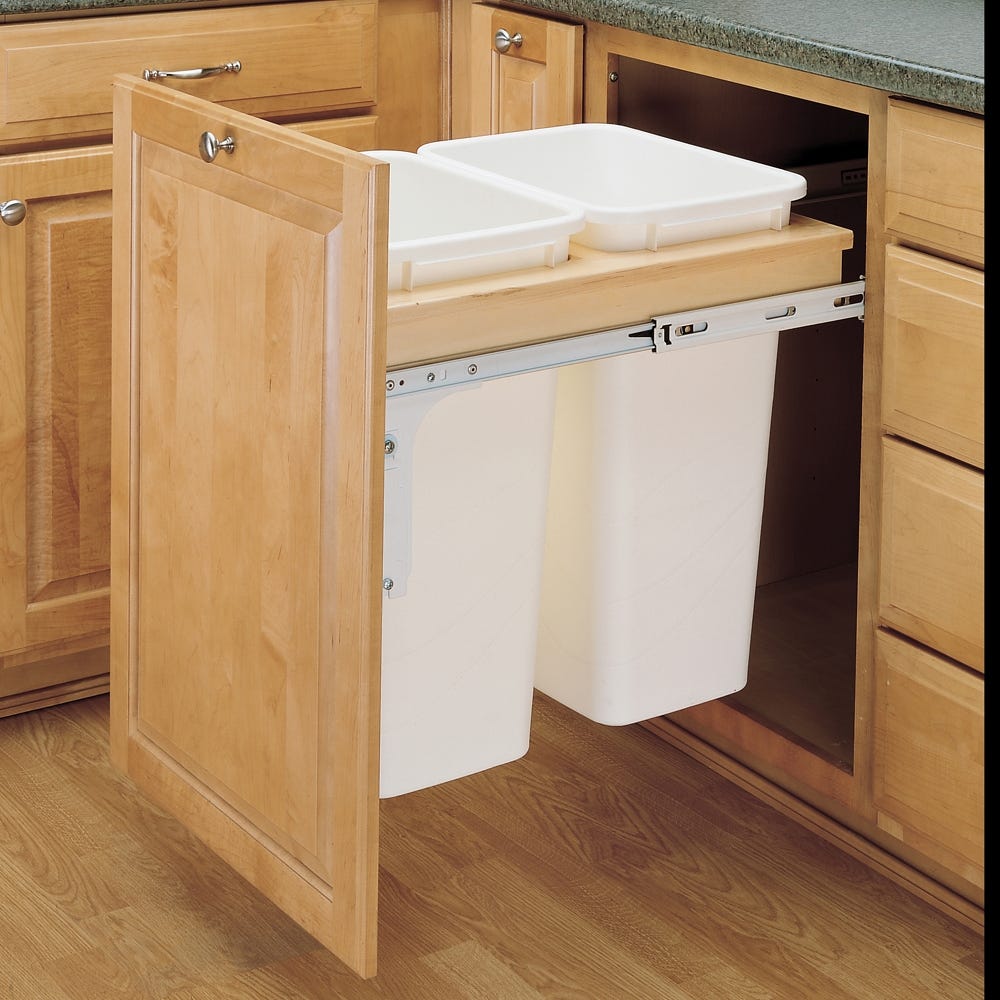
You can buy a pre-made kit or build your own. Each option has trade-offs in cost, time, and customization.
Use a Pre-Made Trash Drawer Kit
Brands like Rev-A-Shelf, SimpleHuman, and Blum offer kits with bins, rails, and frames. These are ideal for standard cabinet sizes. Kits save time and ensure compatibility. Choose a dual-bin model for recycling separation. Match the kit size to your cabinet’s interior width and depth.
Build a Custom Drawer Frame
For non-standard cabinets or budget control, build your own. Use ¾-inch plywood or MDF for durability. Cut two sides, a front, a back, and a bottom to fit inside the cabinet with ½-inch clearance on each side. Assemble with wood glue and screws. Sand edges smooth.
Choose Pull-Out Bins or Buckets
Stainless steel or plastic bins slide better and resist odors. Round corners prevent waste buildup. Look for bins with handles for easy removal. Standard sizes are 10 to 15 gallons. Consider adding a lid or odor-control filter, especially if placing near food prep zones.
Install Drawer Slides
Slides are the backbone of a smooth-operating trash drawer. Choose quality hardware.
Pick Full-Extension Drawer Slides
Full-extension slides let you pull the drawer completely out, which is critical for emptying bins safely. Soft-close models prevent slamming and increase longevity. Side-mount slides are easier for beginners; undermount slides offer a cleaner look but require precise installation.
Mark and Mount Front Bracket
With the cabinet empty, position the drawer front or frame inside. Align slides so the drawer opens straight. Use a level and clamps to hold in place. Mark screw holes on the cabinet side walls. Pre-drill holes to prevent wood splitting.
Attach Slides to Drawer Frame
Secure the mating slide pieces to the drawer frame using provided screws. Ensure alignment, since misaligned slides cause binding. Test fit by inserting the drawer. It should glide smoothly without tilting. Adjust brackets if needed before permanent mounting.
Build or Install the Bin Holder
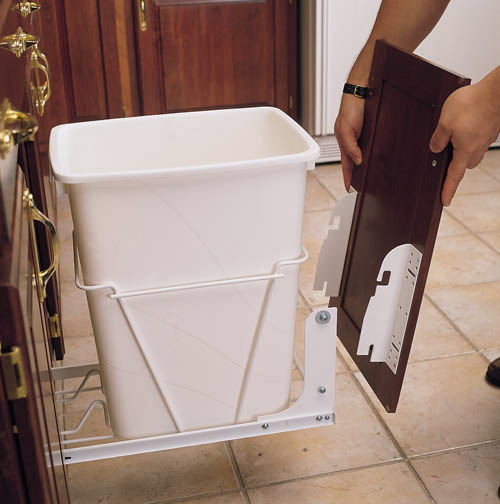
The bin holder keeps trash containers secure and hidden.
Mount Bins to Drawer Base
Secure bins to the drawer bottom using brackets or adhesive-backed clips. Position them so the top is flush or slightly below the drawer front. This prevents snagging when opening. For DIY frames, screw bin flanges directly into the plywood base.
Add Non-Slip Liner
Line the drawer bottom with rubber matting or anti-slip shelf liner. This keeps bins from shifting during use. Trim excess with scissors for a clean finish.
Install Drawer Front
Use the original cabinet door or build a new one. Attach with hinges or a European-style clip system. Ensure the front aligns flush with surrounding cabinets. Add a pull or recessed handle for easy access.
Test and Adjust Operation
After assembly, fine-tune for smooth use.
Check Drawer Glide and Alignment
Open and close the drawer slowly. It should move evenly without catching. If it binds, check slide alignment and reposition if necessary. Loosen mounting screws slightly, realign, then retighten.
Verify Full Bin Access
Pull the drawer all the way out. You should be able to lift bins out freely. If bins hit the countertop or backsplash, shorten the drawer depth or adjust slide position.
Secure Plumbing and Wires
If near the sink, ensure the drawer doesn’t interfere with pipes or dishwasher wires. Use zip ties to secure loose lines and create clearance. Consider rerouting if needed before finalizing.
Maintain and Upgrade Your Trash Drawer
A well-designed trash drawer lasts years with minimal upkeep.
Clean Bins Weekly
Remove bins regularly and wash with mild detergent. Prevent odor buildup with baking soda or vinegar sprays. Replace liners promptly to avoid leaks.
Inspect Slides Every 6 Months
Dust and grease reduce slide performance. Wipe rails with a damp cloth and apply silicone lubricant. Tighten mounting screws if the drawer sags.
Upgrade to Odor-Control Systems
Add carbon filters or automatic-seal lids for high-traffic kitchens. Some kits include foot pedals for hands-free operation, which is ideal when cooking.
Frequently Asked Questions About Turning a Cabinet Into a Trash Drawer
Can I convert any cabinet into a trash drawer?
Most base cabinets work, but you need adequate depth, width, and clearance. Avoid cabinets with plumbing or electrical obstructions. Corner cabinets require specialized slide systems.
How much does it cost to turn a cabinet into a trash drawer?
A pre-made kit costs between $50 and $200 depending on brand and features. A DIY build with plywood, slides, and bins runs $30 to $80 if you already have basic tools.
Do I need special slides for a trash drawer?
Full-extension slides are recommended so bins can be accessed completely. Soft-close slides add convenience and reduce wear. Standard side-mount slides work well for most conversions.
How long does the installation take?
Most conversions take 2 to 4 hours for a DIYer. Pre-made kits install faster, often in under 2 hours. Custom builds with drawer fronts may take longer.
Will the trash drawer hold heavy loads?
Yes, if you use quality slides rated for 75 to 100 pounds. Plywood frames handle heavy bins well. Avoid overloading beyond the slide’s weight capacity.
Can I add recycling bins to the same drawer?
Yes, many kits feature dual-bin designs. For DIY builds, mount two smaller bins side by side. Ensure the drawer width accommodates both containers.
Key Takeaways for Turning a Cabinet Into a Trash Drawer
Turning a cabinet into a trash drawer maximizes space, improves accessibility, and enhances kitchen aesthetics. With the right tools and a few hours, you can eliminate floor-level trash cans and upgrade to a seamless, pull-out solution. Whether you choose a pre-made kit or custom build, focus on slide quality, bin placement, and smooth operation.
Once installed, enjoy a cleaner, more efficient kitchen workflow. No more bending, tripping, or unsightly bins in your workspace. Start by measuring your cabinet today, then pick the approach that fits your skill level and budget. Your kitchen will thank you.


