Kitchen cabinet molding ideas can transform a basic kitchen into a custom, high-end space with architectural charm. Whether you’re remodeling or refreshing your current layout, adding crown molding or other decorative trims enhances visual height, adds depth, and unifies your cabinetry with the rest of the room. Many homeowners overlook molding as a minor detail, but it’s one of the most impactful finishing touches you can make. With the right style, material, and installation, molding frames your cabinets beautifully and reflects your personal design taste.
This guide explores proven kitchen cabinet molding ideas that work across styles, from traditional to modern. You’ll learn about popular molding profiles, material choices like wood and polyurethane, and smart installation techniques that avoid common pitfalls. Whether you want a subtle accent or a bold statement, these ideas help you achieve a polished look that boosts both aesthetics and resale value.
Choose the Right Molding Style

The style of molding you select sets the tone for your kitchen’s overall design. Different profiles create distinct visual effects, from ornate elegance to clean simplicity.
Classic Crown Molding Profiles
Crown molding is the most popular choice for kitchen cabinets, especially on uppers that meet the ceiling or soffit. Common profiles include:
- Cove molding: A simple, concave curve that adds softness without overwhelming the space.
- Ogee molding: Features an S-shaped curve, offering a traditional, decorative look ideal for formal kitchens.
- Beaded crown: Combines a stepped profile with a rounded bead detail, often used in Shaker or cottage-style kitchens.
- Lambs tongue: A gently rounded edge that provides subtle sophistication.
For a cohesive look, match the molding profile to your kitchen’s design style. Ornate profiles suit traditional spaces, while streamlined options work better in modern settings.
Modern Mitered Box Trim
For a custom-built appearance, create a boxed crown using mitered trim pieces that form a closed rectangle above the cabinets. This technique works well when cabinets don’t reach the ceiling. Use straight runs of trim to frame the top and sides, then miter the corners for a seamless box effect. This idea is especially effective in contemporary kitchens where clean lines and symmetry matter.
Inverted Box for Floating Cabinets
If you have floating upper cabinets, an inverted box molding can ground the design. Install crown molding upside down beneath the cabinet to mimic a built-in look. Pair it with simple linear profiles to maintain a minimalist aesthetic.
Compare Molding Materials

Your choice of material affects durability, cost, weight, and ease of installation. Each has pros and cons depending on your kitchen environment and DIY skill level.
Solid Wood: Premium and Natural
Solid hardwood like poplar, pine, or oak offers the most authentic look and can be stained to match existing cabinets. It’s ideal for high-end renovations and holds paint well. However, it’s more expensive and sensitive to humidity, which may cause warping in steam-heavy kitchens.
Best for: Custom homes, traditional kitchens, stained finishes.
Polyurethane: Lightweight and Moisture-Resistant
Polyurethane molding is engineered to resist moisture, making it perfect for kitchens. It’s lightweight, easy to cut, and won’t warp or crack. While it can’t be stained, it accepts paint beautifully and comes in detailed profiles that mimic wood. It’s also less expensive and simpler to install, making it great for DIYers.
Best for: Humid environments, rental properties, painted kitchens.
MDF: Smooth and Affordable
MDF is a budget-friendly option with a smooth surface ideal for painting. It’s denser than polyurethane and holds paint without grain bleed-through. However, it’s heavy, absorbs moisture easily, and can swell if exposed to water. Avoid using MDF in steam-prone areas unless sealed thoroughly.
Best for: Dry kitchens, painted cabinetry, cost-conscious projects.
Plan Smart Installation Techniques
Proper installation ensures your molding looks professional and lasts. Even the best materials fail if installed incorrectly. Plan carefully and use the right tools.
Measure and Cut with Precision
Start by measuring the length of each cabinet run. Use a coping saw or miter saw to cut ends at 45-degree angles for inside corners. For outside corners, use a miter box to ensure clean joints. Always dry-fit pieces before securing them.
Pro Tip: Scribe molding to fit uneven walls instead of relying solely on coped joints. This prevents gaps in older homes with imperfect walls.
Secure with the Right Fasteners
Attach molding using a combination of construction adhesive and finish nails. Apply a bead of adhesive along the back edge, then nail every 12 to 16 inches using a brad nailer. Set nails slightly below the surface and fill holes with wood putty.
For polyurethane or MDF, use adhesive generously. These materials rely more on glue than nails for long-term hold.
Handle Inside and Outside Corners
- Inside corners: Cope the second piece instead of mitering. This allows for wall imperfections and creates a tighter fit.
- Outside corners: Use a 45-degree miter on both pieces, or install corner blocks behind the molding for added strength and a decorative touch.
Finish for a Seamless Look
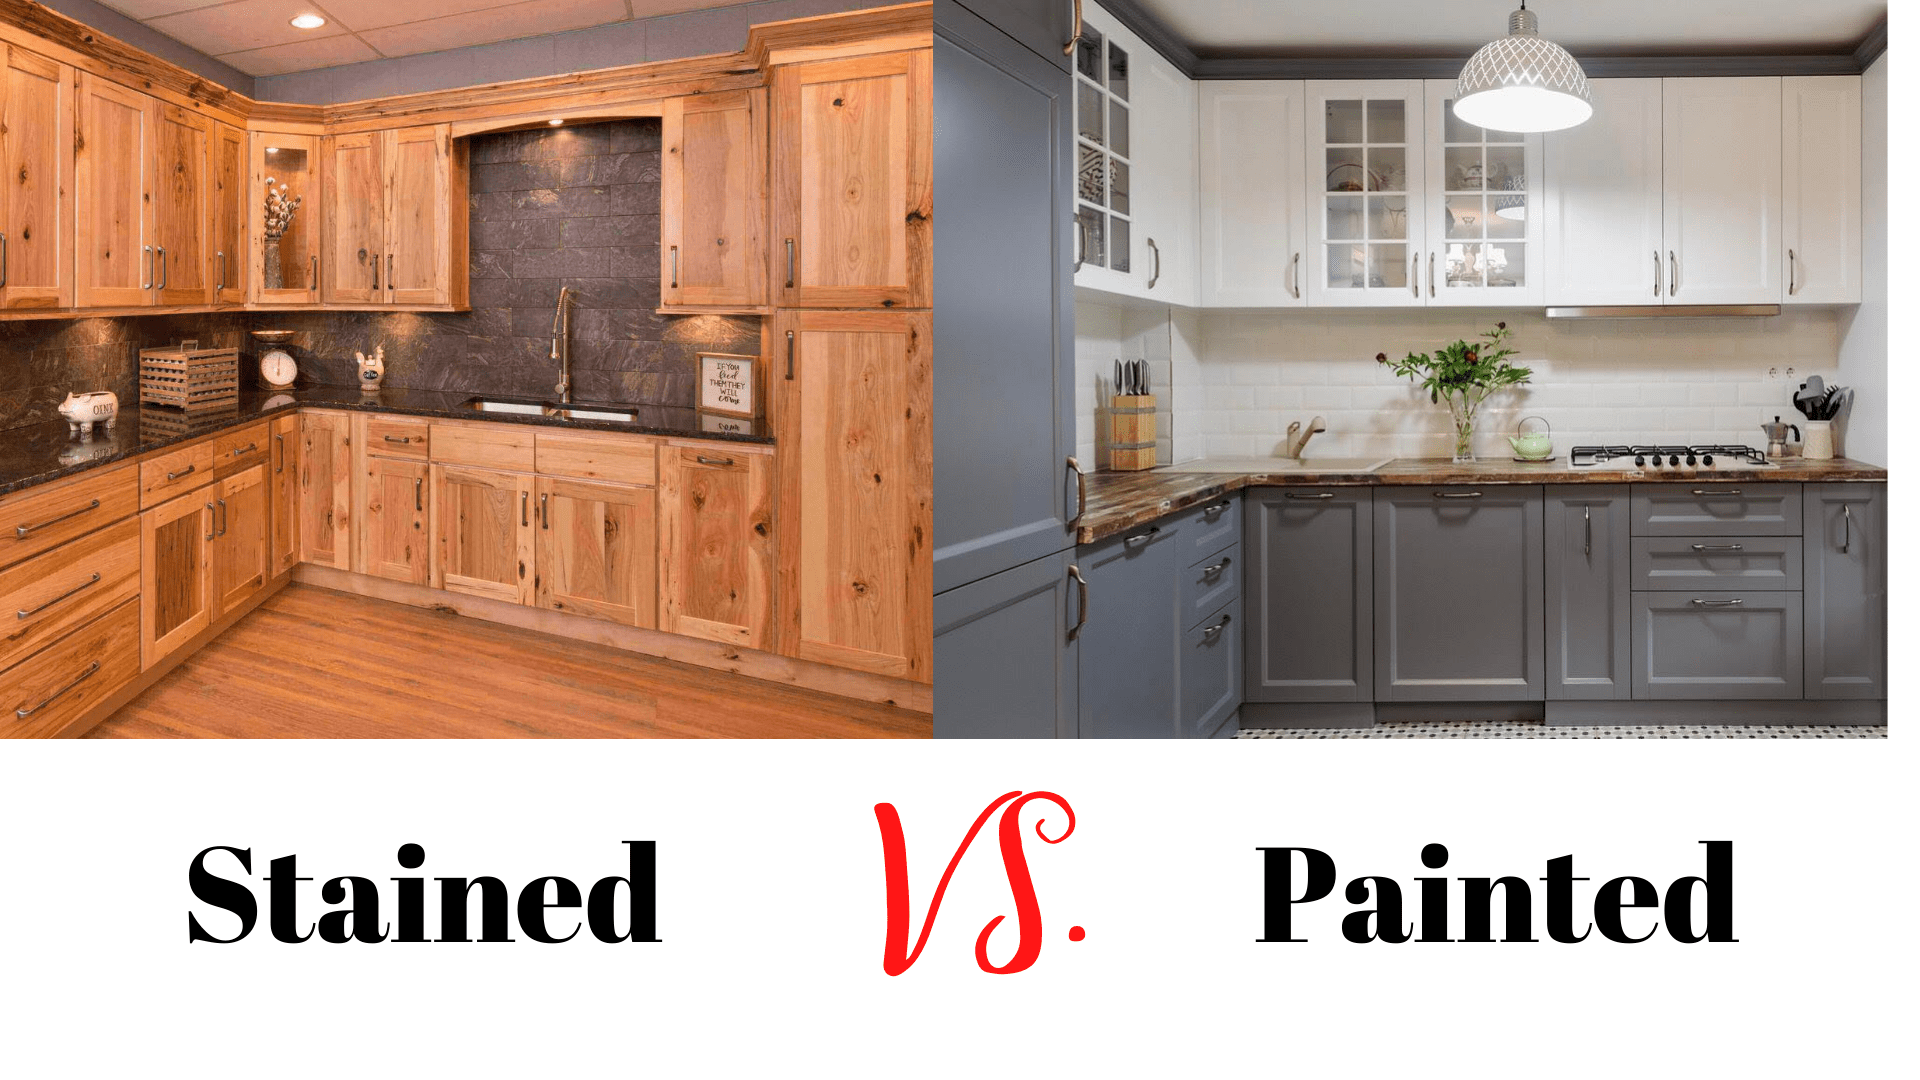
The final finish ties the molding into your kitchen’s color scheme and style. Whether you paint or stain, preparation is key.
Paint for a Crisp, Clean Appearance
Most kitchen molding is painted white or a contrasting color to make it stand out. Use semi-gloss or satin finish for durability and easy cleaning. Follow these steps:
- Sand lightly and prime, especially for MDF.
- Apply two coats of paint, letting dry between coats.
- Use a small brush for detailed edges.
Pro Tip: Tape off cabinets with painter’s tape to avoid smudges.
Stain to Match Wood Cabinets
If using solid wood molding, stain it to match your cabinets exactly. Test the stain on a scrap piece first. Apply with a cloth or brush, wipe off excess, and seal with polyurethane for protection.
Contrast or Match Your Cabinets
- Match: Creates a seamless, built-in look, ideal for traditional and transitional kitchens.
- Contrast: A bold choice, like black molding on white cabinets, adds drama and modern flair.
Choose based on your design goals, whether subtlety or statement.
Avoid Common Molding Mistakes
Even small errors can make molding look amateurish. Watch for these frequent issues.
Uneven Joints and Gaps
Gaps at corners or along seams are the most common complaint. Prevent them by:
- Coping inside corners instead of double-mitering.
- Scribing molding to fit irregular walls.
- Using caulk to hide minor gaps after painting.
Fix Tip: Use painter’s caulk for painted molding. Smooth with a damp finger for a seamless blend.
Improper Alignment with Cabinets
Molding should sit flush with the top of the cabinets. Misalignment draws the eye and breaks continuity. Use a level and spacer blocks during installation to maintain even height across all sections.
Overlooking Ceiling and Wall Variations
In many homes, ceilings aren’t perfectly level and walls aren’t straight. Don’t assume your cabinet top is uniform. Measure from a consistent reference point like the floor and adjust molding height as needed.
Customize with Creative Molding Ideas
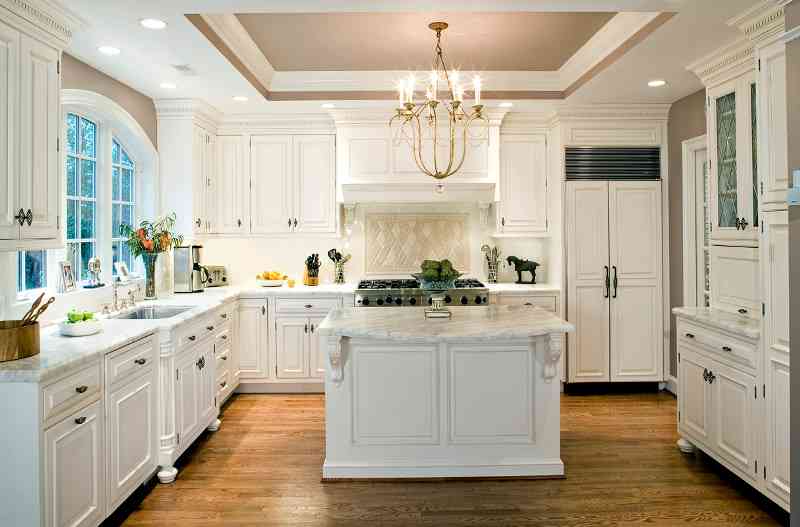
Go beyond standard crown molding with unique applications that add personality and function.
Add Decorative Corbels
Install corbels beneath the molding for a traditional, European-inspired look. They provide visual support and work well in kitchens with open shelving or tall cabinets.
Use Chair Rail as a Mid-Cabinet Accent
Install chair rail molding horizontally between upper and lower cabinets. Paint it a contrasting color or wrap it in wallpaper for a focal point. This works especially well in kitchens with a range hood or open layout.
Frame Windows and Pantries
Extend your molding theme beyond cabinets. Frame a pantry door or kitchen window with the same profile to create cohesion. This trick makes the entire kitchen feel intentionally designed.
Layer Multiple Trim Pieces
For a high-end custom look, layer different molding types such as crown, dentil, and picture frame molding to build depth and texture. This works best in large kitchens with tall cabinetry or vaulted ceilings.
Prep for Long-Term Durability
Kitchen molding faces heat, humidity, and grease. Choose materials and finishes that stand up to daily wear.
Seal All Edges and Joints
Especially for MDF or wood, seal cut edges and back surfaces before installation. This prevents moisture absorption and swelling over time.
Clean Without Damaging Finish
Wipe molding regularly with a damp cloth and mild cleaner. Avoid abrasive pads or harsh chemicals that can dull paint or stain.
Inspect Annually for Gaps or Damage
Over time, settling or humidity changes can create small gaps. Touch up caulk and repaint as needed to maintain a fresh appearance.
Frequently Asked Questions About Kitchen Cabinet Molding Ideas
What is the best molding for kitchen cabinets?
Crown molding is the most popular and versatile choice for kitchen cabinets. It adds height and elegance to upper cabinets. For humid kitchens, polyurethane is the best material because it resists moisture and won’t warp.
Can I install crown molding on kitchen cabinets myself?
Yes, DIY installation is possible with basic tools like a miter saw, brad nailer, and construction adhesive. Polyurethane is the easiest material for beginners due to its lightweight nature and forgiving cutting properties.
Should crown molding match the cabinets or contrast?
Both approaches work well. Matching creates a seamless built-in look that suits traditional kitchens. Contrasting, like black molding on white cabinets, adds modern drama and visual interest.
How do I fix gaps in crown molding corners?
Cope inside corners instead of double-mitering to accommodate wall imperfections. For small gaps after installation, use painter’s caulk and smooth with a damp finger before painting.
What is the difference between wood and polyurethane molding?
Wood offers an authentic look and can be stained, but it’s more expensive and can warp in humid conditions. Polyurethane resists moisture, is lightweight, and won’t crack, but it can only be painted, not stained.
How much does kitchen cabinet molding cost?
Costs vary by material and profile complexity. MDF is the most budget-friendly, while solid wood is the most expensive. Polyurethane falls in the middle and offers the best balance of cost and durability.
Key Takeaways for Your Kitchen Cabinet Molding Project
Kitchen cabinet molding ideas can dramatically upgrade your space when executed with care. Start by selecting a profile that matches your kitchen’s style, then choose a material suited to your environment and skill level. Polyurethane offers the best balance for most DIYers, while solid wood suits those seeking a premium stained finish.
Installation precision matters more than material cost. Cope inside corners, scribe to uneven walls, and use both adhesive and nails for a secure hold. Finish with paint or stain that either blends seamlessly or intentionally contrasts with your cabinetry.
Finally, avoid common mistakes like misaligned sections and unsealed edges. With proper planning and these kitchen cabinet molding ideas, you’ll achieve a custom-crafted look that elevates your entire kitchen. Start with one cabinet run, master the technique, and expand from there to transform your space one section at a time.