Your kitchen range hood does more than clear smoke; it anchors the entire room visually. When you integrate this appliance with your cabinetry, you transform a utilitarian object into a stunning design statement that elevates the whole space.
This guide explores top cabinet range hood ideas ranging from sleek recessed units to custom wood covers. You will learn specific construction steps, ventilation rules, and styling tips to blend function with your unique aesthetic.
Modern Minimalist Hood Designs for Sleek Kitchens

Sleek finishes and hidden mechanics define the best minimalist cabinet range hood ideas. These designs prioritize clean lines and quiet operation, making them perfect for contemporary spaces where clutter-free surfaces are essential.
Select Matte Black or Stainless Steel Finishes
Matte black and stainless steel dominate modern hood styles due to their versatility. Matte black hoods blend seamlessly with dark cabinetry to create a unified, high-end look. Stainless steel models offer a timeless appearance that resists fingerprints when treated properly. Both finishes minimize glare under bright kitchen lighting while maintaining a sharp profile.
Integrate Recessed or Under-Cabinet Lighting
Strategic LED placement enhances both function and mood in minimalist setups. Recessed lighting within the hood frame provides focused task illumination without adding visual bulk. LED-backlit hoods emit a soft glow ideal for ambient lighting over islands. Integrated strips along the bottom edge ensure full cooktop visibility while keeping the silhouette low.
Choose Low-Profile Wall-Mounted Units
Minimalist designs do not sacrifice power for size. Modern wall-mounted hoods offer strong airflow ratings in slim profiles that fit easily under upper cabinets. Look for models with quiet motors under 5 sones and hidden grease trays. These units preserve headroom and sightlines in open-concept homes.
Traditional and Rustic Wood Hood Concepts
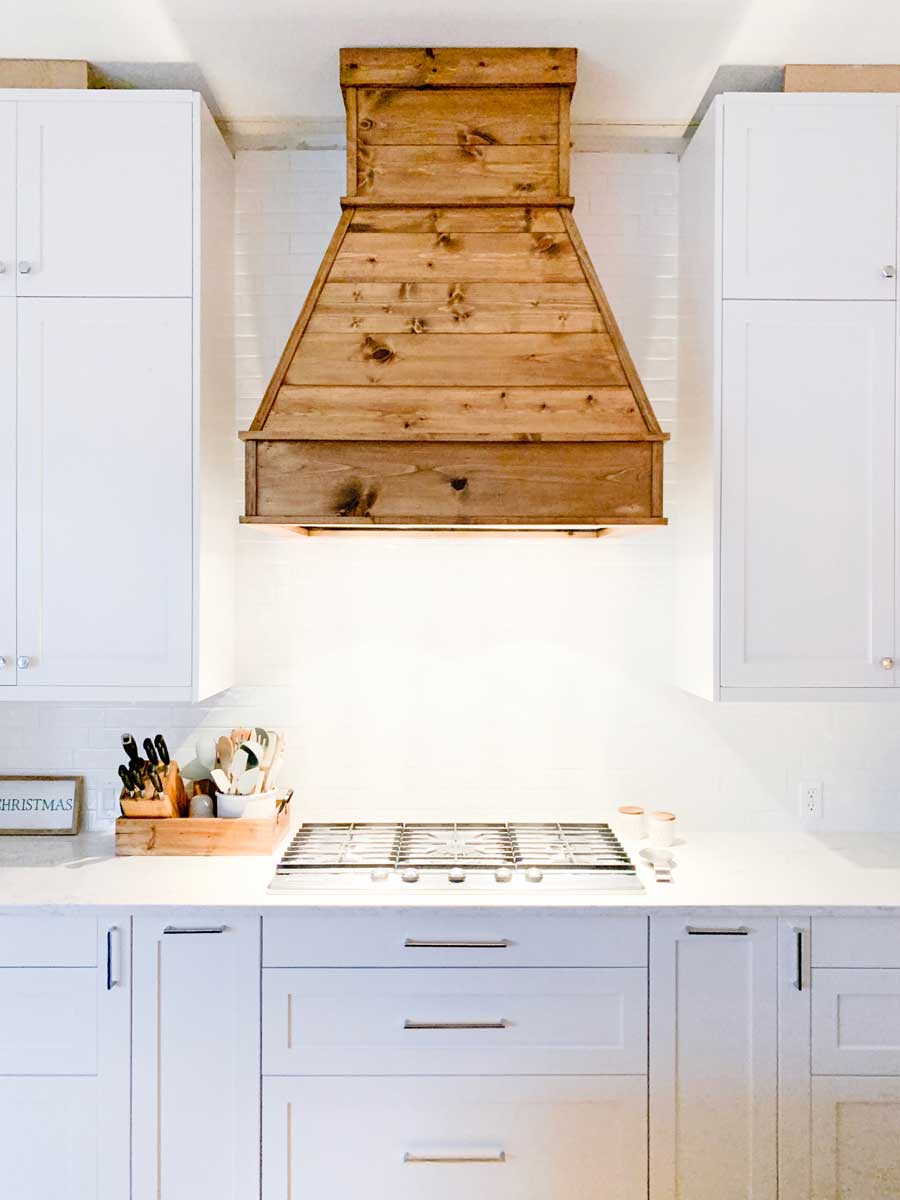
Wood-clad hoods bring warmth and character to farmhouse, cottage, or traditional layouts. When paired correctly with cabinetry, they create continuity or intentional contrast that defines the room.
Match or Contrast with Existing Cabinet Wood
A wood-frame hood can mirror your cabinet finish for a seamless look. Alternatively, use a contrasting species like walnut against white shaker cabinets to add richness. Reclaimed wood offers a weathered appeal ideal for rustic designs. Always seal wood surfaces with heat- and moisture-resistant finishes to protect against grease.
Build Custom Wooden Hood Covers
DIY wood covers allow total customization of size and shape. Use knot-free softwood boards for a smooth finish on your custom project. Construct a 2×4 internal frame and attach finish panels with brad nails for stability. Sand with 120–220 grit paper before staining to match existing cabinetry perfectly.
Add Vintage Hardware and Details
Enhance traditional charm with vintage-style knobs or wrought-iron handles. A green porcelain knob on a wood hood echoes classic appliance details effectively. These small accents reinforce a nostalgic aesthetic without overwhelming the available space.
Industrial and Statement-Making Hood Styles
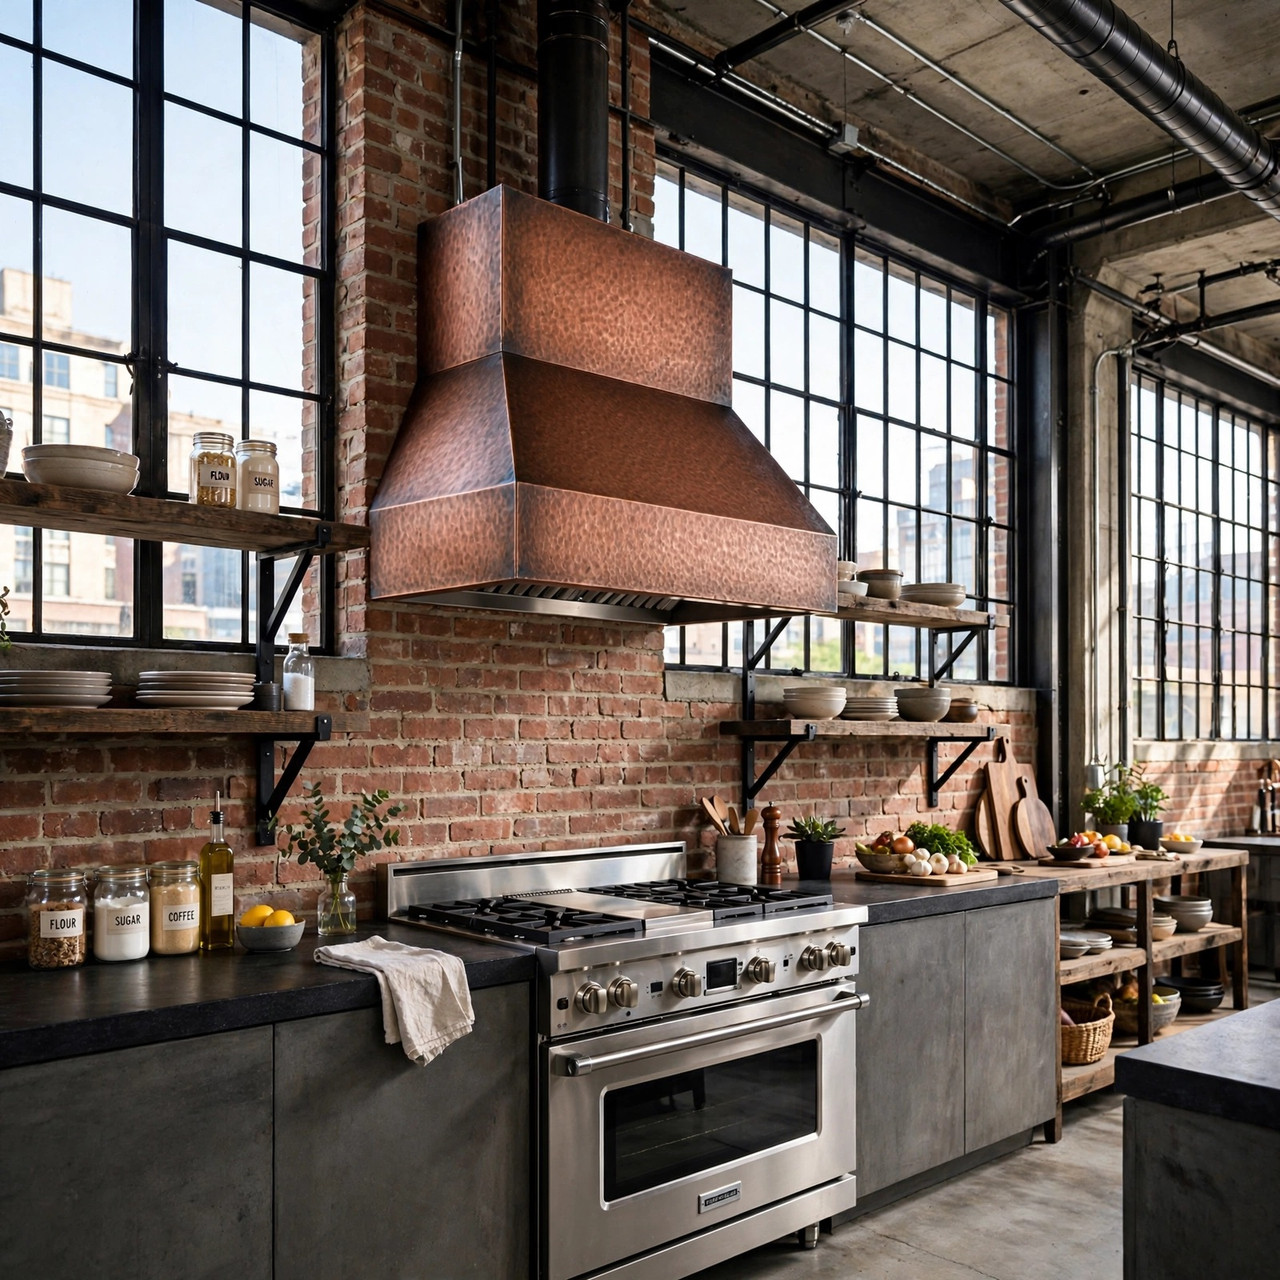
Industrial and color-forward hoods serve as eye-catching centerpieces for bold kitchen designs. These styles celebrate mechanical elements rather than hiding them away.
Install Open-Frame or Exposed Duct Hoods
Industrial hoods feature visible metal trusses and raw finishes like brushed copper. Open-frame designs integrate directly into cabinetry framing with exposed ductwork. This approach works well in lofts where raw textures add authenticity to the space.
Use Bold Colors to Create Contrast
A color-pop hood breaks up neutral palettes and adds immediate energy. Deep navy, emerald green, or matte red hoods stand out sharply against white or gray cabinets. Choose powder-coated metal for durability and easy cleaning in high-traffic areas.
Combine Glass and Metal for Modern Edge
Glass-top or glass-front hoods offer reflective surfaces that amplify light. A glass panel paired with LED backlighting creates a futuristic look above island cooktops. Visibility from multiple angles makes these units a true focal point.
Seamless Built-In and Recessed Hood Solutions

High-end kitchens often favor hoods that disappear into the cabinetry structure. This creates a clean, architectural effect that emphasizes simplicity.
Design Recessed Hoods Flush with Cabinetry
Recessed built-in hoods install directly into the cabinet structure to eliminate protrusions. The hood insert sits behind a custom facade matching surrounding cabinets. Maintain a minimum 2 inches clearance around the insert to ensure proper airflow.
Ensure Underside Controls for Accessibility
Control placement is critical when covering a hood insert with custom materials. Avoid models with front or top-mounted buttons since they become unreachable once enclosed. Choose inserts with underside-mounted controls or remote operation for full functionality.
Use Matching Finish and Hardware
True integration requires matching the hood finish, grain, and hardware to adjacent cabinets. Use the same stain, paint, and knob style to create a unified look. Floating shelves nearby can echo the hood material to reinforce cohesion.
Dual-Sided and Island-Specific Hood Configurations
Kitchen islands demand specialized hoods that handle multi-directional cooking. These units often serve as sculptural elements in the center of the room.
Install Dual-Sided Hoods for Island Cooktops
Dual-sided hoods extract air from both front and back simultaneously. This design is ideal for island stoves used for grilling and simmering at the same time. They pair well with glass or stainless steel finishes for a symmetrical modern look.
Position Hoods at Optimal Height and Width
Hood width should extend 3 to 6 inches beyond the cooktop on each side for efficiency. This overhang ensures efficient capture of smoke and grease during cooking. Mount the unit 30–36 inches above the cooktop depending on manufacturer guidelines.
Choose Ceiling-Mounted or Chimney Designs
Ceiling-mounted hoods with ducted chimneys make dramatic statements over islands. These units hang from above to free wall space and draw the eye upward. Pair them with pendant lighting for layered illumination effects.
Ventless vs. Vented System Choices
The ventilation method impacts both performance and design flexibility for your project. Understanding the difference helps you choose the right system.
Opt for Vented Hoods When Possible
Vented ducted hoods exhaust air outside to remove odors and moisture at the source. This is the preferred option for performance in heavy-cooking households. Ducted systems require exterior access but deliver superior air quality results.
Use Ventless Hoods in Apartments or Ductless Spaces
Ventless recirculating hoods filter air through charcoal filters and return it to the kitchen. These suit rentals or kitchens without external walls for ducting. Replace filters every 3–6 months and ensure strong airflow for effectiveness.
Check CFM and Noise Ratings
Airflow measured in CFM should match your specific cooking habits and needs.
* 300–400 CFM: Suitable for light to moderate cooking tasks.
* 600+ CFM: Recommended for gas ranges or frequent frying sessions.
Pair high CFM with low noise under 5 sones for maximum comfort during use.
DIY Cabinet Hood Cover Construction Steps
Building a custom hood cover allows full control over size, shape, and material selection. Follow these steps for a professional result.
Plan Dimensions and Test with Tape
Sketch the hood shape and dimensions on paper before cutting any wood. Use painter’s tape to outline the design directly on the wall to test fit. Create a cardboard template to verify duct clearance and alignment with studs.
Build a 2×4 Frame with Pilot Holes
Cut 2×4 lumber to size using a miter saw for precise angles. Assemble the frame on a flat surface and drill pilot holes before driving screws. This prevents splitting and ensures a sturdy internal structure.
Install Hood Insert with Underside Controls
Place a vented hood insert inside the frame with 2 inches of clearance. Verify that controls are on the underside for access after covering. Install a metal liner now for durability and easier future cleaning.
Attach Finish Panels and Trim
Sand softwood panels with 120–220 grit paper before assembly for a smooth surface. Attach bottom trim first with painter’s tape, then secure with brad nails. Slide in sideboards and front panel, nailing at angles for strength.
Stain and Seal to Match Cabinetry
Apply stain to match existing wood tones in your kitchen space. Use a heat- and moisture-resistant topcoat like polyurethane for protection. Reinstall cabinet hardware that complements the new hood design.
Performance and Safety Essentials for Hoods
Even the most beautiful hood must function safely and efficiently to be worthwhile. Adhere to these critical performance standards.
Follow Width and Clearance Rules
Stick to the +3 to +6 inch width rule beyond the cooktop for optimal smoke capture. Maintain 2 inches of clearance around the insert to prevent overheating. These specs are non-negotiable for performance and code compliance.
Anchor Frame to Wall Studs
The hood cover must support the weight of metal liners and finish materials securely. Secure the 2×4 frame directly to wall studs using lag screws. A level ensures the final installation is straight and stable.
Hire a Pro for Electrical and Ductwork
Electrical wiring and duct connections should be handled by a licensed professional. Never bypass electrical codes or venting standards in your home. Safety is paramount when modifying ventilation systems.
Verify Local Building Codes
Check local regulations before starting any construction or installation work. Some jurisdictions require permits for ventilation modifications or prohibit DIY installations. Compliance protects both your home value and your family.
Frequently Asked Questions About Cabinet Range Hoods
How much wider should a range hood be than the cooktop?
A range hood should be 3 to 6 inches wider than the cooktop on each side. This overhang ensures efficient capture of smoke, grease, and odors rising from the burners.
Can I build a custom wood cover over a standard hood insert?
Yes, you can build a custom wood cover using a 2×4 frame and finish panels. Ensure the hood insert has underside controls and maintain a 2-inch clearance for airflow.
What is the difference between vented and ventless range hoods?
Vented hoods exhaust air outside, removing odors and moisture effectively. Ventless hoods filter air through charcoal filters and recirculate it, which is less effective for heavy cooking.
Do I need a professional to install a range hood?
You may build the cover yourself, but a licensed professional should handle electrical wiring and duct connections. Local codes often require permits for these specific modifications.
What lighting works best for modern range hoods?
LED lighting is standard for modern hoods due to energy efficiency and low heat output. Recessed or backlit LED options provide excellent task and ambient illumination.
Key Takeaways for Your Cabinet Range Hood Project
Selecting the right cabinet range hood ideas involves balancing aesthetics with strict performance standards. Whether you choose a seamless built-in look or a bold industrial statement, proper ventilation and safety clearance are essential.
Focus on matching materials to your existing cabinetry while ensuring your system has adequate CFM power. Start by planning your dimensions carefully and consulting local codes before beginning construction.