You have selected the perfect cabinets, but those exposed raw ends can ruin the look of your room. Often ignored, these surfaces are prime opportunities to add style and function to your kitchen or bath design.
This guide explores top cabinet end panel ideas ranging from simple DIY fixes to high-end custom builds. You will learn how to choose materials, apply creative finishes, and execute professional construction techniques.
Choose the Right Base Material for Durability
Your material selection determines the stability and final appearance of your project. The right choice ensures your panel stays flat and looks great for years.
Unfinished Plywood with MDF Core
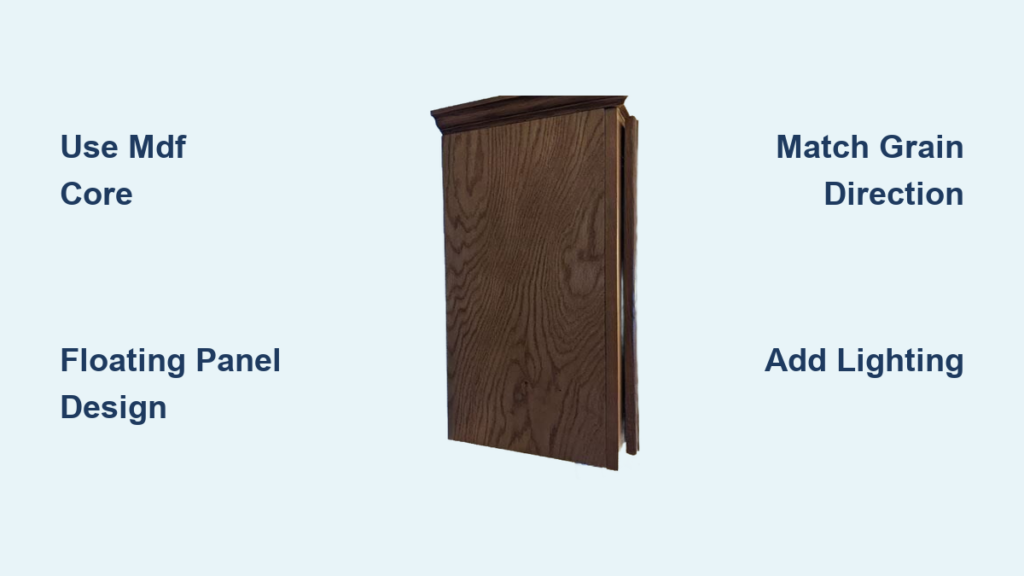
This option is the industry standard for refacing projects. It features an MDF core that prevents warping while a 1/4″ plywood veneer offers a sanded-ready surface.
The vertical grain pattern aligns perfectly with standard cabinet doors. You can find this in oak, maple, or cherry to match your existing cabinetry seamlessly.
- Best for: Budget-friendly upgrades and painted kitchens
- Install Time: 15 to 30 minutes per panel using glue and clamps
Solid Wood for Custom Frames
Solid wood is essential when building applied end panels that mimic raised-panel doors. You should use the same wood species as your cabinet doors for perfect continuity.
Always let solid wood acclimate to your space for at least 48 hours before cutting. This prevents future warping or cracking due to humidity changes.
Alternative Materials for Impact
Distinctive materials can transform a standard cabinet into a focal point. Consider these options for specific design goals:
- Glass: Clear, frosted, or etched styles add light and elegance.
- Metal: Stainless steel, copper, or iron suits industrial themes.
- Tile and Mosaic: Extends backsplash designs to cabinet ends.
- Reclaimed Wood: Offers rustic charm with unique grain patterns.
Design Ideas That Transform Cabinet Ends

Turn dead space into design moments with these functional approaches. These strategies work well for islands and exposed base cabinets.
Wooden Panel with Decorative Trim
Cover the raw end with a solid wood or plywood panel. Frame it with contrasting trim to echo your cabinet door details.
Paint the panel a bold color while keeping the trim white for contrast. This adds architectural depth without requiring complex joinery skills.
Floating Shelves as End Panels
Replace a solid end with open shelving to boost utility instantly. Install two vertical supports matching your cabinet finish and add floating shelves at staggered heights.
Keep items curated to avoid visual clutter. Two or three decorative pieces per level maintain a clean and intentional look.
Hinged or Sliding Storage Panels
Turn the end into hidden storage with moving parts. A hinged panel opens like a door to reveal spice racks or cleaning supplies.
A sliding panel glides sideways to conceal cords or trash bins. Use soft-close hinges or tracks for a premium feel and smooth operation.
Creative Surface Treatments for Visual Impact

The surface is your canvas for making a statement. Custom finishes can match your decor or create a deliberate contrast.
Painted or Stained Finish
Match your cabinets for a built-in look or choose a bold color to create a feature wall. Navy, emerald, or matte black works well for modern spaces.
Use the same sheen level as your cabinet doors for finish continuity. This ensures the end panel feels like an integrated part of the unit.
Accent Wall Patterns
Apply wallpaper, vinyl decals, or wood veneer patterns to the end panel. Geometric prints add modern energy while floral designs suit traditional kitchens.
Seal any paper-based products with clear polyurethane for durability. This protects the surface from moisture and daily wear in kitchen environments.
Tile or Mosaic Integration
Apply ceramic, porcelain, or stone tiles directly to the end panel. This creates a unified look when matched with your backsplash.
Use glass mosaic tiles near sinks for superior moisture resistance. Always seal grout lines annually to prevent staining and water damage.
Add Light and Transparency to Reduce Bulk
Break up visual mass and add ambiance with see-through or illuminated panels. These techniques make large cabinetry feel lighter.
Glass Insert Panels
Incorporate glass into a wood frame for partial visibility. Clear glass shows off internal items while frosted options provide privacy with soft light diffusion.
Pair clear glass with internal LED strip lights for a glowing effect. This works exceptionally well for displaying glassware or decorative items.
Built-In Lighting Integration
Embed LED strip lights behind or within the end panel structure. Edge lighting highlights panel texture and creates a sophisticated halo effect.
Use warm white bulbs between 2700K and 3000K for cozy kitchens. Run wiring through pre-drilled holes and hide power supplies in adjacent drawers.
Build a Custom Raised Panel End
Construct an applied end panel that matches your raised cabinet doors for a high-end look. This advanced method requires precision routing and assembly.
Frame Construction: Rails and Stiles
Build the frame using solid wood and a router table. Use a raised panel bit to route rail ends and a style bit for vertical stiles.
Run material upside down to mirror door profiles accurately. Test all cuts on scrap wood first to ensure a tight final fit.
Cut the Floating Panel
The center panel must float to allow for wood expansion. Set up a panel cutter to create a 1/4″ tongue on all edges.
Make gradual depth passes to avoid tear-out. Wear grippy gloves for safety when feeding material through the router bit.
Dry Fit and Sand the Scoop
Test the fit before applying any glue. The panel should fit tightly in the groove but still have room to move.
Sand the recessed area with 80, 120, and then 150 grit paper. The back of the panel does not need sanding since it remains hidden.
Accommodate Crown Molding
Oversize the top rail if your cabinet has crown molding. Add 1/4″ height to match top and bottom reveals for visual symmetry.
Mark glue zones 1/4″ up from the tongue. Avoid getting glue on the panel area to ensure it can still move freely.
Assemble with Space Balls
Allow for wood movement by using space balls. Place these small rubber balls in stile grooves before inserting the panel.
Glue only the frame joints within your marked zones. Clamp the assembly and let it cure overnight for maximum strength.
Finish with Roundover Edges
Use a 1/8″ roundover bit on the panel face for a finished look. Stop routing 4 inches from the top to preserve a square edge under the crown.
Sand edges with 150 grit paper for smoothness. Lightly break inside corners to prevent splintering during cleaning.
Installation and Final Fit Considerations

Proper installation ensures your new panel looks professional and functions correctly. Attention to detail here makes all the difference.
Measure Cabinet Depth
Standard base cabinets are 12″ deep. Adding a 1/2″ panel makes the total depth 12.5″.
This creates a soft decorative reveal. Ensure your appliances and countertops can accommodate this slight increase in depth.
Align with Cabinet Doors
Match the grain direction vertically for visual continuity. Paint or stain the panel to exact color specifications.
Test your finish on a scrap piece first. This confirms color accuracy before you commit to the final panel.
Final Sanding and Sealing
Sand the entire panel with 80, 120, and 150 grit paper. Wipe clean with a tack cloth to remove all dust.
Apply your chosen finish in a dust-free area. Re-seal unfinished wood annually in high-humidity areas to maintain protection.
Match the Right Idea to Your Project
Select the method that best fits your specific situation and skill level. Different projects demand different solutions.
The Island Upgrade
Exposed ends on islands deserve special attention. Floating shelves, glass inserts, or bold paint colors work best here.
The goal is to reduce visual weight while adding storage or light. Use materials like plywood with decorative edges or metal for impact.
The Refacing Project
Update old cabinets without full replacement using simple panels. Use 1/4″ unfinished plywood end panels in oak, maple, or cherry.
Paint all panels before installing for even coverage. This process takes under 30 minutes per panel and yields impressive results.
The High-End Custom Build
Luxury kitchens require seamless details. Build an applied raised panel with space balls and an oversized top rail.
You will need a router table, clamps, and precision measuring tools. The result looks like a built-in unit rather than an add-on.
Industrial or Modern Loft
Go bold with materials and lighting for these spaces. Stainless steel, iron, or backlit glass creates a sleek aesthetic.
Pair these materials with concrete countertops for full cohesion. Exposed fasteners and matte black finishes enhance the industrial vibe.
Avoid Common Mistakes During Installation
Small errors can ruin a professional look. Learn what to avoid to ensure success.
Gluing the Floating Panel
Never glue the center panel to the frame. Wood expands and contracts, which causes cracks if the panel is fixed in place.
Use space balls and glue only the frame joints. This allows the wood to move naturally without damaging the structure.
Ignoring Grain Direction
Mismatched grain makes panels look incorrect. Always install panels with vertical grain to match cabinet doors.
This simple alignment ensures a cohesive and professional appearance. It ties the end panel visually to the rest of the cabinetry.
Skipping the Dry Fit
Assuming measurements are perfect leads to misalignment. Dry assemble every custom panel before applying glue.
This step confirms fit and reveals any necessary adjustments. It saves time and materials in the long run.
Forgetting Crown Molding Clearance
The top rail must be oversized if crown molding is present. Add 1/4″ height and stop the roundover 4″ from the top.
This ensures the crown sits flush and square. Ignoring this step results in an uneven top edge that looks unfinished.
Frequently Asked Questions About Cabinet End Panels
What is the best material for DIY cabinet end panels?
Unfinished plywood with an MDF core is the best choice for most DIY projects. It resists warping, comes in matching wood species, and is easy to cut and finish.
How do I stop my cabinet end panel from cracking?
Use a floating panel design with space balls if building with solid wood. Never glue the center panel to the frame to allow for natural expansion and contraction.
Can I use tile on a cabinet end panel?
Yes, you can apply ceramic or stone tiles directly to a stable substrate like sealed MDF. This works well to extend a backsplash design to the cabinet end.
How much depth does an end panel add?
A standard 1/2″ panel adds about 0.5 inches to your cabinet depth. A 12-inch deep cabinet becomes 12.5 inches deep with the panel installed.
Do I need special tools to build a raised panel end?
Yes, you typically need a router table, raised panel bits, and clamps. Precision tools are required to create the tongue and groove joints for a professional fit.
Key Takeaways for Your Cabinet End Panel Ideas
Your cabinet ends offer a unique chance to blend style with function. Whether you choose simple unfinished plywood or a complex raised panel build, the right approach elevates your entire space.
Remember to account for wood movement, match your grain direction, and select materials that fit your design goals. With these cabinet end panel ideas, you can turn an overlooked detail into a stunning feature.
Start by measuring your space and selecting a material that matches your skill level. Then follow the steps above to create a finished look that lasts.