
Adding molding to your cabinets can transform an ordinary kitchen into a space that looks custom-built and high-end. Whether you’re refreshing dated cabinetry or finishing a new installation, the process of attaching molding requires precision, the right tools, and a solid understanding of joinery techniques. Many homeowners attempt this project only to struggle with gaps at corners, nails that split the wood, or pieces that simply don’t stay put over time.
This guide covers everything you need to know about attaching molding to cabinets successfully. You’ll learn about different molding styles, the essential tools for the job, how to measure and cut with accuracy, and the best methods for securing each piece. We’ll also tackle tricky corners, finishing touches, and common problems you might encounter along the way.
Select the Appropriate Molding Profile
Match Molding Style to Cabinet Design
Different cabinet styles call for different molding profiles. The right choice depends on the look you want and where the molding will be placed:
- Crown molding sits on top of upper cabinets for a polished, furniture-like appearance
- Light rail molding attaches beneath upper cabinets to conceal under-cabinet lighting fixtures
- Toe kick molding covers the gap between base cabinets and the floor
- Face frame molding adds decorative detail to the front edges of cabinet frames
- Quarter round or shoe molding finishes transitions between cabinets and adjacent surfaces
Choose a profile that complements your cabinet style. Ornate profiles suit traditional kitchens, while clean, simple lines work better in modern spaces.
Pick the Right Material for Your Needs
The material you select affects both appearance and ease of installation:
- Solid wood offers durability and can be stained to match existing cabinetry
- MDF (medium-density fiberboard) provides a smooth surface ideal for painting and resists warping
- Polyurethane is lightweight, moisture-resistant, and won’t crack or swell in humid conditions
For painted cabinets, MDF is often the smartest choice because it has no grain pattern and accepts paint beautifully. For stained finishes, solid wood allows you to match the cabinet color precisely.
Assemble the Necessary Tools and Fasteners

Gather Cutting and Measuring Equipment
Having the right tools on hand before you start will save time and frustration:
- Miter saw for precise angled cuts
- Measuring tape and pencil for accurate layout
- Level to verify alignment
- Safety glasses and dust mask for protection
- Clamps to hold pieces during assembly
A compound miter saw is strongly recommended for crown molding, as it allows you to make both miter and bevel cuts in one pass.
Choose Fasteners and Adhesives
For a secure attachment that lasts, you’ll want both adhesive and mechanical fasteners:
- 18-gauge brad nails in 1 to 1.5 inch lengths work well for most molding
- Construction adhesive provides a strong bond that prevents shifting
- Wood glue is useful for joining molding pieces at corners
- Painter’s caulk fills seams and gaps for a seamless finish
Using adhesive in combination with nails creates a much stronger hold than either method alone. The glue grips the surface while the nails hold the molding firmly in place until the adhesive cures.
Measure and Cut Molding With Precision
Take Accurate Cabinet Measurements
Never assume your cabinets are perfectly square or that walls are plumb. Measure each section individually:
- For crown molding, measure the horizontal run along the top of each cabinet
- For face frame molding, measure the height and width of each frame section
- Always measure at multiple points to catch any variations
Cut your molding pieces slightly long initially. You can trim them down during test fitting, but you cannot add material back once it’s cut.
Make Clean Miter Cuts
Set your miter saw to 45 degrees for corner joints. For straight runs, use a 90 degree cut. A stop block helps you make repeated cuts at identical lengths.
When cutting crown molding, position it in the saw exactly as it will sit on the cabinet. Crown molding requires both a miter angle and a bevel angle because it sits at an angle against the wall and cabinet top.
Pro Tip: Make test cuts on scrap pieces first to verify your saw settings before cutting your actual molding.
Secure Molding With Adhesive and Nails
Apply Adhesive and Position the Molding
Follow these steps for each piece of molding:
- Run a thin, continuous bead of construction adhesive along the back of the molding
- Press the molding firmly into position
- Check alignment with a level
- Secure with brad nails every 12 to 16 inches
- Angle nails slightly toward the cabinet frame or wall for better holding power
Wipe away any adhesive that squeezes out immediately with a damp cloth. Once it dries, it’s much harder to remove.
Fasten Crown Molding at the Correct Angle
Crown molding requires special attention because it bridges two surfaces:
- Position the molding at its spring angle against both the cabinet top and the wall
- Drive nails through the bottom edge into the cabinet crown
- Drive nails through the top edge into wall studs or blocking
If you don’t have blocking behind the wall surface, use trim screws with washers for a stronger hold. You can cover the screw heads with caulk after installation.
Handle Inside and Outside Corners Properly
Cope Inside Corners for a Flawless Fit
Coping is a technique that creates a tighter, more forgiving joint than a simple miter:
- Cut one piece square to length
- Cut the mating piece at a 45 degree miter
- Use a coping saw to remove the waste material, following the profile of the first piece
- Fit the coped piece over the square-cut piece
Coped joints accommodate walls that aren’t perfectly square. The coped piece overlaps the other piece, hiding any minor gaps.
Miter Outside Corners Cleanly
For outside corners where molding wraps around a protruding cabinet edge:
- Cut both pieces at 45 degrees, angled outward
- Test fit the pieces and sand lightly if needed
- Apply wood glue to the mitered faces
- Clamp or tape the joint together
- Nail through both pieces into the cabinet
Check that the outside corner forms a perfect 90 degree angle before the glue sets.
Fill Gaps and Finish for a Seamless Look
Fill Nail Holes and Small Gaps
After all molding is attached, take time to clean up the installation:
- Fill every nail hole with wood filler or spackle
- Allow the filler to dry completely
- Sand the filled areas smooth with fine-grit sandpaper
- Apply a second coat if the filler shrinks as it dries
For painted molding, use a filler that matches the paint color or a white filler that you’ll paint over.
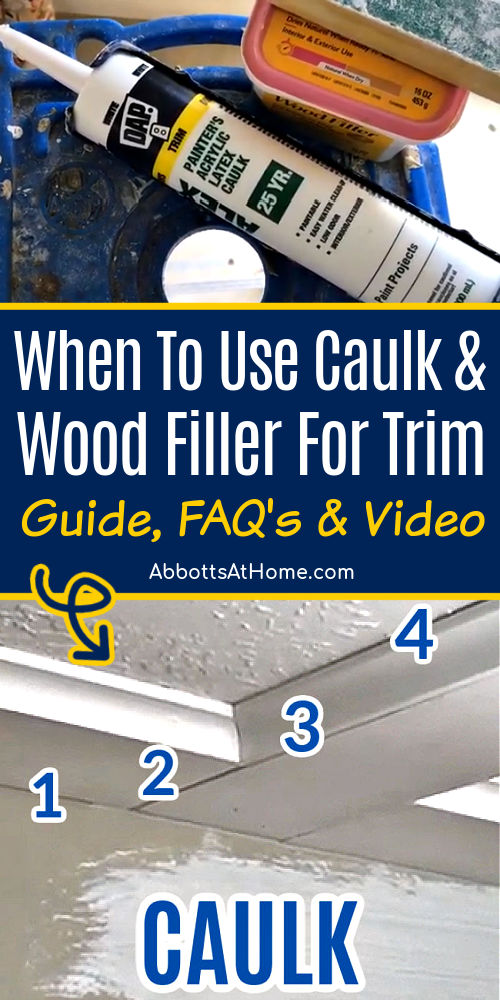
Caulk Seams and Joints
Painter’s caulk is your best friend for achieving a seamless appearance:
- Run a thin bead along inside corners
- Fill gaps where molding meets the wall or cabinet
- Smooth the caulk with a wet finger for a professional finish
Choose a caulk that matches your paint sheen. Use matte caulk for flat paint and satin caulk for eggshell or semi-gloss finishes.
Expert Note: Apply caulk after painting for easier cleanup. If you caulk before painting, the caulk will absorb paint differently than the surrounding surfaces.
Troubleshoot Common Installation Problems
Address Uneven Surfaces
Walls and cabinets are rarely perfectly flat. To compensate:
- Use thin shims behind molding in low spots
- Build up low areas with additional adhesive
- Sand down high spots on the cabinet surface
Check long runs with a level and adjust before the adhesive sets.
Work Around Obstructions
Molding sometimes needs to end at windows, appliances, or soffits:
- Create a return by cutting a small mitered piece that turns back into the wall
- Use a decorative block to cap the end of the molding
- Avoid leaving molding ends floating in open space
Returns look more professional and prevent the molding from catching on things.
Repair Loose or Damaged Molding
If a piece of molding comes loose over time:
- Remove the loose piece carefully
- Scrape away old adhesive and debris
- Apply fresh construction adhesive
- Re-nail the piece and clamp it until the adhesive cures
- Re-caulk and touch up paint as needed
Address loose molding promptly to prevent further damage.
Frequently Asked Questions About Attaching Molding to Cabinets
What type of nails should I use for cabinet molding?
18-gauge brad nails in 1 to 1.5 inch lengths are ideal for most cabinet molding. They’re thin enough to avoid splitting the wood but strong enough to hold the molding securely. For hardwood molding, pre-drill nail holes to prevent splitting.
Can I attach molding with adhesive only?
While construction adhesive alone can hold molding, combining it with nails provides a much stronger and more durable attachment. The adhesive prevents movement and gaps over time, while nails hold the molding in place while the adhesive cures.
How do I cut crown molding for cabinet installation?
Crown molding requires both a miter angle and a bevel angle because it sits at an angle against two surfaces. Position the molding in your miter saw exactly as it will sit on the cabinet, then make your cuts. Test cuts on scrap pieces are essential to verify your settings.
Should I cope or miter inside corners?
Coping is generally preferred for inside corners because it accommodates walls that aren’t perfectly square. A coped joint uses one piece cut square and the other cut to follow the profile of the first. This creates a tighter fit and is more forgiving of imperfections.
How do I fill gaps between molding and the wall?
Use painter’s caulk to fill gaps between molding and the wall or cabinet surface. Apply a thin bead, smooth it with a wet finger, and allow it to dry before painting. For larger gaps, use a combination of adhesive and shims before caulking.
What’s the best way to attach molding to laminate cabinets?
For laminate cabinets, use a combination of construction adhesive and brad nails. The adhesive provides the primary hold since laminate surfaces are smooth and non-porous. Score the laminate surface slightly with sandpaper to help the adhesive grip better.
Key Takeaways for Attaching Molding to Cabinets
Attaching molding to cabinets is a project that rewards careful preparation and precise execution. The most important factors are accurate measurement, proper cutting techniques, and using both adhesive and nails for a secure hold. Taking time to cope inside corners and miter outside corners properly will give your installation a professional appearance.
The finishing details matter just as much as the initial attachment. Filling nail holes, caulking seams, and smoothing joints transform a functional installation into one that looks like it was done by a professional craftsman. These steps take extra time but make all the difference in the final result.
Start your project by selecting the right molding profile and gathering all necessary tools. Measure twice, cut once, and test fit each piece before securing it permanently. With patience and attention to detail, you’ll achieve cabinet molding that enhances your space for years to come.


