

Building custom storage saves money and maximizes space, but many homeowners hesitate because they lack professional tools. Learning how to build cabinets from plywood is easier than you think when you use modern techniques like glue-free assembly and optimized cutting strategies.
This guide walks you through selecting Baltic birch, cutting precise joints, and installing hardware for a flawless finish. You will discover how to create durable frameless units that rival store-bought quality using just a track saw and basic hand tools.
Choose Frameless Design for Faster Construction
Frameless construction offers a clean modern look while significantly reducing build time compared to traditional face-frame styles. This method attaches doors directly to the side panels, eliminating the need for complex front framing and extra material costs.
Why Frameless Beats Face Frame for DIY
Frameless cabinets require fewer parts and less precision cutting, making them ideal for first-time builders. You avoid the tedious process of gluing and clamping a separate front frame, which often leads to alignment errors. Most contemporary kitchens use this Euro-style approach for its efficiency and sleek appearance.
Adapt Plans for Your Space
You can easily modify frameless dimensions to fit awkward corners or specific appliance requirements. If you prefer a traditional look later, you can attach a simple wooden frame to the front of the finished box. Starting with a frameless base gives you the flexibility to customize without compromising structural integrity.
Design Layouts Using Digital Tools
Creating a digital model before cutting wood prevents costly mistakes and ensures every component fits perfectly. Software like SketchUp allows you to visualize the final installation and generate exact measurements for your materials.
Visualize Dimensions and Spacing
Digital design helps you test how cabinets fit around sinks, appliances, and wall irregularities before you make a single cut. You can adjust heights and depths instantly to accommodate unique room features or plumbing obstacles. This step is crucial for avoiding gaps or misalignments during the final installation phase.
Generate Accurate Cut Lists
Use the Cut List Plugin to arrange your parts on standard 4×8 sheets for maximum efficiency. This tool shows you how to minimize waste, often saving nearly half a sheet of expensive plywood per project. Accurate lists ensure you buy only what you need and reduce trip time to the lumber yard.
Select Baltic Birch for Durability

Choosing the right material determines the longevity and appearance of your finished cabinetry. High-quality plywood provides the strength needed for heavy loads while offering a smooth surface for painting or staining.
Benefits of ¾-Inch Baltic Birch
This premium material features 13 plies that provide superior strength and resistance to warping compared to standard construction plywood. Its smooth, void-free faces require minimal sanding, and the factory edges are clean enough for visible applications. Grade A or Quadruple B options offer excellent results even if you plan to paint the final units.
Use Thin Panels for Backs
Install ¼-inch Baltic birch for back panels to add rigidity without unnecessary weight. These thin panels lock the cabinet box square and prevent racking once mounted to the wall. Never skip the back panel, as it is essential for maintaining the structural shape of your custom cabinets.
Optimize Cuts to Reduce Waste
Efficient cutting strategies save money on materials and ensure your cabinet sides have clean, professional edges. Proper planning allows you to maximize yield from every sheet of plywood you purchase.
Trim Rough Factory Edges
Always cut side panels slightly smaller than standard dimensions to remove rough, splintered edges from shipping. Cut base cabinet sides to 23¾ inches instead of 24 inches for a pristine finish. Upper cabinet sides should be cut to 11¾ inches to ensure straight, clean lines.
Follow a Strategic Cutting Order
Cross-cut all pieces to length first, then rip them to their final width in a single pass. Cut stretchers, nailers, and braces from the remaining offcuts to utilize every inch of material. This method keeps dimensions consistent across all units and dramatically reduces scrap waste.
Gather Essential Cutting and Layout Tools
You do not need a fully equipped workshop to build professional cabinets, but specific tools are non-negotiable for accuracy. Investing in the right equipment ensures straight cuts and precise hardware placement.
Must-Have Cutting Equipment
A track saw is the best investment for straight, splinter-free cuts on large sheets of plywood. If a track saw is out of budget, a circular saw with a straight edge guide works well for occasional projects. You will also need a jigsaw for cutting toe kicks and a miter saw for trimming braces.
Critical Measuring and Layout Aids
Accuracy depends on using a tape measure, level, and speed square for every measurement. Create a story stick, which is a 3-inch wide strip matching your door height, to mark hinge positions consistently. Shelf pin jigs and overlay hinge jigs ensure holes and hardware are drilled with perfect alignment every time.
Assemble Cabinets Without Wood Glue
Modern screw technology allows you to build strong cabinets without the mess and wait time of wood glue. This glue-free method is particularly effective for pre-finished or laminate plywood where adhesives struggle to bond.
Advantages of Screw-Only Assembly
Cabinets built this way transfer load through the structure and wall anchors rather than relying solely on joint adhesives. This approach eliminates clamping time and drying waits, speeding up your project significantly. Real-world testing shows zero failures over four years using this mechanical fastening method.
Use Spax Screws for Strong Joints
Spax screws are self-tapping and drive flush without splitting ¾-inch plywood, making them ideal for this application. Drive one screw every 6 to 8 inches along the joints where sides meet the top and bottom. These corrosion-resistant fasteners provide incredible holding power without the need for pre-drilling.
Step-by-Step Assembly Process
- Tack panels together temporarily using 1-inch brad nails or narrow-crown staples.
- Drive Spax screws through the side panels into the top and bottom pieces.
- Install stretchers at the top and back, securing each end with two screws.
- Attach the ¼-inch back panel with staples every 6 to 8 inches to square the box.
- If the bottom panel bows, screw the corners first then tap the center flat before tightening.
Utilize Pocket Holes for Specific Joints
Pocket holes offer a fast and strong solution for attaching trim pieces and face frames where screws might be visible. This technique is excellent for joining 2×4 base frames to the underside of cabinet boxes.
Best Applications for Pocket Joinery
Use pocket holes when attaching front trim to the cabinet carcass or securing face frames in traditional designs. They provide strong connections without requiring extensive clamping during assembly. This method is also perfect for joining side panels to tops in face-frame builds.
Drilling and Assembly Tips
Drill holes on both sides of the joint and the base to ensure a secure connection. Extend front holes to the top so you can fasten trim pieces flush with the cabinet face. Clamp pieces firmly before driving screws to prevent any misalignment or gaps.
Cut Dado Joints for Maximum Strength
Dado joints create a high-end, rock-solid connection that locks all parts of the cabinet in perfect alignment. This method is ideal for frameless cabinets where structural integrity is paramount.
Creating Dado Grooves on a Table Saw
Cut a ¾-inch wide by ⅜-inch deep groove in the side panels to accept the bottom and top braces. Set your table saw fence to ¾ inch and blade height to ⅜ inch for accurate cuts. Make three passes to clear the groove: one on each side and one to remove the center material.
Locking the Box Square with Back Panels
Slide the ¼-inch back panel into the dado groove to lock the entire box structure square. This joint configuration ensures that the cabinet remains rigid during transport and installation. Back braces can also be inset into these grooves to serve as robust wall anchors.
Apply Edge Banding for Professional Edges
Exposed plywood layers on frameless cabinets look unfinished without proper edge treatment. Iron-on edge banding hides these layers and creates the appearance of solid wood.
Application and Trimming Techniques
Cut the banding slightly longer than needed and apply heat with an iron just until the adhesive melts. Let the banding cool for 10 minutes to ensure a full bond before attempting to trim it. Trim the ends with a razor blade and shave off the bulk material using a block plane.
Sanding for a Smooth Finish
Sand the edge with 180 to 220-grit paper to round it slightly and blend it with the face veneer. Always use a block plane to remove bulk material before sanding to avoid tearing the veneer. This process results in a smooth, seamless edge that looks factory-made.
Build a Separate 2×4 Base Structure
Constructing a separate base from 2×4 lumber saves expensive plywood and simplifies installation on uneven floors. This method eliminates the need to cut complex toe kicks directly into your cabinet sides.
Constructing the 2×4 Foundation
Cut two 2x4s to match the width of your cabinet and attach them to the underside using pocket holes. Screw directly through these 2x4s into the floor to anchor the cabinet securely. This approach provides a solid, level foundation that adapts easily to floor irregularities.
Advantages of the 2×4 Method
This technique saves material costs and makes leveling much easier in older homes with sloping floors. It provides strong anchor points that prevent the cabinet from shifting over time. The separate base also simplifies the installation process by allowing you to level the frame before setting the box.
Reinforce Sink and Upper Cabinets
Heavy sinks and wall-mounted units require extra support to prevent sagging or failure under load. Proper reinforcement ensures your cabinets remain sturdy and functional for decades.
Supporting Heavy Farmhouse Sinks
Install headers running front-to-back under the sink opening to support the weight of water and ceramic. Place the sink upside down on the cabinet to mark exact support locations for maximum stability. Add a plywood base beneath the sink area to ensure a flat, level surface.
Strengthening Wall-Mounted Units
Include top and bottom stretchers in upper cabinets to maintain rigidity while mounted on the wall. Use a ¾-inch plywood spacer during assembly to keep gaps consistent and aligned. Add a slight overhang to shelves so they sit flush with the front trim for a polished look.
Install Hardware with Precision Jigs
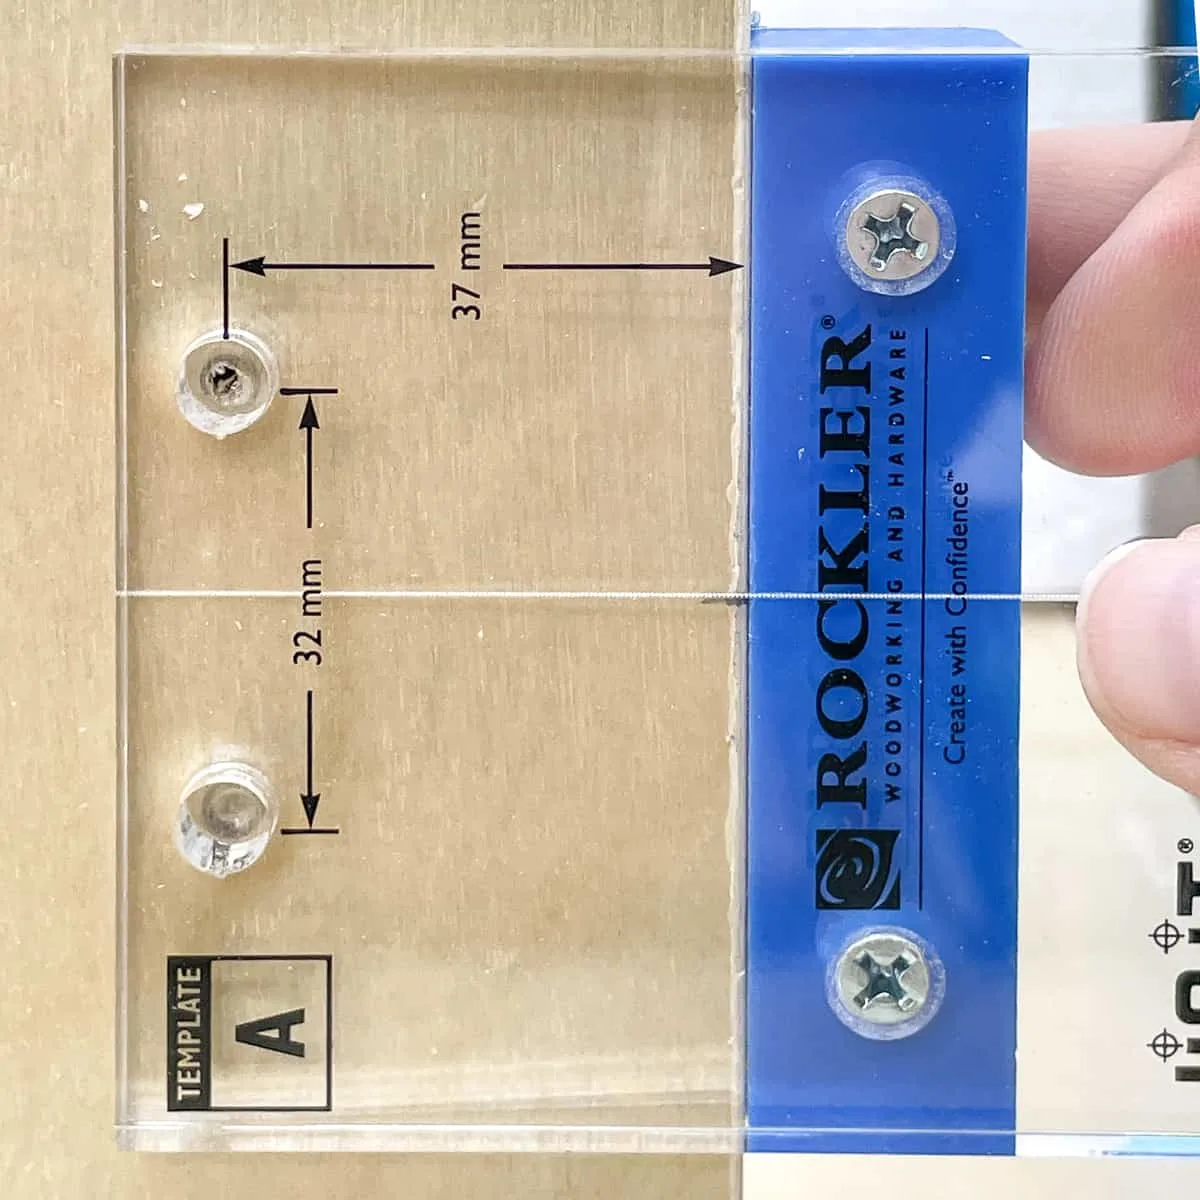
Proper hardware installation is the difference between a DIY project and a professional finish. Using jigs ensures that hinges and drawers function smoothly and align perfectly.
Mounting Overlay Hinges Correctly
Mark 4 inches from the door edge and transfer this measurement to the cabinet interior for hinge placement. Use a self-centering bit and an overlay jig to drill precise holes for soft-close hinges. Create a story stick to replicate these positions across all cabinets for uniform gaps.
Setting Drawer Slides Accurately
Use a dedicated drawer slide jig to ensure perfect alignment for smooth drawer operation. Drill with a 5mm bit and stop collar to avoid drilling through the cabinet sides accidentally. Install the bottom set of slides first, drilling the last hole manually if the jig is too short.
Final Thoughts on Building Plywood Cabinets
Building your own storage solutions offers unmatched customization and significant cost savings compared to buying pre-made units. By choosing how to build cabinets from plywood using frameless designs, optimized cuts, and glue-free assembly, you create durable furniture that fits your space perfectly. Remember that precise measurements, quality Baltic birch, and the right jigs are the keys to a professional result.
Start with a simple base cabinet to practice these techniques before tackling a full kitchen run. With careful planning and the right approach, you can build beautiful, long-lasting cabinets that enhance your home’s value and functionality.
Frequently Asked Questions About Building Plywood Cabinets
What is the best type of plywood for building cabinets?
¾-inch Baltic birch is the top choice due to its 13-ply construction, strength, and smooth edges. It resists warping better than standard plywood and requires less finishing work.
Can I build cabinets without a table saw?
Yes, you can use a track saw or a circular saw with a straight edge guide to make accurate cuts. A jigsaw is helpful for cutting toe kicks, and a miter saw works for trimming braces.
Do I need to use wood glue when assembling cabinets?
No, modern self-tapping screws like Spax provide sufficient strength without glue. This glue-free method is ideal for pre-finished materials and eliminates drying time.
How do I ensure my cabinet boxes are perfectly square?
Attach a ¼-inch back panel to the rear of the box to lock the structure in place. Using dado joints for the back panel also helps maintain squareness during assembly.
What is the standard height for base cabinets?
Standard base cabinets have a box height of 34½ inches, which equals 36 inches total with a 1½-inch countertop. This height provides a comfortable working surface for most users.
How can I hide screw holes on the sides of end cabinets?
Attach a finished-in panel, which is an extra piece of plywood, to the exposed side of the end cabinet. This covers all screws and joints, giving the unit a built-in appearance.


