
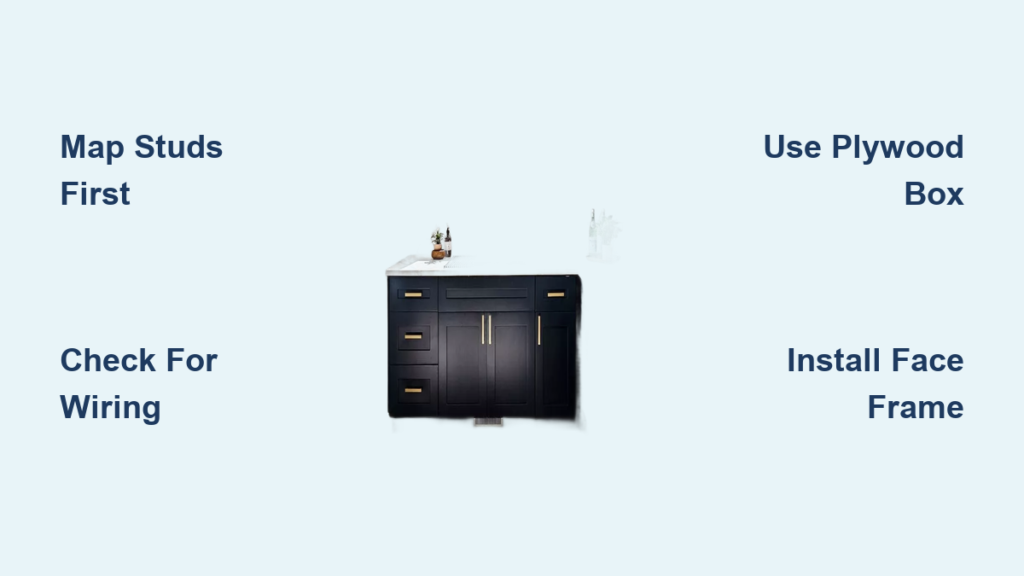
You have likely seen sleek storage tucked neatly into bathroom or kitchen walls, looking as if it were always part of the architecture. Building these units yourself maximizes space without sacrificing style, and learning how to build recessed cabinets in walls is more achievable than you might think with the right planning.
This guide walks you through assessing wall cavities, selecting durable materials, and assembling a sturdy box that fits flush with your drywall. You will discover how to navigate hidden wiring, frame precise openings, and apply professional finishes that blend seamlessly with your existing decor.
Assess the Wall Cavity Before Cutting
Successful installation begins with a thorough analysis of the target wall cavity to ensure clear space within the frame. You must map stud locations and inspect for hidden obstructions before making any cuts to the drywall.
Map Stud Locations Accurately
Use a stud finder to locate framing members, noting that spacing often varies from the standard 16 inches on center. Mark both edges of each stud with a pencil to determine the exact width available for your cabinet box. If studs are closer together, you must design a narrower unit to fit within that specific bay.
Inspect for Hidden Obstructions
Turn off power at the breaker and cut a small inspection hole to look inside the wall with a flashlight. Check for electrical wiring running horizontally, plumbing pipes, or HVAC ducts that could block your planned depth. If wiring crosses your path, you must either reduce the cabinet depth or hire a licensed electrician to reroute the lines safely.
Measure Depth and Clearance
Standard interior walls offer about 3.5 inches of depth inside the stud bay, though thicker partition walls allow more. For deeper storage needs, the cabinet will extend beyond the stud cavity, requiring you to recess only part of the box while keeping the face flush. Always check nearby fixtures like light switches that may require raising the cabinet position.
Choose Durable Materials for Construction
Your cabinet’s longevity depends on selecting strong plywood for the box and solid wood for the visible face frame. Avoid particleboard or MDF as they swell with moisture and lack the strength to hold screws securely over time.
Select Strong Plywood for the Box
Use ½-inch birch plywood for the main structure because it resists warping and handles fasteners well. Baltic birch is an excellent choice for doors and visible parts due to its high density and clean edges. If you must use 3/8-inch scrap plywood to save money, reinforce joints with glued ½-inch strips to ensure stability.
Pick Face Frame Wood Wisely
The face frame meets the wall and requires solid wood for a clean, paintable surface. Poplar is ideal for painted finishes because it has minimal grain, while white birch works best if you plan to stain the unit to match existing woodwork. Cut these pieces slightly oversized and plane the edges smooth before assembly for a perfect fit.
Stock Up on Key Fasteners
You need a mix of mechanical and chemical bonds to build a sturdy unit that lasts. Use Tite Bond #2 wood glue for structural joints and construction adhesive to bond the cabinet to the wall opening without visible screws. Pocket screws work well for box assembly, while brad nails speed up the face frame installation.
Build the Cabinet Box Structure
The box serves as the core structure, so build it slightly oversized initially and trim it later for a perfect fit. Precise cutting and square assembly are critical for a professional result.
Cut Panels to Size
Cut the sides, top, bottom, and back from ½-inch birch plywood, making each piece 1/8 inch larger than final dimensions. Use a circular saw with a straightedge guide or a table saw to ensure clean, straight cuts on all panels. Label each piece clearly to avoid confusion during the assembly process.
Assemble with Glue and Clamps
Lay the bottom piece flat and apply wood glue to the edges where the sides will attach. Clamp the sides vertically and check all four corners with a trued square to ensure they are exactly 90 degrees before driving fasteners. Reinforce the joints with pocket screws from the inside or use brad nails and glue for faster assembly.
Install the Back Panel
The back panel adds essential rigidity to the structure and can be rabbeted into a groove or flush-mounted. Ensure the box remains square after installing the back by measuring diagonally to confirm both corners match. A square box prevents door alignment issues later in the project.
Construct the Face Frame
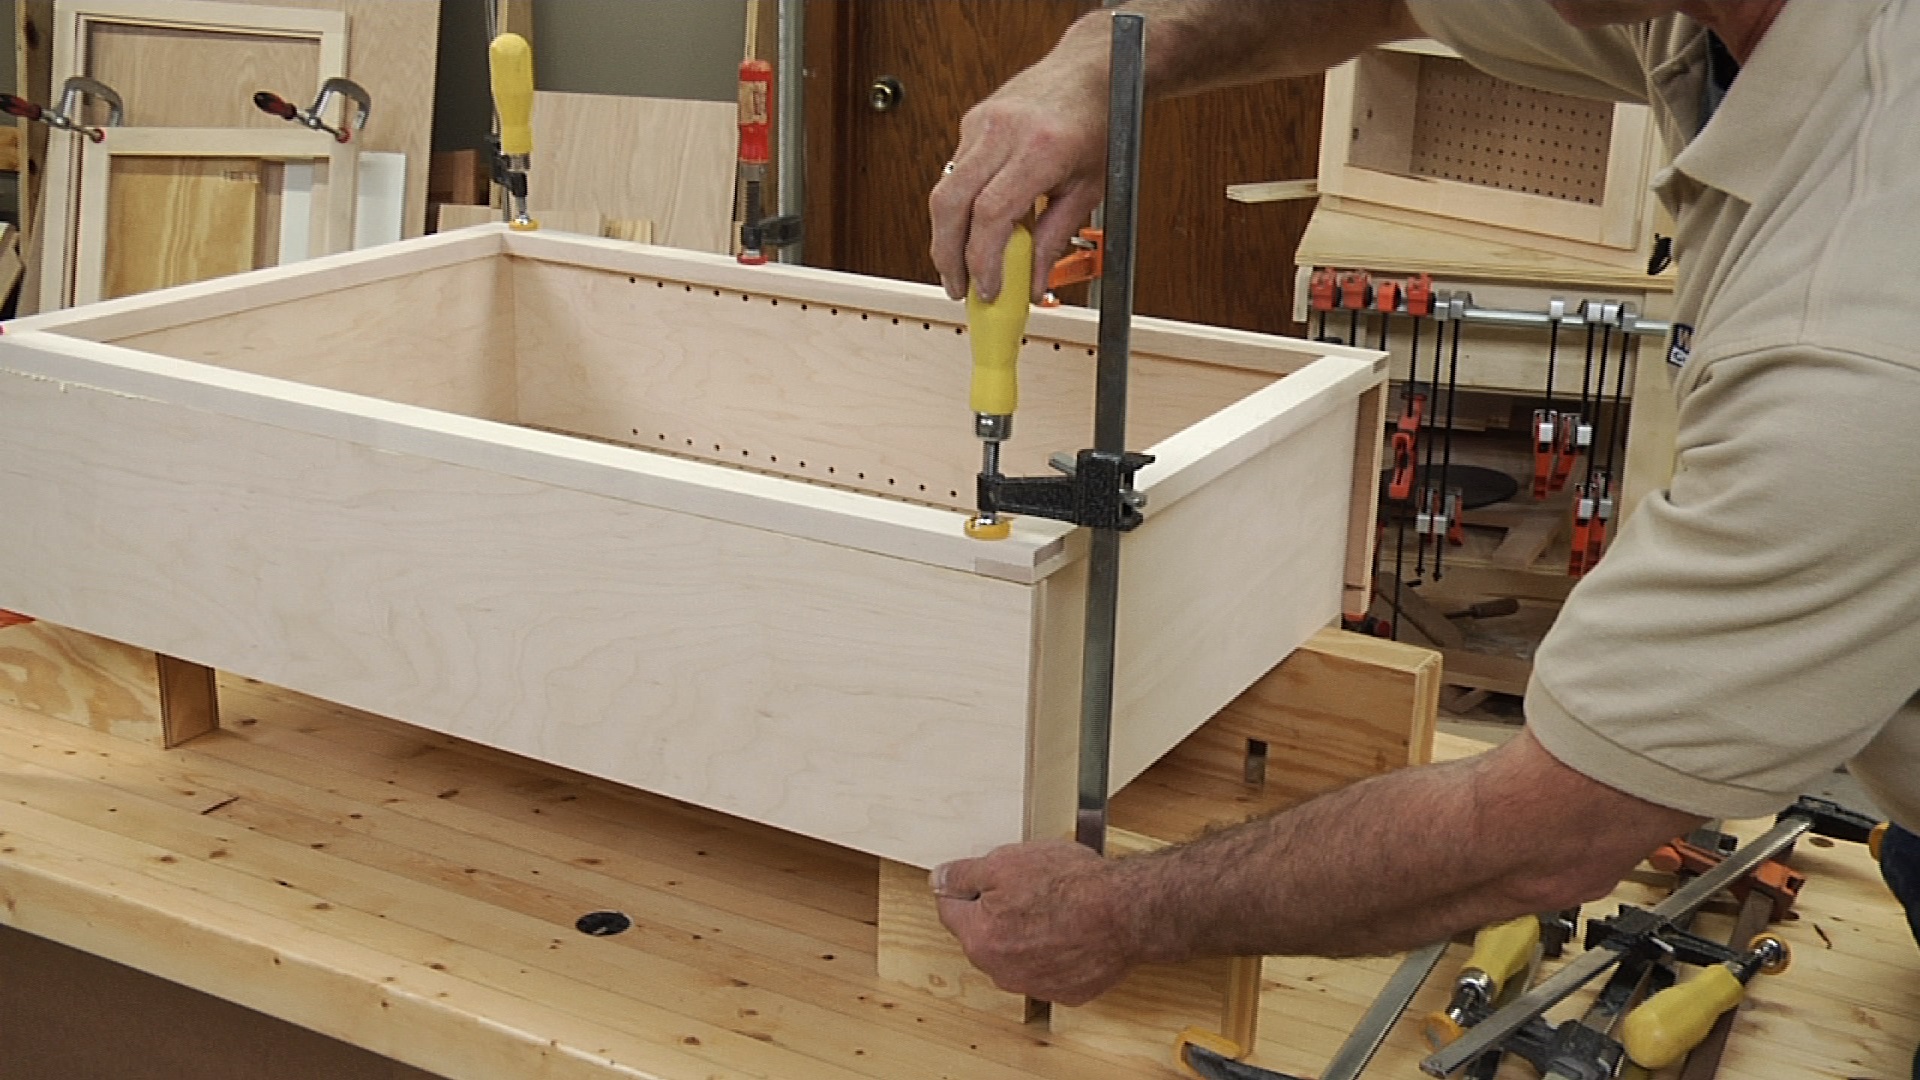
The face frame hides the plywood edges and provides a mounting surface that blends with your wall. It requires precise cutting and assembly to ensure a seamless look.
Cut and Plane Frame Pieces
Cut stiles and rails from ¾-inch poplar, ensuring they are 1/8 inch oversized for final trimming. Run the edges through a thickness planer to remove saw marks and guarantee smooth glue joints. This step ensures the frame sits perfectly flat against the wall surface.
Assemble and Attach the Frame
Glue and nail the frame pieces together on a flat surface, using clamps to keep joints tight and square. For double-door configurations, include a fixed mid-frame to split the opening evenly and add strength. Attach the completed frame to the box from the back using countersunk screws or construction adhesive to avoid visible holes on the front.
Add Doors with Floating Panels
Doors should match the face frame style, typically using a frame-and-panel design for a custom appearance. Proper machining ensures they operate smoothly and look professional.
Use a Template for Consistency
Create a router template for rail and stile profiles to save time and ensure all doors match perfectly. Label the template with the bit type, RPM setting, and feed direction for repeatable results. This preparation prevents errors during the machining process.
Machine the Panel Groove First
Use a router table with a panel-raising bit to cut the groove in the rail and stile first. Follow this with a second pass to shape the outer profile, using a push block to keep your hands safe and prevent kickback. Cutting rails slightly longer allows you to trim off any tear-out after machining.
Fit the Panel with Expansion Room
Cut the Baltic birch panel 1/32 inch to 1/16 inch smaller than the frame opening on all sides to allow for wood movement. Never glue the panel into the frame, as it must float to avoid cracking when humidity changes. Only apply glue to the rail-to-stile joints during final assembly.
Plan Shelving and Internal Features
Shelving transforms a hollow box into functional storage, and you have options for adjustable or fixed configurations. Proper planning ensures your shelves are both sturdy and easy to adjust.
Install Adjustable Shelf Holes
Use a shelf-pin jig to drill evenly spaced holes in the side panels, typically keeping them 1 inch apart vertically. Drill these holes before final assembly and keep the top and bottom rows at least 1 inch from the edges. Alternatively, use countersunk screws directly into the sides for infinite height adjustment.
Add Fixed or Glass Shelves
For a premium look, install glass shelves cut slightly narrower than the cabinet width with a small front lip to prevent sliding. If using wood shelves, apply solid wood edging to the plywood and use spacer blocks during installation to keep levels even. These details elevate the functionality and appearance of the interior.
Prepare the Wall Opening
Cutting into the wall requires precision to ensure the cabinet fits snugly without damaging surrounding structures. Careful preparation prevents costly mistakes.
Cut Drywall Precisely
Use your cabinet box as a template to trace the outline on the wall, then score the line with a utility knife. Cut along the line with a drywall saw to remove the section cleanly. This method ensures the opening matches your cabinet dimensions exactly.
Modify Studs if Needed
If the opening is wider than one stud bay, you must cut out the drywall and remove the existing stud. Install a header and footer made from 2x4s to frame the new opening, reinforcing with jack studs if the span exceeds 16 inches. This structural support is vital for holding the cabinet weight.
Install a Drywall Platform
If you need to raise the cabinet to clear a light switch, build a platform from drywall scraps and secure it inside the cavity. Use construction adhesive to hold the platform in place, creating a solid base for the cabinet to sit on. This simple trick solves clearance issues without major reframing.
Mount the Cabinet Securely
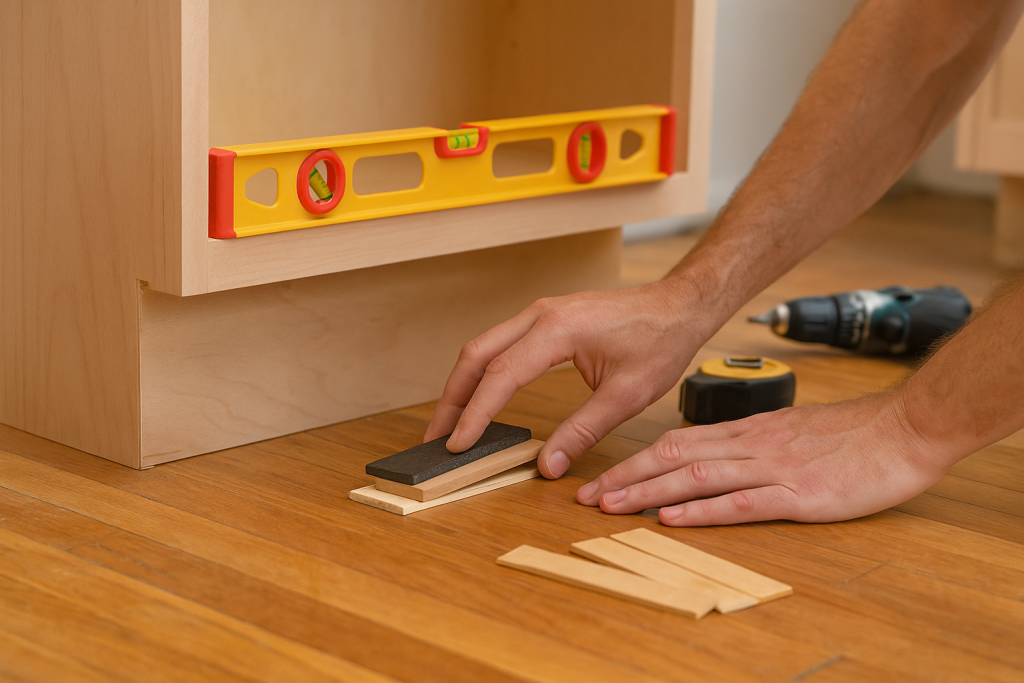
Once the opening is ready, install the cabinet using adhesive and shims to ensure it is level and flush. Proper mounting prevents movement and creates a seamless look.
Apply Construction Adhesive
Run a continuous bead of construction adhesive around the inside perimeter of the wall opening on both studs and drywall edges. This bonds the cabinet securely without requiring visible screws on the face frame. The adhesive provides strong holding power while keeping the front clean.
Insert and Level the Cabinet
Slide the cabinet into the opening and use shims at the top, bottom, and sides to adjust the position. Check with a level to ensure it is perfectly plumb and flush with the wall surface. Secure from the sides with screws into studs if needed, but avoid drilling through the face frame.
Seal Gaps with Caulk
Once the unit is level and secure, caulk all joints between the face frame and the drywall. Use paintable latex caulk and smooth it with a damp finger for a clean finish. Repaint over the caulk after it dries to achieve a seamless look.
Integrate Lighting and Mirrors

Adding lighting and mirrors enhances functionality and creates a high-end aesthetic. Safe wiring practices are essential when integrating electrical components.
Route Wires Safely
Turn off the power and drill a ½-inch hole in the top of the cabinet to feed wires through. If a 2×4 ledge exists inside, cut a notch to let wires pass without compression. Use plug-in LED strips for simplicity or hardwire with a transformer if you have electrical experience.
Install LED Strip Lighting
Run the strip along the top interior edge or behind a mirror for a soft ambient glow. Mount the strips with their adhesive backing and test the lights before finalizing the installation. Hide wires behind trim or in a routed channel for a clean appearance.
Cut and Mount Mirrors
Use salvaged or custom-cut mirrors, scoring them with a glass cutter and snapping them over a straight edge. Attach the mirror with epoxy, which bonds strongly and will not sag over time. Paint the back edge if it is visible from the front to maintain a polished look.
Finish with Professional Detailing
The final touches make the cabinet look custom-installed rather than DIY. Attention to sanding, priming, and painting ensures a factory-like finish.
Sand and Prime All Surfaces
Sand the face frame, doors, and shelves thoroughly, then wipe away all dust. Prime all wood parts, especially poplar, to block bleed-through and ensure even paint coverage. Apply two to three coats of spray paint for a smooth, professional finish.
Add Aluminum Accents
For a modern edge, laminate aluminum strips to poplar face frame pieces using contact cement. Apply the cement to both surfaces, let it dry, then press them together and trim the edges flush. Polish the aluminum to a shine for a sleek, contemporary look.
Install Hinges and Hardware
Quality hinges make doors feel premium and operate smoothly. Proper installation ensures long-term durability and alignment.
Choose Overlay Hinges
Select Blum ½-inch overlay hinges for a premium feel, ensuring the door is 1 inch wider than the opening. Use a Forstner bit to drill hinge mortises in the door according to manufacturer spacing specifications. These self-closing hinges provide a soft-dampened close.
Mount and Adjust
Screw the hinges to the door first, then align them with the face frame using a template for consistent placement. Once mounted, adjust the screws to fine-tune the gap and alignment. Proper adjustment ensures the doors close evenly and look professional.
Match Texture and Paint
Blending the cabinet into the wall requires matching the existing texture and paint color. This step makes the installation appear invisible.
Patch and Texture
Use orange peel texture spray to match the surrounding walls, testing it in an inconspicuous area first. Apply with light, even coats to replicate the existing surface pattern. This texture matching is crucial for a seamless blend.
Paint to Match
Use sample pots to test paint colors and roll or spray the frame and caulk lines. Feather the paint slightly onto the wall for a seamless transition. A perfect color match hides the cabinet edges effectively.
Prevent Common Mistakes
Avoiding common pitfalls ensures a flawless build and prevents costly repairs. Awareness of these issues saves time and frustration.
Don’t Mix Plywood Thicknesses
Using ½-inch and 3/8-inch plywood in the same box causes misalignment and fit issues. Stick to one thickness or account for the difference in your design. Consistency in material thickness prevents structural problems.
Wipe Glue Immediately
Dried glue blocks stain and paint, ruining the finish. Wipe excess glue with a damp cloth before it sets to ensure a clean surface. This simple step preserves the wood’s ability to accept finish.
Avoid Kickback When Routing
Use variable-speed routers and lower RPMs for larger bits to prevent kickback. Always use a push block to keep fingers safe and wood steady during machining. High-quality bits further reduce the risk of accidents.
Final Tips for Longevity
Keep your recessed cabinet looking great for years with simple maintenance. Regular care ensures the unit remains functional and attractive.
Maintain Hardware and Surfaces
Check Blum hinges annually for looseness and tighten screws if needed. Wipe aluminum accents with a microfiber cloth and polish occasionally to maintain luster. Clean mirrors with standard glass cleaner, avoiding ammonia near wood.
Replace LEDs Easily
If using plug-in strips, ensure the transformer remains accessible for replacement. Do not bury it behind drywall, as this makes future maintenance difficult. Easy access ensures you can update lighting without major demolition.
Frequently Asked Questions About Recessed Cabinets
How deep should a recessed cabinet be?
Standard interior walls offer about 3.5 inches of depth, but you can build deeper units that extend beyond the stud cavity. For narrow spaces, keep depth under 22 inches to ensure items remain reachable. Adjust depth based on available wall space and intended storage use.
Can I build a recessed cabinet if there is wiring in the wall?
Yes, but you must either reduce the cabinet depth to avoid the wiring or hire an electrician to reroute it. Never cut into or compress electrical cables during installation. Always turn off power before inspecting or working near electrical components.
What type of wood is best for the face frame?
Poplar is ideal for painted finishes due to its smooth grain, while white birch works best for stained projects. Solid lumber provides a cleaner edge than plywood for face frames. Choose based on whether you plan to paint or stain the final unit.
How do I prevent wood panels from cracking?
Cut floating panels 1/32 inch to 1/16 inch smaller than the frame opening to allow for expansion. Never glue the panel into the frame, as it needs room to move with humidity changes. Only glue the rail-to-stile joints during assembly.
What hinges work best for recessed cabinet doors?
Blum ½-inch overlay hinges are recommended for their smooth operation and self-closing features. Ensure the door is sized correctly for the overlay type you choose. Proper hinge selection contributes to a premium feel and long-term durability.
Key Takeaways for Building Recessed Cabinets
Building recessed cabinets in walls requires careful planning, precise material selection, and attention to detail to achieve a professional result. By assessing your wall cavity, choosing durable materials like birch plywood and poplar, and following safe construction methods, you can create custom storage that adds value to your home.
Start by mapping your studs and checking for obstructions, then build a square box with a floating panel door design. Finish with high-quality hinges, seamless texturing, and proper lighting integration for a truly custom look. With these steps, you can transform unused wall space into functional, stylish storage.


