
Dirty, stained, or greasy Formica cabinets can make an entire kitchen look dull and neglected. If you’ve been wondering how to clean Formica cabinets safely without damaging the surface, you’re not alone—thousands of homeowners search for effective, no-scratch solutions every year. Formica is a laminate material known for its durability and affordability, but it’s not impervious to grime, water spots, or discoloration over time. The good news? With the right tools and techniques, you can restore your cabinets to a like-new shine in under 30 minutes.
This guide walks you through every step of cleaning Formica cabinets, from daily maintenance to deep cleaning stubborn buildup, using common household products and safe methods. You’ll learn how to remove grease, eliminate water stains, avoid common cleaning mistakes, and keep your cabinets looking fresh for years. Whether you’re preparing for a deep clean, tackling kitchen splatter, or maintaining a newly installed cabinet set, these proven strategies will deliver streak-free, damage-free results.
Daily Cleaning Routine
Cleaning Formica cabinets daily keeps grime from building up and reduces the need for heavy scrubbing later. A quick wipe-down takes less than five minutes and maintains the laminate’s finish.
Use a Damp Microfiber Cloth
Wipe cabinet surfaces with a soft, damp microfiber cloth after cooking to remove grease and fingerprints. Microfiber traps dust and oil without scratching, unlike paper towels or rough sponges. Don’t soak the cloth, as excess water can seep into seams and edges, causing swelling or delamination over time.
Mix a Mild Cleaning Solution
For a gentle daily cleaner, combine:
• 1 quart warm water
• 1 teaspoon dish soap (like Dawn or Palmolive)
Mix in a spray bottle and apply lightly to the cloth, not directly on the cabinet. Spray-and-wipe methods can lead to moisture buildup around hinges and joints. Always dry with a second clean, dry microfiber towel to prevent water spots.
Deep Cleaning for Built-Up Grime
Over time, kitchen oils, food splatter, and dust accumulate on cabinet fronts, especially near the stove. A weekly or monthly deep clean removes this residue safely.
Remove Grease and Sticky Residue
Grease buildup around handles and edges requires a slightly stronger solution:
• 1 cup warm water
• 1 tablespoon white vinegar
• 1 tablespoon baking soda
• 1 teaspoon dish soap
Mix in a bowl to form a foaming paste. Apply with a soft sponge and gently rub greasy areas in circular motions. Let sit for 2 to 3 minutes, then wipe clean with a damp cloth. Baking soda acts as a mild abrasive without scratching, while vinegar cuts through oil.
Pro Tip: For sticky spots from spilled syrup or dried food, place a warm, damp cloth over the area for 1 to 2 minutes to soften the residue before wiping.
Tackle Discoloration and Water Stains
White or cloudy stains often come from water exposure or harsh cleaners. To restore clarity:
• Apply a small amount of non-gel toothpaste (white, not blue) to a soft cloth
• Gently buff the stained area in circular motions
• Wipe clean with a damp cloth, then dry
Toothpaste contains mild abrasives that polish the surface without damaging the laminate. Alternatively, use a commercial laminate polish for frequent maintenance.
Handle and Hardware Care
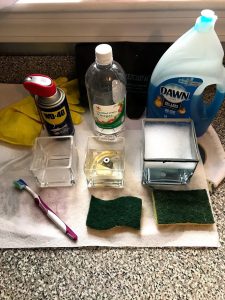
Cabinet handles and knobs collect oils from hands and can tarnish or discolor over time. Cleaning them properly prevents transfer of grime to the cabinet surface.
Clean Metal and Plastic Handles
Remove hardware if possible by checking for screws on the inside. Soak in warm, soapy water for 10 minutes. Use an old toothbrush to scrub crevices. Dry thoroughly before reattaching to prevent moisture damage.
If hardware stays in place, wrap a cloth around the toothbrush bristles and wipe around the base to remove buildup.
Avoid Damaging Cleaners and Tools
Formica is durable but not scratch- or chemical-proof. Some common cleaning products can ruin the finish permanently.
Never Use Abrasive Scrubbers
Steel wool, scrub pads, and stiff-bristled brushes will scratch the laminate surface. Even non-scratch sponges with green scrub layers can dull the finish over time.
Use instead: Soft sponges, microfiber cloths, or melamine foam with light pressure.
Skip Harsh Chemicals
Avoid oven cleaners, ammonia-based sprays, and undiluted bleach. These can strip the protective layer, causing fading or yellowing.
Acetone and paint thinner are especially dangerous, as even brief contact can dissolve the laminate surface.
Use a Magic Eraser Carefully
A melamine foam eraser effectively removes scuff marks, crayon, and stubborn stains.
Test First on Hidden Area
Before using, test on an inside corner or back edge. Wet the eraser slightly and rub gently. If the surface dulls or changes color, discontinue use.
Apply Light Pressure Only
Pressing too hard removes the glossy finish and leaves flat, worn patches. Use short strokes and follow up with a damp cloth to remove residue.
Expert Note: Magic erasers work by micro-abrading the surface. Think of them as ultra-fine sandpaper, effective but potentially damaging if misused.
Prevent Future Buildup
Keeping Formica cabinets clean is easier with a few preventive habits. A little effort goes a long way in maintaining appearance and longevity.
Wipe Spills Immediately
Clean splashes, especially from acidic foods like tomato sauce, vinegar, and citrus, as soon as possible. Prolonged exposure can etch the surface or cause discoloration.
Apply Cabinet Polish Occasionally
Use a laminate-safe polish every 2 to 3 months to enhance shine and repel dust. Apply with a microfiber cloth in circular motions, then buff lightly.
Avoid furniture polishes containing silicone, which can leave a hazy buildup over time.
Address Scratches and Chips
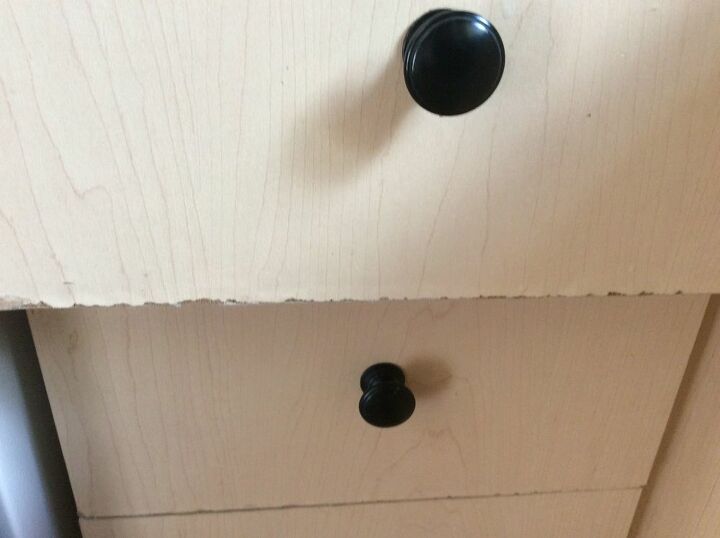
Minor surface scratches are common but can be minimized with simple fixes.
Hide Fine Scratches
For light surface marks, apply a small amount of petroleum jelly or mineral oil to a soft cloth and rub into the scratch. It fills the groove and reduces visibility.
Repair Small Chips
If the laminate has a chip, use a Formica repair kit with color-matched putty. Clean the area, apply the putty with a plastic tool, let dry, and smooth with fine sandpaper. Finish with a clear sealant to protect the patch.
Note: Deep damage may require professional refinishing or panel replacement.
Maintain Edges and Seams

The edges of Formica cabinets are vulnerable to moisture and peeling. Regular inspection helps catch problems early.
Check for Lifting Edges
Run your finger along the edges. If you feel a gap or lift, clean the area with isopropyl alcohol and use a laminate adhesive to reattach it. Clamp lightly with binder clips until dry.
Seal Exposed Edges
If replacing or cutting Formica, always seal edges with a matching edge band or clear acrylic sealer to prevent moisture intrusion.
When to Call a Professional
Most Formica cabinet issues can be handled at home, but some problems go beyond DIY fixes.
Extensive Delamination
If large sections of laminate are bubbling or peeling, the bond has failed. This often means moisture has penetrated the substrate. A professional may re-laminate or recommend replacement.
Persistent Mold or Odor
If cabinets smell musty or show black spots that don’t wipe away, mold may be growing behind the laminate. This requires professional assessment and possible removal.
Frequently Asked Questions About Cleaning Formica Cabinets
Can I use vinegar to clean Formica cabinets?
Yes, white vinegar is safe for Formica when diluted with water. Mix one part vinegar with three parts water for an effective grease cutter. Avoid using it undiluted, as prolonged exposure to acidic solutions can dull the finish over time.
Will baking soda scratch Formica surfaces?
Baking soda is a mild abrasive that won’t scratch Formica when used correctly. Always make a paste with water and apply with a soft cloth or sponge. Rub gently in circular motions rather than pressing hard.
How do I remove yellow stains from Formica cabinets?
Mix baking soda with water to form a paste and apply to the yellowed area. Let it sit for 5 minutes, then gently rub and rinse. For stubborn stains, use a small amount of non-gel toothpaste and buff in circular motions.
Can I use bleach to whiten Formica cabinets?
Undiluted bleach can damage Formica by stripping the protective layer. If you need to disinfect, use a diluted bleach solution of one tablespoon per gallon of water. Rinse thoroughly and dry immediately after cleaning.
How often should I deep clean Formica cabinets?
Deep clean your Formica cabinets every 2 to 4 weeks, depending on cooking frequency. Kitchens that see heavy frying or roasting may need weekly deep cleaning. Daily wipe-downs with a damp cloth help extend the time between deep cleans.
Is it safe to use magic erasers on Formica?
Melamine foam erasers are safe when used with light pressure and a damp surface. Always test on a hidden area first. Pressing too hard will remove the glossy finish and leave a dull patch.
Key Takeaways for Cleaning Your Formica Cabinets
Cleaning Formica cabinets doesn’t require expensive products or tools, just consistency and care. Stick to gentle cleaners like dish soap, vinegar, and baking soda, and always pair them with soft cloths or sponges to protect the laminate surface.
The most important habits are wiping spills immediately, drying surfaces after cleaning, and avoiding harsh chemicals or abrasive scrubbers. These simple practices prevent the majority of common problems, including water stains, grease buildup, and finish damage.
Start today by giving your cabinets a quick wipe-down with warm soapy water and a microfiber cloth. Then schedule a deep clean for the weekend using the baking soda and vinegar paste method. Your cabinets will stay bright, smooth, and stain-free for years to come.


