

Stained wood cabinets add warmth and character to any kitchen, but over time, they can accumulate grease, food residue, and stubborn stains that dull their appearance. If your cabinets look darkened or grimy, especially on the fronts where hands and cooking oils touch most, you’re not alone. Many homeowners struggle with how to safely clean stained wood without damaging the delicate finish. The good news is that with the right techniques and gentle products, you can restore their natural beauty and protect their longevity.
Cleaning stained wood cabinets isn’t just about aesthetics. It’s also essential for hygiene and home maintenance. Unlike painted surfaces, stained wood is more porous and sensitive to harsh chemicals, excess moisture, and abrasive scrubbing. That means standard cleaning tricks can do more harm than good. This guide walks you through proven, safe methods using everyday supplies like dish soap, vinegar, baking soda, and Murphy’s Oil Soap. You’ll learn step-by-step how to deep clean every surface, from cabinet interiors to hardware, while preserving the wood’s finish. Whether you’re tackling light grime or years of buildup, these strategies will deliver results without stripping, warping, or discoloring your cabinets.
Remove Cabinet Contents First
Before any cleaning begins, clear out everything inside the cabinets. Take out dishes, pantry items, spices, and small appliances. This gives you full access to all interior surfaces, allowing for a thorough inspection and cleaning. It also prevents items from getting wet or displaced during the process.
Use this opportunity to assess what you’re storing. Discard expired food, consolidate duplicates, and consider organizing with labeled bins or drawer dividers. A clean cabinet is the perfect time to upgrade your kitchen storage system for better efficiency and accessibility.
Dust Interior Surfaces Thoroughly
Wipe Away Loose Debris
Start by removing dust, cobwebs, and crumbs from shelves and corners. Use a dry microfiber cloth or a vacuum with a soft brush attachment. This dry step is critical because cleaning with water or solution over dusty surfaces can create scratches or smear grime into the wood grain.
Pay close attention to edges, back panels, and corners where dust accumulates unnoticed. If you see insect activity or signs of pests, address that before proceeding with wet cleaning. A clean, dry surface ensures the next steps are effective and safe for your wood finish.
Mix a Gentle Soap Solution
Use Warm Water and Mild Dish Soap
Create a cleaning solution with a few drops of mild dish soap, such as Dawn grease-cutting formula, and warm water. Mix it in a bucket or bowl. Avoid excessive suds because too much soap can leave residue that attracts more dirt later.
Always wring out your cloth well before wiping. Wood is vulnerable to water damage, so the cloth should be damp, not wet. This minimizes moisture exposure while still lifting everyday grime effectively.
Clean Interior Cabinet Walls
Wipe from Top to Bottom
Dip a soft microfiber cloth into the soapy solution and wring it out completely. Begin wiping interior walls and shelves, working from top to bottom to catch drips. Focus on areas with visible stains or grease buildup, especially near handles and edges.
For stubborn spots, apply a paste made of baking soda and water. Gently rub with a cloth or soft toothbrush, then wipe clean with a damp rag. Rinse the area lightly and dry immediately to prevent moisture absorption.
Clean Exterior Doors and Frames
Focus on High-Touch Areas
Exterior surfaces collect the most grease and fingerprints, particularly around handles and cabinet fronts. Use the same dish soap and warm water solution to clean doors, frames, and edges.
For heavy grease, use hot water with Dawn dish soap in a bucket. Apply with a rag, then follow with a clean, damp rag to rinse. Don’t skip rinsing because soap residue can cloud the finish over time.
Detail Tight Corners and Edges
Use Cotton Swabs and a Toothbrush
Crevices, molding, and corners trap grime that cloths can’t reach. Use cotton swabs for precision cleaning in narrow gaps and around decorative trim. A soft-bristled toothbrush works well for textured surfaces and hardware surrounds.
Replace swabs and rinse the brush frequently to avoid spreading dirt. This detail work makes a dramatic difference in overall appearance, especially on older or intricate cabinetry.
Remove and Clean Hardware
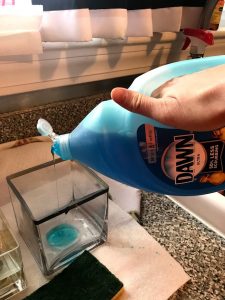
Soak Knobs and Pulls Separately
Take off cabinet knobs, pulls, and hinges if possible. Soak them in warm, soapy water for 10 to 15 minutes. Use an old toothbrush to scrub away built-up grime, then rinse and dry thoroughly with a soft towel.
Reattach hardware only when both the cabinet surface and hardware are completely dry. This prevents water spots and ensures a secure fit. If screws are corroded or loose, consider replacing them for a refreshed look.
Apply Vinegar Solution for Disinfecting
Kill Germs and Cut Grease Naturally
Mix equal parts white vinegar and water in a spray bottle. Lightly mist cabinet surfaces without soaking them, then wipe with a microfiber cloth. This step disinfects, deodorizes, and cuts through residual grease without harsh chemicals.
Vinegar doesn’t require rinsing and leaves no residue, making it ideal for final polishing. Repeat 2 to 3 times on heavily stained areas. Avoid using vinegar too frequently, as prolonged exposure may affect some finishes over time.
Try Murphy’s Oil Soap for Deep Cleaning

Condition While You Clean
Murphy’s Oil Soap is specially formulated for wood and safe for stained finishes. Dilute according to label instructions and apply with a soft cloth. It lifts grease effectively while adding light conditioning to the wood.
This method is excellent for regular maintenance every 3 to 6 months. It’s gentle enough for frequent use but powerful enough to refresh even slightly dull surfaces. Always follow with a dry cloth to prevent streaks.
Tackle Stubborn Stains with Baking Soda Paste
Use a 2:1 Baking Soda to Oil Mix
For set-in stains or discolored spots, mix two parts baking soda with one part oil, such as mineral or olive oil, to form a thick paste. Apply with a soft cloth and rub gently in circular motions.
Let it sit for a few minutes, then wipe clean with warm water and dish soap. Dry immediately. This paste lifts deep grime without scratching, thanks to the oil’s lubricating effect. Test first in an inconspicuous area to ensure compatibility with your finish.
Dry All Surfaces Completely
Prevent Warping and Mold
After cleaning, go over every surface with a dry microfiber cloth. Ensure no moisture remains on shelves, door edges, or joints. Trapped water can cause warping, swelling, or mold growth inside cabinets.
Leave cabinet doors open for several hours to allow airflow and complete drying, especially in humid environments. Never restock until surfaces are fully dry to the touch.
Maintain a Cleaning Schedule
Clean Every 3 to 6 Months
Regular cleaning prevents heavy buildup and makes each session faster. Aim to deep clean stained wood cabinets every 3 to 6 months, depending on kitchen use.
For daily upkeep, wipe spills and splatters immediately with a dry or slightly damp cloth. Weekly light dusting keeps surfaces looking fresh and reduces the need for intensive cleaning later.
Avoid These Common Mistakes
Never Use Harsh or Abrasive Cleaners
Steer clear of ammonia, bleach, steel wool, or abrasive scrub pads. These can strip the stain, scratch the surface, or compromise the protective finish. Even all-purpose cleaners may be too aggressive for stained wood.
Avoid soaking cabinets or using steam cleaners, which force water into the wood. Always test new products on a hidden spot, like the back of a shelf, before full application.
Choose the Right Cleaning Tools
Use Soft, Lint-Free Cloths Only
Microfiber cloths are ideal for all stages: dusting, cleaning, rinsing, and drying. They’re non-abrasive and trap dirt without scratching. Keep separate cloths for different tasks to avoid cross-contaminating clean surfaces.
Cotton swabs, soft toothbrushes, and vacuum brush attachments are safe for detail work. Never use paper towels because they can scratch and leave lint behind.
Know When to Repeat the Process
Stubborn Stains May Need Multiple Passes
If stains persist after the first cleaning, repeat the vinegar solution or baking soda paste method 2 to 3 times. Layered grease and old food residue often require multiple treatments.
Combine methods for best results: start with soap, follow with vinegar, then spot-treat with paste. Patience and consistency yield the best outcomes without risking damage to your wood.
Frequently Asked Questions About Cleaning Stained Wood Cabinets
Can I use vinegar to clean stained wood cabinets?
Yes, a solution of equal parts white vinegar and water is safe for stained wood cabinets. It disinfects, deodorizes, and cuts grease without leaving residue. Lightly mist surfaces and wipe with a microfiber cloth. Repeat 2 to 3 times for stubborn areas, but avoid overuse to protect the finish.
What is the best cleaner for stained wood cabinets?
Murphy’s Oil Soap is highly recommended for stained wood cabinets because it removes grease effectively while conditioning the wood. It leaves no residue and is gentle on stained finishes. For everyday cleaning, a few drops of mild dish soap in warm water works well too.
How do you remove dark stains from wood cabinets?
Mix two parts baking soda with one part oil to form a paste. Apply it gently with a soft cloth in circular motions, let it sit for a few minutes, then wipe clean with warm water and dish soap. Dry immediately. This method lifts set-in grime without scratching the surface.
How often should I clean my wood cabinets?
Deep clean stained wood cabinets every 3 to 6 months to prevent grease and food residue buildup. Wipe spills immediately and dust weekly for daily maintenance. High-use kitchens may need more frequent deep cleaning sessions.
Can I use baking soda on wood cabinets?
Yes, baking soda is safe for wood cabinets when used correctly. Mix it with water or oil to create a paste and apply with gentle pressure. Avoid aggressive scrubbing, which can scratch the surface. Always rinse and dry thoroughly after use.
Do I need to rinse cabinets after cleaning with dish soap?
Yes, rinsing is important when using dish soap. Soap residue can cloud the finish over time if left behind. After cleaning with a soapy solution, wipe surfaces with a clean, damp rag, then dry completely with a microfiber cloth.
Key Takeaways for Cleaning Stained Wood Cabinets
Cleaning stained wood cabinets doesn’t require expensive products or professional help. With the right supplies and techniques, you can safely remove stains, eliminate grease, and extend the life of your cabinetry. Focus on gentle methods, thorough drying, and regular maintenance to keep your kitchen looking fresh and well-cared-for.
Start by removing cabinet contents and dusting all surfaces. Use a mild dish soap solution for general cleaning, vinegar for disinfecting, and a baking soda paste for stubborn stains. Always dry completely to prevent warping and mold.
Make a habit of cleaning every 3 to 6 months, and wipe spills immediately when they happen. Test any new product on a hidden area first, and stick to soft cloths and gentle tools. Your stained wood cabinets will reward you with lasting beauty and durability for years to come.


