

White cabinets brighten kitchens and bathrooms, but they show every fingerprint, grease spot, and water mark. Keeping them clean can feel like a constant battle, especially in high-traffic areas. The good news is that with the right tools and techniques, you can restore their shine without damaging the finish. Whether your cabinets are painted, laminate, or wood, this guide reveals how to clean white cabinets safely and effectively using simple, proven methods from everyday household products.
You don’t need harsh chemicals or expensive cleaners. Most people achieve excellent results with mild dish soap, vinegar, baking soda, or isopropyl alcohol. The key is matching the cleaning solution to the type of grime and cabinet material while avoiding anything abrasive. In this step-by-step guide, you’ll learn exactly what works, what to avoid, and how to keep your white cabinets looking fresh week after week.
Choose the Right Cleaning Solution
The best way to clean white cabinets starts with selecting the correct cleaner for the job. Not all stains or finishes respond the same, so use these targeted solutions based on your cabinet’s condition.
Mild Dish Soap and Warm Water
For daily maintenance and light smudges, mix a few drops of mild dish soap (like Dawn) with warm water. This gentle formula lifts dirt without stripping protective finishes.
- Dip a soft microfiber cloth into the solution
- Wring it out well, as excess moisture can warp wood or cause paint to bubble
- Wipe cabinet surfaces in the direction of the grain if visible
- Follow with a damp cloth to remove soap residue
- Dry immediately with a clean, dry microfiber towel
This method is ideal for weekly cleaning and works safely on painted, laminate, and sealed wood cabinets.
White Vinegar and Water Mix
For sticky residue, grease buildup, or hard water spots, use a 1:1 solution of white vinegar and water. Vinegar naturally cuts through grime and disinfects without leaving streaks.
- Pour equal parts vinegar and water into a spray bottle
- Lightly mist the cabinet surface, but do not soak
- Let sit for 2 to 3 minutes to break down grime
- Wipe clean with a microfiber cloth
- Dry thoroughly
Avoid using vinegar on unsealed wood or stone surrounds, as acidity may cause damage over time. Always test in a hidden area first.
Baking Soda Paste for Tough Stains
When grease or scuff marks won’t budge, make a baking soda paste for gentle abrasion.
- Mix 2 tablespoons of baking soda with a teaspoon of water
- Adjust until it forms a thick, toothpaste-like consistency
- Apply to the stained area with a soft cloth or sponge
- Gently rub in circular motions for 10 to 15 seconds
- Wipe away with a damp cloth
- Dry completely
Use this sparingly on stubborn spots only. While non-scratch, over-scrubbing can dull glossy finishes.
Isopropyl Alcohol for Fingerprints
Fingerprints and smudges stand out most on white cabinets. For instant clarity, use 70% isopropyl alcohol.
- Dampen a microfiber cloth with a small amount of alcohol
- Wipe down problem areas like handles and door fronts
- No rinsing needed since alcohol evaporates quickly
- Buff lightly to prevent streaks
Keep a pre-moistened cloth or small spray bottle handy for quick touch-ups. Avoid frequent use, as alcohol can dry out wood finishes over time.
Pro Tip: Always test any new cleaner on an inconspicuous spot, like inside a corner or near the floor, before applying it widely.
Use the Best Cleaning Tools
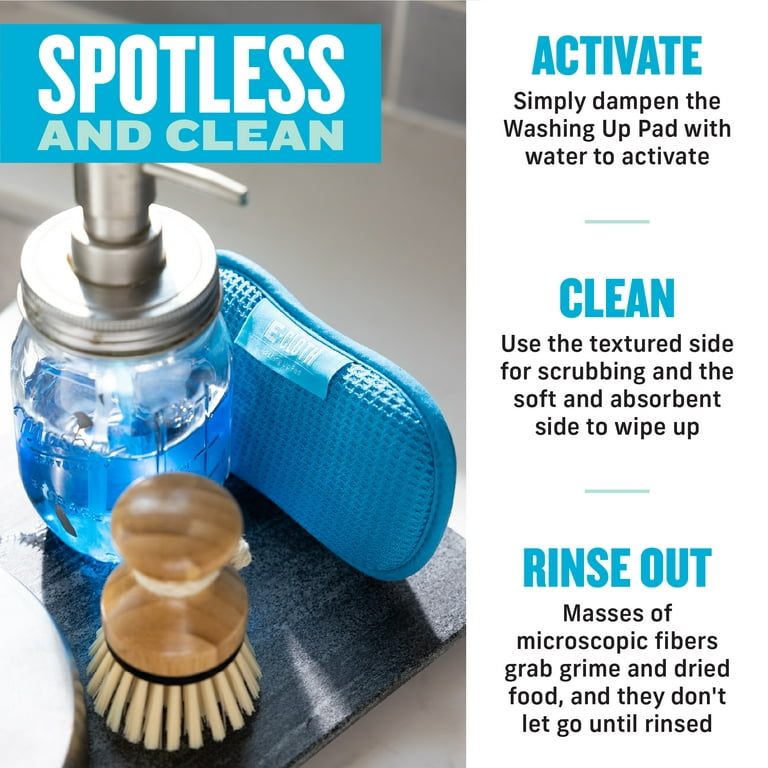
Even the safest solution can damage cabinets if used with the wrong tools. Protect your investment by using only soft, non-abrasive materials designed for delicate surfaces.
Microfiber Cloths Are Essential
These lint-free, ultra-soft cloths lift dirt without scratching. Use one for cleaning and a second dry one for immediate drying to prevent water marks.
- Use white cloths to avoid dye transfer
- Replace or wash frequently to prevent grit buildup
- Never reuse cloths that have touched greasy stovetops
Soft-Bristle Brushes for Detail Work
Cabinet edges, grooves, and decorative molding trap dust and grease. A soft-bristle brush like a toothbrush or detailing brush helps loosen debris in tight spaces.
- Dip the brush lightly in soapy water or vinegar solution
- Gently scrub along crevices
- Wipe clean with a damp cloth
- Dry with a microfiber towel
Avoid metal-bristled or stiff brushes, as they can scratch paint or laminate.
Non-Abrasive Sponges for Large Surfaces
For bigger cabinet doors, a non-scratch sponge often labeled green or non-scratch offers light scrubbing power.
- Use only the soft side, never the abrasive green scrubber
- Apply minimal pressure
- Rinse frequently during use
These sponges work well with dish soap or vinegar solutions but should be replaced when worn.
Spray Bottles for Even Application
Pour your cleaning solution into a spray bottle to control application and avoid oversaturation.
- Mist lightly, never drench the surface
- Hold the bottle 6 to 8 inches away
- Focus on one section at a time
This ensures even coverage and reduces the risk of water damage.
Clean Cabinet Doors Step by Step
Now that you have the right supplies, follow this systematic process to clean white cabinets thoroughly without causing harm.
Remove Hardware First
Take off knobs, pulls, and hinges if possible. This allows full access to corners and prevents cleaner buildup around fixtures.
- Store hardware in a labeled container to avoid loss
- Soak metal pieces in warm soapy water, then dry completely before reattaching
- Clean the exposed screw holes with a cotton swab
If removing isn’t practical, clean carefully around each piece.
Work Top to Bottom
Always clean from the top down to avoid dripping onto already-cleaned surfaces.
- Start with upper cabinets, then move to lowers
- Within each cabinet, begin at the top edge and work downward
- Clean one door at a time to maintain consistency
This prevents dirty runoff from contaminating clean areas.
Wipe With the Grain
If your cabinets have a wood grain, real or printed, wipe in the direction of the grain to avoid swirl marks and uneven sheen.
- Use straight, smooth motions
- Overlap strokes slightly for full coverage
- Don’t press too hard, as the cleaner should do the work
For flat-panel or thermofoil cabinets, direction matters less, but consistent strokes reduce streaking.
Dry Immediately After Cleaning
Moisture is the enemy of white cabinets. Leaving them wet can lead to:
- Water spots
- Swelling in particleboard
- Peeling paint
- Mold in hinges or seams
Always follow up with a dry microfiber cloth immediately after wiping. Buff lightly for a streak-free shine.
Tackle Common Cabinet Problems
:max_bytes(150000):strip_icc()/GettyImages-1212047946-003e4b3f50f0494c86cf3153df7668a0.jpg)
Even with regular care, white cabinets face specific challenges. Here’s how to fix them fast.
Remove Grease Buildup
Grease from cooking clings to cabinet fronts, especially near stoves.
- Spray vinegar solution on affected areas
- Let sit 3 to 5 minutes
- Wipe with a microfiber cloth
- For heavy buildup, repeat with baking soda paste
- Finish with a dry cloth
To prevent future accumulation, install a backsplash or range hood and wipe cabinets weekly.
Eliminate Hard Water Spots
In bathrooms or near dishwashers, mineral deposits leave cloudy marks.
- Use vinegar solution and let sit for 2 minutes
- Wipe gently, don’t scrub
- Dry thoroughly
- For persistent spots, try a paste of baking soda and vinegar, used sparingly
Install water softeners or wipe down wet surfaces after use to reduce recurrence.
Fix Yellowing or Dullness
Over time, white cabinets may yellow due to sunlight, smoke, or aging finishes.
- Clean thoroughly with vinegar solution
- If yellowing persists, consult a professional about repainting or refinishing
- Avoid bleach, as it can worsen discoloration or damage laminate
Prevent future yellowing by cleaning regularly and minimizing exposure to heat and UV light.
Prevent Scratches and Chips
White paint shows every flaw. Avoid damage by:
- Not using steel wool or abrasive pads
- Keeping sharp objects away
- Touching up chips quickly with matching paint
Use felt pads on shelves and soft-close hinges to reduce wear.
Maintain Clean White Cabinets Weekly
Prevention beats deep cleaning. A few minutes each week keeps grime from building up.
Schedule Regular Wipes
Set a reminder to wipe down cabinets every 7 days.
- Focus on handles, edges, and lower doors
- Use a dry microfiber cloth to remove dust
- Spot-clean smudges with alcohol or soapy water
Consistency prevents the need for aggressive cleaning later.
Keep Cleaners Handy
Store a small spray bottle of vinegar solution or pre-moistened microfiber wipes under the sink for quick access.
- Label clearly
- Keep away from children and pets
- Replace monthly to avoid contamination
Having supplies nearby makes maintenance effortless.
Avoid Harsh Chemicals
Never use:
- Bleach
- Ammonia
- Oven cleaner
- Abrasive powders like Comet
These can strip finishes, cause discoloration, or etch surfaces. Stick to gentle, tested solutions.
Protect Your Cabinets Long Term
Extend the life and brightness of your white cabinets with simple protective habits.
Apply Wood Sealant If Applicable
For unfinished, satin, or porous wood cabinets, a light coat of wood sealant adds protection.
- Test in an inconspicuous area first
- Apply with a clean cloth according to manufacturer instructions
- Reapply every 6 to 12 months
This helps resist stains and moisture but isn’t needed for most laminate or painted cabinets.
Control Humidity and Heat
Excess moisture and temperature swings damage cabinet materials.
- Use exhaust fans in kitchens and bathrooms
- Keep cabinets away from direct heat sources
- Maintain indoor humidity between 40 and 50%
Stable conditions preserve both structure and finish.
Use Cabinet Liners
Place washable liners on shelves to catch spills and crumbs.
- Choose clear or neutral colors
- Clean or replace monthly
- Prevents staining and makes interior cleaning easier
They’re especially useful in lower cabinets storing food or cleaning supplies.
Frequently Asked Questions About Cleaning White Cabinets
Can I use bleach to clean white cabinets?
No. Bleach can strip finishes, cause discoloration, and damage laminate surfaces. Stick to mild dish soap, vinegar, or baking soda solutions instead.
How often should I clean my white cabinets?
Wipe down cabinets weekly with a dry or slightly damp microfiber cloth. Deep clean with soapy water or vinegar solution every few weeks, or more often if cooking grease accumulates.
Will vinegar damage white cabinet finishes?
Vinegar is safe for most painted, laminate, and sealed wood cabinets when diluted with water. Avoid it on unsealed wood or stone surfaces, and always test in a hidden area first.
What is the best way to remove yellowing from white cabinets?
Clean thoroughly with a vinegar and water solution. If yellowing persists due to age or smoke damage, professional repainting or refinishing may be necessary. Avoid bleach, which can worsen discoloration.
Can baking soda scratch my white cabinets?
Baking soda is mildly abrasive but generally safe for cabinet surfaces when used as a paste with gentle pressure. Over-scrubbing can dull glossy finishes, so use it sparingly on tough spots only.
Is isopropyl alcohol safe for daily use on cabinets?
Alcohol works great for quick fingerprint removal but can dry out wood finishes over time. Use it sparingly and follow with a dry buff. Reserve daily cleaning for dish soap and water.
Key Takeaways for Cleaning White Cabinets
Cleaning white cabinets doesn’t have to be difficult or risky. Start with the mildest solution, dish soap and water, and step up only when needed. Use soft cloths, avoid harsh chemicals, and dry immediately after wiping.
Remember to match your cleaner to the problem. Vinegar handles grease and water spots, baking soda tackles tough stains, and alcohol removes fingerprints fast. Always test new products in hidden areas first.
The secret to bright, streak-free cabinets is consistency, not intensity. A few minutes of weekly maintenance prevents the need for aggressive deep cleaning later. Keep your supplies handy, dry surfaces promptly, and your white cabinets will stay beautiful for years to come.


