

You’ve decided to build frameless cabinets, modern, sleek, and space-efficient. Whether you’re using ¾” veneered birch plywood for a high-end kitchen or tackling your first DIY cabinet project, the right techniques make all the difference. With tools like a Felder table saw, Festool routers, and Blum hardware on hand, you’re well-equipped to build strong, durable frameless cabinets that look professional.
This guide walks you through every step of building frameless cabinets, from joint selection and assembly order to back panel attachment, leveling, and finishing. We’ll cover what works best with plywood, how to hide fasteners, whether pocket screws are strong enough, and why 32mm system planning matters, even if you’re not using European hardware yet.
By the end, you’ll know exactly how to assemble a cabinet carcass that supports stone countertops, installs cleanly on the wall, and lasts decades.
Choose the Right Joinery Method
Frameless cabinets rely on precise joinery and rigid construction since there’s no face frame to hide imperfections or add strength. You have several proven options.
Use Pocket Screws with Glue
Pocket screws are fast, forgiving, and ideal for beginners. When combined with wood glue, they create a permanent, strong joint.
- Drill holes into the bottom and back panels so screws enter the ends of the side panels.
- This keeps screw heads hidden inside the cabinet.
- Use Kreg coarse-thread screws for plywood.
- Pair with right-angle clamps to hold parts square during assembly.
Pro Tip: Lay the bottom panel flat, place the sides on top, and drive screws upward. Gravity helps alignment.
Consider Confirmat Screws for Maximum Strength
If you’re supporting heavy stone countertops, Confirmat screws offer superior holding power in plywood.
- They have a coarse thread and wide shank that grips sheet goods better than standard screws.
- Require pre-drilled pilot holes, usually with a two-step bit.
- Can be used in addition to pocket screws, and this is not overkill for base cabinets.
Warning: Don’t rely solely on screws. Always glue butt joints for long-term durability.
Biscuit Joinery Adds Alignment and Support
Some builders use biscuits, size #20 or #30, at corners to align panels before screwing.
- Helps maintain 90° angles during glue-up.
- Not structurally essential but improves accuracy.
- Glue plus biscuits plus screws equals overbuilt but very stable.
Best Practice: Use 3 biscuits in uppers and 4 to 5 in base cabinets.
Assemble the Cabinet in the Right Order

Building in sequence prevents misalignment and makes clamping easier.
Start With Bottom and Back Panel
- Lay the bottom panel flat on your work surface.
- Attach the back panel to the bottom using pocket screws or Confirmat screws.
– Drill pocket holes in the back panel’s edge so screws go into the end grain of the bottom.
– This creates a rigid L-shape to build on. - Ensure both panels are square before fastening.
Visual Check: Use a framing square to confirm 90° at the corner.
Attach the First Side Panel
- Flip the L-shaped assembly onto one long edge, back panel down.
- Position one side panel vertically.
- Clamp it flush to the bottom and back.
- Drive screws through the bottom and back into the side’s edge.
Use right-angle clamps to hold the joint tight and square.
Flip and Attach the Second Side
- Carefully flip the U-shaped assembly.
- Repeat the process for the second side.
- Double-check that all edges are flush and corners square.
Time-Saver: Cut all matching parts in one session to ensure uniformity.
Install Top Stretchers or Cleats
For countertop support, especially with stone, install two 4-inch wide stretchers across the top front and back.
- Pocket screw them to the inside top edges of the sides.
- Place screw heads on the top surface, and they’ll be hidden under the countertop.
- Ensure stretchers are level and aligned.
Alternative: Use a 4-inch top cleat bisquited to the sides for wall hanging.
Set the Correct Panel Dimensions
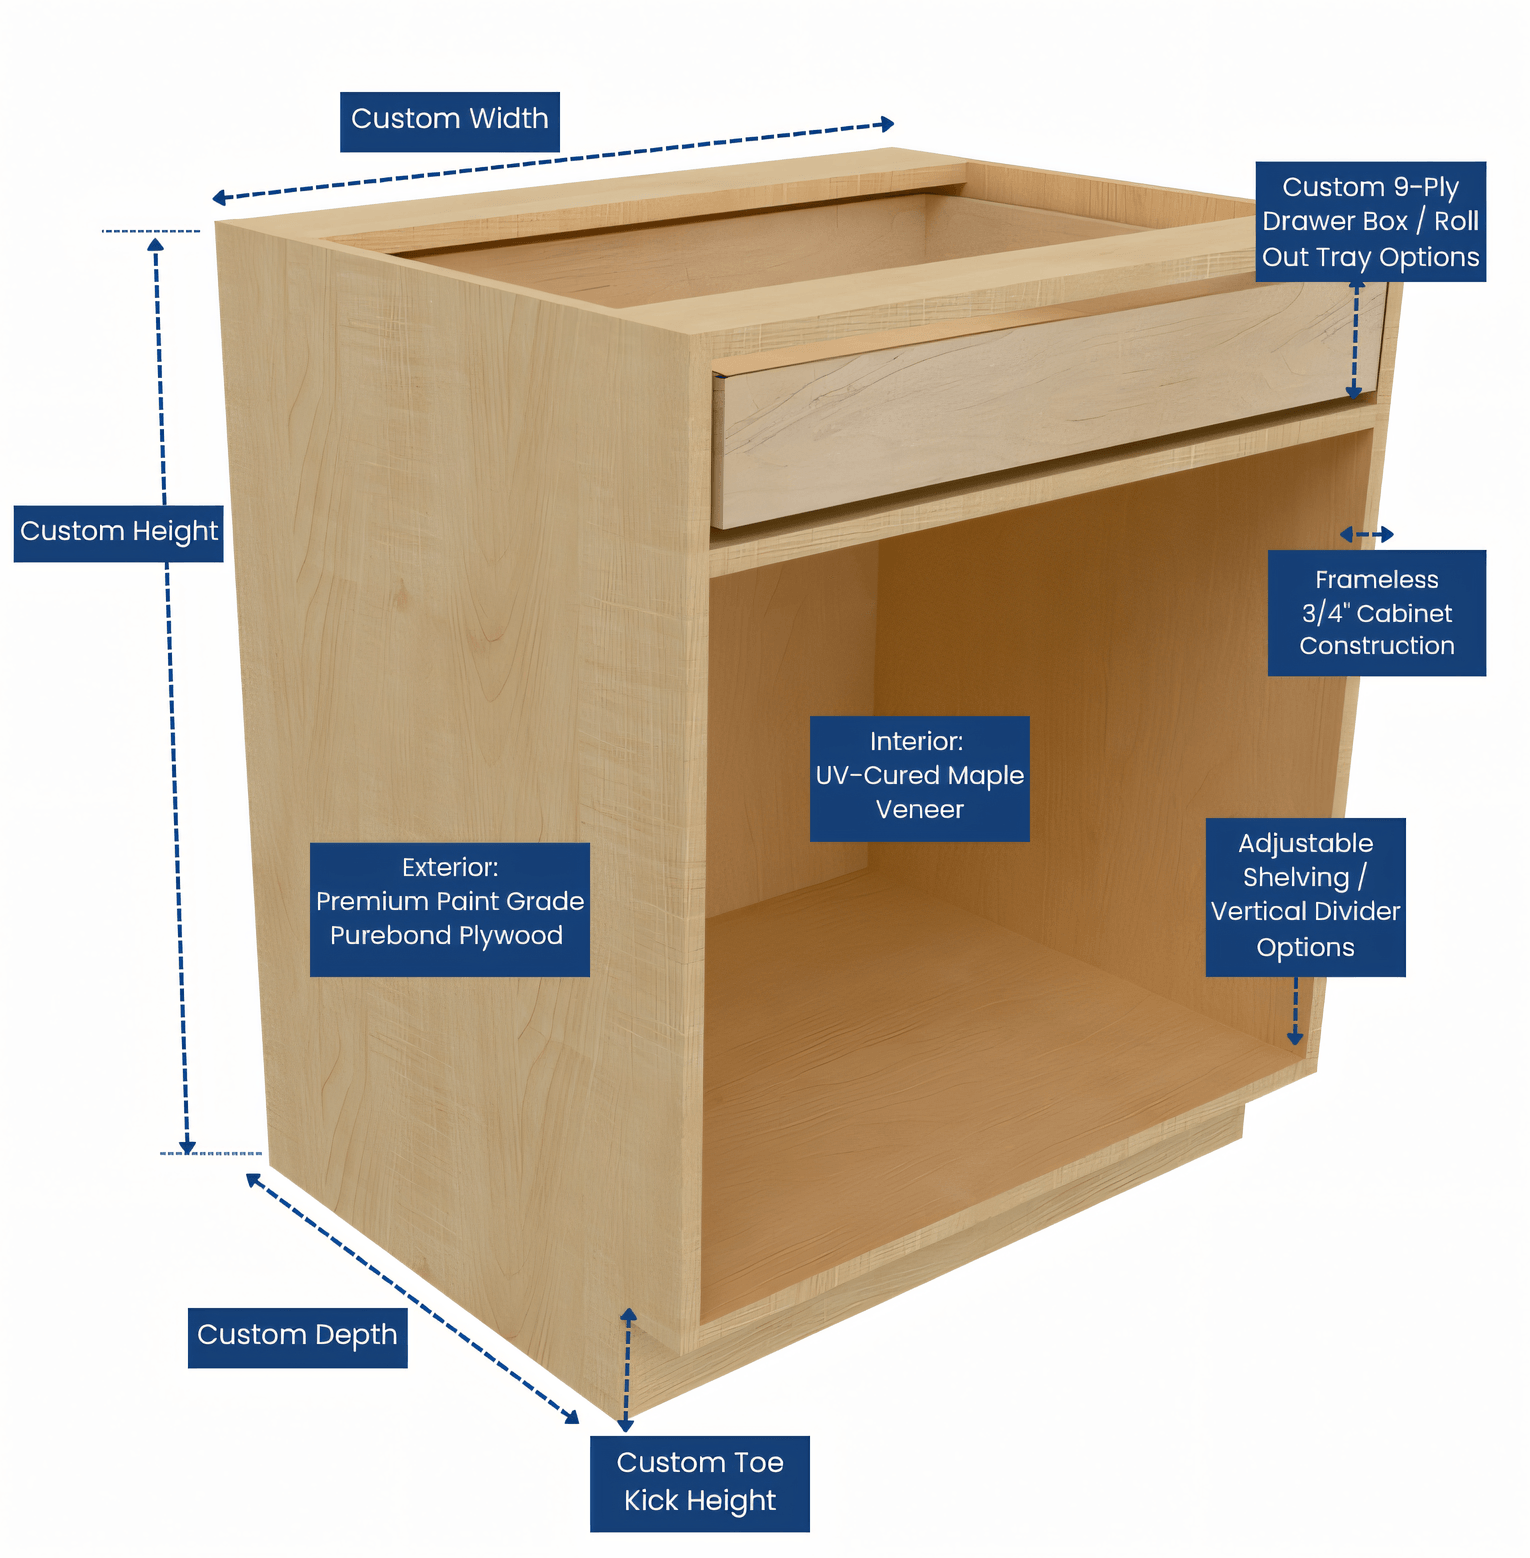
Your cabinet’s strength and fit depend on accurate sizing.
Bottom Panel Width: 22½ Inches for 24-Inch Cabinet
- For a 24-inch wide cabinet, cut the bottom to 22½ inches wide.
- This allows the two ¾-inch sides to fit flush on each end, totaling 24 inches.
- Ensures the cabinet is exactly 24 inches wide for standard countertop cuts.
Depth Tip: Subtract 1½ inches from total depth if the back is inset. For example, a 24-inch deep cabinet gets a 22½-inch bottom.
Back Panel: Recessed or Flush
- A ¾-inch back panel can be:
- Flush-mounted: Screwed directly to the back edges of sides, bottom, and top.
- Rabbeted: Set into a ¼-inch rabbet for extra rigidity and a cleaner look.
- Either method works, but rabbeting improves squareness and hanging stability.
For wall mounting, a recessed back allows space for shims behind the cabinet.
Fasten the Back Panel to the Wall
The back panel isn’t just structural. It’s your primary wall attachment point.
Screw ¾-Inch Plywood Back Directly to Studs
- Use long cabinet screws, 2½ to 3 inches, from McFeelys or FastenMaster.
- Locate wall studs and drive one screw per stud through the back panel.
- Pre-drill to prevent splitting.
No cleat needed: A full ¾-inch plywood back is strong enough to support the cabinet.
Optional: Add a French Cleat
- Hang the cabinet with a French cleat for faster, adjustable installation.
- One cleat on the wall, mating cleat on the cabinet back.
- Not required, but useful for heavy or tall units.
Pro Note: Even with cleats, screw through the back into studs for safety.
Support Heavy Countertops Properly
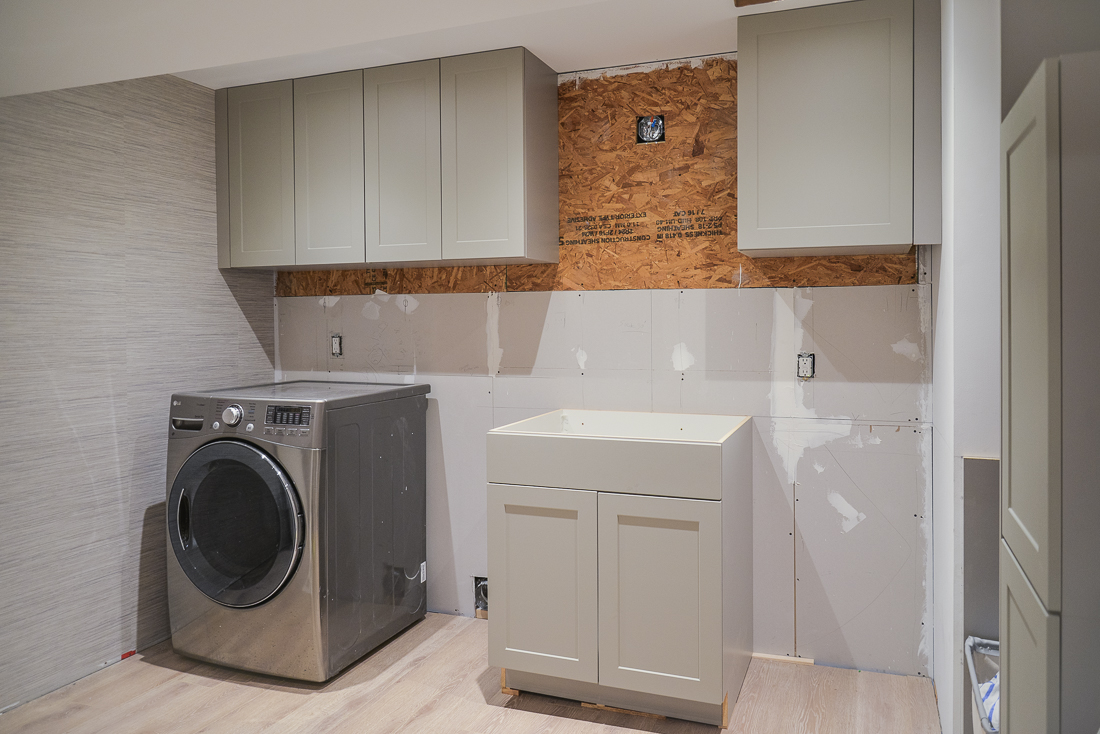
Stone countertops weigh 15 to 20 pounds per square foot. Your cabinet must handle the load.
Rest Sides on the Bottom for Strength
- For stone tops, rest the side panels on the bottom panel, not the other way around.
- This puts the full weight on a solid base, not just screws through thin plywood edges.
- Makes the cabinet more rigid and less prone to racking.
Confirmat screws plus glue plus side-on-bottom equals ideal for granite or quartz.
Use Stretchers, Not Just Cleats
- Two 4-inch stretchers, front and back, provide full support.
- Screw through the top of the stretchers into the side panels.
- Leave no gap between countertop and cabinet top.
Avoid relying only on a thin cleat at the back.
Install Adjustable Legs or a Toe Kick Frame

You have two clean options for elevating base cabinets.
Choose Adjustable Legs for Simplicity
- Rockler or Hafele adjustable legs let you level cabinets on uneven floors.
- Install them after the cabinet is in place.
- Height adjustments up to 1.5 inches make fine-tuning easy.
Pro Tip: Position legs so they don’t interfere with toe kick or drawer slides.
Build a Detached Toe Kick for a Seamless Look
- Create a ladder-style toe kick from ¾-inch plywood.
- Attach it separately below the cabinet.
- Allows for a continuous run under multiple cabinets.
Advantage: No risk of leg screws hitting internal fasteners.
Avoid building toe kicks from 2x4s. Wood can shrink and warp.
Finish the Interior for Durability and Safety
Even hidden surfaces need protection, especially in kitchens.
Apply Water-Based Polyurethane or Shellac
- Water-based polyurethane dries fast, has low odor, and resists moisture.
- Shellac is food-safe, easy to repair, and seals plywood edges well.
- Avoid oil-based finishes. They off-gas fumes inside enclosed cabinets.
Do this before assembly. Finish all panels, then mask glue areas.
Seal All Exposed Plywood Edges
- Use iron-on edge banding or PVC tape like FastCap Pro-Edge.
- Trim with a hand plane or edge trimmer for a smooth finish.
- Sand lightly and reapply finish if needed.
Tool Tip: An edge trimmer gives cleaner results than a router for long edges.
Plan for Future Hardware: Use 32mm System Spacing
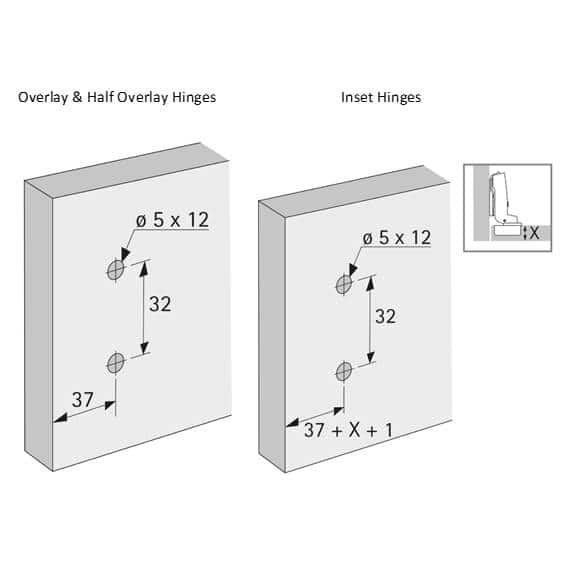
Even if you’re not using European hinges now, plan for them later.
Space Holes in 32mm Increments
- Vertical drilling lines every 32mm from the bottom.
- Allows compatibility with Blum, Grass, and Hettich drawer slides and hinges.
- Standard 37mm setback from front edge for hinge placement.
Free Resource: Download the Blum System 32 PDF from WoodWeb.com instead of buying a $500 template.
Mark Drill Points Before Assembly
- Use a drilling jig or grid batten to mark hole locations on the inside of side panels.
- Drill after assembly if needed, but pre-drilling is more accurate.
Pro Move: Build all cabinets with 32mm spacing. You’ll thank yourself later.
Avoid Common Mistakes
Even experienced woodworkers make these errors.
Don’t Skip Glue on Butt Joints
- Screws alone can loosen over 10 to 20 years.
- Glue creates a permanent bond when edges are clean and flat.
- Wipe excess glue before it dries.
Best Practice: Clamp joints for 30 minutes while glue sets.
Don’t Misalign Pocket Holes
- Pocket screws can pull joints out of square if not clamped.
- Use at least two right-angle clamps per corner.
- Test-fit first. Dry assembly saves time.
Fix: If joints aren’t flush, sand or plane after assembly. Don’t force it.
Don’t Cut Panels Inaccurately
- One mis-cut side ruins the whole cabinet.
- Use your jointer and planer to ensure consistent thickness.
- Cut all matching parts, like all bottom panels, in one setup.
Double-check: Measure diagonals for squareness. Both should match.
Final Assembly Checklist
Before installing your frameless cabinets, verify:
- All joints are glued and screwed.
- Cabinet is square, with diagonal measurements equal.
- Back panel is securely fastened.
- Stretchers are level and screwed in.
- Adjustable legs or toe kick are installed.
- Interior is finished and sealed.
- 32mm hole spacing is marked or drilled.
Pro Tip: Take photos during the build. Great for future projects or troubleshooting.
Frequently Asked Questions About Building Frameless Cabinets
Can I use pocket screws for frameless cabinet construction?
Yes, pocket screws work exceptionally well for frameless cabinets. Drill holes in the bottom and back panels so screws enter the ends of the side panels. This keeps screw heads hidden. Combine with wood glue and right-angle clamps for strong, permanent joints.
Should the bottom panel be 22½ inches or 24 inches wide for a 24-inch cabinet?
For a 24-inch cabinet with ¾-inch sides, cut the bottom to 22½ inches wide. This allows the two sides to fit flush on each end, totaling exactly 24 inches. If you want the sides to rest on top of the bottom, cut the bottom to 24 inches instead.
Are Confirmat screws better than pocket screws for plywood cabinets?
Confirmat screws offer superior holding power in plywood and particleboard. They have a coarse thread and wide shank that grips sheet goods effectively. Many builders use both, adding Confirmat screws alongside pocket screws for maximum strength, especially on base cabinets supporting stone countertops.
Can I screw a ¾-inch plywood back panel directly into wall studs?
Yes, a ¾-inch plywood back panel can be screwed directly into wall studs using long cabinet screws, typically 2½ to 3 inches. Locate studs and drive one screw per stud through the back panel. Pre-drill to prevent splitting. A French cleat is optional and not necessary for strength.
What finish should I use inside frameless cabinets?
Use water-based polyurethane or shellac for the interior of plywood cabinets. Water-based polyurethane dries fast and resists moisture. Shellac is food-safe and easy to repair. Avoid oil-based finishes because their fumes linger inside enclosed spaces. Apply finish to all panels before assembly.
Do I need the expensive Blum template for 32mm hardware spacing?
No, you don’t need a $500 template. Search for “Blum system 32” and download the free PDF from WoodWeb.com. It provides all the layout guidance you need for 32mm hole spacing, including the 37mm setback from the front edge for hinge placement.
Key Takeaways for Building Strong Frameless Cabinets
Building frameless cabinets with veneered plywood is entirely achievable with the right approach. Focus on three critical elements: glue, accuracy, and planning.
- Use pocket screws with glue for most joints, or add Confirmat screws for extra strength on base cabinets.
- Assemble in the correct order: bottom to back, then sides, then stretchers.
- Drill pocket holes in bottom and back panels to keep all fasteners hidden.
- Finish interiors with water-based polyurethane or shellac before assembly.
- Plan for the 32mm system now, even if you’re not using European hardware yet.
Your next step is to set up your saw and cut your first test panel. Measure twice, cut once, and build a sample cabinet to practice your joinery before committing to the full set. With careful planning and these proven techniques, your frameless cabinets will be strong, modern, and built to last.


