
You’ve decided to update your kitchen, but you’re not replacing every cabinet. Whether you’re adding new units, swapping damaged doors, or reconfiguring the layout, one challenge stands out: how to match existing kitchen cabinets. It’s more complex than it sounds. Wood ages, finishes fade, and styles go out of production, making seamless integration a real puzzle.
The goal isn’t necessarily perfection, it’s visual harmony. A mismatched door or off-color finish can draw the eye like a sore thumb. But with the right approach, tools, and expectations, you can achieve a cohesive look that blends old and new effortlessly. This guide breaks down proven methods, from door replacement to full refacing, and reveals expert-backed strategies to avoid common pitfalls. You’ll learn how to identify door styles, match finishes like a pro, and decide when to repaint or replace entirely.
Let’s dive into the smart, practical ways to make your kitchen look unified without starting from scratch.
Door Replacement Strategy

Replacing cabinet doors is one of the most cost-effective ways to refresh or expand a kitchen while preserving existing cabinet boxes. This method works best when the underlying structure is solid and only the aesthetic elements need updating.
Match Door Style Accurately
Identifying your current cabinet door style is the first critical step. Even small differences in panel design or edge profile can break visual continuity. Use a straight-on photo and a corner close-up of your existing door and upload them to services like Xpress Cabinet Doors, which compares your images to their catalog and suggests the closest match.
Common styles include:
– Shaker: Simple, clean lines; highly versatile
– Raised Panel: Traditional with a 3D effect (e.g., Mitchell or Maverick styles)
– Flat Panel (Slab): Modern, minimalist look
If your original style is discontinued, choose the closest visual equivalent. For example, IKEA’s Axstad white door offers a shaker-style look that blends well with many older designs.
Customize Dimensions and Edges
Once you’ve identified the style, customize the replacement door to fit precisely. Key parameters include:
– Wood type (oak, maple, MDF, etc.)
– Door type (shaker, raised panel, etc.)
– Edge profiles (panel, inside, outside)
– Exact measurements
Order doors slightly oversized if sanding or fitting adjustments are expected. Most suppliers, like Xpress Cabinet Doors, ship unfinished options within 7 to 10 days, giving you flexibility in finishing.
Install New Doors Correctly
Before installation:
– Remove old doors and hardware
– Clean hinge areas and check for wear
– Test fit new doors; adjust hinges or bore holes if needed
Use a template or jig for consistent hinge placement, especially when mixing old and new doors. Align all doors and drawer fronts to ensure even gaps (typically 1/8 to 3/16 inch). This attention to alignment makes a huge difference in perceived quality.
Cabinet Refacing for Full Integration
When adding new cabinets or upgrading an entire run, refacing ensures all units, old and new, appear as if they were installed together. This method delivers the most seamless results, especially when original finishes are worn or inconsistent.
Install New Cabinets First
A counterintuitive but crucial tip from expert Sebastian Phillips: install all new cabinets before refacing. Why? Because trying to match refaced old cabinets to new ones creates uncertainty. Instead, treat everything as a single project.
Once new cabinets are in place and perfectly aligned with existing ones, apply the same veneer and finish across all surfaces, old and new. This eliminates visible differences in grain, color, and sheen.
Apply Veneer Uniformly
Use high-quality wood veneer (e.g., oak, maple, or African Mahogany) for a natural look. Key steps:
1. Finish the veneer before application; this allows full control over color and sheen
2. Practice on scrap material first to perfect adhesion and trimming
3. Use contact cement or iron-on adhesive based on project scale
4. Trim edges cleanly with a sharp utility knife or router
Include all components:
– Cabinet faces
– Toe kicks
– End panels
– Filler strips
– Drawer fronts
Finishing everything together, especially with professional help, ensures consistency no DIY method can reliably achieve.
Build Simple Face Frames
If original face frames are damaged or incompatible, build new ones using paint-grade or stain-grade material. Keep designs simple (e.g., flat stiles and rails) to reduce complexity and cost. Then veneer over them for a unified appearance.
Finish and Color Matching Techniques
Even perfect door replication fails if the color is off. Finish matching is often the hardest part, especially with aged wood. Here’s how to get it right.
Use Physical Samples for Accuracy
Take a small piece of the original cabinet, such as a broken door corner or removed trim, to a paint or woodworking store. Digital photos can misrepresent color due to lighting and screen calibration. A real sample allows technicians to:
– Match stain pigments
– Test sheen levels
– Replicate aging effects
If removal isn’t possible, take multiple high-resolution photos in natural daylight from different angles.
Create a Test Board Before Proceeding
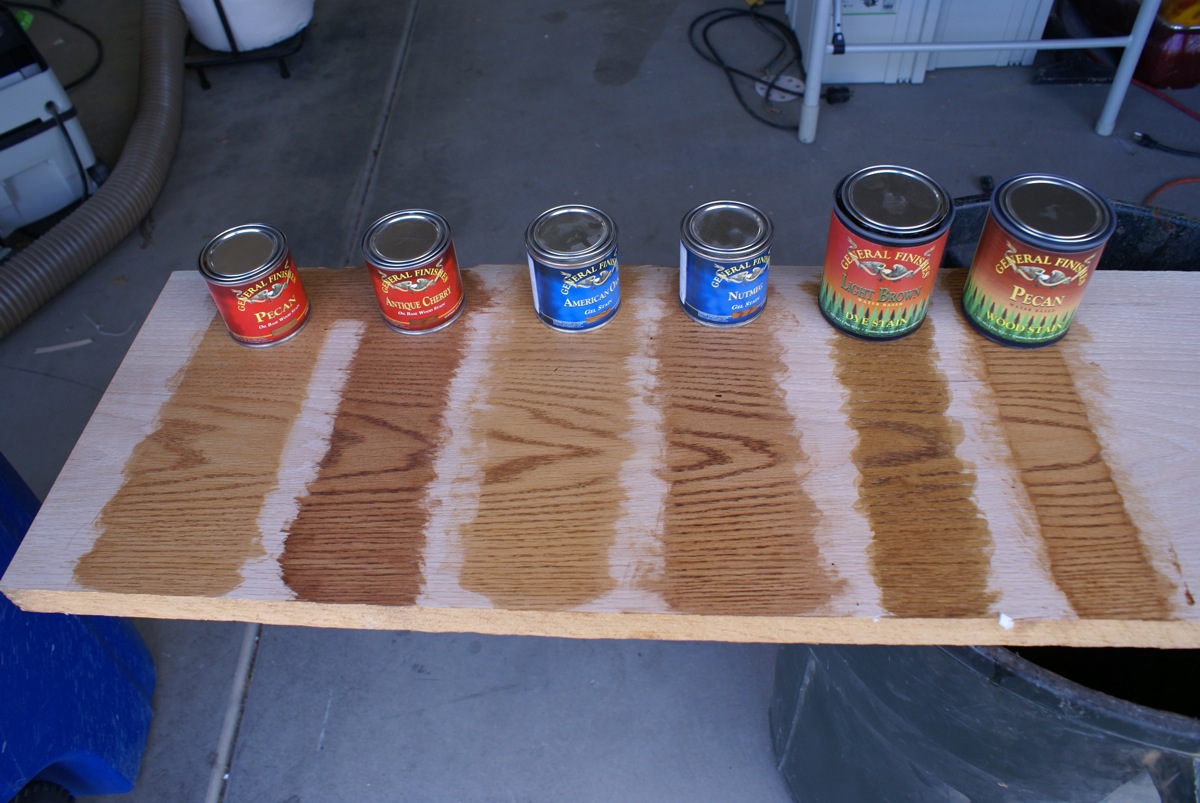
Never apply stain or finish directly to new doors without testing. Build a test board using the same wood species and prep process (sanding, grain filling, etc.). Apply various stain combinations until you achieve a match under different lighting conditions: natural, overhead, and under-cabinet lights.
Pro tip: Layer stains (e.g., walnut over golden oak) to mimic aged patina. Use a glaze coat or light toner to fine-tune the final hue.
Avoid Cherry with Clear Finish
Cherry wood undergoes significant color change over time, darkening from pale pink to deep reddish-brown. A new cherry door will never match an old one, even if sourced from the same batch. Experts like Andrew Pitonyak strongly advise avoiding cherry when matching is required.
Instead, opt for stable woods like maple, oak, or poplar, especially if painting or staining uniformly.
Painting as a Matching Solution
When finish matching feels impossible, painting offers a clean, consistent alternative that eliminates material and color variability.
Choose Paint for Uniformity
Paint covers imperfections, hides wood grain inconsistencies, and allows full control over color. A single coat across all cabinets, old and new, creates instant cohesion.
White shaker-style doors are a popular choice because they:
– Blend with almost any decor
– Hide minor alignment issues
– Are widely available (e.g., IKEA Axstad)
Use cabinet-grade enamel paint (e.g., Benjamin Moore Advance or Sherwin-Williams ProClassic) for durability and smooth finish.
Prep All Surfaces Equally
For a professional result:
1. Remove all doors and hardware
2. Clean with TSP to remove grease
3. Sand surfaces lightly (120 to 150 grit)
4. Fill dents and holes; sand smooth
5. Prime with bonding primer (e.g., Zinsser BIN)
6. Spray or roll paint in thin, even coats
Reassemble only after full cure, typically 7 to 10 days.
Material and Supplier Selection
Choosing the right materials and suppliers makes or breaks the project. Not all sources offer the flexibility or quality needed for seamless integration.
Order from Specialized Door Suppliers
Xpress Cabinet Doors is a top choice for custom replacements:
– Offers photo-based style matching
– Ships unfinished doors in 7 to 10 days
– Wide selection of woods and styles
– Custom edge profiling available
For professional-grade results, Walzcraft provides refacing veneers and full finishing services. Their consistency surpasses DIY efforts, especially for large projects.
Consider Complete Cabinet Systems
Sometimes, replacing everything is simpler and cheaper than matching. IKEA cabinets, for example:
– Offer full customization
– Include soft-close hinges and full-extension glides
– Feature high-quality doors (Axstad series)
– Are often more cost-effective than piecemeal repairs
Similarly, Lily Ann Cabinets (knock-down plywood units with solid wood doors) provide a middle ground between prefab and custom, with easier assembly than traditional builds.
Check Retailer Refacing Programs
Home Depot offers a DIY refacing program at refacing.homedepot.com, though availability of prefinished materials that match new cabinets is limited. Lowe’s does not support refacing in-store, but online orders may still be viable.
Expert Tips for Success
Even experienced DIYers underestimate the precision required for cabinet matching. These expert-backed tips will help you avoid costly mistakes.
Practice on Scrap First
Always test:
– Veneer application
– Staining techniques
– Sanding pressure
– Paint spraying
Mistakes on scrap are lessons; mistakes on cabinets are expensive fixes.
Work with One Finish Source
Have all components, including doors, drawer fronts, end panels, and trim, finished by the same professional shop. This ensures batch consistency. Walzcraft is frequently recommended for this reason.
Accept Imperfections Gracefully
As Sebastian Phillips notes: “Success comes not from perfection, but from thoughtful execution.” Focus on consistency in style, color, and alignment rather than pixel-perfect replication.
If perfect matching isn’t feasible, consider a coordinated but distinct approach. For example, use the same door style but a slightly different finish for new cabinets (e.g., matte vs. satin, or warm white vs. cool white). This creates intentional contrast, common in high-end kitchens.
Evaluate Time vs. Cost
Glenn Bradley reminds us: “Kitchen cabinets require specialized skills.” Even experienced woodworkers often outsource. Ask yourself:
– How much is your time worth?
– What’s the cost of a rework?
– Will this affect resale value?
Sometimes, hiring a pro for finishing or refacing saves money in the long run.
When to Replace Instead of Match
Not every cabinet deserves saving. Consider full replacement if:
Cabinet Boxes Are Damaged
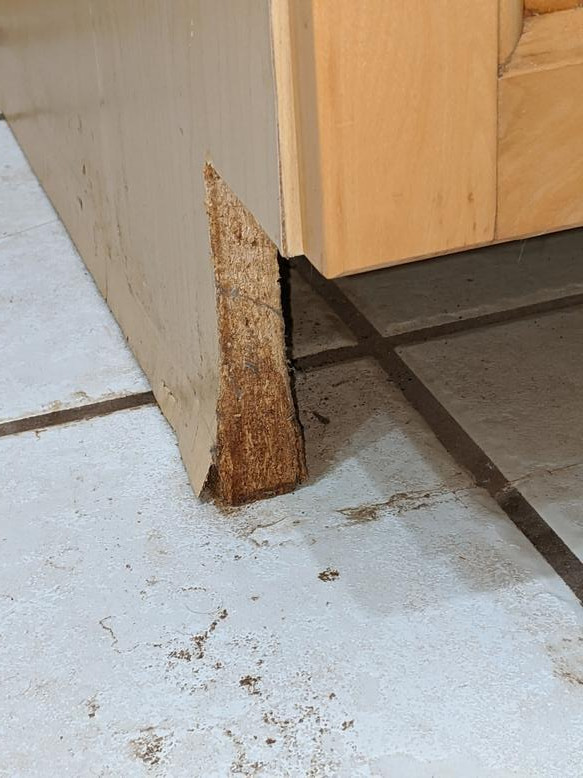
Sagging, warping, water damage, or loose joints mean the structure is compromised. No amount of new doors or veneer can fix poor foundations.
Layout No Longer Works
If reconfiguring the kitchen (e.g., removing a wall oven, adding a pantry), piecing in new cabinets often leads to awkward gaps or misalignment. A full system like IKEA allows flexible, modular design with consistent aesthetics.
Original Finish Is Too Unique
Exotic woods, custom stains, or discontinued finishes may be impossible to replicate. In such cases, embracing a fresh look, like white shaker or painted gray, can modernize the space without fighting the past.
Budget Allows for Better Value
As one user noted: “Replacing all cabinets with IKEA was easier and less costly than trying to piecemeal it together.” Prefab systems now offer quality finishes, soft-close hardware, and customizable storage, often at lower total cost than high-end refacing.
Frequently Asked Questions About Matching Existing Kitchen Cabinets
Can I order new doors that match my old cabinets?
Yes. Custom door manufacturers like Xpress Cabinet Doors can produce replacement doors based on your measurements and photos. Upload a straight-on and corner photo of your existing door, and they’ll suggest the closest style match from their catalog.
How do I match the stain color of old cabinets?
Take a physical sample of the original wood to a paint or woodworking store. If that’s not possible, use high-resolution photos taken in natural daylight. Always test stains on a scrap board before applying them to new doors.
Is it better to paint or stain when matching cabinets?
Painting eliminates color matching challenges entirely and creates instant consistency across old and new cabinets. Staining preserves natural wood beauty but requires careful technique, especially when replicating aged patina.
What wood species should I avoid when matching cabinets?
Avoid cherry with clear finish. Cherry darkens significantly over time, making new doors impossible to match with older ones. Stable woods like maple, oak, and poplar are safer choices.
Should I install new cabinets before or after refacing?
Install all new cabinets first, then reface everything together with the same veneer and finish. This sequencing eliminates visible differences in grain, color, and sheen between old and new units.
How long does it take to receive custom replacement doors?
Most suppliers, including Xpress Cabinet Doors, ship custom doors within 7 to 10 days. Add extra time for finishing, either professionally or DIY, before installation.
Key Takeaways for Matching Your Kitchen Cabinets
Matching existing kitchen cabinets requires a clear strategy before you buy anything. Assess your cabinet boxes first. If they’re solid, door replacement or refacing can work beautifully. If they’re damaged or the layout is changing significantly, full replacement might save you time and money.
Use real samples, not just photos, when matching finishes. Test every stain and paint on scrap material first. And when precision matters most, don’t hesitate to bring in professionals for finishing. A single source for all components, like Walzcraft, ensures batch consistency that DIY methods rarely achieve.
Your next step is simple: take photos of your current doors, measure them carefully, and request quotes from two or three suppliers. Compare costs for door replacement versus refacing versus full replacement. With thoughtful planning and realistic expectations, you can create a kitchen that looks like it was designed all at once, even if it wasn’t.


