
Your kitchen cabinets have good bones, but that dated honey oak finish is dragging the whole room down. Replacing them costs thousands, but painting over stained cabinets delivers a dramatic transformation for a fraction of the price. Here’s the honest truth though: the difference between a flawless, durable finish and a peeling mess comes down to one thing. Preparation.
This guide breaks down the complete process from start to finish. You’ll learn how to break the glossy seal on stained wood, which primers and paints actually bond to slick surfaces, and how to apply everything for a smooth, professional result. Follow these steps in order, and your painted cabinets will look factory-fresh for years.
Clean All Cabinet Surfaces Thoroughly
Before any sanding starts, every cabinet surface must be spotless. Kitchen cabinets accumulate grease, cooking oils, and grime that you cannot see with the naked eye. That invisible residue prevents paint from bonding properly and causes premature peeling.
Use a Strong Degreaser
Reach for a TSP (Trisodium Phosphate) substitute or a dedicated degreaser. These products cut through years of kitchen buildup that regular cleaners leave behind. Apply the degreaser to all surfaces including doors, drawer fronts, frames, and edges.
Scrub High-Touch Areas
Pay special attention to areas around handles, stove-adjacent cabinets, and bottom edges. These zones collect the most oil and grease. Use a microfiber cloth or sponge and work in small sections to ensure even coverage.
Rinse and Dry Completely
After scrubbing, wipe every surface with a clean damp cloth to remove degreaser residue. Dry immediately with a lint-free towel. Let the cabinets sit for at least 30 minutes to guarantee no moisture remains before you proceed.
Sand to Break the Glossy Seal

Paint cannot adhere to a slick, sealed surface. The glossy finish on stained cabinets repels paint like water on a windshield. Your goal is to scuff that surface enough to create a mechanical tooth for the primer to grip.
Use 220-Grit Sandpaper
Choose 220-grit sandpaper or a sanding sponge for this task. This grit is fine enough to avoid visible scratches but coarse enough to break the shine. For flat panels, a sanding block provides even pressure. For contoured or raised areas, a flexible sanding sponge works better.
Sand Lightly and Evenly
Apply light pressure and move in the direction of the wood grain. You are not trying to strip the stain. You are simply dulling the finish. When done correctly, the surface will look flat and matte under direct light instead of shiny.
Avoid Over-Sanding
Pressing too hard exposes raw wood and creates uneven patches that absorb primer differently. If you notice dark spots where the finish is completely gone, stop immediately. Those areas will look blotchy after painting.
Remove All Sanding Dust
Fine dust particles are the enemy of a smooth paint job. Even microscopic specks create texture in your finished surface. Dust removal is quick, but it is absolutely non-negotiable.
Wipe With a Tack Cloth
Use a tack cloth, which is a sticky, lint-free rag designed specifically for lifting fine dust. Wipe every surface including corners, crevices, and edges. Regular towels leave lint and can reintroduce dirt.
Check With a Flashlight
Hold a flashlight at a low angle across the surface. This technique reveals missed dust particles and unsanded areas that look fine under normal lighting. Touch up any spots you find.
Apply a High-Adhesion Primer
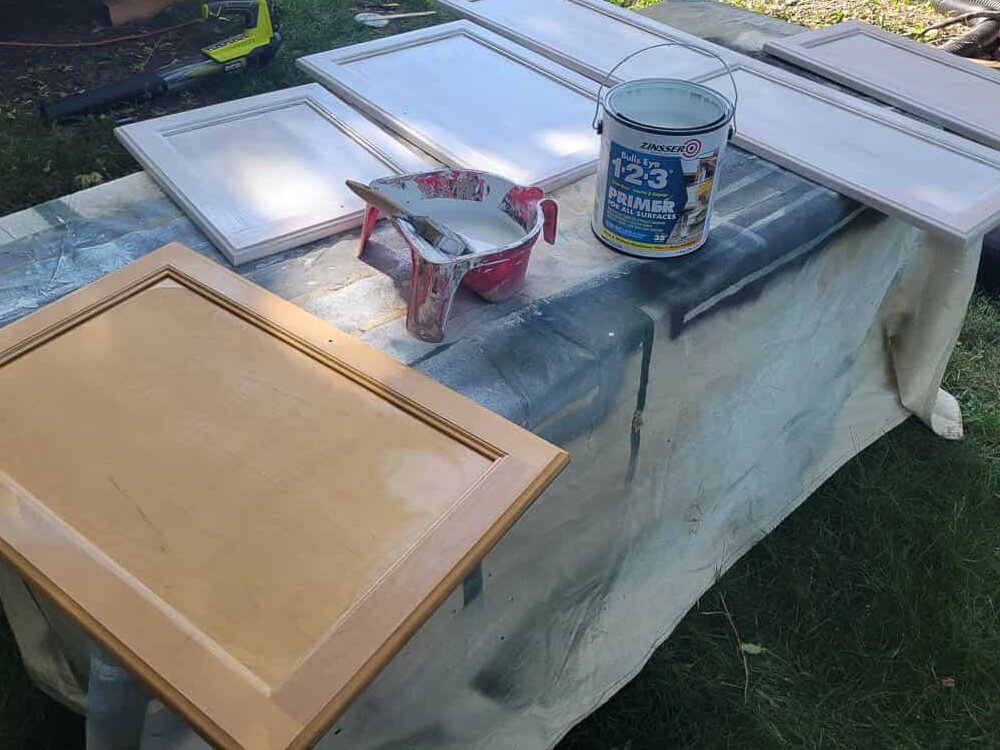
Primer is the critical bridge between sealed stained wood and your new paint. Skip this step, and your paint will fail regardless of its quality. The right primer bonds to slick surfaces and gives your topcoat something to hold onto.
Choose the Right Primer Type
Not all primers are created equal. Standard drywall primer will not bond to sealed wood. You need a high-adhesion formula designed for slick surfaces. Two proven options are:
• BIN Shellac-Based Primer: Superior stain blocking, dries fast, but has a strong odor
• Zinsser Bulls Eye 1-2-3: Water-based, low odor, strong adhesion, ideal for interior projects
Prime Every Surface
Use a high-quality brush or foam roller to apply primer evenly. Work in sections and follow the wood grain. Do not skip cabinet interiors, edges, or back panels. They need protection and a uniform base too.
Let Primer Dry Completely
Most primers dry to the touch within one to two hours. However, always follow the manufacturer’s recommended drying time before painting. Rushing this step leads to poor adhesion and bubbling.
Sand Lightly After Priming
A quick sanding pass after the primer dries creates an even smoother base for your paint. This step removes raised grain and any brush marks left behind.
Use 220-Grit Again
Gently sand the primed surface with fresh 220-grit paper. Keep the pressure light. You are smoothing, not removing the primer.
Wipe Clean Again
Dust will reappear after this sanding pass. Remove it with a tack cloth or a slightly damp rag. This second dusting is normal and necessary for a flawless finish.
Select Premium Cabinet Paint
Your paint choice matters enormously. Wall paint lacks the binders and resins needed for cabinet durability. Kitchen cabinets face constant use, moisture, and cleaning. Your paint must handle all of it.
Pick a Durable Paint Formula
Two professional-grade options consistently deliver excellent results:
• Benjamin Moore Advance: An alkyd and water hybrid that self-levels and dries to a hard, durable enamel
• Sherwin-Williams Emerald: A 100 percent acrylic latex that resists chipping, fading, and yellowing
Choose Satin or Semi-Gloss Sheen
These finishes offer the best balance for kitchen cabinets. They are easy to clean, resist moisture and stains, and hide minor surface imperfections. Avoid flat or matte finishes, which cannot withstand kitchen conditions.
Paint in Thin, Even Coats
Thick paint application causes drips, runs, and uneven drying. Thin coats dry faster, level better, and produce a smoother final result.
Use the Right Tools
• Foam roller: Best for flat surfaces, delivers a smooth finish without brush marks
• High-quality angled brush: Essential for edges, corners, and detailed areas
Load your tools lightly and spread the paint evenly across each surface.
Apply Two to Three Coats
One coat never provides adequate coverage or durability. Apply the first coat thinly and let it dry completely. Add a second coat and assess coverage. Dark stains may require a third coat for full opacity.
Wait Between Coats
Follow the manufacturer’s recommended drying time between coats, typically four to six hours. Do not rush this step. Touching or sanding prematurely ruins the finish.
Allow Proper Cure Time
Drying and curing are not the same thing. Paint feels dry to the touch within hours, but it takes days to fully harden. Using cabinets too soon causes sticking doors, smudges, and permanent damage.
Wait 24 to 48 Hours
Keep cabinet doors and drawers open during this period. This prevents doors from sticking to frames and allows proper airflow for even curing.
Avoid Heavy Use for a Week
Do not hang heavy items or aggressively scrub surfaces for at least seven days. Full cure time for Benjamin Moore Advance is 14 days. The finish continues to harden throughout this period.
Add a Protective Topcoat for Extra Durability
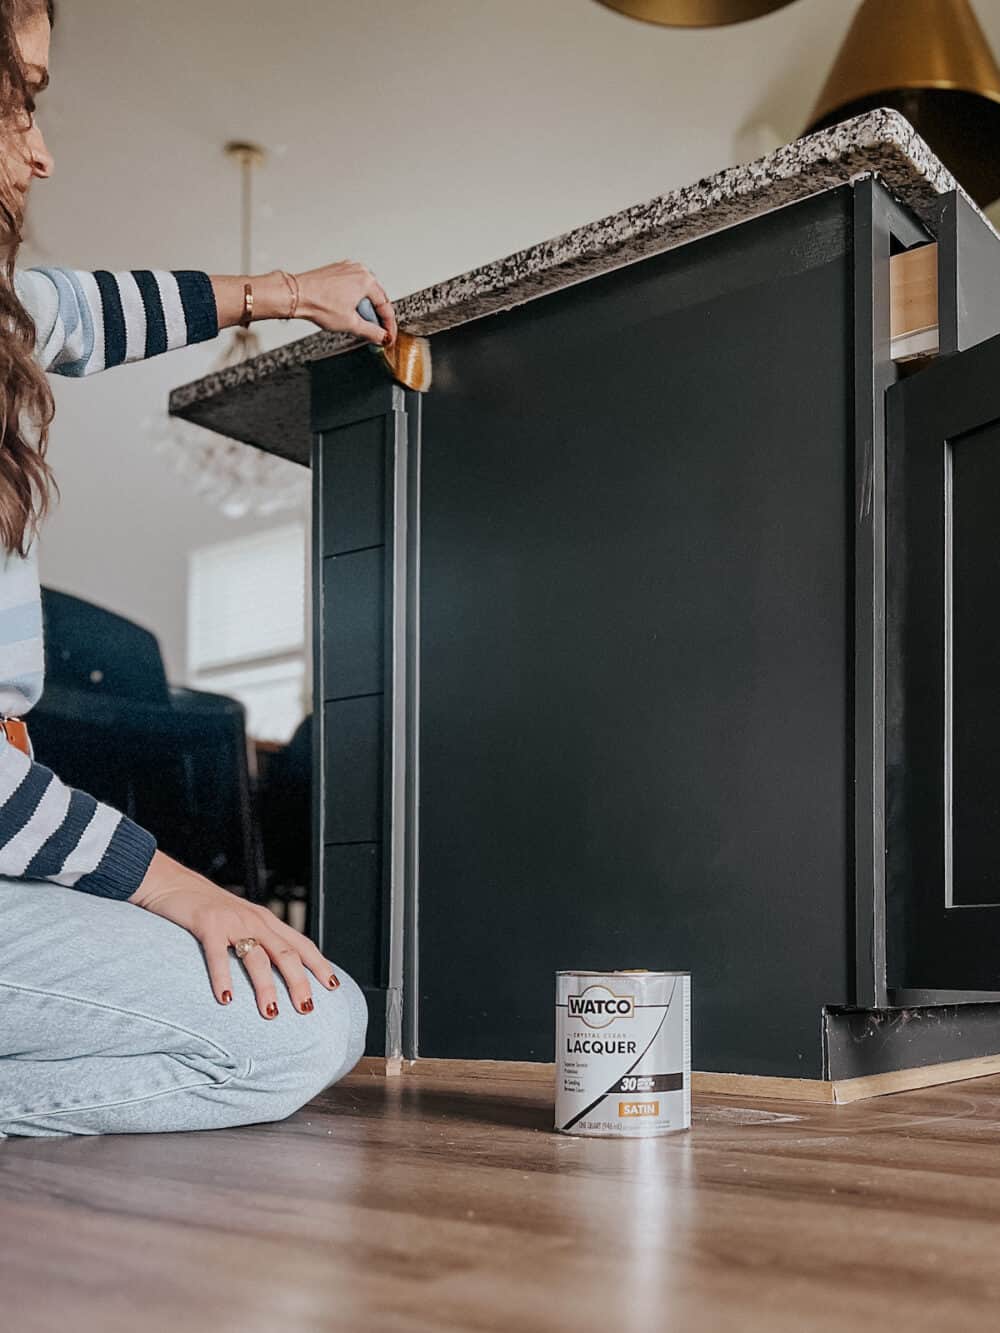
In high-traffic kitchens, an additional clear coat extends the life of your painted finish. This optional step adds significant protection against scratches and chemicals.
Use Water-Based Polyurethane
Apply a water-based clear polyurethane after your final paint coat has fully cured, typically after seven days. This adds scratch resistance, chemical protection, and makes cleaning easier. Avoid oil-based polyurethane, which yellows over time.
Apply Thinly With a Foam Roller
Use a high-density foam roller to prevent bubbles. If applying multiple coats, sand lightly between them for optimal adhesion.
Avoid These Common Painting Mistakes
Even experienced DIYers make errors that compromise their results. Here is what to watch out for.
Skipping the Cleaning Step
Grease is invisible but destructive. No amount of sanding or priming fixes a dirty surface. This is the most common cause of paint failure.
Using Low-Quality Paint
Cheap paint lacks the binders and resins required for durability. It chips, fades, and requires more coats to achieve coverage.
Rushing Drying Times
Impatience causes smudges, sticking doors, and soft finishes that dent easily. Follow every recommended wait time.
Painting in Dusty Conditions
Close windows, turn off HVAC systems, and cover floors. Dust lands on wet paint and creates a rough texture that is nearly impossible to fix.
Maintain Your Painted Cabinets
A beautiful finish lasts longer with proper care. Simple habits keep your cabinets looking fresh.
Clean Gently
Use a damp cloth with mild soap for routine cleaning. Avoid abrasive sponges and harsh chemicals like bleach or ammonia.
Repair Chips Immediately
Touch up scratches or chips with a small brush as soon as you notice them. This prevents moisture from seeping into the wood underneath.
Reapply Topcoat as Needed
Every few years, consider adding a fresh clear coat to high-wear areas like drawer fronts and cabinet edges.
Frequently Asked Questions About Painting Over Stained Cabinets
Do I need to strip the stain before painting?
No. You only need to scuff the glossy finish with 220-grit sandpaper. Stripping is unnecessary and creates extra work. The primer bonds to the scuffed surface and bridges the old finish to your new paint.
Can I paint over stained cabinets without sanding?
Technically you can use a liquid deglosser, but sanding is the more reliable method. Liquid deglossers can leave residue that affects adhesion. Light sanding with 220-grit takes minimal time and delivers consistent results.
What is the best primer for stained cabinets?
BIN shellac-based primer and Zinsser Bulls Eye 1-2-3 are both excellent choices. BIN offers superior stain blocking but has strong fumes. Zinsser is water-based, low odor, and provides strong adhesion for interior projects.
How long does it take to paint kitchen cabinets?
The entire project takes three to five days including drying and curing time. Active work takes one to two days depending on cabinet quantity. Drying times between coats account for most of the schedule.
Can I paint over stained cabinets with chalk paint?
Chalk paint can work, but it requires a topcoat for durability in kitchens. It is less durable than enamel or acrylic latex paints. For best results, stick with products specifically formulated for cabinetry.
Why is my painted cabinet finish peeling?
Peeling almost always traces back to inadequate surface preparation. Grease residue, skipped sanding, or insufficient primer all cause adhesion failure. The fix requires stripping the failed paint and starting over with proper prep.
Key Takeaways for Painting Over Stained Cabinets
Painting over stained cabinets is one of the highest-impact upgrades you can make to your kitchen. The transformation is dramatic, the cost is minimal, and the process is beginner-friendly when you follow the right sequence.
The secret to success is discipline in preparation. Clean thoroughly to remove invisible grease. Sand lightly to break the glossy seal. Apply a high-adhesion primer. Use premium cabinet paint in thin, even coats. And never rush the drying or curing process.
Your reward is a kitchen that looks professionally renovated at a fraction of the replacement cost. Start with a single cabinet door to test your technique, then tackle the full project with confidence. Your dated stained cabinets are about to become the best feature in your kitchen.


