

Painting plywood cabinets is one of the most affordable ways to transform your kitchen without a full remodel. A fresh coat of paint can completely change the look of your space, but plywood requires special preparation to ensure the paint adheres properly and lasts for years. Skip the prep work, and you risk peeling, bubbling, or an uneven finish that looks anything but professional.
This guide walks you through the entire process, from removing your cabinet doors to reinstalling them with a flawless finish. You’ll learn how to clean, sand, prime, paint, and protect plywood surfaces so your cabinets look custom-built, not just painted over.
Remove and Label Cabinet Parts
Before you pick up a paintbrush, you need to clear the way. Painting around doors and hardware leads to messy edges and uneven coverage.
Take Off Doors, Drawers, and Hardware
Start by removing all cabinet doors, drawers, hinges, knobs, and handles. Use a screwdriver or drill with the correct bit to avoid stripping screws. Work through one cabinet at a time so you don’t feel overwhelmed by a pile of parts.
Label Each Part for Reassembly
Grab masking tape and a marker, then label every door and drawer with its location, such as “Upper Left” or “Island Drawer.” Place matching labels on the cabinet frames themselves. This simple step prevents confusion when it’s time to put everything back together. Store screws in labeled baggies or a pill organizer to keep them sorted.
Clean All Surfaces Thoroughly
Plywood absorbs grease and grime over time, especially in kitchens where cooking splatters are common. Painting over dirty surfaces leads to poor adhesion, bubbling, and a finish that won’t last.
Wipe Down with Degreasing Solution
Mix warm water with a mild dish soap or a trisodium phosphate (TSP) substitute. Use a microfiber cloth to scrub all cabinet surfaces, including fronts, edges, backs, and interiors. Pay extra attention to areas near the stovetop and around handles, where grease tends to build up.
Dry Completely Before Sanding
Allow all parts to air dry for at least 2 to 4 hours. Moisture trapped under paint causes warping or lifting, so never skip this step. Even slightly damp surfaces can compromise your final finish.
Sand for Better Adhesion
Sanding creates a rough surface, or “tooth,” that helps primer and paint bond to smooth plywood. This step is critical for a durable, long-lasting finish.
Use 120-Grit Sandpaper First
Sand all surfaces lightly with 120-grit sandpaper using a sanding block or orbital sander. Focus on edges, corners, and any glossy spots where paint may struggle to adhere. Avoid aggressive sanding; you’re not removing wood, just scuffing the surface enough for grip.
Wipe Away Dust with Tack Cloth
After sanding, wipe every piece with a tack cloth. This sticky, lint-free rag picks up fine dust that regular cloths miss. Don’t use water or standard towels, as they leave residue or lint behind.
Repair Surface Flaws

Plywood cabinets often show dents, scratches, or chipped veneer, especially around edges and drawer fronts. Fixing these imperfections before painting ensures a smooth, professional result.
Fill Gaps with Wood Filler
Apply a water-based wood filler to dents, screw holes, or delaminated edges using a putty knife. Feather the edges for a seamless blend with the surrounding surface. Let it dry completely, which usually takes 1 to 2 hours depending on the product.
Sand Smooth with 220-Grit Paper
Once dry, lightly sand the filled areas with 220-grit sandpaper until they’re flush with the surface. Wipe clean with a tack cloth again. This step prevents shadows or texture from showing through your paint.
Apply High-Bonding Primer
Primer is non-negotiable for plywood. It seals the wood, prevents tannin bleed, and creates a uniform base that paint can grip. Skipping primer is the fastest way to end up with peeling paint.
Choose the Right Primer Type
Use a high-adhesion bonding primer like Zinsser Bullseye 1-2-3, BIN Shellac, or Kilz Adhesion. These products are formulated for slick or porous surfaces and prevent peeling better than standard primers.
Apply with Brush and Roller
Use a high-quality synthetic brush for edges and a small foam roller for flat surfaces. This combination reduces brush marks and ensures even coverage. Avoid thick coats; thin, even layers dry better and prevent drips.
Let Dry and Lightly Sand
Wait the recommended time, usually 2 to 4 hours, before lightly sanding with 220-grit paper. This removes dust nibs and creates a smooth surface for paint. Wipe with a tack cloth before moving on.
Pick the Right Cabinet Paint
Not all paints stand up to kitchen wear. Choose durability and finish carefully to ensure your cabinets look great and hold up to daily use.
Use Cabinet-Grade Interior Paint
Opt for 100 percent acrylic or latex enamel paints labeled for cabinets or trim. Recommended brands include Sherwin-Williams Emerald Urethane Trim Enamel, Benjamin Moore Advance, or Behr Cabinet & Trim. These products are designed to withstand the wear and tear of a busy kitchen.
Choose a Wipeable Finish
Go for semi-gloss or satin finishes. They resist moisture, stains, and daily wear better than flat or eggshell options. Semi-gloss is easier to clean but shows imperfections more readily, while satin offers a softer look with good durability.
Paint in Thin, Even Coats
How you apply paint matters just as much as the product you choose. Proper technique prevents brush marks, drips, and uneven coverage.
Use Quality Tools
A high-density foam roller, about 4 inches wide, gives a smooth finish on flat surfaces. For edges, corners, and recessed panels, use a 2-inch angled synthetic brush. Avoid cheap brushes that shed bristles into your paint.
Work in Sections
Start with cabinet doors: paint the frame first, then panels, then edges. Use a “W” or “M” rolling pattern to distribute paint evenly and prevent lap marks where wet paint meets dry paint.
Let First Coat Dry Fully
Wait 2 to 4 hours, or as directed on the paint can, before touching the surface. Humidity and temperature affect drying time. Ideal conditions are 65 to 75 degrees Fahrenheit with low humidity.
Sand Between Coats
After the first coat dries, lightly sand with 220-grit paper. This removes dust specks and creates a mechanical bond for the next layer. Wipe with a tack cloth, and never skip this step.
Apply Second and Third Coats
Apply a second coat the same way as the first. Most projects need 2 to 3 thin coats for full, even coverage. Let the final coat dry completely, usually 24 hours, before handling or reassembly.
Paint Hidden Areas Too
Don’t forget the parts you don’t see every day. Painting them improves durability and prevents moisture damage.
Coat the Backs of Cabinet Boxes
The backs are exposed to air and humidity, which can cause warping over time. A primer and paint coat helps prevent this and extends the lifespan of your cabinets.
Paint Door Interiors and Drawer Interiors
If your cabinet interiors are bare or stained, prime and paint them too. You can use a less expensive paint if you prefer, but match the sheen for consistency. This step also prevents staining from stored items.
Allow Proper Cure Time
Drying is not the same as curing. Paint may feel dry to the touch but still be soft underneath, so patience pays off.
Wait 24 to 72 Hours Before Reassembly
Most cabinet paints take 3 to 7 days to fully cure. Reattach hardware after 24 to 48 hours, but avoid heavy use, like slamming doors, for at least 72 hours.
Avoid Moisture and Pressure
Keep the area dry and don’t place items inside cabinets too soon. Rushing this step can leave permanent marks or scratches in your fresh finish.
Add a Protective Topcoat (Optional)
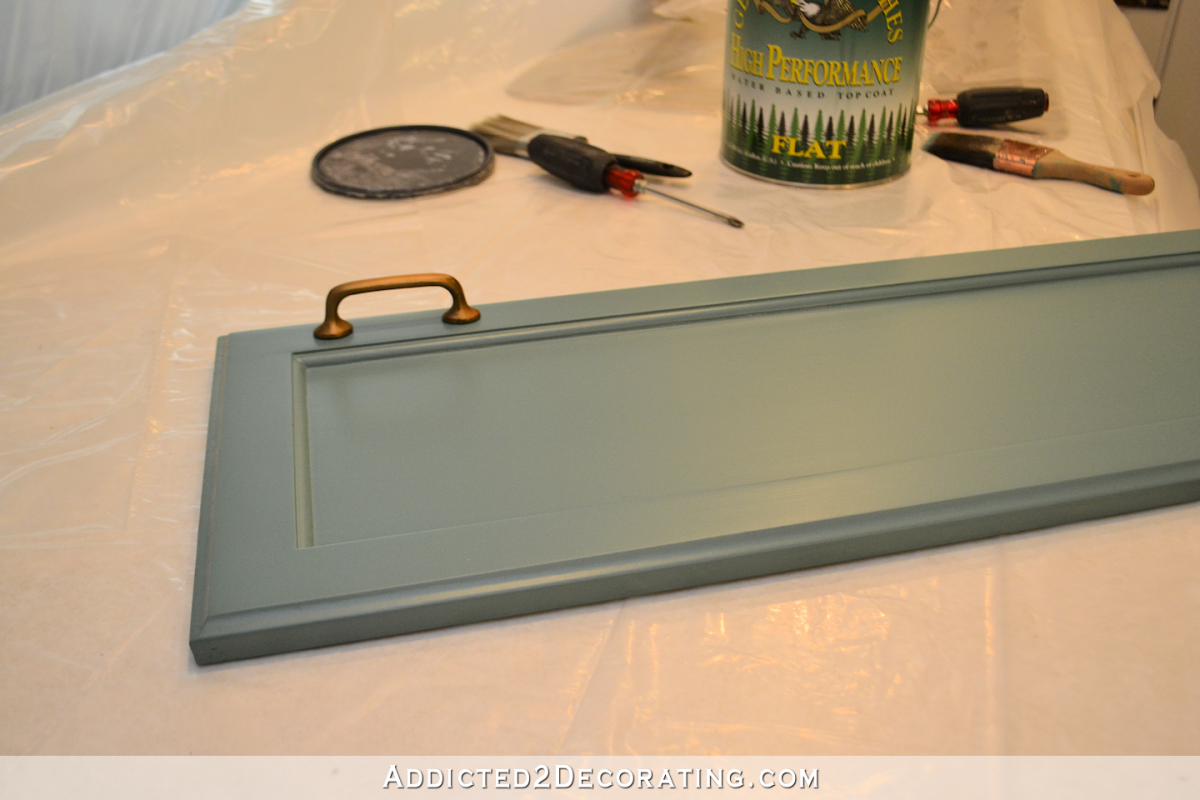
For high-traffic kitchens or homes with kids, extra protection pays off. A clear topcoat adds a layer of defense against scratches and moisture.
Apply Water-Based Polyurethane
A clear, water-based polyurethane like Minwax Polycrylic adds scratch and moisture resistance. Use a foam brush and apply 1 to 2 thin coats. Sand lightly between coats with 320-grit paper for a smooth finish.
Avoid Yellowing with Water-Based Formulas
Oil-based polyurethanes can yellow over time, especially on white or light paint. Stick with water-based formulas for a clear, long-lasting finish that won’t discolor.
Reinstall Doors and Hardware
Now it’s time to put everything back together. This is where your labeling system pays off.
Reattach Doors with Care
Use your labels to match doors and hinges correctly. Tighten screws securely, but don’t overtighten, as this can strip holes or misalign doors.
Replace Knobs and Handles
If you’re reusing old hardware, clean it first. For a fresh look, consider upgrading to modern knobs or pulls. Use a template to drill new holes evenly if you’re changing hardware placement.
Pro Tips for a Flawless Finish
Avoid common mistakes and save time with these expert-tested strategies.
Work in a Dust-Free Environment
Paint in a garage or room with closed doors and windows. Cover floors with drop cloths rather than plastic, which traps dust. Run an air purifier if you have one.
Use Painter’s Tape Wisely
Apply tape to glass inserts, hinges, or adjacent walls. Remove it while the paint is still slightly tacky, not fully hardened, to avoid peeling.
Test Paint on a Scrap Piece
Cut a small piece of scrap plywood and prime and paint it. Let it dry fully to see the true color and sheen. Lighting affects how paint looks, so check it in both daylight and artificial light.
Maintain Your Painted Cabinets
Clean with a soft, damp cloth and mild soap. Avoid abrasive cleaners or soaking the surface. Touch up chips quickly with a small brush and leftover paint.
Frequently Asked Questions About Painting Plywood Cabinets
Do I need to prime plywood cabinets before painting?
Yes, priming is essential. Plywood is porous and can bleed tannins through paint. A high-adhesion bonding primer seals the surface, prevents discoloration, and helps paint adhere properly for a durable finish.
What kind of paint should I use on plywood cabinets?
Use a 100 percent acrylic or latex enamel paint formulated for cabinets or trim. Semi-gloss or satin finishes work best because they resist moisture, stains, and daily wear. Brands like Sherwin-Williams Emerald Urethane, Benjamin Moore Advance, and Behr Cabinet & Trim are reliable choices.
How many coats of paint do plywood cabinets need?
Most projects require 2 to 3 thin coats of paint for full, even coverage. Sand lightly with 220-grit paper between coats to remove dust and ensure proper adhesion. Let each coat dry completely before applying the next.
How long should I wait before reinstalling cabinet doors?
Wait at least 24 to 48 hours before reattaching hardware, and avoid heavy use for 72 hours. Paint takes 3 to 7 days to fully cure, so handle cabinets gently during this period to prevent marks or scratches.
Can I paint plywood cabinets without sanding?
Sanding is strongly recommended. It creates a rough surface that helps primer and paint bond to the smooth plywood. Skipping this step increases the risk of peeling, bubbling, and an uneven finish.
Should I add a topcoat to painted plywood cabinets?
A water-based polyurethane topcoat adds scratch and moisture resistance, making it a smart choice for high-traffic kitchens. Apply 1 to 2 thin coats with a foam brush, sanding lightly between coats for a smooth, durable finish.
Key Takeaways for Painting Plywood Cabinets
Painting plywood cabinets is a rewarding DIY project that delivers dramatic results for a fraction of the cost of new cabinets. The key to success lies in preparation: thorough cleaning, proper sanding, and a high-quality bonding primer set the foundation for a flawless finish.
Take your time with each step. Apply multiple thin coats of cabinet-grade paint, sand between coats, and allow plenty of time for curing. These small investments of effort pay off with a durable, professional-looking result that lasts for years.
Ready to transform your kitchen? Start by removing your cabinet doors and gathering your supplies. With the right approach and a little patience, you’ll have beautiful, freshly painted plywood cabinets that look custom-built.


