

Struggling to see what you’re chopping on the counter? Shadows from your body and upper cabinets can make food prep frustrating and even unsafe. Hardwired under cabinet lighting solves this by providing bright, even illumination right where you need it, and it looks clean with no cords in sight. This guide walks you through the complete installation process, from safety prep to final testing, so you can tackle this project with confidence.
Unlike plug-in strips that clutter your outlets or battery lights that die at the worst moments, hardwired units connect directly to your home’s electrical system. That means permanent power, a professional appearance, and one less thing to recharge. You’ll learn how to plan your layout, run wiring safely, mount fixtures, and make secure connections that will last for years.
Essential Safety Steps Before You Begin
Turn Off Power at the Breaker
Your first move is always to cut power to the circuit you’ll be working on. Locate the correct breaker in your panel and flip it off. Don’t rely on the wall switch alone, since someone could accidentally turn it back on. Use a voltage tester on the wires you’ll touch to confirm zero current before proceeding.
Verify Local Electrical Codes
Building codes vary by region, and some areas require permits for new wiring work. Contact your local building department or a licensed electrician to confirm what’s allowed. This step prevents failed inspections and potential safety hazards down the road.
Use Proper Protective Gear
Wear insulated gloves and safety glasses throughout the project. Keep your work area dry and use tools with insulated handles. These simple precautions protect you from shocks and injuries while drilling or handling wires.
Required Tools and Materials
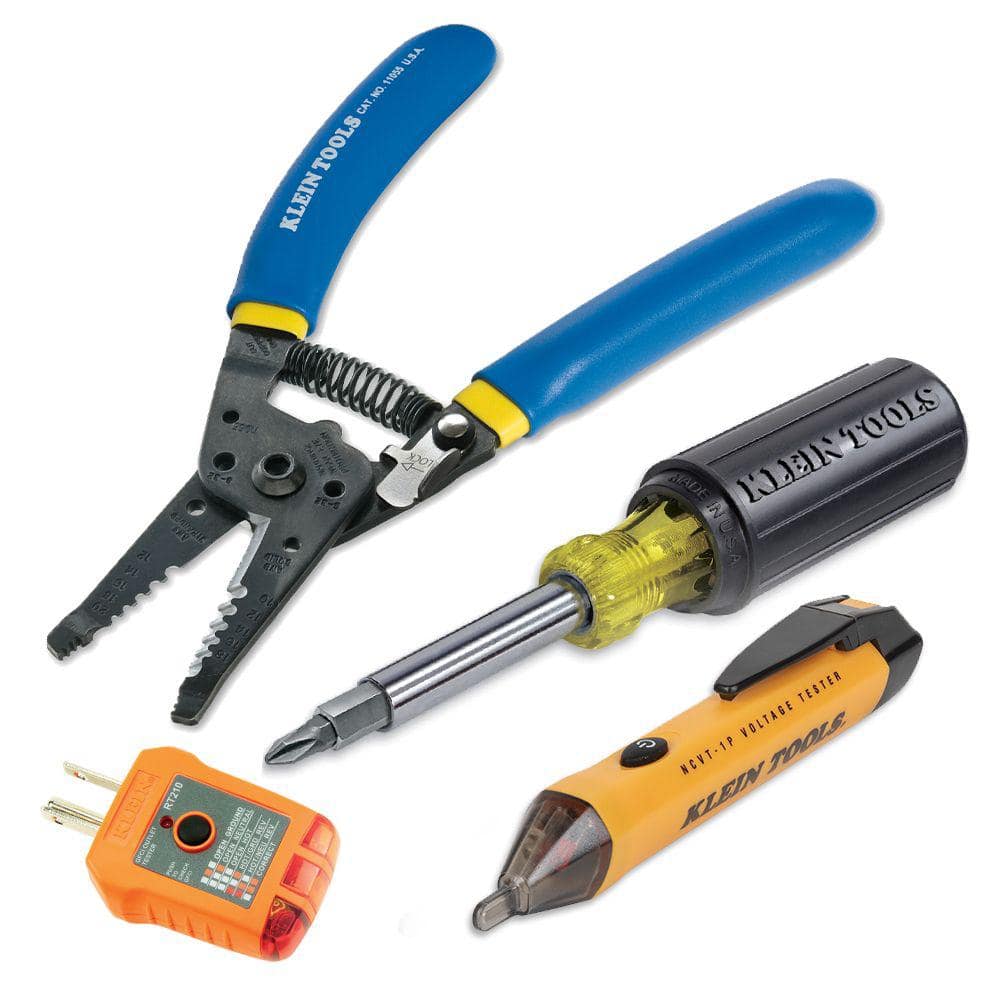
Basic Tools You’ll Need
- Voltage tester
- Wire stripper
- Screwdrivers in Phillips and flathead sizes
- Drill with bits for wood and metal
- Fish tape for pulling wire through tight spaces
- Stud finder to locate framing
- Measuring tape and pencil for marking
Electrical Supplies
- Hardwired under cabinet light fixtures
- NM cable, typically 14/2 or 12/2 depending on your circuit
- Wire nuts or push-in connectors
- Electrical tape for extra protection
- Junction box if your local code requires one
- Cable clamps and staples for securing wire
- Mounting screws and wall anchors
Optional but Helpful Items
- Dimmer switch for adjustable brightness
- Step stool or small ladder
- Painter’s tape for temporary fixture alignment
Plan Your Lighting Layout
Measure Cabinet Length and Spacing
Start by measuring the underside of each cabinet section where you want lights. Fixtures typically range from 12 to 36 inches long, so choose sizes that fit your space. You can combine multiple units to cover longer runs, but keep them evenly spaced for consistent illumination.
Determine Power Source Location
Find the closest accessible power source, whether that’s an existing outlet, switch, or junction box. Shorter wire runs mean less complexity and fewer chances for mistakes. If nothing is nearby, you may need to run a new circuit from your panel, which is best left to a professional electrician.
Mark Fixture and Wiring Paths
Use a level and pencil to mark exact positions for each fixture under the cabinets. Also map out where wires will travel through walls or cabinet backs. For installations that pass through cabinet interiors, drill small pilot holes to guide the cable cleanly.
Mount the Light Fixtures
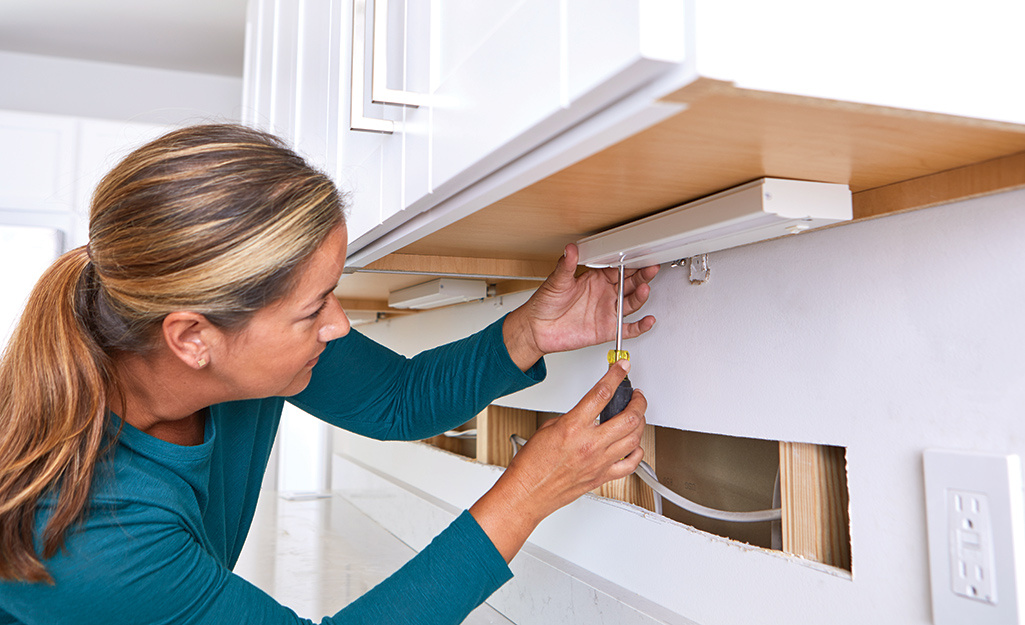
Attach Mounting Brackets Securely
Most hardwired lights include mounting brackets designed for your specific unit. Choose screws and anchors that match your cabinet material, whether that’s wood, particleboard, or metal. Make sure each bracket is level and positioned according to the manufacturer’s spacing recommendations.
Position Fixtures Before Final Tightening
Slide the fixtures onto their brackets and adjust alignment before tightening everything down. Use painter’s tape to hold units in place temporarily. This lets you test the layout and coverage before committing to the final position.
Drill Access Holes Carefully
If your wiring needs to pass from cabinets into walls, drill holes in discreet spots, usually near the back edge. Choose a drill bit slightly larger than your cable diameter. Before drilling, check for wall studs and existing plumbing or electrical lines to avoid costly damage.
Run Electrical Wiring
Run Cable from Power Source
Starting at your chosen power source, run NM cable along your planned path. Route it through walls, soffits, or behind baseboards whenever possible for a clean look. Secure the cable every 4.5 feet with staples and use clamps wherever the wire enters a box or fixture.
Feed Wire Through Cabinets
Use fish tape to guide cable through drilled holes into cabinet interiors. Pull the wire gently to avoid damaging the insulation. Leave at least 6 inches of slack at each fixture and connection point to make wiring easier.
Connect to Existing Circuit Safely
Double-check that power is off before tapping into an outlet or switch. Remove the cover plate and examine the existing wiring. Connect your new cable to the hot wire, usually black, the neutral wire, usually white, and the ground wire, which is bare copper or green. Secure each connection with wire nuts and test before moving on.
Wire the Light Fixtures
:max_bytes(150000):strip_icc()/make-pigtail-wire-connections-1152879-hero-3a11916036da4e9f9e6132c5ecf0571e.jpg)
Strip and Prepare Wires
Use your wire stripper to remove about three-quarters of an inch of insulation from each cable end. Match the fixture wires to your cable: black to black for hot, white to white for neutral, and green or bare to ground.
Make Secure Wire Connections
Join wires using wire nuts or push-in connectors. Twist the wires together clockwise before capping them, then give a gentle tug to confirm they’re secure. Wrap each connection with electrical tape for added protection against loosening.
Tuck Wires Neatly into Housing
Once all connections are made, carefully fold excess wiring into the cabinet or junction box. Avoid pinching wires between the fixture and the mounting surface, which can damage insulation over time.
Make Final Electrical Connections
Connect to Power Source Last
After all fixtures are wired, make the final connection to your power source. If you’re using a switch, verify the hot wire connects to the correct terminal. Confirm all ground wires are bonded together for safety.
Install Junction Box If Required
Some local codes require an accessible junction box for all wire splices. If that applies to your area, install a metal or plastic box inside a cabinet or wall and keep all connections within it. This protects the splices and makes future maintenance easier.
Test for Power Continuity
Turn the breaker back on and use your voltage tester to confirm the circuit is live. Flip the switch and check that your lights illuminate. If nothing happens, cut power and recheck every connection point.
Test and Troubleshoot Common Issues

Lights Won’t Turn On
Start by verifying the breaker is on and the switch is functioning. Check wire connections at each fixture and at the power source. Use a multimeter to test continuity if you suspect a broken wire or faulty switch.
Flickering or Dim Lights
Loose connections are the usual culprit behind flickering. Inspect every wire nut and terminal for tightness. Also confirm your fixtures are compatible with your voltage, since some LED units need specific transformers or drivers to operate correctly.
Uneven Light Distribution
If some areas are brighter than others, adjust fixture placement or add extra units. Consider upgrading to higher-lumen LEDs or models with wider beam angles for more consistent coverage.
Secure and Finish the Installation
Tighten All Fixtures and Covers
Once everything works, fully tighten all mounting screws and snap on any lens covers or diffusers. Check that no wires are exposed or pinched between components.
Conceal Wires and Cables
Use wire molding or raceways along baseboards or cabinet backs to hide any visible cable runs. Paint the covers to match your surrounding surfaces for a seamless, built-in appearance.
Label the Circuit Breaker
Clearly mark the breaker that controls your new lighting. This simple step saves time and confusion during future maintenance or emergencies.
Maintain and Upgrade Over Time
Clean Fixtures Regularly
Dust and grease from cooking can reduce light output over time. Wipe fixtures with a soft, damp cloth every few months. Avoid abrasive cleaners that can scratch lenses or damage finishes.
Replace Bulbs or Modules as Needed
Most hardwired under cabinet lights use integrated LEDs with lifespans exceeding 25,000 hours. If brightness fades noticeably, check the manufacturer’s instructions for replacement modules or drivers.
Consider Adding a Dimmer
A compatible dimmer switch adds versatility, letting you adjust brightness for different tasks or moods. Verify your lights are dimmable and match the switch type to your fixtures, such as trailing-edge dimmers for LED units.
Frequently Asked Questions About Hardwired Under Cabinet Lighting
Can I install hardwired under cabinet lighting myself?
Yes, if you have basic electrical knowledge and follow safety protocols. Always turn off power at the breaker, use a voltage tester, and check local codes. If you’re unsure about any step, hire a licensed electrician.
How long does installation take?
Most installations take 2 to 4 hours for someone with basic DIY experience. Planning, measuring, and running wire takes the most time, while mounting and connecting fixtures goes faster.
Do I need a permit for this project?
It depends on your local building codes. Some areas require permits for new wiring or modifications to existing circuits. Contact your building department to confirm requirements before starting.
What type of cable should I use?
NM cable, commonly called Romex, is standard for this application. Use 14/2 for 15-amp circuits or 12/2 for 20-amp circuits. Match the cable size to your existing circuit’s amperage.
Can I connect to an existing outlet for power?
Yes, tapping into a nearby outlet is common and often the easiest option. Just ensure the outlet is on a circuit that can handle the additional load, and make all connections inside an accessible box.
Are LED under cabinet lights dimmable?
Many are, but not all. Check the packaging or manufacturer specifications for dimming compatibility. If dimmable, you’ll need a compatible dimmer switch, typically a trailing-edge model for LEDs.
Key Takeaways for Installing Hardwired Under Cabinet Lighting
Hardwired under cabinet lighting transforms your kitchen workspace with bright, even illumination that plug-in options can’t match. The project requires careful planning, attention to safety, and methodical wiring, but the results are worth the effort. You’ll enjoy a permanent lighting solution that boosts both functionality and home value.
The most critical steps are turning off power before any work, verifying local codes, and making secure wire connections. Take your time measuring and marking your layout, and don’t rush the wiring phase. If you encounter anything unfamiliar, consult a professional rather than guessing.
Your next step is to gather the tools listed here and measure your cabinet space. Once you have a clear plan and the right materials, you’re ready to start. Follow each section in order, and you’ll have professional-quality under cabinet lighting that makes every meal prep session easier and more enjoyable.


