

You’ve spent time sanding, priming, and painting your kitchen cabinets—now it’s time to protect that beautiful finish. Without proper sealing, painted cabinets can quickly show wear, water damage, or scratches from daily use. Sealing painted cabinets is the essential final step to ensure durability, longevity, and a professional-quality result. Whether you’ve painted wood, MDF, or laminate cabinets, applying the right protective topcoat makes all the difference. In this guide, you’ll learn the best sealers, application techniques, and pro tips to lock in your cabinet paint job for years.
From choosing between water-based and oil-based polyurethane to mastering brush vs. spray application, every decision impacts the final look and resilience of your cabinets. We’ll walk through each phase—prep, application, drying, and maintenance—so you avoid common pitfalls like bubbles, streaks, or peeling. With the right tools and method, sealing painted cabinets can be a straightforward DIY project that transforms your kitchen with lasting results.
Choose the Right Cabinet Sealer
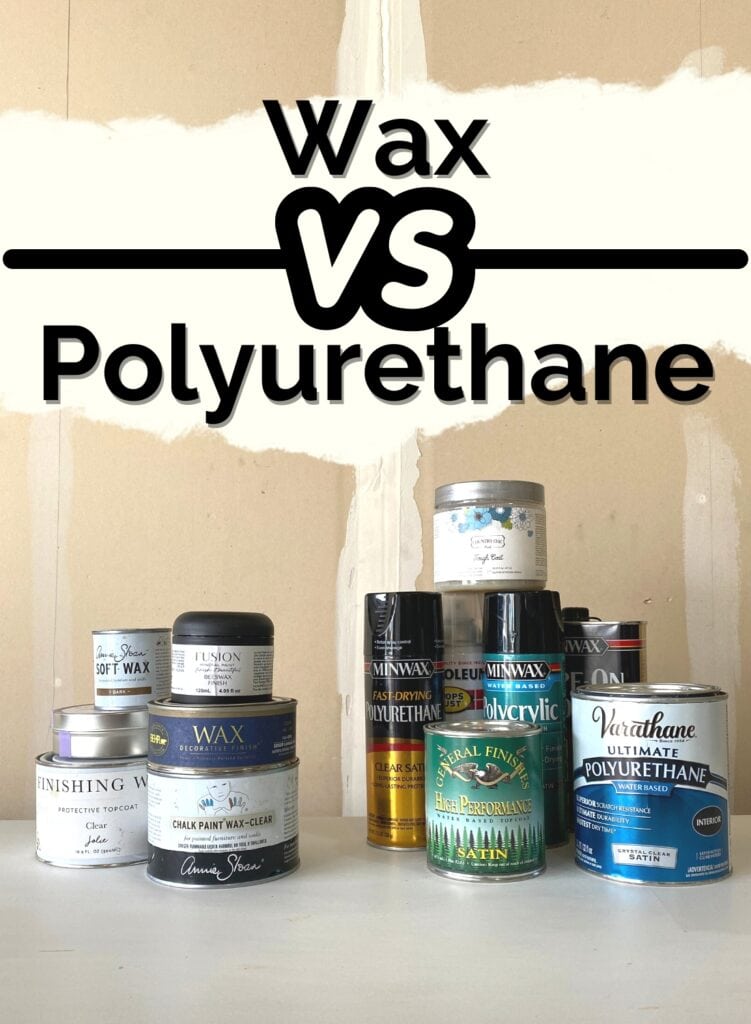
Selecting the best sealer determines how well your painted cabinets withstand heat, moisture, and frequent handling. Not all sealers are equal, and using the wrong one can lead to yellowing, chipping, or a sticky surface over time.
Compare Polyurethane, Polycrylic, and Wax
Polyurethane offers maximum durability and comes in oil-based and water-based formulas. Oil-based polyurethane provides a warm, amber tone and is highly resistant to water and wear—but it yellows over time and requires mineral spirits for cleanup. Water-based polyurethane dries clear, has low odor, and cleans up with soap and water, making it ideal for kitchens.
Polycrylic is a water-based acrylic sealer that’s easy to apply and dries fast. It’s less durable than polyurethane but works well on light-use cabinets. Avoid oil-based topcoats over latex paint unless you’re using an oil-based bonding primer underneath—otherwise, adhesion issues may occur.
Paste wax is best for low-traffic areas or decorative finishes. While it gives a soft, hand-rubbed look, it requires frequent reapplication and offers minimal protection against water or grease. For kitchen cabinets, wax is generally not recommended unless used over chalk paint in a dry environment.
Gloss Levels: Matte to High Gloss
The sheen of your sealer affects both appearance and maintenance. Matte finishes hide imperfections and offer a modern, subtle look—but they’re less wipeable and show more wear. Satin is the most popular choice for cabinets, balancing a soft sheen with durability and cleanability. Semi-gloss and high-gloss finishes are highly resistant to moisture and easy to clean, but they highlight dents, brush marks, and surface flaws.
For kitchens, satin or semi-gloss is recommended. They resist fingerprints and grease splatter better than flat finishes and maintain a polished appearance with minimal upkeep.
Prep Cabinets for Sealing
Proper preparation ensures the sealer bonds well and delivers a smooth, long-lasting result. Skipping prep leads to peeling, bubbling, or an uneven finish—even with the best products.
Ensure Paint Is Fully Cured
Wait at least 72 hours after the final paint coat before sealing. While paint may feel dry to the touch in a few hours, it continues to cure internally. Applying sealer too soon traps solvents, leading to cloudiness or soft spots. For oil-based paint, wait 5–7 days to allow full cure.
Check manufacturer guidelines for exact recoat times. Rushing this step is one of the most common causes of failed topcoats.
Clean and Light Sand Before Sealing
Wipe each cabinet surface with a tack cloth or microfiber rag to remove dust, lint, and debris. Even invisible particles can mar the sealer’s finish.
Lightly sand with 220-grit sandpaper to de-gloss the paint and create “tooth” for the sealer to adhere. Focus on smooth, even strokes—don’t press hard. After sanding, wipe again with a tack cloth. Never skip this step, especially on glossy paint.
Apply the First Sealer Coat
The first coat seals the paint and sets the stage for a flawless final look. How you apply it affects clarity, smoothness, and durability.
Use the Right Tools for Smooth Finish
For brushing, use a high-quality synthetic brush (2–3 inches wide) for flat surfaces and an angled brush for edges. Foam brushes are affordable but can leave bubbles and wear out quickly.
For rolling, use a microfiber or lambswool roller with a 1/4-inch nap to minimize texture. Roll in one direction for consistency.
For spraying, an HVLP sprayer delivers the smoothest, brush-free finish. It’s ideal for large cabinet faces but requires masking, proper ventilation, and cleanup. Practice on scrap material first.
Apply Thin, Even Coats
Pour a small amount of sealer into a clean tray. Work in sections, applying in the direction of the wood grain (or panel layout for non-wood). Maintain a wet edge to avoid lap marks.
Use long, light strokes—don’t overwork the sealer. Bubbles are common; pop them with a brush or let them rise and settle before drying. Avoid thick coats, which can sag, wrinkle, or take days to dry.
Let the first coat dry completely—usually 4–6 hours for water-based, 8–12 hours for oil-based. Follow product instructions precisely.
Sand Between Coats
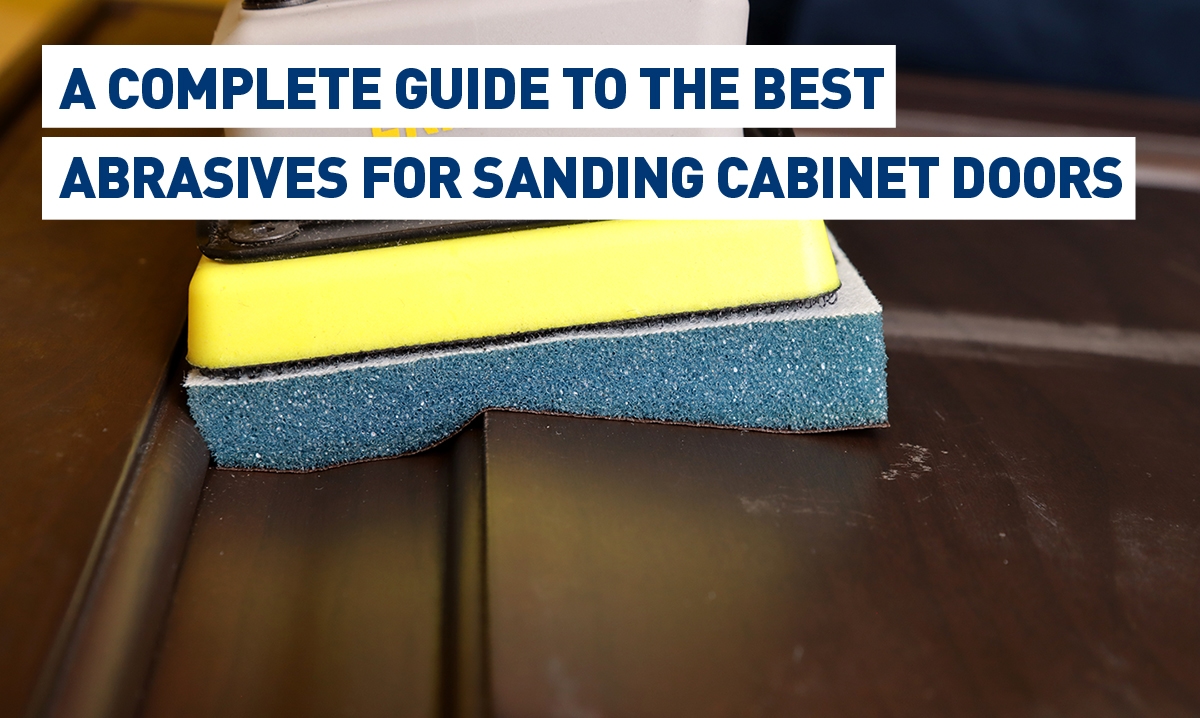
Multi-coat sealing requires light sanding between layers to remove dust nibs and ensure adhesion. Skipping this step results in a rough, uneven finish.
Sand with 220–320 Grit Paper
Once the sealer is dry, lightly sand with 220-grit for first layers, moving to 320-grit for final sanding. Use a sanding block or sponge for flat surfaces to avoid gouging.
Focus on smoothing high spots and removing any particles that settled during drying. Wipe thoroughly with a tack cloth after sanding—any leftover dust will show in the next coat.
Remove All Dust Before Next Coat
Even a speck of dust can ruin a smooth finish. After wiping, inspect under bright light. Use a vacuum with a brush attachment for crevices and panel grooves.
Wait at least 15 minutes after cleaning before applying the next coat to ensure no fibers or moisture remain.
Apply Additional Sealer Coats
Most cabinets need 2–3 coats of sealer for full protection. Each layer builds durability and depth.
Know When to Stop Adding Coats
Two coats are sufficient for polycrylic on low-use cabinets. For polyurethane in high-traffic kitchens, three coats are ideal. More than three coats can lead to buildup, especially on edges, and increase drying time without significant benefit.
Assess sheen and coverage after each coat. If the finish looks even and fully opaque, you may not need a third.
Fix Drips and Bubbles Quickly
If you spot a drip, sand it lightly after drying and touch up. For bubbles, avoid shaking the sealer—pour it gently. Use a bubble-free brush technique: lightly run the tip over the wet surface to pop bubbles.
If bubbles dry, sand and recoat the affected area.
Allow Final Cure Time
Drying is not the same as curing. A sealer may feel dry in hours but take days to reach full hardness.
Wait 72 Hours Before Rehanging
After the final coat, let cabinets cure for at least 72 hours before reinstalling. For oil-based sealers, wait 5–7 days. During this time, avoid touching, stacking, or placing objects on the surfaces.
Cabinets continue to harden over 21–30 days, so handle gently during the first few weeks.
Avoid Moisture and Heavy Use Early
Don’t run the dishwasher or boil water near curing cabinets—excess moisture can cloud the finish. Delay deep cleaning for at least a week. Use coasters under appliances and avoid slamming doors.
Patience here prevents permanent damage to your hard work.
Maintain Sealed Cabinet Finish
A well-sealed cabinet can last years with simple care. Regular maintenance prevents buildup, scratches, and premature wear.
Clean With Mild Soap and Water
Use a soft microfiber cloth and a solution of warm water and dish soap. Wipe gently—don’t scrub. Rinse with a damp cloth and dry immediately.
Avoid abrasive cleaners, degreasers, or paper towels, which can scratch or dull the finish.
Reapply Sealer If Worn
After several years, high-touch areas (like handles or lower cabinets) may show wear. Clean the surface, lightly sand, and apply a fresh coat of the same sealer.
For spot repairs, mask surrounding areas and blend edges carefully.
Troubleshoot Common Sealing Issues
Even careful DIYers encounter problems. Knowing how to fix them saves time and prevents rework.
Fix Sticky or Tacky Sealer
If the sealer stays sticky, it may be due to humidity, poor ventilation, or over-application. Ensure the area is warm (70°F) and dry. Wipe with a cloth dampened with mineral spirits (for oil-based) or denatured alcohol (for water-based). If persistent, sand and recoat.
Repair Bubbles and Brush Marks
Sand the area smooth with 320-grit paper, wipe clean, and apply a thin, even coat. For brush marks, use a sprayer or high-flow brush on the next attempt.
Prevent Peeling and Delamination
Peeling usually results from poor adhesion—either dirty surfaces or uncured paint. Always clean and sand between layers. Use compatible products (e.g., don’t apply oil-based sealer over uncured latex paint without proper primer).
If peeling occurs, strip the sealer, sand to bare paint, and restart the sealing process.
Frequently Asked Questions About Sealing Painted Cabinets
How long should I wait before sealing freshly painted cabinets?
Wait at least 72 hours after the final paint coat before applying sealer. Oil-based paints require 5–7 days for full cure. Sealing too early traps solvents and causes cloudiness or soft spots.
Can I use wax to seal my painted kitchen cabinets?
Paste wax is not recommended for kitchen cabinets. It offers minimal protection against water and grease, requires frequent reapplication, and wears quickly in high-traffic areas. Use polyurethane or polycrylic instead.
What’s the difference between polyurethane and polycrylic for cabinets?
Polyurethane is more durable and comes in oil-based (amber tone, yellows over time) or water-based (clear, low odor) formulas. Polycrylic is water-based, dries fast, and is easier to apply but less durable. For kitchens, polyurethane is the better choice.
How many coats of sealer do I need on cabinets?
Most cabinets need 2–3 coats. Two coats work for polycrylic on low-use cabinets. For polyurethane in high-traffic kitchens, three coats are ideal. More than three coats cause buildup and longer drying times.
Why does my sealer look sticky after drying?
Sticky sealer usually results from high humidity, poor ventilation, or over-application. Warm the room to around 70°F and improve airflow. Wipe with mineral spirits (oil-based) or denatured alcohol (water-based). If it persists, sand and recoat.
Do I need to sand between sealer coats?
Yes, light sanding with 220–320 grit paper between coats removes dust nibs and ensures adhesion. Wipe with a tack cloth after sanding to avoid trapping particles in the next coat.
Key Takeaways for Sealing Painted Cabinets
Sealing painted cabinets is the difference between a finish that lasts years and one that fails within months. Choose the right sealer for your kitchen’s traffic level, prep surfaces thoroughly, and apply thin, even coats with proper drying time between each.
The most important steps are patience and preparation. Let paint cure fully, sand lightly between coats, and never rush the final cure time. These habits prevent peeling, bubbles, and sticky surfaces.
Now that you know how to seal painted cabinets, gather your materials and start protecting your hard work. Your kitchen will reward you with a durable, beautiful finish that stands up to daily life.


