

Removing a bathroom cabinet from the wall can feel like a daunting task, especially in tight spaces like RVs or small bathrooms. But with the right tools and approach, how to take a bathroom cabinet off the wall becomes a manageable DIY project. Whether you’re upgrading your vanity, replacing damaged cabinetry, or renovating your entire bathroom, this guide walks you through every step safely and efficiently. You’ll learn how to identify mounting types, disconnect utilities, remove fixtures without damage, and prepare the wall for what comes next.
From hidden brackets to sealed seams in mobile environments, bathroom cabinets, especially in RVs, can be secured in ways that aren’t immediately obvious. Rushing the process risks wall damage, injury, or water line leaks. This guide emphasizes safety, precision, and smart prep so you can remove your cabinet cleanly and avoid common mistakes.
Let’s break down the entire removal process step by step.
Essential Safety Steps Before Removal
Before touching any screws or tools, protect yourself and your space.
Turn Off Water Supply
If your cabinet houses a sink or plumbing, shut off both hot and cold water valves under the sink or at the main supply. Open the faucet to drain residual water and relieve pressure.
Pro Tip: Place a towel and small bucket under connections to catch drips.
Disconnect Power if Needed
Some bathroom cabinets have built-in lighting, outlets, or heated mirrors. Turn off the circuit at the breaker and confirm power is off using a voltage tester.
Clear the Area
Remove all items from the cabinet and nearby countertops. Lay down a drop cloth to protect flooring and catch debris.
Identify Your Cabinet Mounting Type
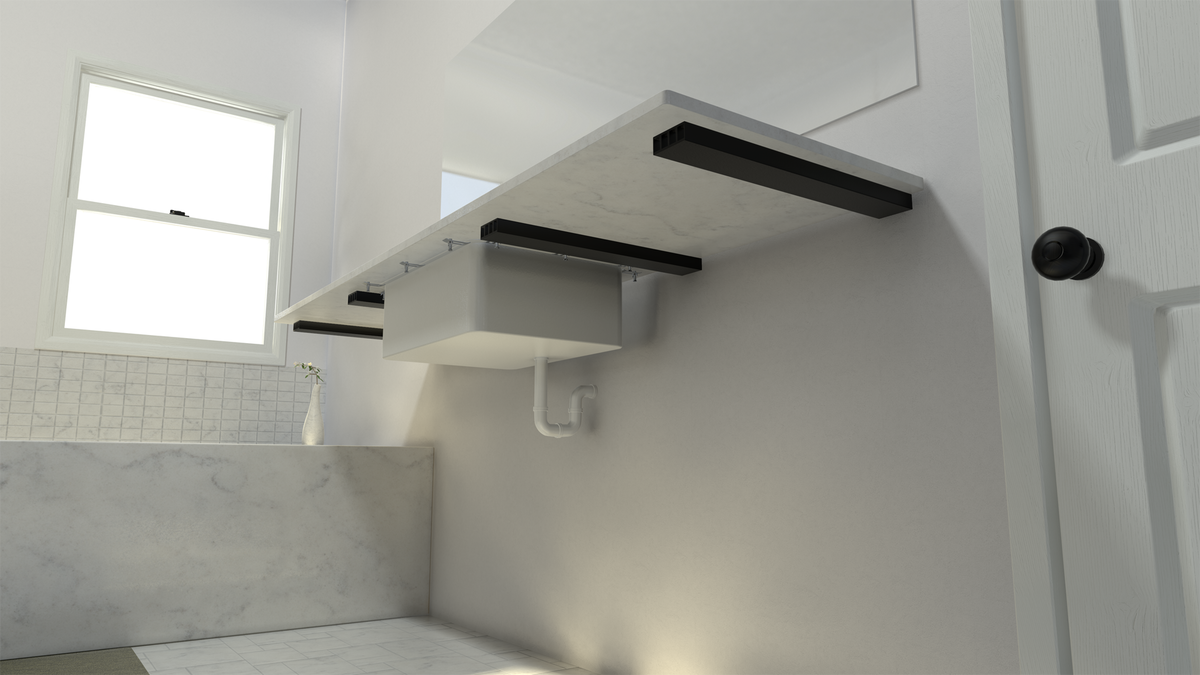
Not all bathroom cabinets are installed the same way. Knowing your mounting system prevents damage during removal.
Wall-Mounted Vanity or Floating Cabinet
These cabinets are secured directly to wall studs with heavy-duty brackets or screws hidden under the unit.
Look for Hidden Fasteners
Check underneath the cabinet or along the top edge for screws. Some units have decorative caps or trim hiding screw heads. Gently pry them off with a flathead screwdriver.
Confirm Stud Anchors
Use a stud finder to verify if screws are anchored into wood or metal studs, which are common in RVs. Avoid forcing removal if screws are still in place.
Frameless or Semi-Recessed Units
Common in RVs, these cabinets may be glued, screwed, or sealed into a framed opening.
Check for Caulk or Sealant
Run a utility knife around the edges to break any silicone or adhesive bond. This prevents wall damage when pulling the cabinet free.
Inspect Side and Top Supports
Some units are braced from above or sides using L-brackets or wooden cleats. Look inside wall cavities or behind adjacent fixtures.
Disconnect Plumbing Connections
If your cabinet holds a sink, disconnect plumbing carefully.
Remove P-Trap and Drain Line
Use a wrench to loosen slip nuts on the P-trap. Support the trap as you remove it because wastewater will spill out.
Warning: Wear gloves and eye protection. Old pipes may be brittle.
Detach Water Supply Lines
Unscrew flexible supply lines from shut-off valves. If lines are corroded, use a second wrench to stabilize the valve and prevent leaks.
Cap or Plug Exposed Pipes
Once disconnected, cap the stubs temporarily with threaded plugs or wrap them in Teflon tape. This prevents debris from entering the lines.
Remove Fixtures and Trim
:max_bytes(150000):strip_icc()/7_remove-vanity-top-56a4a26d3df78cf772835b2d.jpg)
Free the cabinet completely before attempting to detach it from the wall.
Take Out Sink or Countertop
If the sink is integrated, like in many RV vanities, it may be sealed to the countertop. Disconnect clips or brackets underneath, then gently rock the sink to break the seal.
Detach Backsplash or Edge Trim
Use a utility knife to slice through caulk between the cabinet and wall. Gently pry off trim pieces with a putty knife to avoid gouging drywall.
Remove Mirror or Lighting
If your cabinet includes a mirror or LED strip, disconnect wiring and unscrew mounting hardware. Label wires for reinstallation later.
Loosen and Remove Mounting Hardware
Now that utilities are disconnected, it’s time to free the cabinet.
Unscrew Bracket Bolts or Wall Anchors
Using a drill or screwdriver, remove all visible screws from underneath, inside corners, or along the top edge.
For RV or Mobile Units
Check for hex bolts or carriage bolts used in metal framing. A socket wrench may be needed.
Support Cabinet While Removing Final Screws
Have a helper hold the cabinet as you remove the last fasteners. Even lightweight units can fall suddenly.
Gently Pull Away from Wall
Start at the bottom and angle the cabinet away. If it resists, double-check for missed screws or adhesive seals.
Caution: Don’t yank or twist. This can tear drywall or damage plumbing stubs.
Prepare the Wall for Next Steps
After removal, inspect and repair the wall surface.
Patch Screw Holes and Anchor Marks
Fill small holes with spackle and sand smooth. For large voids or damaged drywall, cut out the section and patch with a new piece.
Check for Water Damage
Inspect behind the mounting area for soft spots, mold, or discoloration. These issues are especially common near sinks. Replace damaged substrate before installing new cabinetry.
Reconnect or Cap Utilities
Decide whether to leave plumbing and electrical in place or cap them off. If remodeling, consider relocating lines for better layout.
Common Mistakes to Avoid
Even experienced DIYers make errors when removing bathroom cabinets.
Forgetting Hidden Brackets
Many wall-mounted units use internal cleats or Z-brackets not visible from the front. Always inspect top and side edges.
Not Supporting the Cabinet
Removing screws without support leads to drops, broken tiles, or injury. Always have a helper or use temporary supports like a stud brace.
Cutting Through Wires or Pipes
Before drilling near walls, use a stud finder with wire and pipe detection. Mark locations of all utilities.
Leaving Adhesive Behind
Old silicone or construction adhesive can interfere with new installations. Clean the wall fully with a scraper and isopropyl alcohol.
Tips for RV and Small Bathrooms

RVs present unique challenges due to lightweight materials and tight clearances.
Work in Tight Spaces
Use short-handled tools or a right-angle drill to access confined mounting points. Magnetic trays help catch small screws.
Mind the Vibration Factor
In mobile units, cabinets are often over-secured. Expect extra brackets or locking washers designed to withstand travel.
Sealants Are Common
RV builders use sealant liberally to prevent leaks during movement. Break all seals with a utility knife before pulling the unit.
Label Everything
Photograph wiring, plumbing, and bracket positions before disassembly. Use masking tape to label parts and fasteners.
When to Call a Professional
While most cabinet removals are DIY-friendly, some situations require expert help.
Integrated Plumbing or Electrical Systems
If your cabinet connects to hardwired lighting, heated floors, or under-sink water filters, a licensed plumber or electrician should handle disconnection.
Signs of Major Water Damage
Soft, crumbling walls or mold behind the cabinet may indicate deeper issues requiring structural repair.
Unclear Mounting Method
If you can’t identify how the cabinet is secured after thorough inspection, stop and consult a contractor.
Frequently Asked Questions About Removing Bathroom Cabinets
How do I remove a bathroom cabinet that is glued to the wall?
Run a utility knife around all edges to cut through the adhesive. Then gently pry the cabinet away using a pry bar with a scrap wood block to protect the wall. If it resists, apply heat with a hairdryer to soften the adhesive.
Do I need to turn off the water before removing a bathroom cabinet?
Yes, always shut off the water supply valves before disconnecting any plumbing. Open the faucet to drain residual water and relieve pressure. This prevents leaks and flooding during removal.
Can I remove a bathroom cabinet without damaging the wall?
With careful technique, yes. Break all caulk and adhesive seals before pulling, remove all screws and brackets, and support the cabinet as you detach it. Patch any small holes afterward with spackle.
How long does it take to remove a bathroom cabinet?
A basic wall-mounted cabinet takes 30 to 60 minutes. Units with plumbing, electrical connections, or heavy adhesive can take 2 to 3 hours. Always budget extra time for unexpected complications.
What tools do I need to remove a bathroom cabinet?
You’ll need a screwdriver or drill, utility knife, putty knife, wrench for plumbing, stud finder, pry bar, and a voltage tester. For RV units, add a socket wrench for hex bolts.
Should I hire a professional to remove my bathroom cabinet?
If you’re comfortable with basic tools and the installation is straightforward, DIY is fine. Call a professional if you encounter hidden wiring, complex plumbing, or signs of structural water damage.
Key Takeaways for Removing Your Bathroom Cabinet
Removing a bathroom cabinet is a straightforward process when you approach it methodically. Start by turning off water and power, then identify how your cabinet is mounted. Disconnect all plumbing and electrical connections before tackling the mounting hardware.
Always support the cabinet as you remove the final screws, and break all adhesive seals with a utility knife before pulling. After removal, inspect the wall for water damage and patch any holes. This prep work sets you up for a smooth new installation.
Whether you’re renovating a home bathroom or upgrading an RV interior, careful disassembly leads to better results and fewer surprises. Measure everything twice, waterproof all seams, and prioritize ventilation in your new design. Now you’re ready to tackle that cabinet removal with confidence.


