A cluttered utility room can turn laundry day into a daily frustration. The right utility room cabinet ideas transform this hardworking space into an organized, efficient hub. Whether you’re renovating a compact laundry nook or designing a full-scale utility room, strategic cabinet selection is key. From base cabinets that maximize drawer access to wall units that use vertical space, smart storage keeps cleaning supplies, ironing gear, and laundry essentials neatly tucked away. This guide dives into proven cabinet configurations, replacement options, and space-saving hacks so you can build a functional layout that fits your space and budget.
Base Cabinet Configurations That Maximize Function
30″ Drawer Base Cabinet Alternatives
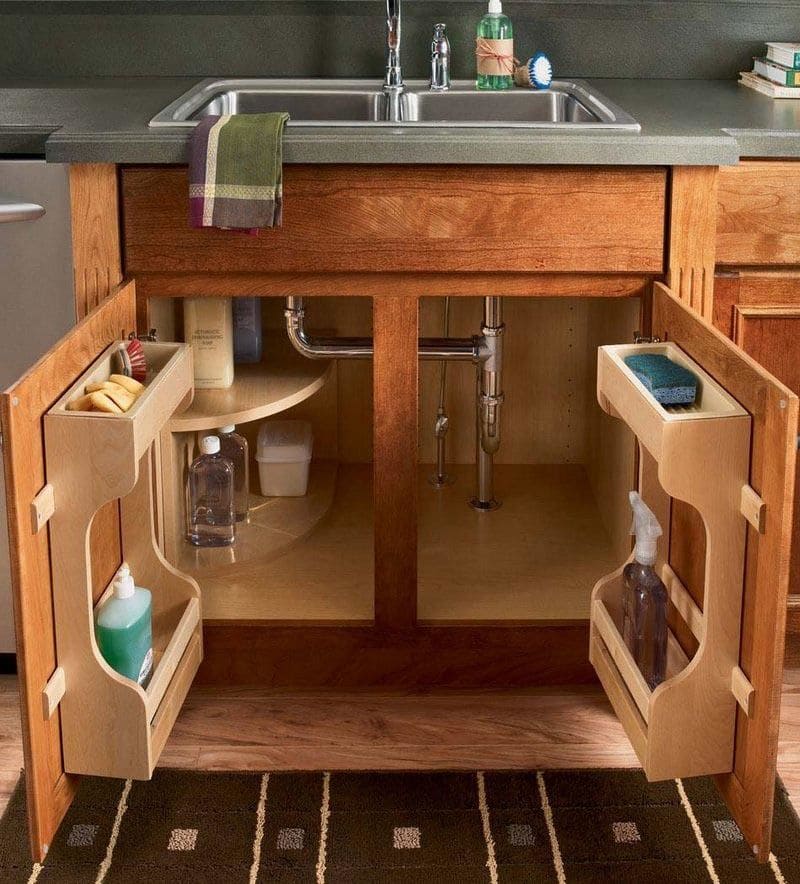
When your layout calls for a 30″ base cabinet, you have several flexible options. A standard 30″ base cabinet works well for sink or appliance zones. For more drawer storage, consider two 15″ drawer base cabinets instead. This split configuration gives you pull-out access to detergents, rags, and small tools.
In tight spaces, a 27″ base cabinet paired with a 3″ filler creates a custom fit. This approach works especially well when walls are uneven or slightly off-standard. The filler piece bridges the gap cleanly without requiring custom cabinet construction.
Pro Tip: Drawer bases beat hinged doors for quick access to small, frequently used items. Place them near the washer or ironing board for maximum convenience.
36″ Sink Base Cabinet Solutions
Replacing a 36″ sink base requires careful planning. The most straightforward option is a 36″ base cabinet with drawer boxes and glides uninstalled. This modification allows direct sink installation while keeping plumbing accessible.
A 36″ vanity pulled forward 3″ offers another route. Remember that vanities come in 21″ depths rather than the standard 24″. Verify your sink depth compatibility before ordering. For non-standard widths, a 33″ sink base with 1-1/2″ fillers on each side provides a seamless fit.
Watch Out: Always verify sink cutout dimensions before ordering. A 36″ cabinet does not guarantee a 36″ sink fit. Measure the internal space carefully.
9″ Narrow Cabinet Fixes
Tight gaps and corner zones often measure around 9″ wide. A 6″ spice cabinet with 1-1/2″ fillers on each side squeezes storage into these openings perfectly. These slim cabinets work well for housing cleaning brushes, irons, or small bins. They blend into corners or side walls without wasting valuable floor space.
Wall Cabinet Strategies for Vertical Storage

42″ High Wall Cabinet Options
Maximize vertical storage with a 42″ total wall cabinet height. A 36″ wall cabinet with crown molding on top creates height continuity. This option only works if you have sufficient clearance between the cabinet top and ceiling.
Alternatively, pair a 30″ wall cabinet with a 12″ stacker cabinet on top. This combination reaches the same 42″ height while adding extra shelf space. Stackers work well for storing off-season clothes, spare linens, or bulky cleaning tools like mops and vacuums.
Ceiling Check: Measure from the top of your cabinet to the ceiling. You need at least 6″ clearance for crown molding. If clearance is tight, stackers offer a better solution.
Corner Cabinet Solutions That Eliminate Dead Space
Blind Corner Configurations
Awkward corners become usable with blind corner cabinets. Combine a blind corner wall or base cabinet with another regular cabinet to create a functional L-shaped layout. These configurations require precise measurements, so confirm your corner angle is exactly 90 degrees before ordering.
DIY Hack: Install a tension rod inside a blind corner cabinet to hang spray bottles. This keeps them visible and upright while maximizing the deep interior space.
Empty Corner with Filler Panels
For a simpler approach, leave corners empty and install 1-1/2″ filler panels on each wall at a right angle. This cost-effective solution keeps the space clean and avoids complex corner hardware. It works particularly well in rooms with limited budgets or shallow depths.
Lazy Susan Alternatives
When a 36″ lazy susan corner cabinet is out of stock, consider two alternatives. A 36″ stationary shelf corner cabinet offers fixed shelves that work well with baskets or bins. A 36″ corner sink base cabinet serves dual purposes if plumbing is nearby.
Trade-Off: Stationary shelves lack rotation but cost less and are easier to install. They also provide more stable support for heavier items.
Measurement and Fit Guidelines for Perfect Installation
Width Matching Strategies
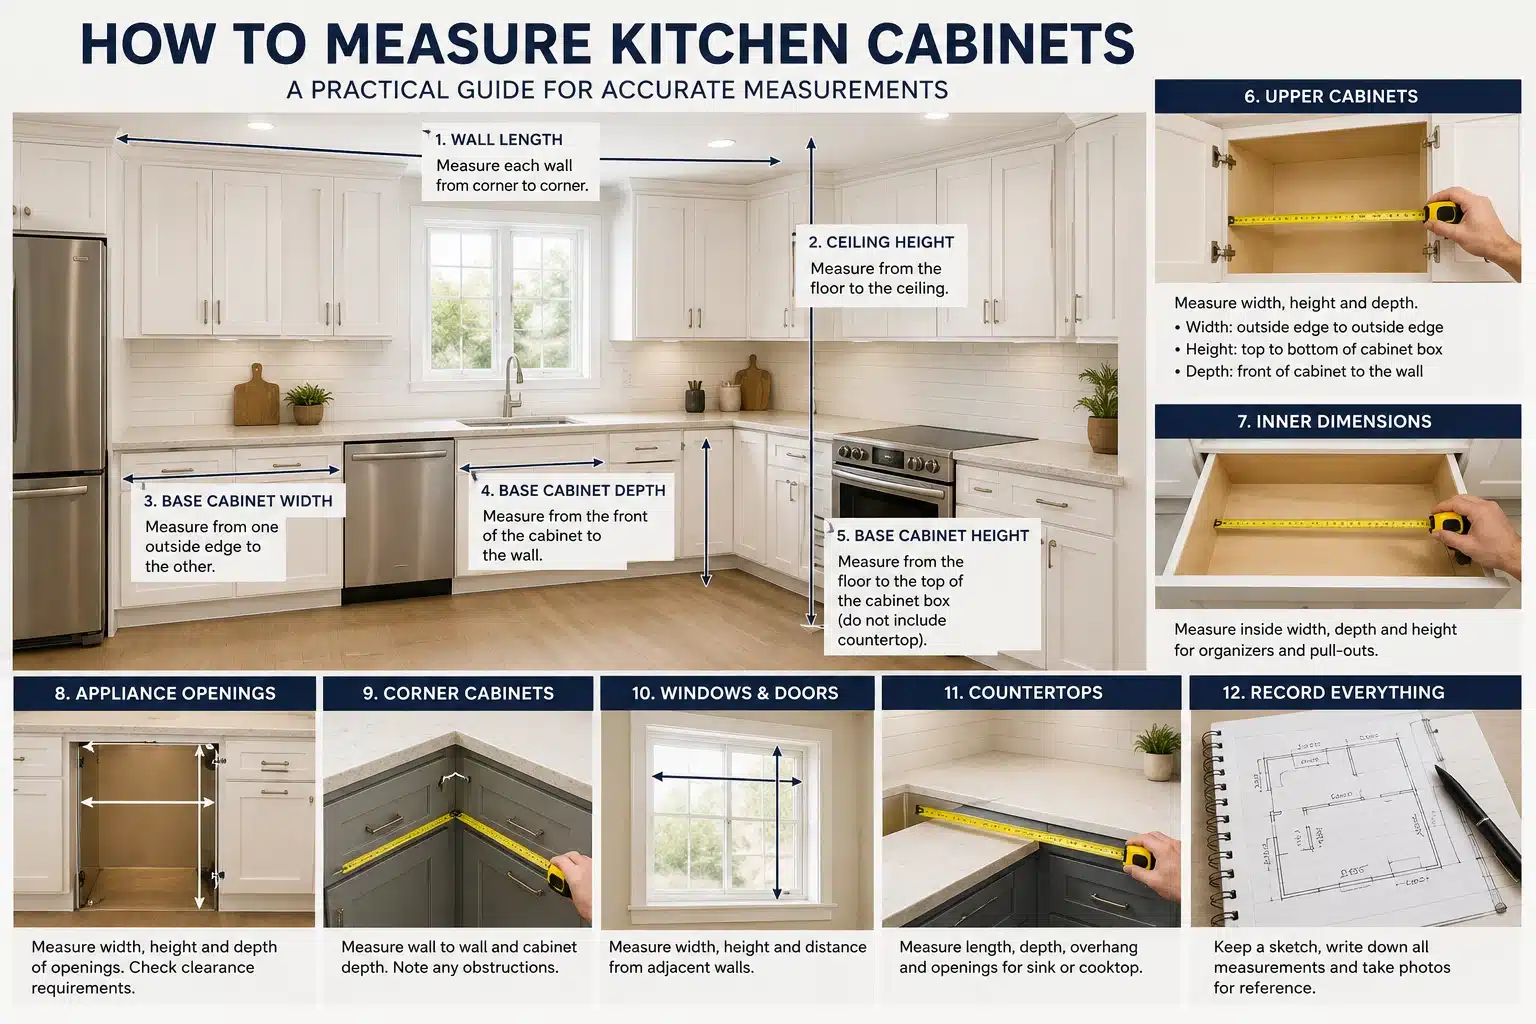
Standard base cabinets come in 12″, 15″, 18″, 24″, 30″, and 36″ widths. Use filler strips in 1-1/2″ or 3″ sizes to close gaps between cabinets and walls. For example, a 33″ space works with a 30″ cabinet plus 1-1/2″ fillers on each side.
Avoid Gaps: Measure at floor level. Walls can bow, making top and bottom widths differ by up to 1/4″.
Depth Considerations
Standard base cabinet depth is 24″. Vanity cabinets measure 21″ deep, making them 3″ shallower. If using a vanity as a sink base, pull it forward 3″ to align with other cabinets. All base cabinets should form a flush front plane for a professional look.
Height Planning for Wall Units
Wall cabinets come in 12″, 18″, 30″, and 36″ heights. Standard installation places them 54″ from the floor, allowing for an 18″ countertop and 18″ clearance above. For a 42″ total height, combine a 30″ cabinet with a 12″ stacker.
Safety Rule: Maintain at least 18″ between the countertop and the bottom of wall cabinets.
Style and Layout Ideas for Every Utility Room
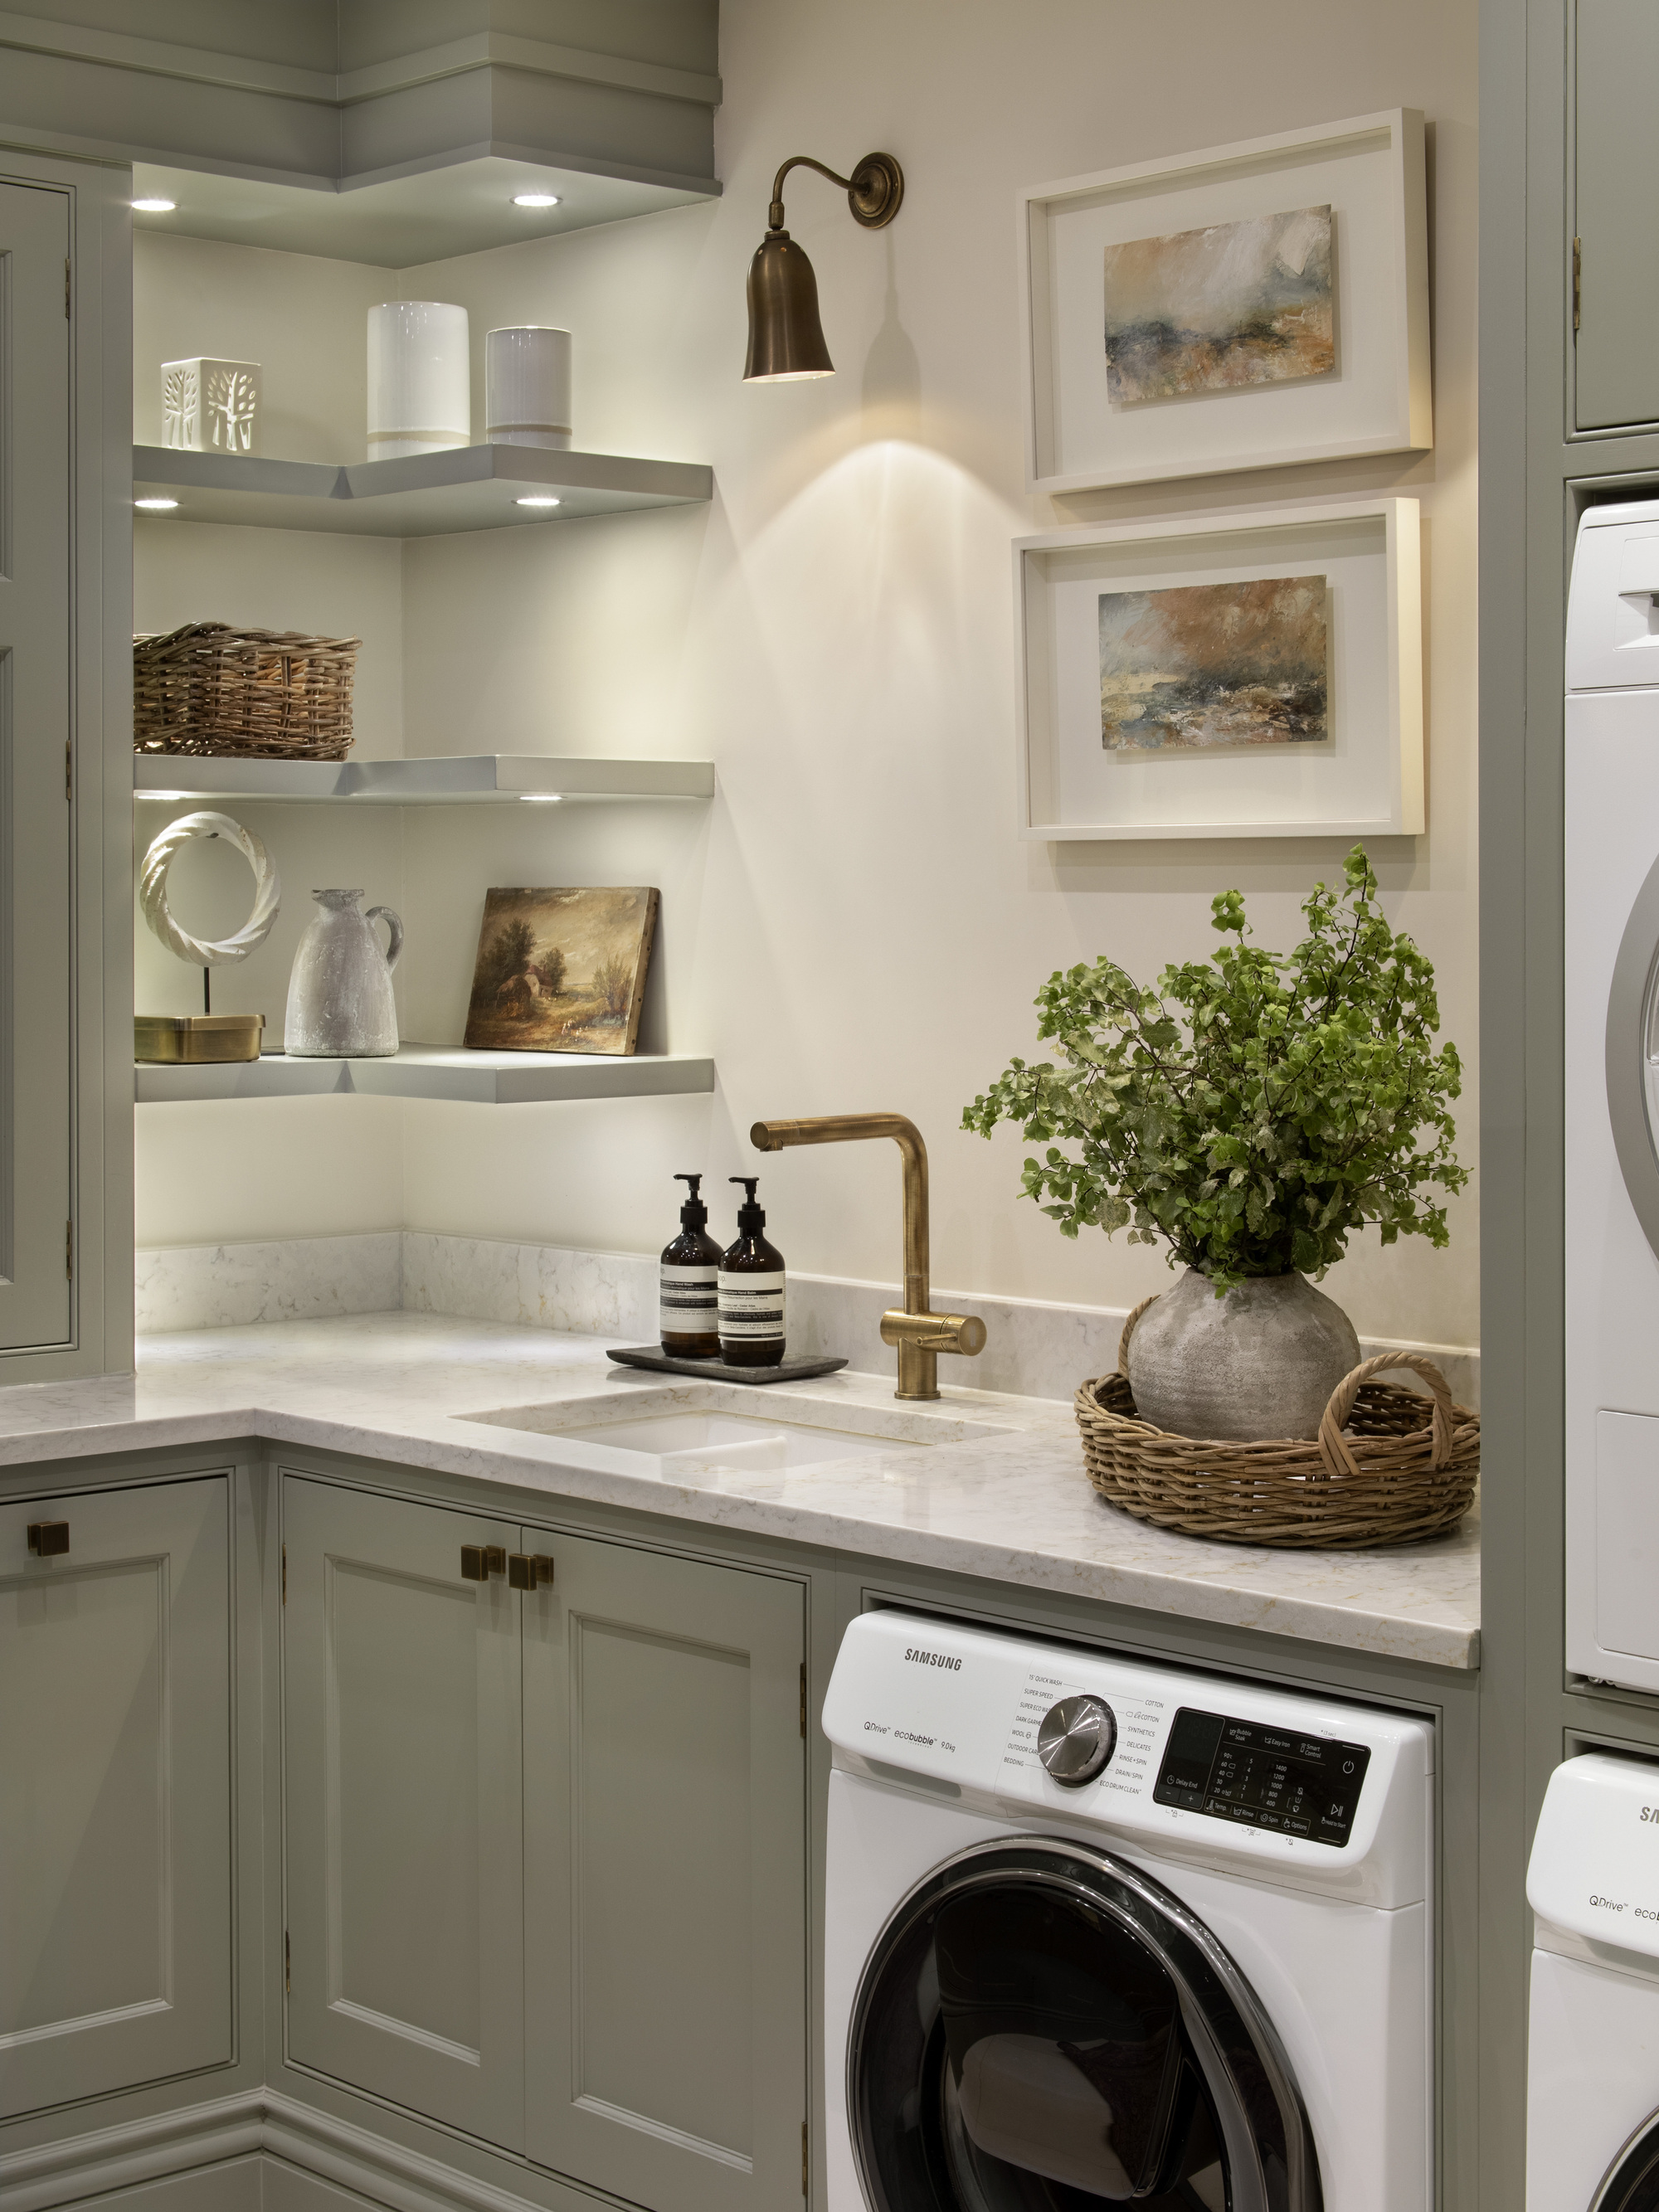
Farmhouse Utility Room Charm
Blend rustic charm with practical storage using shaker-style doors in white or gray. Open wood shelving above counters displays baskets and adds warmth. Pair 30″ drawer bases with 9″ spice cabinets for vintage flair. Antique-style hardware and a farmhouse sink in a 36″ base complete the look.
Small Room Space Maximizers
Make every inch count in compact utility rooms. Use stacked wall cabinets to go vertical. Install narrow 6″ cabinets in side gaps. Choose blind corners over empty ones to boost storage capacity.
Time-Saver: Mount a fold-down ironing board inside a base cabinet door. This keeps the board accessible without taking up floor space.
DIY Custom Layouts
Build your own configuration by mixing 15″ and 30″ bases for asymmetrical designs. Use fillers to create a built-in look in odd-sized rooms. Replace out-of-stock items with combination units, such as two 15″ drawers for one 30″ cabinet.
Pro Move: Sketch your layout on grid paper first, using one square per inch, for accurate planning before you order.
Cost-Saving Cabinet Strategies
RTA Cabinet Benefits
Ready-to-Assemble (RTA) cabinets offer significant savings. Prices run up to 50% off big-box store pricing. Flat-pack shipping reduces delivery costs. DIY installation eliminates professional carpentry fees entirely.
Source Smart: Check LilyAnnCabinets.com for RTA laundry cabinets with full specifications and SKU numbers.
Budget-Friendly Cabinet Swaps
Use vanity cabinets as sink bases to save over $100. Skip lazy susans in favor of stationary corner shelves. Install filler panels instead of ordering custom cabinets for odd spaces.
Warning: Never sacrifice structural integrity for savings. Always verify load ratings for wall cabinets, especially when storing heavy items.
Installation Best Practices for Long-Lasting Results
Layout Planning Steps
- Measure wall space at floor level
- Mark door swing paths and appliance zones
- Account for plumbing and outlet locations
- Plan cabinet sequence starting from the corner
Pro Tip: Dry-fit cabinets before securing them. Adjust fillers as needed for a perfect fit.
Sink Base Preparation
Remove drawer glides if converting a standard base to a sink base. Reinforce the bottom panel to support sink weight. Leave 2″ clearance behind for plumbing access. Confirm sink cutout size, drain position, and faucet clearance before installation.
Filler Installation Techniques
Use 1/2″ plywood or MDF strips for fillers. Attach them to the cabinet side before mounting. Paint to match cabinets for a seamless look.
Pro Trick: Apply painter’s tape to the wall and mark cabinet edges. This ensures perfect alignment during installation.
Storage Optimization Tips for Daily Convenience
Drawer Base Organization
Store detergents, stain removers, sewing kits, and cleaning cloths in drawer cabinets. Add adhesive liner to prevent items from slipping. Group similar items together for quick retrieval.
Vertical Wall Storage Ideas
Use wall cabinets for extra towels, pet supplies, or holiday decor bins. Maximize space with shelf risers or baskets inside cabinets. Label bins clearly to maintain organization.
Corner Space Fixes
Turn dead corners into functional zones with pull-out spray bottle organizers or swivel baskets for shoes and rags. Mount a small shelf for a Bluetooth speaker or notepad. Never leave corners completely empty, use at least a filler or shallow cabinet.
Frequently Asked Questions About Utility Room Cabinets
What is the best cabinet configuration for a small utility room?
Use stacked wall cabinets to maximize vertical space. Install narrow 6″ cabinets in side gaps and choose blind corner solutions over empty corners. Combine 15″ and 30″ bases to fit your exact wall dimensions.
Can I use a vanity cabinet as a sink base in my utility room?
Yes, with modifications. Vanities are 21″ deep versus the standard 24″. Pull the vanity forward 3″ to align with other cabinets. Verify your sink depth compatibility before ordering.
How do I fill gaps between cabinets and walls?
Use filler strips in 1-1/2″ or 3″ widths. Attach them to cabinet sides before mounting. Paint them to match for a seamless built-in appearance.
What should I do if my lazy susan corner cabinet is out of stock?
Choose a 36″ stationary shelf corner cabinet or a 36″ corner sink base cabinet instead. Stationary shelves work well with baskets and bins, while corner sink bases serve dual purposes if plumbing is nearby.
Are RTA cabinets good quality for utility rooms?
Yes. Ready-to-Assemble cabinets offer quality construction at up to 50% off box store pricing. They ship flat-packed and install easily with basic DIY skills. Verify specifications and load ratings before purchasing.
How much clearance do I need above wall cabinets for crown molding?
You need at least 6″ between the top of your wall cabinet and the ceiling. If clearance is less than this, use stacker cabinets instead to reach your desired height.
Key Takeaways for Your Utility Room Cabinet Project
The best utility room cabinet ideas balance form and function. Start by measuring your space carefully at floor level, accounting for door swings, plumbing, and appliance zones. Choose drawer bases for frequently accessed items and use fillers to bridge gaps between standard cabinet sizes.
Corner spaces deserve attention. Blind corner configurations, stationary shelf corners, or simple filler panels all eliminate dead space. For vertical storage, combine wall cabinets with stackers to maximize height without requiring excessive ceiling clearance.
Ready-to-assemble cabinets offer significant savings without sacrificing quality. Plan your layout on grid paper first, verify all measurements, and dry-fit cabinets before securing them. With the right configuration, your utility room becomes a streamlined, stress-free zone that makes chores faster and easier. Start by measuring your space today and sketch out your ideal layout.