
Building a sturdy cabinet requires precision, especially when learning how to build a cabinet frame that lasts for decades. A poorly constructed frame leads to misaligned doors, sagging shelves, and an unprofessional appearance that ruins the entire project.
This guide teaches you to cut precise dado joints, assemble a square carcass, and attach a solid face frame using pocket hole joinery. You will discover professional techniques for sealing seams and selecting the right materials for painted or stained finishes.
Cut Carcass Panels for Maximum Stability
The foundation of any strong cabinet lies in the accuracy of your initial cuts and groove placements. Using ¾-inch birch plywood ensures the structure remains rigid under weight without warping over time.
Create Dado Grooves for Bottom Support
Cutting a dado groove into the side panels provides a mechanical shelf for the bottom panel to rest upon. This joint prevents the bottom from sagging and keeps the entire box perfectly square.
- Set your table saw blade or dado stack to cut a ¾-inch wide groove.
- Adjust the cutting depth to exactly ½ inch to leave sufficient material strength.
- Run the cut across the bottom edge of both side panels using a sacrificial fence.
- Test the fit with a scrap piece of plywood to ensure a snug slide without forcing.
Add Back Panel Grooves for Alignment
Positioning the back panel correctly requires a precise groove along the rear edges of your structural components. This step ensures the back sits flush and locks the box geometry in place.
- Measure ¾ inch from the back edge of each side and bottom panel.
- Cut a ¼-inch deep groove along this line on all three pieces.
- Verify the fit with a piece of ¼-inch plywood before applying any adhesive.
- Ensure the panel slides in smoothly but does not rattle within the channel.
Assemble the Cabinet Box Structure
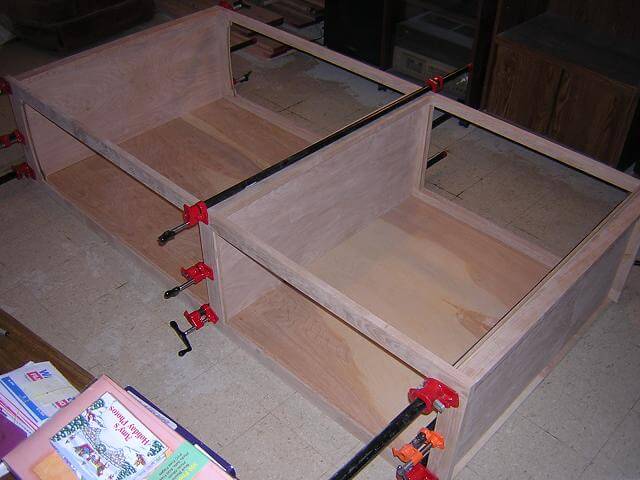
Gluing and clamping the carcass demands attention to detail to maintain perfect 90-degree angles throughout the process. Proper alignment at this stage prevents door fitting issues later in the project.
Install Bottom Panel with Glue
Applying adhesive correctly creates a bond stronger than the wood fibers themselves when cured properly. You must work quickly yet carefully to position the panels before the glue sets.
- Apply a generous bead of wood glue into the dado grooves on both side panels.
- Insert the bottom panel into the grooves while holding the assembly slightly off the bench.
- Use square-holding clamps to lock the corners at exact right angles.
- Wipe away excess squeeze-out immediately with a damp cloth.
Attach Internal Braces and Back Panel
Internal bracing strips add critical rigidity and provide a secure mounting point for the back panel. These nailers prevent the cabinet from twisting or bowing when mounted to a wall.
- Cut four strips of ¾-inch plywood to a width of 4 inches.
- Drill pocket holes on both ends of each strip using a jig set for ¾-inch material.
- Slide the ¼-inch back panel into the rear grooves of the assembled box.
- Secure the top brace (with a dado cut) over the back panel using four pocket screws.
- Install the remaining front, top, and bottom nailers with pocket screws.
Reinforce Against Wall Mount Bowing
Driving screws through your nailers into the back brace creates a unified structure that resists deformation. This simple step significantly increases the lifespan of wall-mounted units.
- Drive 1½-inch cabinet screws through the top nailer into the back brace.
- Repeat the process at the bottom nailer to lock the frame vertically.
- Check that the back panel remains flat and taut after tightening.
Build the Face Frame Components
The face frame hides raw plywood edges and provides a robust surface for mounting hardware. Accurate measurements here determine the final aesthetic reveal of your cabinet doors.
Cut Stiles and Rails to Exact Size
Selecting the right lumber ensures your frame matches your desired finish quality and durability standards. Poplar offers a smooth surface for painting while pine serves as a cost-effective alternative.
- Cut vertical stiles to the cabinet height plus ⅝ inch for overhang.
- Measure the distance between stiles on the cabinet to determine rail length.
- Alternatively, calculate rail length as cabinet width minus ½ inch for standard overlap.
- Use pre-ripped 1½-inch pine or rip poplar boards to consistent widths.
Drill Pocket Holes on Rails Only
Drilling pocket holes exclusively on the horizontal rails creates strong hidden joints without visible screws on the vertical stiles. Proper jig setup ensures clean holes that accept screws without splitting the wood.
- Set your pocket hole jig depth collar to 3 9/16 inches for ¾-inch stock.
- Clamp the jig flush with the end grain of each rail.
- Drill one pocket hole on each end of every rail piece.
- Avoid drilling holes in the stiles to maintain a clean outer appearance.
Assemble the Face Frame Joints

Joining the frame components requires precise alignment and adequate clamping pressure to ensure tight seams. A well-assembled frame remains square and stable for years of daily use.
Glue and Clamp the Joints
Applying glue to the end grain creates a permanent bond that mechanical fasteners alone cannot achieve. Clamping holds the pieces tightly together while the adhesive cures fully.
- Apply wood glue to the ends of each rail where it meets the stile.
- Position the top rail flush with the top of the stiles.
- Place the bottom rail to create a ⅝-inch overhang at the base.
- Use hold-down clamps to press the joints tightly together.
Drive Pocket Screws Securely
Driving screws into the pre-drilled pockets pulls the joint tight and adds shear strength to the connection. Controlling your drill torque prevents stripping the screw heads in softer woods.
- Insert 1¼-inch Kreg screws into each pocket hole.
- Set your drill clutch to a low setting to avoid camming out.
- Tighten until the screw head seats just below the wood surface.
- Check that all joints are flush and square before the glue dries.
Add Dividers for Drawers or Shelves
Installing center dividers provides necessary support for internal components and divides the cabinet space logically. These pieces attach using the same pocket hole method as the outer frame.
- Cut divider strips to fit vertically between the top and bottom rails.
- Use spacer blocks to ensure even spacing for drawer fronts.
- Secure the dividers with pocket screws from the back of the frame.
Attach Frame to Cabinet Box
Choosing the correct attachment method depends on whether your final finish will be paint or stain. Each technique offers distinct advantages regarding visibility and strength.
Use Brad Nails for Painted Cabinets
This method allows for quick installation and minor adjustments before the glue sets permanently. Nail holes disappear completely under layers of primer and paint.
- Apply a thick bead of wood glue around the front edge of the cabinet box.
- Drive four brad nails into the frame corners leaving them slightly proud.
- Set the frame onto the cabinet so the protruding nails rest on the glue line.
- Adjust alignment visually then press down firmly to seat the frame.
- Drive remaining nails flush to secure the frame permanently.
Clamp for Maximum Contact
Using multiple clamps ensures uniform pressure across the entire glue line for a seamless bond. This approach eliminates gaps between the frame and the carcass surface.
- Apply glue evenly to the cabinet face before positioning the frame.
- Place 8 to 10 bar clamps across the width and height of the frame.
- Insert crowned spacers between clamp jaws to distribute pressure evenly.
- Leave clamps in place until the glue reaches full cure time.
Install with Internal Screws for Stained Finish
Attaching from the inside keeps the front face completely free of visible fasteners or filler. This technique is essential for stained projects where nail holes would stand out.
- Pre-drill pocket holes into the inside faces of the cabinet side panels.
- Position the face frame carefully over the cabinet box opening.
- Drive 1¼-inch pocket screws from the interior to secure the frame.
- Verify that no screw heads are visible from the front view.
Install the Kick Plate Base
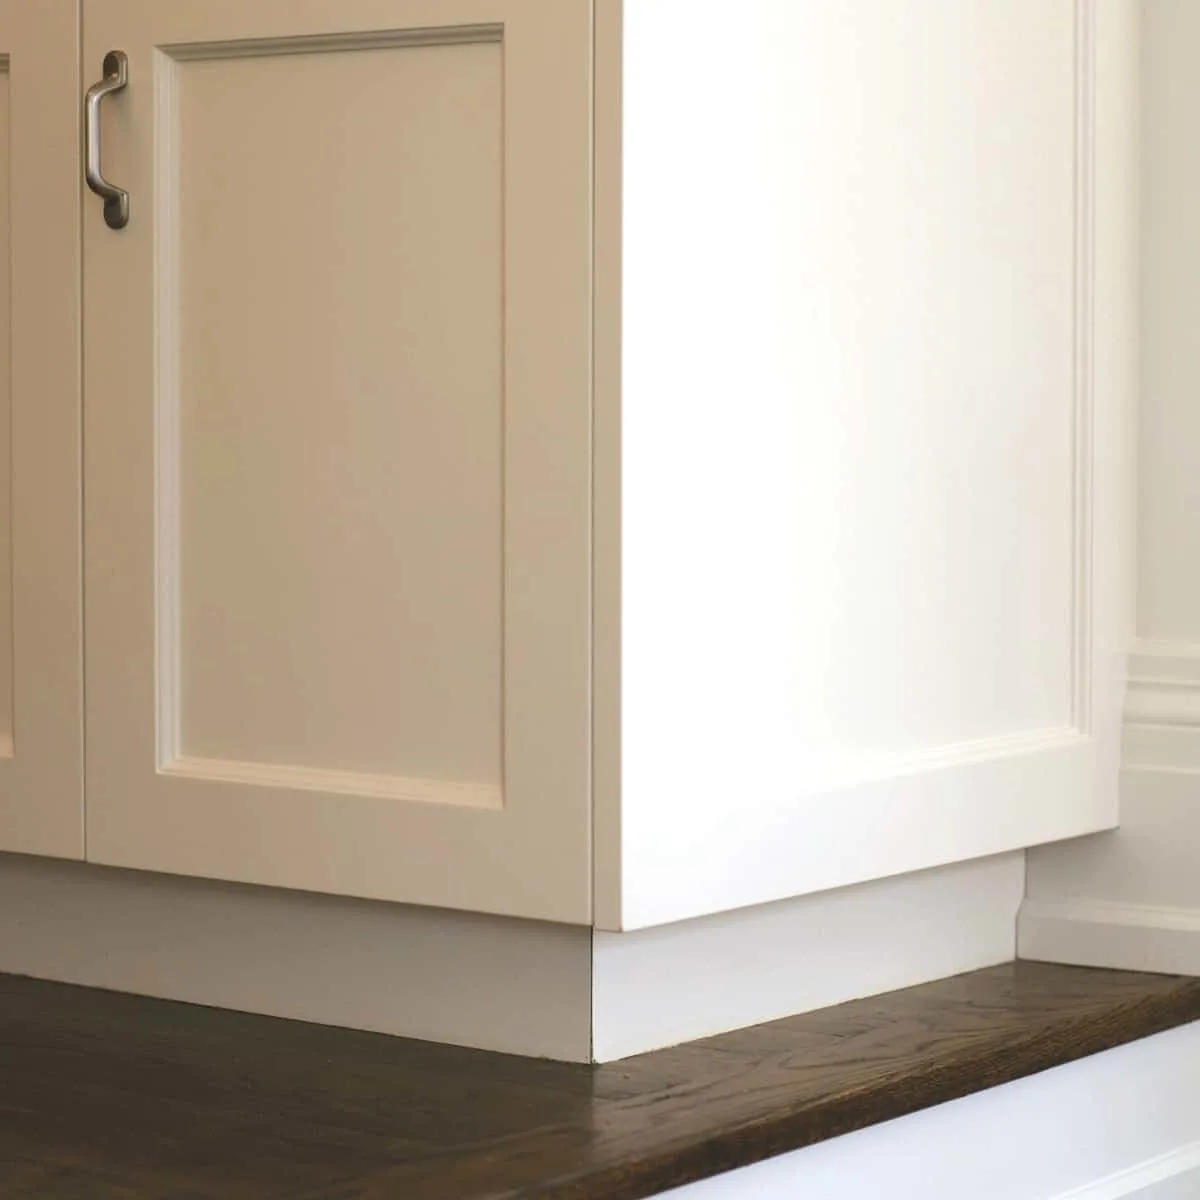
A separate kick plate allows for easy leveling adjustments without compromising the main cabinet structure. Proper installation ensures a clean transition to the floor.
Cut and Miter the Pieces
Creating mitered corners gives the kick plate a professional wrapped appearance around the cabinet base. Precise angles ensure tight joints that do not show gaps.
- Cut two pieces of matching wood to a height of 3½ inches.
- Miter one end of each piece at a 45-degree angle.
- Join the pieces so the mitered corners meet cleanly at the front and side.
- Sand the joint smooth before attachment.
Bond with CA Glue and Accelerator
Using cyanoacrylate glue with an accelerator creates an instant bond while wood glue cures underneath. This dual-adhesive approach ensures long-term durability.
- Tape the mitered pieces together with ends touching tightly.
- Apply standard wood glue to the center of the joint interface.
- Add CA glue to both sides of the mitered corner.
- Spray accelerator to cure the CA glue instantly.
- Remove tape and sand the joint with 220-grit paper.
Mount with Pocket Screws
Attaching the kick plate from below allows for easy removal if floor leveling adjustments are needed later. Pocket screws provide a strong hold without visible hardware.
- Drill pocket holes in the back face of the assembled kick plate.
- Position the plate against the bottom of the cabinet box.
- Secure it with screws ensuring it remains level with the floor.
Seal Seams and Sand Smooth
Final preparation determines the professional quality of your finished cabinet. Proper filling and sanding create a seamless surface ready for paint or stain.
Fill Nail Holes Effectively
Using the right filler prevents unsightly shrinkage marks from appearing after the finish dries. Alcohol-based fillers dry hard and sand smoothly.
- Select an alcohol-based plastic wood filler like DAP.
- Mound the filler slightly above each nail hole to account for shrinkage.
- Allow the filler to dry completely according to manufacturer instructions.
- Sand the area flush with 120-grit then 220-grit sandpaper.
Seal Frame-to-Plywood Seams
Standard fillers often crack due to different expansion rates between solid wood and plywood. Two-part epoxy provides a flexible yet hard seal that lasts.
- Mix two-part epoxy filler to match your wood tone.
- Press the mixture firmly into the seam between the face frame and plywood.
- Allow the epoxy to cure until it becomes rock hard.
- Sand the seam smooth to blend with the surrounding wood.
Sand the Entire Frame
Thorough sanding removes tool marks and prepares the surface for an even finish application. Progressing through grits ensures a silky smooth result.
- Start with 120-grit paper to remove high spots and ridges.
- Progress to 220-grit for a refined surface texture.
- Hand sand internal corners and edges for safety and polish.
- Optionally use a router with a roundover bit to soften front edges.
Final Checks and Pro Tips
Verifying your work before finishing saves time and prevents costly mistakes. These final checks ensure your cabinet frame meets professional standards.
Dry-Fit Before Gluing
Always assemble your frame without glue to check for fit and squareness. This step allows you to correct errors before they become permanent.
- Assemble the face frame pieces without adhesive.
- Place the frame on the cabinet box to verify alignment.
- Mark pieces for reassembly order if you need to disassemble.
- Make necessary adjustments to cuts before final assembly.
Verify Squareness at Every Stage
Checking squareness repeatedly ensures that doors and drawers function correctly later. Small errors compound quickly in cabinetry construction.
- Use a carpenter’s square on all carcass corners.
- Check face frame joints for 90-degree angles.
- Verify the final assembly sits flat and square on a level surface.
Choose Materials Based on Finish
Selecting the appropriate wood type enhances the final look and durability of your project. Different finishes require different material properties.
- Use poplar or pine for painted cabinets as they sand well.
- Choose high-grade hardwoods for stained projects to avoid blotching.
- Avoid pine for staining unless you use a pre-stain conditioner.
Save Time with Pre-Cut Lumber
Utilizing pre-ripped materials reduces setup time and ensures consistent dimensions. This approach benefits beginners who may lack advanced ripping equipment.
- Purchase ¾-inch by 1½-inch pre-ripped pine from lumberyards.
- Verify thickness consistency before beginning construction.
- Focus your energy on joinery rather than milling stock.
Prevent Screw Stripping
Controlling your drill settings protects your work and ensures tight joints. Soft woods require careful torque management to avoid damage.
- Set your drill clutch to a low torque setting.
- Replace worn driver bits regularly to maintain grip.
- Drive screws slowly to prevent camming out of the pocket hole.
Frequently Asked Questions About Building Cabinet Frames
What is the best wood for a beginner building a cabinet frame?
Pine is the most budget-friendly option and often comes pre-ripped to save time. However, poplar is recommended for painted projects because it sands smoother and resists denting better than pine.
How do I ensure my cabinet frame stays square during assembly?
Use square-holding clamps on the carcass corners and check angles with a carpenter’s square frequently. Installing the back panel early in the process also helps lock the box geometry in place.
Can I attach the face frame using only glue?
While possible, using only glue requires extensive clamping with 8 to 10 bar clamps for even pressure. Combining glue with brad nails or pocket screws provides immediate strength and holds the frame while the glue cures.
Why should I use epoxy filler instead of standard wood filler for seams?
Solid wood face frames and plywood boxes expand at different rates with humidity changes. Two-part epoxy remains flexible enough to handle this movement without cracking or shrinking away from the seam.
What size pocket hole screws should I use for ¾-inch material?
For ¾-inch thick stock, use 1¼-inch pocket hole screws to join the face frame components. This length provides sufficient thread engagement without piercing through the opposite side.
How do I hide screw holes on a stained cabinet face frame?
Attach the face frame from the inside of the cabinet using pocket screws drilled into the cabinet sides. This method leaves the front face completely free of visible holes that would need filling.
Key Takeaways for Building a Strong Cabinet Frame
Mastering how to build a cabinet frame involves precise cutting, square assembly, and choosing the right attachment methods for your finish. Focus on creating strong dado joints for the bottom panel and using pocket holes for invisible face frame connections.
Always dry-fit your components before gluing and verify squareness at every step to ensure professional results. Start your next project by gathering your materials and cutting your first dado grooves for a solid foundation.


