

You want a custom kitchen look without the massive price tag, and learning how to build base cabinets is your ticket to professional results. Whether you choose traditional face frames or modern frameless designs, you gain full control over materials and dimensions.
This guide details exact measurements, tool requirements, and step-by-step assembly for both construction styles. You will discover material hacks that maximize plywood yield and specific techniques to avoid common DIY pitfalls.
Define Standard Base Cabinet Dimensions
Precision in sizing ensures your countertops fit perfectly and doors align seamlessly across the entire run. Deviating from standard measurements often leads to expensive errors with appliances and fixtures.
Establish Correct Height and Toe Kick
The industry standard box height is exactly 34.5 inches to accommodate a 1.5-inch countertop. This brings the total working surface to 36 inches, which is ergonomic for most users. You must account for a 4.5-inch toe kick clearance at the bottom, either by notching the side panels or using adjustable leveling feet.
Determine Depth and Width Requirements
Standard base cabinets measure 24 inches deep, while vanity units often reduce this to 21 inches. Widths typically follow 3-inch increments ranging from 15 inches to 36 inches.
* Face Frame Adjustment: Reduce box depth by 1 inch if using full-overlay doors since the door adds the missing depth.
* Frameless Adjustment: Cut side panels to 23.75 inches to remove rough factory edges while maintaining strength.
* Sink Bases: Plan for 30-inch or 36-inch widths to handle plumbing and basin size.
Select Your Construction Method
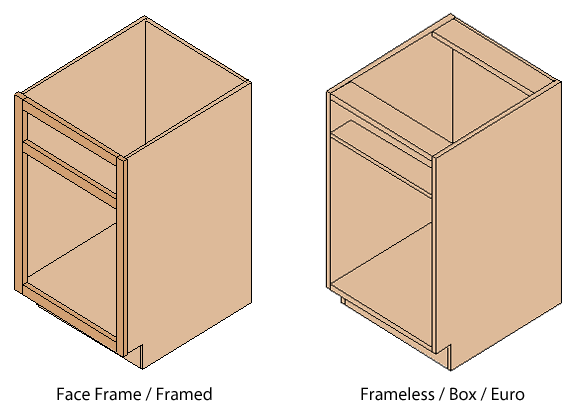
Choosing between face frame and frameless styles depends on your available tools, desired aesthetic, and need for interior space. Both methods yield durable results when executed with 3/4-inch plywood.
Face Frame Characteristics and Benefits
This traditional approach uses a front frame made of 1×4 lumber to mount doors and cover drywall imperfections. It joins the box with pocket holes and attaches the frame with micro-pocket screws. Beginners often prefer this style because it hides minor assembly errors and provides robust door support.
Frameless Design Advantages
Modern frameless construction eliminates the front frame, allowing doors to mount directly to the box sides. This method maximizes interior storage space and creates a sleek, contemporary appearance. It relies on SPAX screws and brad nails rather than glue, making it ideal for pre-finished or laminated plywood where adhesives fail.
Optimize Material Selection and Cutting
Selecting the right core materials and planning your cuts dramatically reduces waste and ensures structural integrity. Proper sheet optimization can yield more cabinets from fewer sheets of plywood.
Choose Core Materials Wisely
Use 3/4-inch birch or maple plywood for cabinet boxes to ensure void-free strength. Face frames typically utilize 1×4 pre-primed pine or poplar ripped to 1.75 inches wide. Back panels can be 1/4-inch plywood stapled in place or 3/4-inch plywood screwed for added rigidity.
Maximize Plywood Sheet Yield
Cutting side panels to 23.75 inches wide instead of 24 inches allows three full rows per 4×8 sheet. This simple adjustment yields six side panels from a single sheet of plywood. Use a track saw or circular saw with a guide to achieve clean, square cuts without tearout.
Select Appropriate Fasteners
Self-drilling SPAX hardwood screws (1.75 inches) work excellently in 3/4-inch plywood without pre-drilling. Use pocket hole screws for face frames and drawer boxes, while 1.25-inch screws with washers prevent blowout on drawer fronts.
* Avoid 1.5-inch brad nails as they may punch completely through the material.
* Use 5mm system screws for drawer slides to ensure superior holding power.
Gather Essential Tools for Cabinet Building
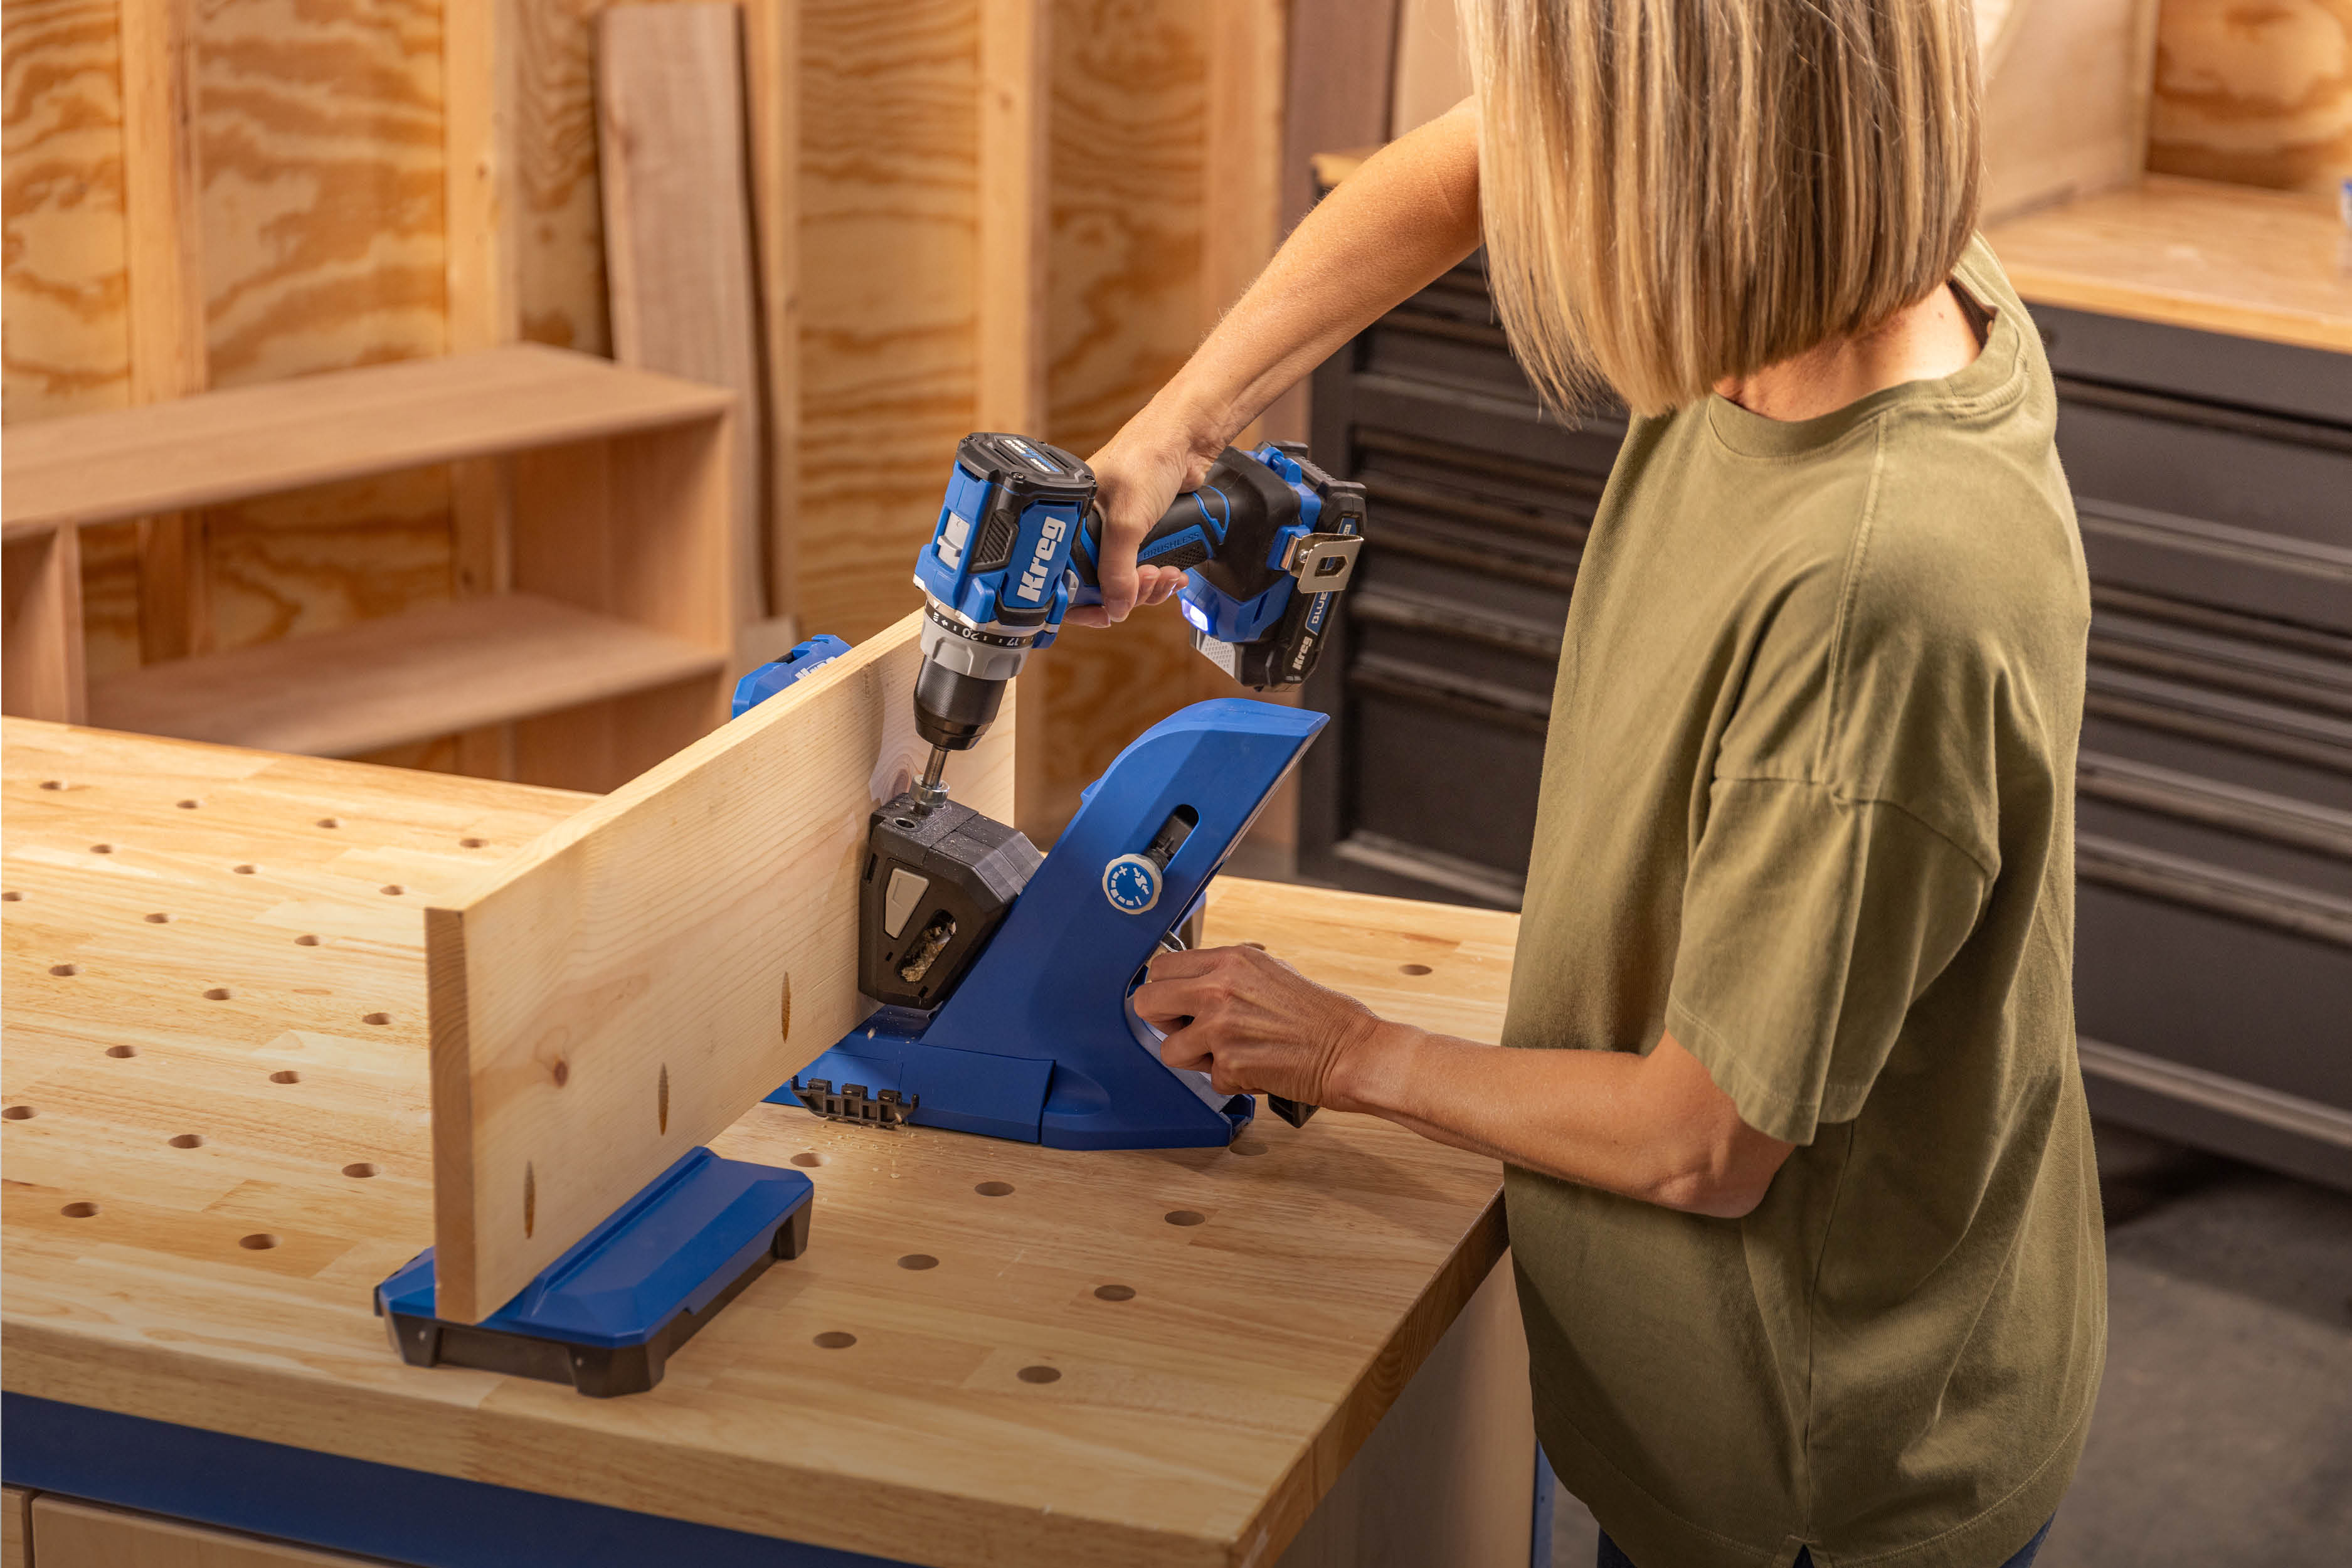
You do not need a commercial shop, but specific precision tools will save you significant time and frustration. Investing in jigs for drilling ensures consistent results across all units.
Required Cutting Equipment
A table saw or track saw is essential for breaking down large sheets and ripping strips accurately. A jigsaw handles toe kick notches and rounded corners on drawer fronts, while a router creates door panel grooves.
* Use a circular saw with a straight edge guide as a budget-friendly alternative.
* Ensure blades have 80+ teeth to minimize tearout on veneer surfaces.
Drilling and Joinery Gear
A micro-pocket hole jig prevents splitting when working with narrow face frame pieces. Concealed hinge jigs drill perfect cup holes for soft-close hinges, and drawer slide jigs ensure consistent height alignment.
* Self-centering drill bits guarantee perfect alignment for hinge plate screws.
* Shelf pin jigs create evenly spaced holes for adjustable shelving.
Assembly and Planning Aids
Cordless drills drive screws efficiently, while staple guns secure 1/4-inch back panels quickly. Clamps hold face frames square during glue-ups, and a mallet helps tap bowed panels flat.
* Use SketchUp with a cut list plugin to model layouts and optimize material usage.
* Scribing tools help fit end panels to uneven floors or walls.
Construct Face Frame Base Cabinets
Building a face frame cabinet involves creating a sturdy box and attaching a front frame for door mounting. This method is forgiving and produces a classic, durable result.
Cut Components and Notch Toe Kicks
Cut side panels to 34.5 inches tall and bottom panels to the desired width minus 1.5 inches. Mark a 3.5-inch high by 4.5-inch deep rectangle on the front bottom corners of both side panels. Use a jigsaw to remove this section, creating a recessed toe kick without needing extra material.
Assemble Box with Pocket Holes
- Drill pocket holes in the ends of the bottom panel and three support strips.
- Attach the bottom panel to the side panels, positioning it 0.5 inches above the toe kick notch.
- Install the top front support strip to hold the countertop front edge.
- Install two back support strips, one at the top and one lower for wall mounting.
Pro Tip: Drill pocket holes after initial assembly if the cabinets will sit in tight spaces where side access is blocked.
Attach Face Frame and Interior Hardware
Pre-assemble the face frame using wood glue and clamps, then secure it to the box front with 1.25-inch pocket screws. Since the frame intrudes into the interior, use spacer blocks made of stacked plywood to align drawer slides flush with the frame. Drill shelf pin holes in the side panels using a jig for adjustable shelving.
Install Back Panel for Rigidity
Cut 1/4-inch plywood to fit the back opening and staple it in place every 6 to 8 inches. This step adds critical torsional rigidity to the cabinet structure. Never skip adding a back panel, as it prevents the box from twisting over time.
Assemble Frameless Euro-Style Cabinets
Frameless construction skips the front frame entirely, relying on precise screw placement and mechanical fasteners. This approach speeds up assembly and maximizes usable interior volume.
Utilize Ledger Boards for Leveling
Instead of notching side panels, attach a 4.5-inch tall ledger board to the wall 4.5 inches above the floor. The cabinet sits on front leveling feet and rests against this rear ledger. This method keeps side panels full height for better sheet yield and simplifies leveling on uneven floors.
Execute Glue-Free Assembly
Joints remain strong with screws alone once cabinets are tied together and wall-mounted. Glue often fails on pre-finished surfaces, so rely on mechanical fasteners.
1. Tack joints with brad nails to hold the bottom to one side panel in an L-shape.
2. Align the second side panel, clamp, and tack it in place.
3. Add back nailers and top stretchers only where necessary to save weight.
4. Reinforce all joints with SPAX screws, placing two screws per end on stretchers.
Finish End Panels Cleanly
Attach a full 3/4-inch plywood panel to the exposed side of the last cabinet in a run. Screw from the inside to hide fasteners, then scribe the outer edge to match wall contours. This creates a seamless built-in look without visible trim or caulk lines.
Fabricate Doors and Drawers
:max_bytes(150000):strip_icc()/100505124-e9f1c4ce331345fb8f947576e821b1a0.jpg)
Creating custom doors and drawers allows you to match your specific style preferences and functional needs. Proper joinery ensures these components withstand daily use.
Build Framed Cabinet Doors
Construct door frames using 1×3 poplar or maple with a 1/4-inch plywood panel floating in a groove. Cut a 1/4-inch groove on a table saw and create tongues on rail ends using a router. Assemble with glue and clamps, allowing 24 hours for drying. A 1.5-inch overlay ensures full coverage and a clean appearance.
Create Drawer Fronts and Boxes
Choose between framed fronts with routed panels or simple 3/4-inch plywood slabs for top drawers. For slab fronts, use a jigsaw to cut 1-inch radius corners to avoid complex chiseling.
* Build drawer boxes from 3/4-inch plywood using pocket holes on the front and back.
* Set the 1/4-inch bottom in a groove or nail it securely.
* Attach fronts using 1.25-inch screws with washers to prevent poking through thick fronts.
Install Hardware Like a Professional
Precise hardware installation distinguishes amateur work from professional-grade cabinetry. Using jigs and specific techniques ensures smooth operation for years.
Mount Concealed Hinges Accurately
Use a hinge jig to drill perfect 35mm cup holes in your doors. Measure 4 inches from the top and bottom of the door to mark placement, then transfer these marks to the cabinet side or face frame. Drill with a self-centering bit to guarantee alignment before screwing the base plate to the cabinet.
Install Drawer Slides and Leveling Systems
A slide jig ensures both sides match height perfectly, while 5mm system screws provide superior holding power. Mark the centerline on the cabinet side for consistency and drill the final hole manually to avoid blowout.
* Use plastic leveling feet with base plates for the front corners.
* Employ a hybrid method with two front feet and a rear ledger for cost-effective leveling.
* Install feet using a jig to drill recessed holes and secure legs with screws.
Add Adjustable Shelving
Drill shelf pin holes with a jig to ensure perfect vertical alignment throughout the cabinet interior. Standard spacing places holes 2 inches apart vertically. Insert metal pins to support 3/4-inch plywood shelves that can be reconfigured as needed.
Finish and Paint for Durability
Proper finishing protects your investment and gives the cabinets a professional appearance. High-durability paints resist moisture and wear in kitchen environments.
Prime and Paint Surfaces
Prime all surfaces first to prevent warping and ensure paint adhesion, paying special attention to plywood edges. Apply two coats of high-durability paint like Sherwin-Williams Emerald Urethane Trim Enamel. Allow the finish to cure for at least 72 hours before installing hardware to prevent damage.
Complete Toe Kick and Protection
Cut a 3.5-inch wide trim piece to span multiple cabinets and nail it across the toe kick area. Paint this piece the same color as the cabinets for a seamless look. Add temporary skitter strips to the bottom of shop cabinets to facilitate sliding during installation, then remove them once positioned.
Troubleshoot Common Cabinet Mistakes
Identifying and fixing common errors early saves time and materials. Understanding these pitfalls helps you build with confidence.
Prevent Splitting and Blowout
Standard pocket holes often split narrow 1.75-inch face frame pieces. Solve this by using a micro-pocket hole jig designed for narrow boards. Prevent screw blowout on drawer fronts by using 1.25-inch screws with washers that act as spacers.
Fix Bowed Panels and Tearout
If a bottom panel warps during assembly, add corner screws and tap it flat with a mallet before final tightening. Eliminate tearout on plywood by using high-tooth-count blades and removing factory edges with a track saw.
Address Glue and Access Issues
Glue peels off pre-finished or laminated plywood, so rely on mechanical fasteners for these materials. Avoid making upper cabinets taller than 42 inches, as anything higher requires a stool for comfortable access.
Final Tips for Building Base Cabinets
Success in cabinet building comes from preparation, proper sequencing, and attention to detail. Follow these final guidelines to ensure your project meets professional standards.
- Build components in sequence by cutting all parts first, then assembling in batches.
- Label every piece clearly to prevent mix-ups during the assembly process.
- Dry-fit cabinets before final assembly to catch errors early.
- Use soft-close hinges and slides to reduce wear and improve user experience.
- Scribe end panels to walls for a custom, built-in look without caulk lines.
- Tie adjacent cabinets together side-to-side and anchor them to the wall for stability.
Building base cabinets gives you the power to create durable, custom storage that fits your space perfectly. Whether you select the traditional charm of face frame construction or the sleek efficiency of frameless design, these techniques ensure professional results. With the right materials and methods, your DIY kitchen will stand the test of time.
Frequently Asked Questions About Building Base Cabinets
What is the standard height for a base cabinet box?
The standard box height is 34.5 inches, which allows for a 1.5-inch countertop to reach the universal 36-inch working height.
How deep should I cut side panels for frameless cabinets?
Cut side panels to 23.75 inches deep instead of 24 inches to remove rough factory edges while maintaining structural strength.
Can I build cabinets without using any glue?
Yes, frameless cabinets rely on SPAX screws and brad nails for strength, especially since glue often fails on pre-finished plywood.
What screw length prevents blowout on drawer fronts?
Use 1.25-inch screws with washers to reduce effective length and prevent screws from poking through thick drawer fronts.
How do I handle uneven floors during installation?
Use adjustable plastic leveling feet at the front corners and a ledger board at the rear to level cabinets on uneven surfaces.
What paint works best for kitchen cabinets?
Sherwin-Williams Emerald Urethane Trim Enamel is recommended for its durability, moisture resistance, and smooth finish.
Key Takeaways for How to Build Base Cabinets
Mastering how to build base cabinets requires understanding standard dimensions, material optimization, and precise assembly techniques. Whether you choose face frame or frameless construction, using 3/4-inch plywood and proper fasteners ensures long-lasting results.
Focus on accurate cutting, utilize jigs for hardware installation, and allow finishes to cure fully before use. Start your project by planning your cut list in software, then proceed with confidence knowing these proven methods deliver professional quality.


