
Changing your kitchen cabinets doesn’t always mean demolition, dust, and weeks of renovation chaos. Whether you’re on a tight budget, short on time, or just want a fresh look without the mess, there are proven ways to transform your kitchen without removing old cabinets. From refacing to overlay installations and quick cosmetic upgrades, you can achieve a stunning new kitchen in days, not months.
This guide breaks down every method step by step, so you can choose the best approach based on your cabinet condition, style goals, and budget. You’ll learn how to assess your current setup, pick the right materials, and install like a pro. The result is a kitchen transformation that saves time, money, and stress.
Evaluate Cabinet Condition First
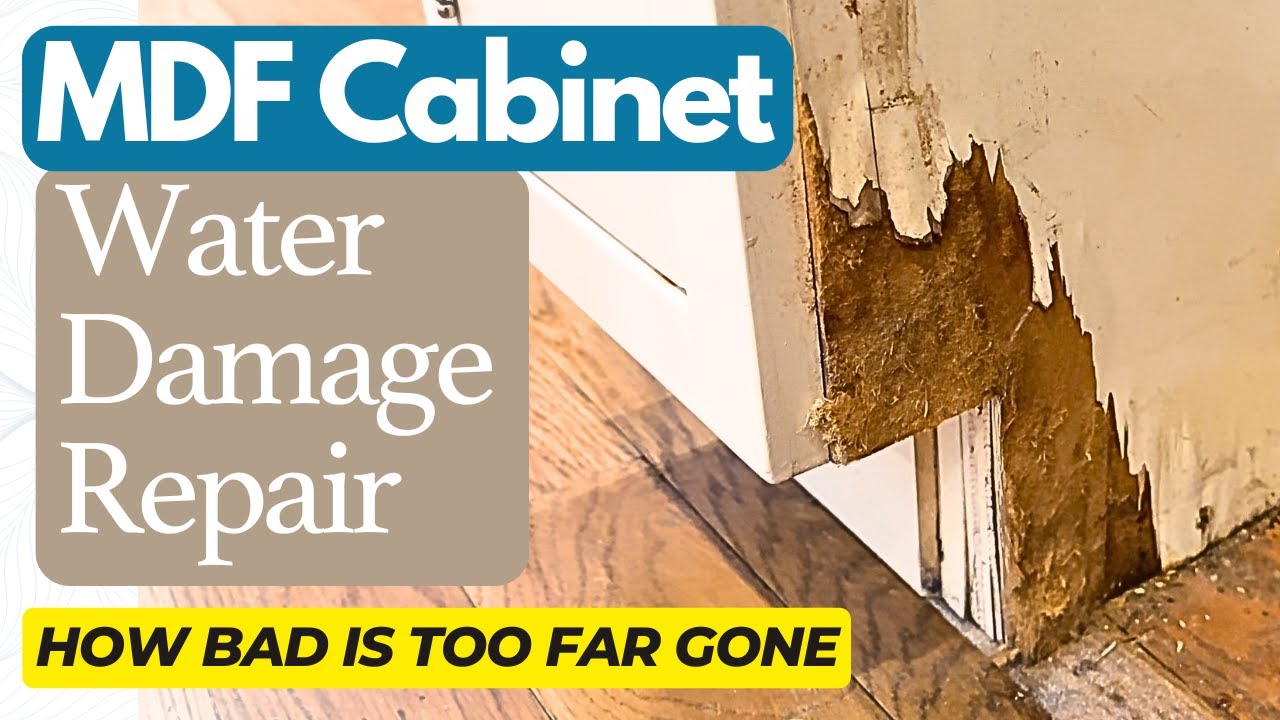
Before any upgrade, determine if your cabinets can support a non-removal transformation. The success of most modern cabinet change methods depends entirely on the structural health of your existing units.
Check for Structural Soundness
Inspect each cabinet box for warping, water damage, or rot. Gently shake doors and drawers. Excessive wobble or creaking may signal failing joints. If the carcass, which is the main cabinet body, feels loose or compromised, full replacement is safer. But if boxes are solid and securely mounted, you’re a prime candidate for low-impact upgrades.
Test Hinges and Joints
Open and close every door slowly. Are hinges stiff, squeaky, or misaligned? Worn hinges can often be replaced, but if the screw holes are stripped or the wood is crumbling, the cabinet may not support new doors or overlay systems. Drawer runners should glide smoothly. If they stick or sag, consider upgrading the interior mechanics during your refresh.
Use This Quick Decision Guide
| Cabinet Condition | Recommended Method |
|---|---|
| Solid boxes, good alignment | Refacing or overlay installation |
| Cosmetic wear only | Paint, hardware, lighting upgrades |
| Damaged, warped, or unstable | Full replacement required |
| Layout change desired | Full removal and rebuild |
Only proceed with no-removal methods if your cabinets pass these checks. Otherwise, prioritize safety and long-term function over convenience.
Choose the Right Upgrade Method
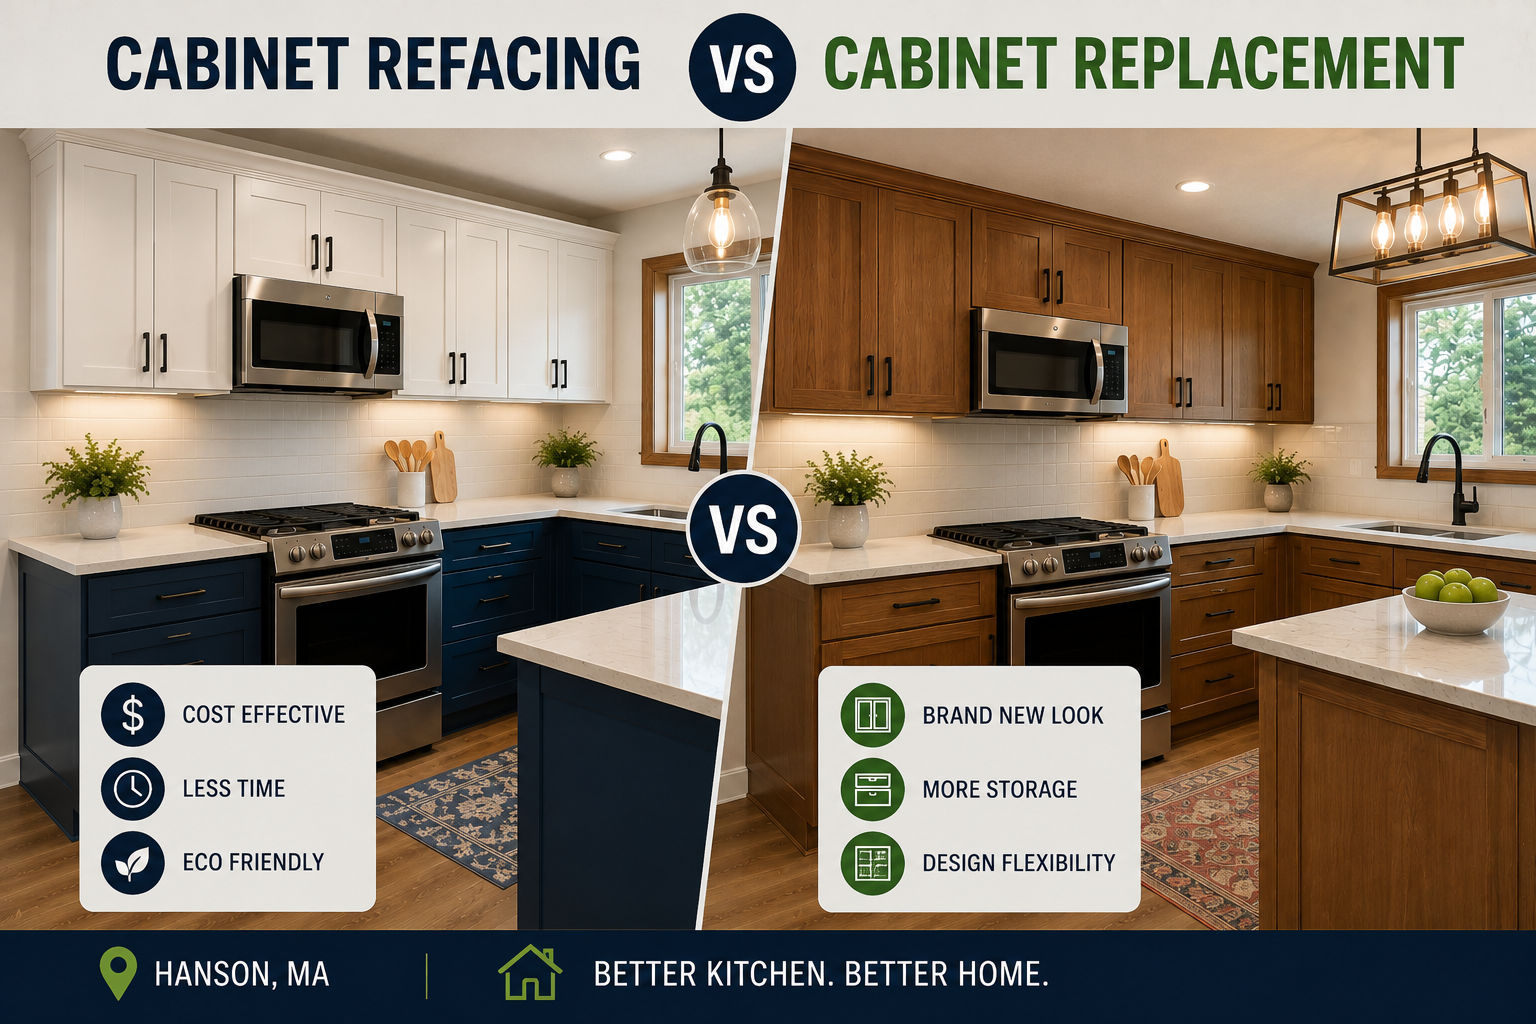
Not all cabinet changes are equal. Your choice impacts cost, time, and final results. Pick the method that matches your goals and cabinet condition.
Cabinet Refacing: New Doors, Same Boxes
Replace just the doors, drawer fronts, and hardware while keeping the existing cabinet boxes. This is ideal when structure is sound but style is outdated.
- Best for: Budget-friendly visual refresh
- Time required: 2 to 5 days for DIY
- Cost savings: Up to 50% versus full replacement
- Pro tip: Match hinge type, such as cup hinge or overlay style, for easier installation
Overlay Installation: New Cabinets Over Old
Mount new cabinet boxes directly over existing ones using wall brackets or hidden fasteners. Full-overlay designs cover the entire front for a seamless, modern look.
- Best for: Complete style transformation without demolition
- Time required: 3 to 7 days
- Ideal cabinets: Frameless or full-overlay styles
- Key requirement: Exact measurement matching
Full Replacement: When Removal Is Necessary
Required when cabinets are damaged, misaligned, or if you’re changing the kitchen layout. This involves full demolition, disposal, and new installation.
- Best for: Major layout changes or water-damaged units
- Disruption level: High
- Time required: 2 to 4 weeks
- Consider: Permits and plumbing or electrical adjustments
Cosmetic Upgrades: Fast, Low-Cost Refresh
No tools? No problem. Simple swaps like hardware, paint, or lighting can modernize your kitchen in hours.
- Best for: Renters or quick pre-sale updates
- Time required: A few hours to 2 days
- Examples: Brushed nickel pulls, matte black faucets, LED strips
Reface Cabinets: Replace Doors and Hardware
Cabinet refacing delivers dramatic results with minimal effort. It’s one of the most cost-effective ways to change kitchen cabinets, especially if the boxes are still in great shape.
Remove Old Doors and Drawer Fronts
Start by labeling each door and its location, such as “left of sink,” with painter’s tape. Use a screwdriver to remove hinges and set them aside. Keep screws if they’re in good condition. Many new doors use the same hole pattern.
- Pro tip: Lay doors flat on a protected surface to avoid warping
- Warning: Don’t force stripped hinges. Use a repair kit or fill holes for re-drilling
Measure for New Doors and Fronts
Accurate measurements are critical. Measure width and height at three points, top, middle, and bottom, and use the smallest dimension to ensure fit.
- Standard base cabinets: 24 to 36 inches wide
- Wall cabinets: 12 to 30 inches wide
- Order slightly oversized and trim with a router if needed
Install New Doors and Drawer Fronts
Attach new hinges to doors first, then align with cabinet mounting plates. Use a door alignment tool or spacer blocks, like coins or credit cards, to ensure even gaps.
- Gap standard: 1/8 inch between doors and frame
- Adjustable hinges: Fine-tune position after mounting
- Soft-close upgrade: Install soft-close hinges to prevent slamming
Upgrade to Modern Hardware
Swap old knobs for sleek pulls or minimalist handles. Match finishes across all cabinets for a cohesive look.
- Popular finishes: Brushed nickel, matte black, brass
- Spacing tip: Use a jig or template to drill holes evenly
- Renter-friendly option: Adhesive-backed knobs for temporary use
Install Overlay Cabinets Over Existing Ones
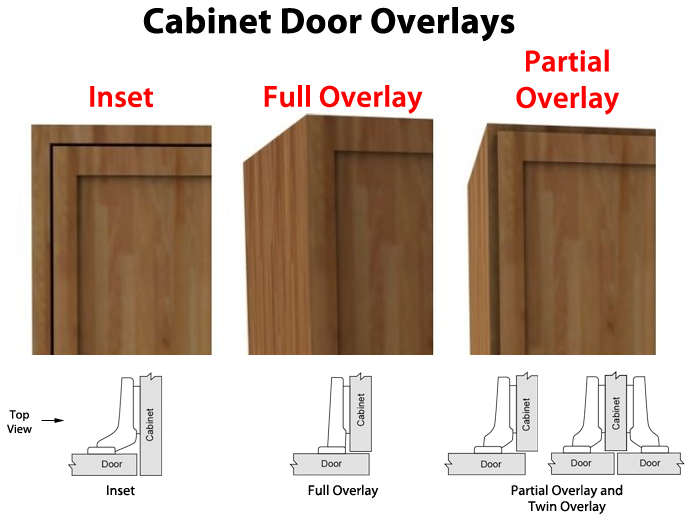
When you want a full cabinet replacement look without the demolition, overlay installation is the answer. This method mounts new cabinets directly over old ones, preserving time, labor, and sanity.
Select Full-Overlay or Half-Overlay Style
Full-overlay cabinets have doors that completely cover the frame, creating a clean, modern slab look. Best for contemporary kitchens.
Half-overlay doors cover about half the face frame, leaving a visible border. Ideal for traditional or farmhouse styles.
- Frameless cabinets work best for overlay projects
- Ensure new doors match existing hinge type or plan to replace hinges
Measure Existing Cabinets Precisely
Use a laser level and tape measure to record:
- Width, height, and depth of each cabinet
- Distance between units
- Wall and ceiling clearances
Even a quarter-inch mismatch can cause alignment issues. Double-check all numbers before ordering.
Prepare the Surface for Mounting
Clean all cabinet fronts with TSP, which is trisodium phosphate, or a degreaser. Sand lightly to improve adhesion, then fill dents or screw holes with wood filler.
- Prime if painting: Use bonding primer for better finish hold
- Remove all hardware: Prevents uneven mounting
- Check for protrusions: Trim any sticking screws or brackets
Mount New Cabinets Using Brackets
Use wall-mounted rails or hidden fasteners to secure new cabinets over old ones.
- Install horizontal mounting brackets into wall studs
- Slide new cabinet frame onto brackets
- Secure from inside using screws or clips
- Check for level with a bubble or laser level
- Never rely on old cabinets for support. Mount directly to wall
- Adjustable rails allow fine-tuning for perfect alignment
Attach Doors and Finalize Finish
Once frames are secure, install new doors, drawer fronts, and hardware. Touch up paint around edges and clean all surfaces.
- LED lighting: Add under-cabinet strips during this phase
- Final inspection: Open and close all doors to test smoothness
Upgrade Without Removal: Cosmetic Fixes
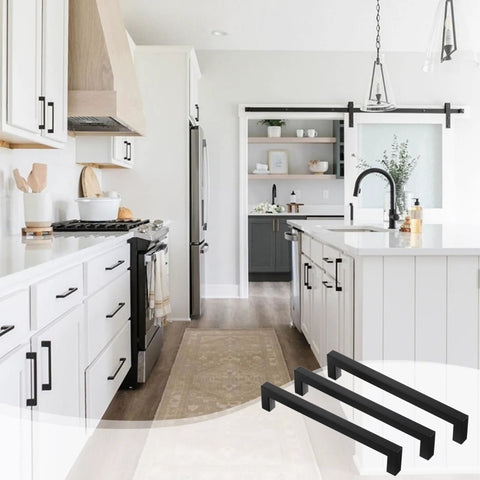
You don’t need to change cabinets at all to get a new kitchen look. Many upgrades skip structural changes entirely, saving money and effort.
Replace Cabinet Hardware
Swapping knobs and pulls is the fastest way to modernize. Choose finishes that complement your faucet, lighting, or appliances.
- Trend alert: Mixed metals, like brass pulls with nickel faucets
- Pro tip: Use a template to drill new holes perfectly aligned
Paint or Refinish Existing Cabinets
A fresh coat of paint can transform dated wood or laminate cabinets.
- Remove doors and hardware
- Sand surfaces with 120-grit paper
- Wipe clean, then apply bonding primer
- Use cabinet-grade paint, semi-gloss or satin
- Reinstall after 48 hours of drying
- Best paint types: Acrylic enamel or shellac-based primer
- Avoid cheap paint. It chips and yellows quickly
Add LED Lighting
Install LED strip lights inside cabinets or under upper units.
- Battery-powered strips: No wiring needed
- Hardwired under-cabinet lights: Cleaner look, permanent solution
- Motion-sensor options: Hands-free convenience
Install a New Backsplash
Peel-and-stick tiles or real ceramic backsplashes can be installed in a weekend.
- Peel-and-stick pros: No grout, DIY-friendly
- Tile pros: Durable, high-end look
- Design tip: Use bold patterns as a kitchen focal point
Upgrade Sink and Faucet
Swap a worn sink for a farmhouse style or install a sleek single-handle faucet.
- Requires plumbing: Turn off water, disconnect lines
- DIY-friendly if experienced. Otherwise, hire a plumber
- Pair with new countertop for full impact
Convert to Open Shelving
Remove a few upper cabinet doors and replace with open shelves.
- Unscrew doors and remove
- Sand and paint the opening
- Install floating shelves with hidden brackets
- Style with dishes, glassware, or decor
- Benefits: Makes kitchen feel larger, adds display space
- Best for: Small kitchens or rentals
Improve Functionality and Storage
A kitchen refresh isn’t just about looks. It’s about performance. Smart storage upgrades make daily use easier and more efficient.
Add Pull-Out Shelves
Install sliding shelves in base cabinets for easy access.
- Types: Full-extension ball-bearing glides
- Use for: Pots, pans, spices, or trash bins
- DIY kits available. No carpentry needed
Install Lazy Susans in Corners
Maximize awkward corner space with rotating shelves.
- Frameless corner units: Best for 90-degree corners
- Pull-out alternatives: Track-mounted corner drawers
- Tip: Use for oils, sauces, or snacks
Use Drawer Dividers
Keep utensils, cutlery, and tools organized.
- Custom inserts: Measure drawer interior first
- Adjustable dividers: Fit changing needs
- Material options: Bamboo, acrylic, or wood
Add Cabinet Liners
Line shelves with peel-and-stick felt, vinyl, or metal.
- Benefits: Prevents scratches, absorbs moisture
- Washable options: Great for spice or pantry cabinets
- Decorative patterns: Add subtle style
When Full Cabinet Replacement Is Required
Some situations demand full removal and replacement. No shortcuts.
Signs You Need Full Replacement
- Water damage or rot in cabinet boxes
- Severe warping that affects door alignment
- Mold or pest infestation
- Desire to change layout, like adding an island or moving the sink
- Outdated plumbing or electrical behind cabinets
If your cabinets fail the structural test, overlay or refacing won’t last.
Plan for Demolition and Disposal
- Turn off water and electricity
- Remove countertops if attached
- Unscrew cabinets from wall and each other
- Label parts for recycling or disposal
- Rent a dumpster or hire junk removal
- Time estimate: 1 to 3 days
- Dust control: Seal off kitchen, use HEPA filter
Choose New Cabinet Types
- Stock cabinets: Cheapest, pre-built, quick install
- Semi-custom: Adjustable sizes, more finishes
- Custom: Built to exact specs, highest cost
Match new cabinets to your style. Options include shaker, flat-panel, or raised door designs.
Reinstall with Professional Help
Hire a kitchen installer if you’re moving plumbing, gas lines, or electrical. Even experienced DIYers benefit from a pro for leveling and alignment.
- Ensure level walls and floors
- Use shims behind cabinets for perfect fit
- Secure to studs, not drywall
Frequently Asked Questions About Changing Kitchen Cabinets
Can I change kitchen cabinets without removing them?
Yes. You can reface cabinets by replacing doors and hardware, or install overlay cabinets directly over existing ones. Both methods preserve the current structure and avoid demolition.
What is the cheapest way to change kitchen cabinets?
Cabinet refacing is the most budget-friendly structural option. For even lower cost, paint existing cabinets and swap hardware for an instant refresh.
How long does it take to install overlay cabinets?
Overlay installation typically takes 3 to 7 days. This depends on kitchen size, number of cabinets, and whether you’re working alone or with help.
What is the difference between full-overlay and half-overlay cabinets?
Full-overlay doors completely cover the cabinet frame for a modern, seamless look. Half-overlay doors cover about half the frame, leaving a visible border for a traditional appearance.
Do overlay cabinets require professional installation?
Not always. DIY is possible if you have solid measuring and leveling skills. For complex layouts or plumbing adjustments, professional installation is recommended.
Can I paint over my existing cabinets instead of replacing them?
Yes. Sand surfaces, apply primer, and use cabinet-grade paint. Proper preparation ensures the finish adheres well and lasts for years.
Key Takeaways for Changing Kitchen Cabinets
Changing kitchen cabinets doesn’t have to mean chaos. By assessing your current setup, choosing the right method, and following proven steps, you can achieve a stunning new kitchen without full demolition.
Refacing and overlay installations save time and money. Cosmetic upgrades deliver instant impact with minimal effort. Focus on structural integrity first, then prioritize style and function.
Whether you’re refreshing for resale or personal enjoyment, these strategies ensure a smooth, successful transformation. Start by evaluating your cabinet condition today, then pick the method that fits your budget and timeline. Your dream kitchen is closer than you think.


