

Painting oak cabinets can transform your kitchen without the cost of a full remodel. If you’re dealing with outdated, honey-toned oak that feels stuck in the 1990s, you’re not alone, many homeowners want to modernize their space with a fresh coat of paint. But oak presents unique challenges: prominent grain, tannin bleed, and a glossy finish that resists adhesion. The good news? With the right prep, materials, and technique, you can achieve a smooth, durable, professional-looking finish.
This guide walks you through every step, from selecting supplies to applying the final coat, so you can confidently paint oak cabinets and love the results. You’ll learn how to properly clean, sand, and prime oak to prevent blotching and peeling. We’ll cover which paints and tools deliver the best finish, how to avoid brush marks and drips, and why skipping steps leads to disappointment. Whether you’re painting cabinet doors, drawers, or frames, this process ensures long-lasting, beautiful results.
Essential Prep Work Before Painting Oak Cabinets
Before any paint touches your cabinets, thorough preparation is critical. Oak’s open grain and frequent finish buildup mean surface prep makes or breaks the final look. Skipping cleaning or sanding leads to poor adhesion, bubbling, and uneven coverage.
Remove Doors and Hardware
Take cabinet doors and drawers off hinges and remove all knobs, pulls, and hinges. Label each door and its position with painter’s tape so reassembly is easy. Working off the cabinet allows for even coating on all sides and prevents dust buildup in hinges.
Pro Tip: Lay doors flat on sawhorses or a drop cloth when painting. This reduces drips and ensures consistent drying.
Deep Clean All Surfaces
Oak cabinets collect grease, grime, and oils over time, especially in kitchens. Wipe down every surface with a degreasing cleaner like TSP (trisodium phosphate) or a mix of warm water and dish soap. Rinse with clean water and let dry completely.
Watch for: Sticky spots near handles or above the stove. These need extra scrubbing. Use a soft brush for crevices.
Sand to Create Adhesion
Even if cabinets look dull, they often have a factory varnish that repels paint. Lightly sand all surfaces with 120 to 150 grit sandpaper to rough up the finish and help primer stick.
Focus on:
– Flat panel surfaces
– Raised door edges
– Any glossy areas
Wipe away dust with a tack cloth after sanding. Avoid skipping this step. Even with no-sand primers, light sanding ensures better results.
Choose the Right Primer for Oak Cabinets
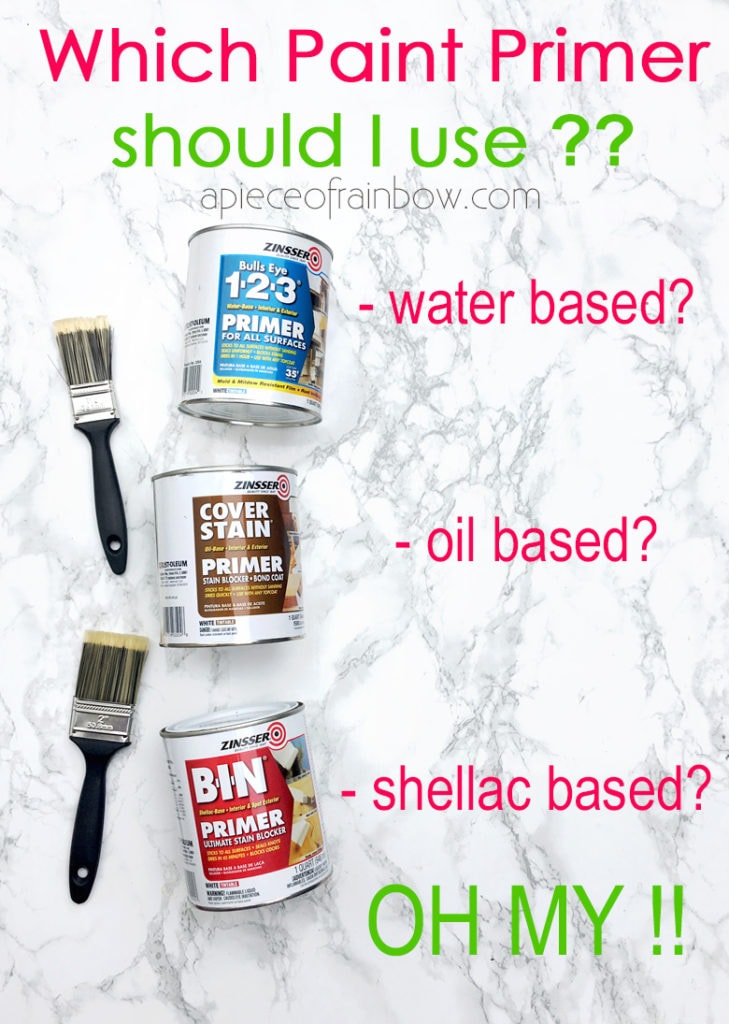
Priming is non-negotiable when painting oak. Oak contains tannins that can bleed through paint, causing yellow or pink discoloration. A proper primer seals the wood, blocks stains, and creates a uniform base.
Use Oil-Based or Bonding Primer
For oak, use either:
– Oil-based primer (like Zinsser Cover Stain) for blocking tannin bleed
– High-adhesion bonding primer (like BIN or Kilz Adhesion) for grip on glossy surfaces
Avoid water-based primers alone. They’re less effective at sealing tannins and may require multiple coats.
Apply Primer Evenly
Use a high-quality synthetic brush for edges and a foam roller for flat surfaces. Apply thin, even coats. Let dry per manufacturer instructions, usually 2 to 4 hours.
Look for: Complete coverage without runs. Sand lightly with 220-grit paper between coats for a smooth finish.
Seal Open Grain if Needed
Oak has deep grain that can telegraph through paint, creating a porous look. For ultra-smooth results, apply a wood grain filler or use multiple primer coats, sanding lightly between each.
Option: Use a thinned first coat of primer (10% water or thinner) to help it penetrate the grain.
Select the Best Paint for Oak Cabinets

Not all paints are created equal for cabinetry. You need a durable, washable finish that resists chipping and yellowing.
Use Cabinet-Grade or Trim Paint
Choose:
– 100% acrylic enamel (like Benjamin Moore Advance or Sherwin-Williams Emerald Urethane)
– Alkyd-modified waterborne paint for a smooth finish, low odor, and fast dry
These self-leveling paints minimize brush marks and harden to a tough, scrubbable surface.
Avoid standard wall paint. It’s too soft and will wear quickly.
Pick the Right Sheen
For kitchens, go with:
– Satin for a soft luster that hides imperfections
– Semi-gloss for more durability and easier cleaning
Semi-gloss highlights flaws but stands up better to moisture and cleaning.
Use a Paint Sprayer for Smoothest Finish
While brushing and rolling works, an HVLP sprayer delivers the smoothest, most professional result, especially on raised-panel doors.
If brushing:
– Use a high-density foam roller (3/16 inch nap)
– Use a fine-bristle brush
– Apply thin coats, avoiding overloading the brush
Painting Techniques That Last
How you apply paint affects durability and appearance. Rushing leads to drips, uneven coverage, and a finish that chips under daily use.
Apply Thin, Even Coats
Use two to three thin coats instead of one thick one. Thick paint sags, drips, and takes longer to cure. Let each coat dry fully, usually 6 to 8 hours, before applying the next.
Drying Tip: Keep the room warm (around 70°F) and well-ventilated for even drying.
Sand Between Coats
After each coat dries, lightly sand with 220 to 320 grit sandpaper or a fine sanding sponge. This removes dust nibs and creates tooth for the next coat.
Wipe clean with a tack cloth. Never skip this step.
Avoid Common Painting Mistakes
- Don’t paint in direct sunlight. It dries too fast, causing brush marks.
- Don’t close cabinet doors too soon. Wait 24 to 48 hours for full cure.
- Don’t skip back-rolling after spraying. Lightly roll with a dry roller to level the surface.
Pro Tip: Paint all sides of doors and drawers, even the back, so they dry evenly and resist warping.
Reassemble Your Oak Cabinets with Care
Once paint is fully cured, wait at least 48 to 72 hours, and it’s time to reattach everything.
Rehang Doors and Drawers
Use your labeled tape to match doors to their original positions. Check alignment and adjust hinges if needed. Make sure doors close smoothly without binding.
Reinstall Hardware or Upgrade
You can reuse old knobs and pulls or install new ones for a fresh look. If switching styles, fill old holes with wood filler and drill new ones.
Design Tip: Upgrade to matte black, brushed nickel, or brass for a modern contrast.
Maintain Painted Oak Cabinets
A beautiful finish needs care to last.
Clean Gently
Use a soft cloth and mild soap-and-water solution. Avoid abrasive cleaners or soaking the surface.
Never use ammonia-based cleaners. They can dull or damage the paint.
Prevent Wear and Tear
- Use felt pads inside doors to reduce stress on hinges
- Avoid slamming doors
- Wipe spills quickly to prevent moisture damage
With proper care, painted oak cabinets can look great for 5 to 10 years or more.
Troubleshooting Common Oak Cabinet Painting Issues

Even with good prep, problems can arise. Here’s how to fix them.
Blotchy or Uneven Finish
Cause: Incomplete sanding or poor priming
Fix: Lightly sand and apply another coat of primer, then repaint
Tannin Bleed (Yellow or Orange Spots)
Cause: Unsealed wood
Fix: Sand affected area, apply oil-based primer, then repaint
Paint Peeling or Chipping
Cause: Poor adhesion from grease or inadequate prep
Fix: Strip paint, clean thoroughly, sand, prime, and repaint
Visible Brush Strokes or Roller Marks
Cause: Thick paint or improper tools
Fix: Sand smooth, apply thinner coat with better roller or sprayer
Frequently Asked Questions About Painting Oak Cabinets
Do I need to sand oak cabinets before painting?
Yes, light sanding with 120 to 150 grit paper is essential. It roughs up the factory finish so primer and paint can adhere properly. Skipping this step often leads to peeling and poor adhesion.
What kind of primer should I use on oak cabinets?
Use oil-based primer or a high-adhesion bonding primer. These block tannin bleed and grip glossy surfaces effectively. Water-based primers alone are less reliable for oak.
Can I paint oak cabinets without priming?
Technically yes, but it’s risky. Oak has tannins that can bleed through paint and cause discoloration. Priming also creates a uniform base for better paint adhesion and durability.
What paint finish is best for kitchen cabinets?
Satin or semi-gloss are the best choices. Satin hides imperfections while semi-gloss offers more durability and easier cleaning. Both withstand moisture and frequent wiping.
How long should I wait before putting cabinet doors back?
Wait at least 48 to 72 hours for paint to fully cure. Rushing this step can cause sticking, smudges, or damage to the finish.
Why is my painted oak cabinet turning yellow?
This is likely tannin bleed. The oak’s natural tannins are seeping through the paint. Sand the affected area, apply an oil-based primer, and repaint to seal the wood properly.
Key Takeaways for Painting Oak Cabinets
Painting oak cabinets is a project that demands patience, but the payoff is a modern kitchen without the cost of replacement. The three pillars of success are thorough prep, the right materials, and disciplined technique. Clean and sand every surface, choose a bonding or oil-based primer to block tannins, and use a cabinet-grade paint with a satin or semi-gloss sheen.
Apply thin coats, sand between each, and let everything cure fully before reassembly. Avoid rushing drying times or skipping primer, as these shortcuts lead to peeling, blotching, and brush marks. With proper care, your painted oak cabinets will look fresh and durable for years.
Your next step is to gather your supplies and start with the prep work. Remove your doors and hardware, deep clean every surface, and begin sanding. The effort you put in now determines the quality of your final finish.


