

If your wood kitchen cabinets are looking outdated, dingy, or just tired, you don’t need a full renovation to refresh your space. Painting wood kitchen cabinets is one of the most cost-effective ways to transform your kitchen’s appearance, without the hassle and expense of replacement. Whether your cabinets are oak, maple, cherry, or another hardwood, a fresh coat of paint can modernize your kitchen, improve resale value, and breathe new life into your home.
But painting wood cabinets isn’t as simple as rolling on a new color. Wood is porous and often has a protective finish that resists paint adhesion. Without proper prep and technique, your paint job can end up peeling, chipping, or looking uneven. That’s why a successful cabinet painting project requires careful planning, thorough preparation, and the right materials. This guide walks you through every step, from selecting paint and tools to sanding, priming, and finishing, so you can achieve a smooth, professional-quality result that lasts.
You’ll learn how to remove cabinet doors and hardware efficiently, which sandpaper grits to use, how to choose between brush, roller, and spray application, and how to prevent common mistakes like brush marks or paint buildup. Whether you’re aiming for a crisp white Shaker style, a bold navy island, or a warm matte gray finish, this guide gives you the tools and confidence to get it right.
Remove Cabinet Doors and Hardware
Before any painting begins, fully disassemble your cabinets to ensure even coverage and a clean, professional finish. Working on flat, detached doors and drawer fronts is far easier than trying to paint in tight corners and around hinges.
Take Off Doors and Drawers
Start by removing all cabinet doors and drawers using a screwdriver or drill. Label each door and its corresponding hinge location with painter’s tape and a marker. This prevents confusion during reinstallation. Remove drawer slides as well, if possible, to avoid paint getting on moving parts. Keep all screws organized in labeled bags so you can easily match them later.
Remove Hinges and Hardware
Take off hinges, knobs, pulls, and any other hardware. If you plan to replace them, now is the time. If keeping the existing hardware, clean it thoroughly or consider refinishing for a coordinated look. Set aside all small parts in a container to avoid losing them.
Clean All Wood Surfaces Thoroughly
Paint will not adhere properly to greasy, dusty, or grimy wood. Kitchen cabinets accumulate years of cooking residue, especially near stoves and ovens, so deep cleaning is essential.
Use a Degreasing Cleaner
Mix a solution of warm water and TSP (trisodium phosphate) or a TSP substitute like Krud Kutter or Simple Green. Using a sponge or microfiber cloth, scrub every surface, including frames, rails, and door edges. Pay extra attention to areas around handles and near the stove. Rinse with clean water and let dry completely. This can take several hours.
Inspect for Damage
While cleaning, examine each cabinet part for dents, scratches, or water damage. Fill small imperfections with wood filler, let dry, then sand smooth. This step ensures a flawless painted finish.
Sand for Paint Adhesion
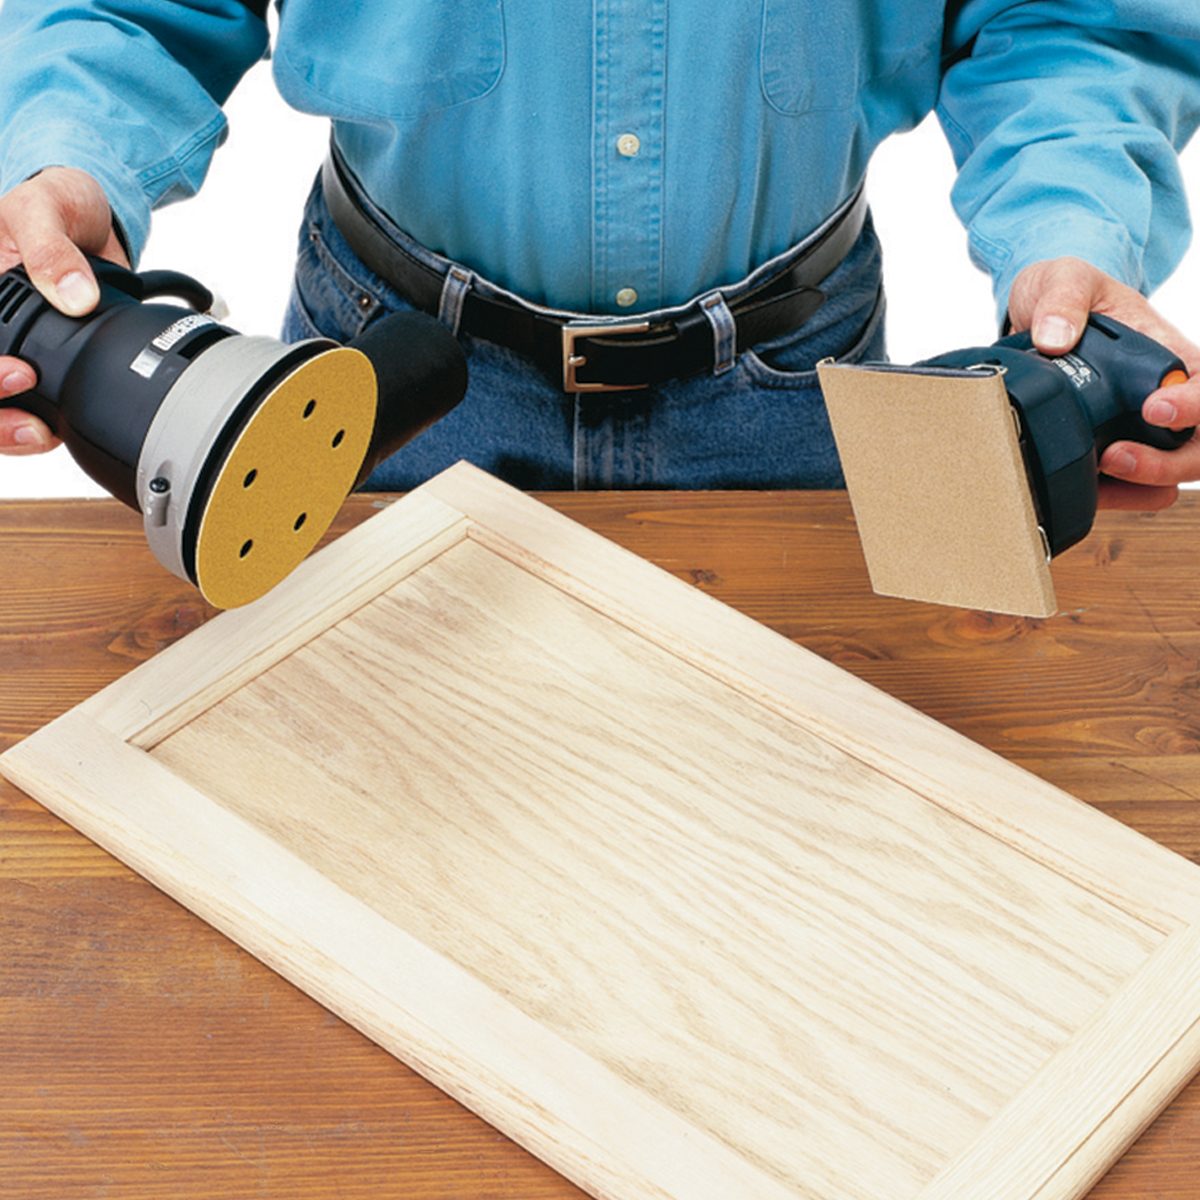
Sanding is critical for helping primer and paint bond to the wood’s surface, especially if your cabinets have a glossy varnish or polyurethane finish.
Sand Doors and Frames
Use a 120-grit sanding block or orbital sander to lightly scuff all surfaces. Focus on smoothing edges and removing any sheen. You don’t need to sand down to bare wood, just enough to create a tooth for the primer to grip. Always sand in the direction of the wood grain to avoid scratches.
Wipe Away Dust
After sanding, wipe every piece with a tack cloth or microfiber rag dampened with mineral spirits. Any remaining dust will compromise the paint finish, so this step cannot be skipped.
Apply High-Bond Primer
Primer seals the wood, blocks stains, and creates a uniform surface for paint. For wood cabinets, use a high-adhesion, oil-based or bonding primer.
Choose the Right Primer
Recommended options include Zinsser Bullseye 1-2-3, Zinsser BIN (shellac-based), or Kilz Adhesion. These primers stick well to glossy finishes and prevent tannin bleed in wood like oak.
Prime All Surfaces
Using a high-quality synthetic brush for edges and a small foam roller for flat areas, apply a thin, even coat of primer. Avoid heavy buildup, especially in corners. Let dry according to manufacturer instructions, typically 2 to 4 hours. Lightly sand with 220-grit paper between coats, then wipe clean.
Apply a Second Primer Coat if Needed
Some woods or dark finishes may require a second coat of primer for full coverage. Check for any missed spots or uneven areas before moving on.
Choose the Right Paint and Finish
The paint you choose affects both appearance and durability. Kitchen cabinets take daily wear, so durability is just as important as color.
Use Cabinet-Grade Paint
Opt for a paint specifically formulated for cabinets and trim, such as Benjamin Moore Advance, Sherwin-Williams Emerald Urethane, or Behr Alkyd. These are waterborne alkyd paints that dry to a hard, washable finish with minimal brush marks.
Select a Durable Sheen
Semi-gloss or satin finishes are ideal for cabinets. They resist moisture, stains, and scrubbing better than flat or eggshell finishes. Semi-gloss offers more shine and durability. Satin provides a softer look with good resilience.
Pick Colors Strategically
White, gray, navy, and greige are popular choices for timeless appeal. Test samples on cabinet doors and observe them at different times of day to see how lighting affects the shade.
Paint with Precision and Care
How you apply the paint determines the final look. A smooth, even finish requires the right tools and technique.
Use Quality Tools
Invest in a high-density foam roller with a quarter-inch nap for flat surfaces and a 2 to 2.5 inch angled synthetic brush for details and recessed panels. A paint sprayer, like an HVLP, delivers the smoothest finish but requires more setup and masking.
Apply Thin, Even Coats
Stir the paint thoroughly. Don’t shake, as this creates bubbles. Start with the edges and recessed areas using a brush, then roll the flat center sections in long, even strokes. Work in sections, maintaining a wet edge to prevent lap marks.
Let Dry and Sand Between Coats
Allow the first coat to dry completely, typically 6 to 8 hours or as directed. Lightly sand with 220-grit sandpaper to smooth any imperfections, then wipe with a tack cloth. Apply a second coat, and a third if needed for full coverage.
Reassemble with Care
:max_bytes(150000):strip_icc()/how-to-adjust-cabinet-hinges-1822181-01-9518583bf0374f2a8d3b87cadd5fc25f.jpg)
Once paint is fully cured, which can take up to 7 to 10 days, begin reattaching hardware and reinstalling doors.
Reinstall Hinges and Doors
Match your labeled doors to their original positions. Reattach hinges and hang doors, checking alignment. Adjust hinge screws as needed to ensure doors are level and evenly spaced.
Reattach Hardware or Upgrade
If reusing hardware, reinstall it now. For a fresh look, consider modern knobs or pulls that complement your new cabinet color.
Protect and Maintain the Finish
A newly painted cabinet surface needs time to fully harden and regular care to stay beautiful.
Allow Full Cure Time
While paint may feel dry in a few hours, it takes days to cure completely. Avoid heavy use or washing for at least a week.
Clean Gently
Use a soft damp cloth and mild soap for cleaning. Avoid abrasive cleaners or soaking the surfaces. Wipe up spills promptly to prevent water damage.
Prevent Wear and Tear
Use cabinet liners, avoid slamming doors, and consider felt pads on interior edges to reduce friction.
Frequently Asked Questions About Painting Wood Kitchen Cabinets
Do I need to sand my cabinets before painting?
Yes, sanding is essential for paint adhesion. Use 120-grit sandpaper to scuff the surface, creating a texture that helps primer bond properly. Skip this step and your paint may peel or chip within months.
What kind of paint should I use on wood cabinets?
Use a cabinet-grade paint like Benjamin Moore Advance or Sherwin-Williams Emerald Urethane. These waterborne alkyd paints dry hard and resist moisture, making them ideal for high-use kitchen surfaces.
How long does it take to paint kitchen cabinets?
The full process takes about 3 to 5 days, including cleaning, sanding, priming, painting multiple coats, and drying time. Allow at least 7 days before heavy use so the paint fully cures.
Can I paint over stained wood cabinets?
Yes, you can paint over stained wood. Clean thoroughly, sand to remove sheen, and apply a high-bond primer to seal the surface. This prevents stains from bleeding through the new paint.
Is it better to spray or brush cabinets?
Spraying gives the smoothest finish but requires masking and proper ventilation. Brushing and rolling with quality tools works well for DIYers and produces excellent results with patience and thin coats.
How many coats of paint do cabinets need?
Most cabinets need two to three coats of paint for full coverage and durability. Lightly sand between coats and wipe away dust to achieve the smoothest finish.
Key Takeaways for Painting Your Wood Cabinets
Painting wood kitchen cabinets is a rewarding DIY project that can completely transform your kitchen. With proper prep, the right materials, and patient application, you can achieve a high-end look that lasts for years. Focus on cleaning, sanding, priming, and using quality paint. These steps make all the difference.
Start with thorough cleaning and sanding to ensure adhesion. Apply a high-bond primer and use cabinet-grade paint with a satin or semi-gloss finish. Allow proper drying and curing time between coats. These details separate a professional result from a disappointing one.
Whether you’re updating a 90s oak kitchen or refreshing a modern design, a well-painted cabinet delivers maximum impact for minimal cost. Begin by gathering your supplies and scheduling a few dedicated days for the project. Your kitchen will thank you.


