
Adding knobs to your kitchen cabinets is one of the fastest ways to transform the entire look of your space. This small hardware upgrade delivers a big visual impact, yet many homeowners feel uncertain about the process. The good news is that learning how to put knobs on kitchen cabinets is a straightforward DIY project that requires minimal tools and just a few hours of your time. From choosing the right placement to drilling precise holes, this guide covers everything you need for a professional-looking result.
By the end of this article, you’ll know exactly how to measure, mark, drill, and attach knobs with confidence. You’ll also learn how to avoid common mistakes, select the right hardware style, and fix errors if they happen. Let’s get your cabinets looking their best.
Choosing Knobs vs. Pulls for Your Cabinets

Knobs Are Simple and Budget-Friendly
Knobs are the easier option for most DIYers because they require only one mounting hole. They cost less than pulls and work beautifully on cabinet doors and smaller drawers. If you have limited experience with home improvement projects, knobs are an excellent starting point.
Pulls Offer Better Grip and Stability
Pulls feature two mounting points, which makes them more secure on wide or heavy drawers. Their larger size means you can grab them with one finger or your whole hand for better leverage. This design is especially helpful for people with larger hands or limited dexterity.
Mixing Knobs and Pulls for Visual Interest
Many designers recommend using knobs on upper cabinets and pulls on lower cabinets or drawers. This combination balances style and function. For the most cohesive look, select knobs and pulls from the same hardware collection, even if the styles differ slightly.
Measuring Cabinet Knob Placement
Traditional Placement for Framed Cabinets
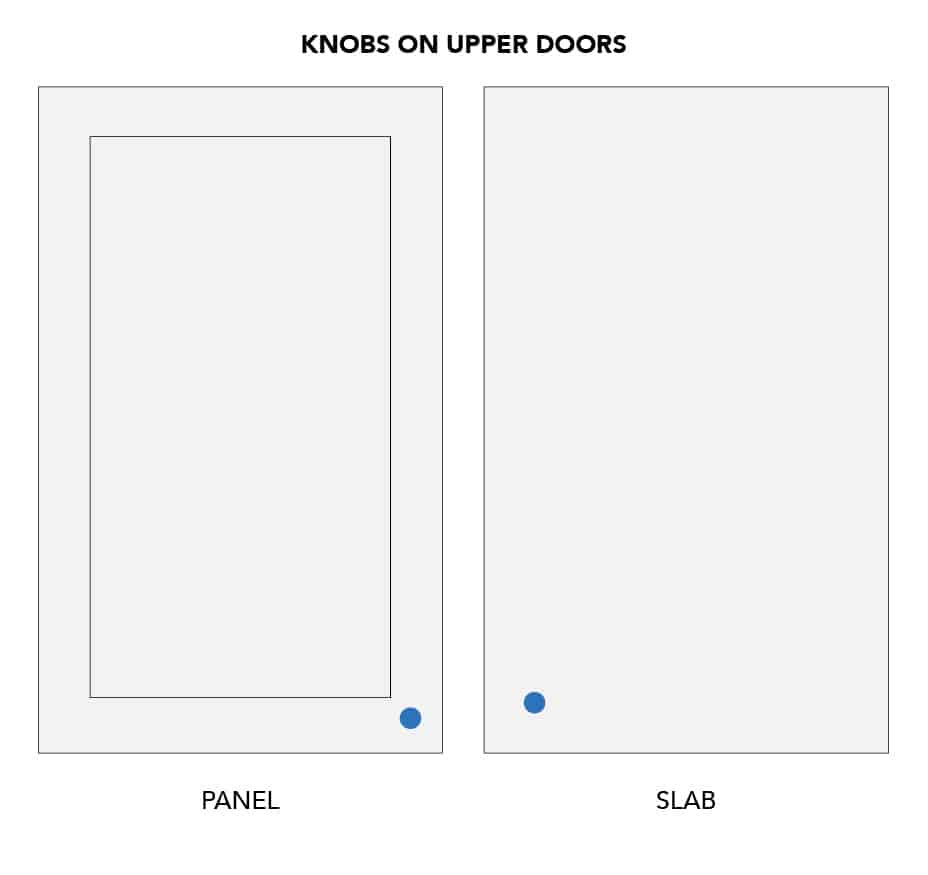
Framed cabinets have visible stiles and rails that guide your hardware placement. For a classic look, find the middle of the vertical stile and the middle of the horizontal rail. Install the knob where those two lines intersect. On drawers, place the knob in the center of the front panel for a balanced appearance.
Modern Placement for a Contemporary Look
For an updated style, center the knob on the vertical stile but position it even with the edge of the frame rail. This subtle adjustment creates a cleaner, more current aesthetic. On drawers, install the knob centered on the top rail instead of the middle of the panel.
Placement on Slab or Frameless Cabinets
Slab cabinets have no visible frame, so you’ll measure from the edges instead. Position the knob two to three inches from both the top and side edges of the door. This rule applies consistently to both doors and drawers on frameless cabinetry.
Tools You Need for Knob Installation
Essential Tools Checklist
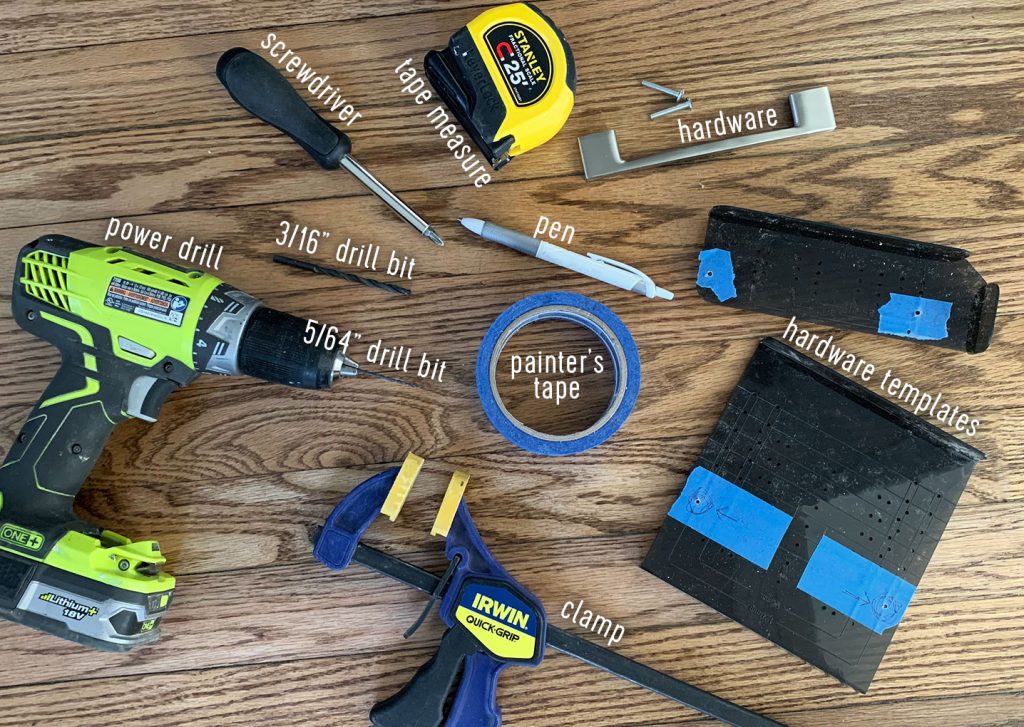
- Tape measure
- Pencil or marking tool
- Painter’s tape or masking tape
- Drill with a 1/8-inch bit (verify your knob specifications)
- Screwdriver or drill with a screwdriver bit
- Level for checking alignment
Pro Tips for Accurate Marking
Apply painter’s tape to the cabinet surface before you mark anything. This protects the finish from scratches and gives your pencil marks a surface that’s easy to see. Use a level to ensure your marks line up correctly, especially when working across multiple cabinets in a row.
Step-by-Step: How to Drill and Install Knobs
Step 1: Mark the Hole Location
Close the cabinet door and measure according to your chosen placement style. Use your tape measure to find the exact spot, then mark it with a pencil on the painter’s tape. Always double-check your measurements on the first cabinet before moving to the others.
Step 2: Verify Alignment Across All Cabinets
Open every cabinet door and compare the marked positions. Are they aligned horizontally and vertically with each other? Make any necessary adjustments now. Misaligned hardware is immediately noticeable and difficult to ignore once installed.
Step 3: Drill the Pilot Hole
Select the correct drill bit size, which is typically 1/8-inch for most knobs. Drill straight through the marked point, keeping the drill perpendicular to the door surface. Avoid angling the drill, as this can cause the screw to insert unevenly. Remove any wood shavings after drilling.
Step 4: Insert the Screw and Attach the Knob
Feed the screw through the back of the cabinet door. Thread the knob onto the screw from the front side. Tighten with a screwdriver until secure, but avoid over-tightening. Excessive force can strip the hole or crack the cabinet material.
Step 5: Repeat for All Remaining Cabinets
Work systematically through your kitchen, starting with upper cabinets and then moving to lower ones. Install hardware on all doors before switching to drawers. This organized approach helps you maintain consistency throughout the project.
Avoiding Common Installation Mistakes
Always Do a Test Installation First
Before drilling holes in every cabinet, install a knob on one door as a test. Step back and evaluate the look and feel. Is the height comfortable for daily use? Does the placement match your design vision? Adjust the position if needed before committing to the rest.
Never Assume All Cabinets Are Identical
Even in brand-new kitchens, cabinet sizes can vary slightly from one unit to the next. Measure each cabinet individually rather than relying on assumptions. This extra step prevents frustrating misalignments.
Use the Correct Drill Bit Size
A bit that’s too large weakens the screw’s grip in the wood. A bit that’s too small makes screw insertion difficult and can split the material. Always check the manufacturer’s instructions for the recommended hole size for your specific knobs.
Consider Interior Cabinet Functionality
If you have corner cabinets or lazy Susans, think about how knob placement affects usability. Make sure hardware doesn’t interfere with opening mechanisms or bump against adjacent doors when opened.
Selecting the Right Knob Size and Style
Match Knob Size to Cabinet Proportions
Small knobs around 1 to 1.25 inches work best on narrow doors and shallow drawers. Larger knobs of 1.5 inches or more suit bigger cabinets and modern designs. A knob that’s too small looks lost on a large door, while one that’s too large overwhelms a petite cabinet.
Coordinate Style with Your Kitchen Design
Farmhouse and traditional kitchens pair beautifully with cup pulls and bin pulls. Sleek bar pulls and minimalist knobs complement modern and contemporary spaces. Match your hardware finish to your faucet and lighting fixtures for a unified, intentional look.
Think About Ergonomics and Daily Use
Round knobs are classic but can feel slippery. Textured or fluted designs offer better grip and are easier to use. For family kitchens or accessible spaces, consider slightly larger or contoured knob shapes that accommodate various hand sizes.
Fixing Mistakes and Repairing Errors
What to Do If You Drill the Wrong Hole
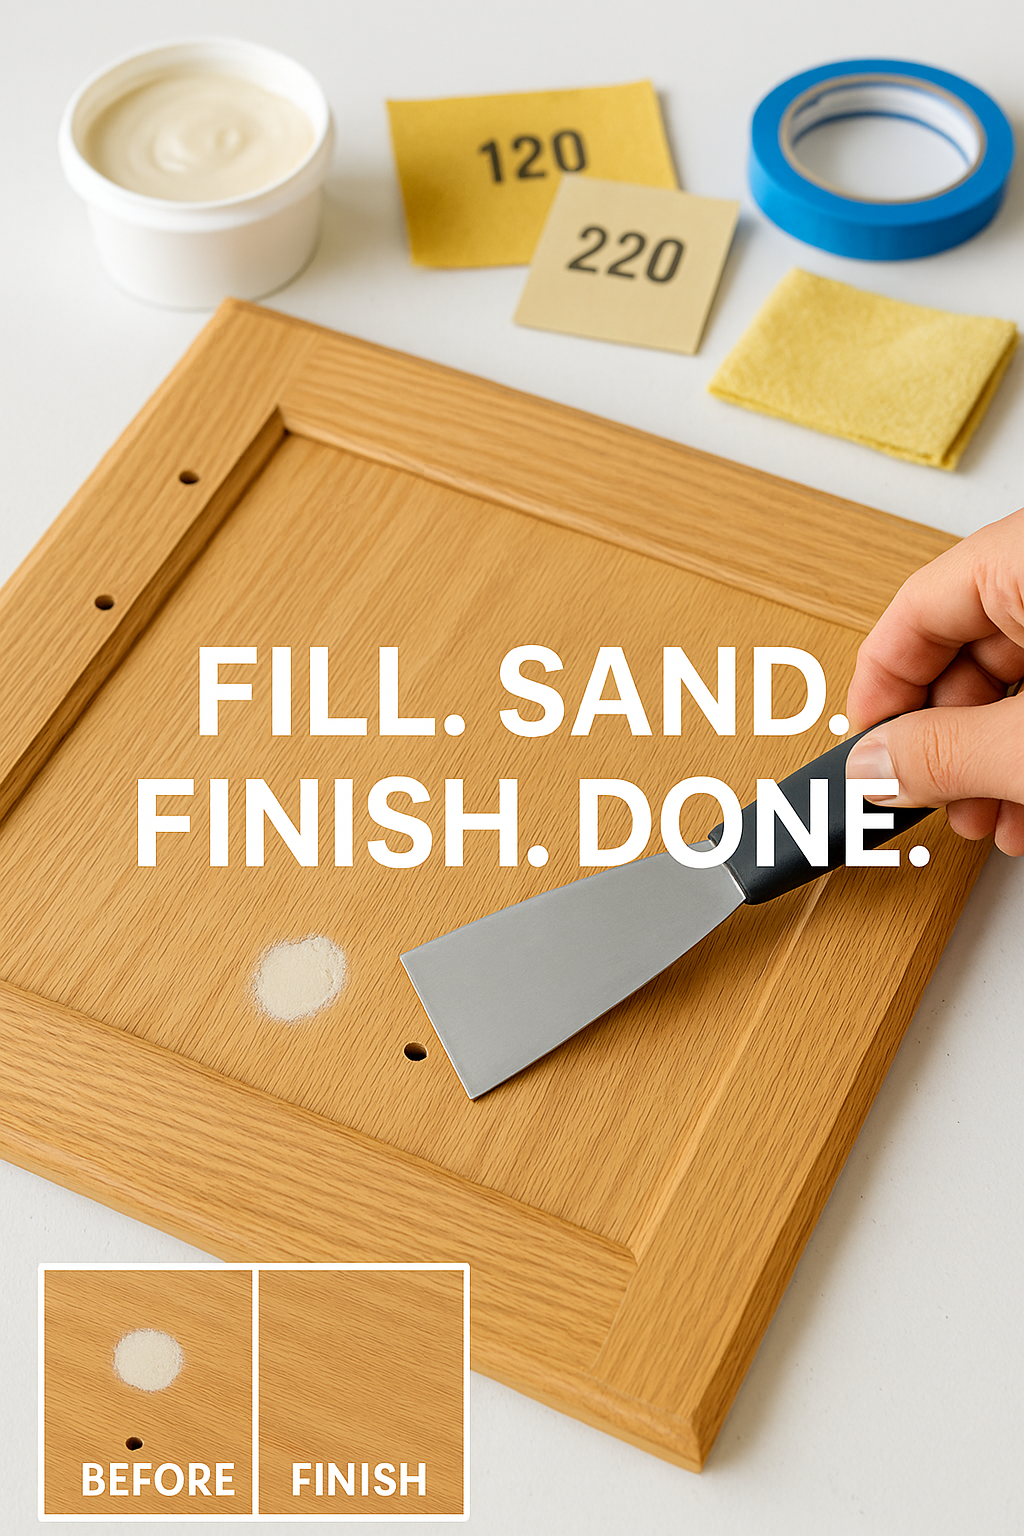
If a hole ends up off-center, you have several options. You can install a larger decorative backplate to cover the error. Alternatively, fill the hole with wood filler, sand it smooth, and re-drill in the correct position. Swapping to a pull can also work, since the two mounting points can bridge minor misalignments.
Hiding Holes from Previous Hardware
Fill old holes with wood putty or a combination of toothpicks and wood glue. Allow the filler to dry completely, then sand the area smooth. Paint or stain to match the surrounding cabinet surface. This technique is essential when updating hardware in a kitchen you plan to sell.
Maintaining Your Cabinet Knobs
Clean Knobs on a Regular Schedule
Wipe knobs weekly with a damp cloth to remove grease, fingerprints, and everyday grime. Avoid harsh chemical cleaners that can damage finishes, especially on brass or oil-rubbed bronze hardware.
Tighten Loose Knobs as Needed
Daily use causes knobs to loosen over time. Check them every few months and tighten the screws as necessary. Keep a few spare screws on hand in case replacements are needed.
Replace Worn or Damaged Hardware Promptly
If a knob cracks, chips, or loses its finish, replace it quickly. Keep extras in storage, especially if your hardware line might be discontinued in the future.
Frequently Asked Questions About Putting Knobs on Kitchen Cabinets
What is the standard height for cabinet knobs?
For traditional placement, install knobs at the intersection of the vertical stile and horizontal rail on framed cabinets. For a modern look, center the knob on the stile and align it with the edge of the frame rail. On drawers, traditional placement centers the knob on the panel, while modern placement positions it on the top rail.
How far from the edge should cabinet knobs be placed?
On slab or frameless cabinets, install knobs two to three inches from both the top and side edges of the door. This measurement applies consistently to both doors and drawers for balanced hardware placement.
What size drill bit should I use for cabinet knobs?
Most cabinet knobs require a 1/8-inch pilot hole. Always verify the recommended size in the manufacturer’s instructions that come with your specific hardware. Using the correct bit prevents splitting and ensures a secure screw fit.
Can I install knobs without a drill?
Yes, you can use a manual screwdriver to create a pilot hole, though it requires more effort. For best results, use an awl to create a starting point, then carefully drive the screw through the cabinet door. A drill makes the process faster and more precise.
How do I fix a stripped screw hole in a cabinet?
Fill the hole with wood filler or insert toothpicks coated with wood glue. Allow it to dry completely, then sand smooth. Re-drill a fresh pilot hole and install the knob with a new screw for a secure fit.
Should I use knobs or pulls on kitchen cabinets?
Knobs are simpler to install and cost less, making them ideal for doors and smaller drawers. Pulls offer better grip and stability on wide or heavy drawers. Many homeowners mix both, using knobs on upper cabinets and pulls on lower ones for optimal function and style.
Key Takeaways for Installing Cabinet Knobs
Installing knobs on kitchen cabinets is a rewarding DIY project that dramatically improves your kitchen’s appearance. The most critical factors are accurate measurement, consistent placement, and using the right tools. Take your time with the first cabinet, verify your alignment, and then replicate that positioning across the rest of your kitchen.
Remember to choose hardware that matches your cabinet proportions and complements your overall design style. Whether you prefer traditional symmetry or modern minimalism, consistency across all cabinets is the secret to a professional finish. With careful marking and precise drilling, your new knobs will look like they were installed by a professional.
Now that you know exactly how to put knobs on kitchen cabinets, gather your tools and start with a single test door. Once you see the transformation, you’ll be motivated to complete the entire kitchen. Your cabinets will thank you, and so will everyone who sees your beautiful new hardware.


