
Installing cabinet pulls is one of the simplest ways to transform the look of your kitchen or bathroom. Whether you’re upgrading worn-out hardware or refreshing newly painted cabinets, the process takes just a few hours and requires no special skills. The phrase how to put pulls on cabinets ranks among the most searched DIY topics because crooked or misaligned hardware can ruin an otherwise flawless finish. This guide walks you through measuring, marking, drilling, and securing pulls with professional-grade accuracy.
You’ll learn which tools deliver the cleanest results, how to space pulls consistently across multiple drawers, and what to do when things go wrong. From selecting the right drill bit to fixing stripped screw holes, every step is covered in plain language. By the end, your cabinets will look intentional, balanced, and expertly finished.
Choose the Right Tools
Gathering the correct tools before you start prevents frustration and protects your cabinet surfaces from damage.
Essential Installation Tools
You will need:
– Power drill with variable speed control
– Drill bits sized to match your pull hardware (commonly 1/4 inch or 3/8 inch)
– Screwdriver or a drill bit attachment for driving screws
– Measuring tape or a metal ruler
– Pencil for marking hole positions
– Level to verify straight alignment
– Masking tape to reduce wood splintering
A sharp drill bit designed for wood or metal, depending on your cabinet material, creates cleaner holes. Placing masking tape over the drill point minimizes chipping on painted, laminated, or veneered surfaces.
Helpful Additions for Accuracy
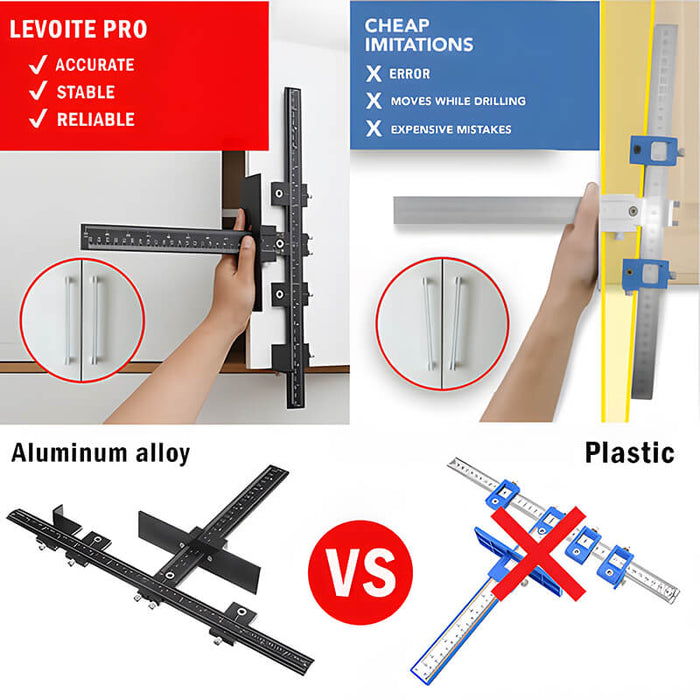
- Cabinet hardware jig – aligns holes perfectly for standard pull sizes
- Drilling template – often included with pull sets for consistent placement
- Self-centering drill bit – automatically centers the hole on drawer fronts
A jig or template proves invaluable when installing pulls across an entire kitchen. These tools guarantee identical placement on every door and drawer, saving time and eliminating guesswork.
Measure Pull Spacing Accurately

Precise measurements create the symmetrical, professional appearance you’re after.
Standard Center-to-Center Distances
Most cabinet pulls specify a center-to-center measurement, which is the distance between the two screw holes. Common sizes include:
– 3 inches – suited for smaller drawers
– 96mm (3.75 inches) – the European standard
– 5 inches – typical for large drawers and base cabinets
– 8 inches or more – reserved for wide pantries or island fronts
Always measure the distance between the screw holes on your actual pull before marking the cabinet. Manufacturer specifications may differ slightly from what you expect.
Drawer Versus Door Placement
- Drawers: Center the pull horizontally and position it 1 to 2 inches from the top edge.
- Doors: Mount pulls vertically on the stile, which is the vertical frame piece, especially on shaker-style cabinets.
- Mixed installations: Keep the same height across all drawers and doors for visual consistency.
Use your measuring tape and level to mark both screw positions clearly before picking up the drill.
Mark Drilling Points Carefully
Thoughtful marking prevents costly mistakes and mismatched hardware placement.
Use a Level for Straight Alignment
Even a slight tilt makes pulls look unprofessional. Follow these steps:
1. Lightly mark both screw positions with a pencil.
2. Lay a small level across the two marks.
3. Adjust the marks until the bubble sits centered.
4. Finalize the marks once alignment is confirmed.
For multiple drawers, measure from the same reference point, such as the top edge, to maintain consistent placement across the entire cabinet bank.
Prevent Splintering with Tape
Apply a small square of masking tape over each drilling point. The tape stabilizes the surface fibers and reduces chipping when the drill bit exits the back side of the door or drawer front.
Drill Holes with Precision
Straight, clean holes ensure screws seat properly and pulls sit flush against the surface.
Select the Correct Drill Bit Size
Most standard pulls require a 1/4 inch drill bit. If your pull uses thicker screws, consult the manufacturer’s instructions, as some hardware needs a 3/8 inch hole instead.
Drill at a slow speed to prevent the bit from wandering across the surface. Keep the drill perpendicular to the cabinet face throughout the process.
Drill Straight Through the Material
For standard through-holes:
1. Position the drill bit directly on the marked point.
2. Start slowly, applying steady, gentle pressure.
3. Continue drilling all the way through without stopping midway.
When working with hollow doors or thin panels, place a scrap piece of wood behind the surface. This backing prevents blowout and splintering on the exit side.
Clean Up Rough Edges
After drilling, lightly sand each hole with fine-grit sandpaper. Wipe away dust with a dry cloth before installing the pull hardware.
Install the Pull Hardware
With holes drilled, you’re ready to attach the pulls securely.
Insert Screws from the Front
Most cabinet pulls use machine screws that pass:
– Through the front of the cabinet door or drawer
– Into a threaded backplate or nut on the interior side
Hand-start the screw to avoid cross-threading, then tighten with a screwdriver. Avoid overtightening, as this can strip the threads or crack the cabinet material.
Tighten Evenly and Verify Alignment
Once both screws feel snug:
– Visually confirm the pull sits straight.
– Open and close the door or drawer to check for catching or wobbling.
– Make minor adjustments if the pull shifts during use.
Fix Common Installation Mistakes

Even careful DIYers encounter problems. Here’s how to resolve them quickly.
Misaligned Holes? Install Decorative Backplates
If your holes sit slightly off, mount decorative backplates or oversized rosettes over the existing holes. These covers hide gaps while adding a stylish, intentional design element.
Stripped Screw Holes? Reinforce the Wood
When a screw won’t hold:
1. Remove the screw completely.
2. Insert a toothpick or wooden matchstick coated with wood glue into the hole.
3. Snap the stick flush with the surface.
4. Let the glue dry, then reinsert the screw.
This simple repair fills enlarged holes and restores a secure grip.
Wrong Hole Size? Use Inserts or Plugs
For oversized holes:
– Install threaded inserts designed for metal or wood applications
– Or glue wooden plugs into the hole, then re-drill to the correct size
Alternatively, switch to a larger pull that naturally covers the existing holes.
Maintain Consistent Style and Finish
Hardware significantly impacts your kitchen’s overall aesthetic, so choose and place pieces thoughtfully.
Match Pulls to Cabinet Style
- Shaker cabinets: Simple bar pulls or cup pulls in satin finishes
- Modern cabinets: Sleek, linear pulls in matte black or brushed nickel
- Traditional cabinets: Ornate knobs or bin pulls in antique brass
Ensure all pulls in a room share the same finish and size to create cohesion across the space.
Coordinate with Other Fixtures
Match your pull finish to:
– Kitchen faucets
– Light fixtures
– Appliance handles
This coordination produces a unified, designer-curated appearance throughout the room.
Upgrade Old Cabinets on a Budget
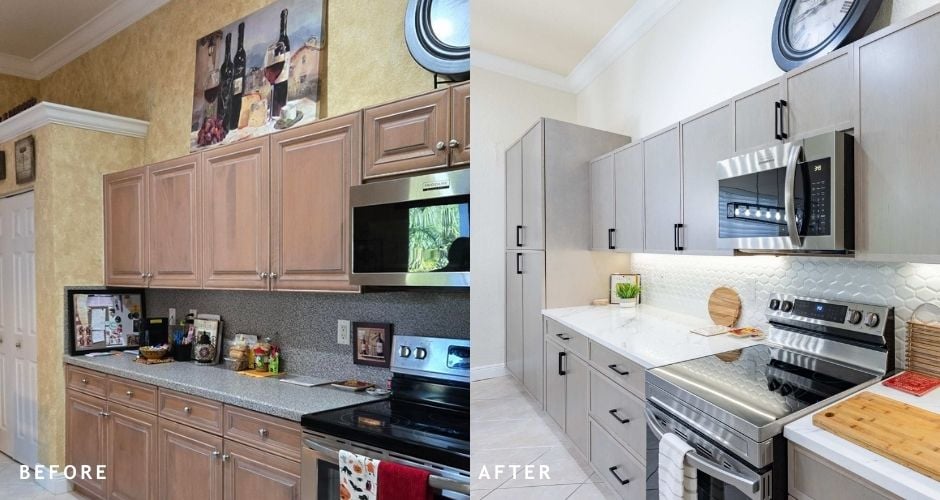
Replacing pulls ranks among the most cost-effective kitchen updates available.
Cost Versus Impact
- Average cost per pull: $5 to $20
- Installation time: Under one hour for a full set of cabinets
- Return on investment: Up to 90 percent when selling your home
Even premium looks remain affordable. Brushed brass or matte black pulls add instant luxury without a major financial commitment.
Combine Paint and Hardware
For maximum transformation:
1. Paint cabinets in a modern color such as navy, gray, or soft white
2. Install new pulls in a contrasting or complementary finish
This combination revitalizes outdated kitchens without the expense of a full remodel.
Frequently Asked Questions About How to Put Pulls on Cabinets
What is the standard height for cabinet pulls on drawers?
Most installers place drawer pulls 1 to 2 inches from the top edge, centered horizontally. This position feels natural to grip and maintains visual consistency across multiple drawers.
Do I need a template to install cabinet pulls?
A template or jig is not required but is highly recommended for multi-cabinet projects. These tools guarantee identical hole placement on every door and drawer, eliminating measurement errors and saving significant time.
What drill bit size should I use for cabinet pulls?
Most standard pulls require a 1/4 inch drill bit. Check your hardware’s manufacturer instructions, as some thicker screws need a 3/8 inch hole. Using the correct size prevents loose-fitting screws and damaged threads.
How do I fix a pull that keeps coming loose?
Remove the screw and insert a toothpick or wooden matchstick coated in wood glue into the hole. Snap it flush, allow the glue to dry completely, then reinsert the screw. This fills the enlarged hole and restores a secure hold.
Can I install pulls on hollow cabinet doors?
Yes, but place a scrap piece of wood behind the drilling point to prevent blowout. This backing supports the material and prevents splintering when the drill bit exits the back side of the door.
Should I match cabinet pulls to my faucet finish?
Matching your pull finish to faucets, light fixtures, and appliance handles creates a cohesive, professionally designed look. Mixing finishes can appear unintentional or cluttered, so consistency is key.
Key Takeaways for Installing Cabinet Pulls
Successful pull installation comes down to three fundamentals: accurate measurement, careful drilling, and consistent placement. Take time to measure each pull’s center-to-center distance and mark both holes before touching the drill. Use a level to verify alignment, and apply masking tape to prevent splintering on finished surfaces.
When mistakes happen, simple solutions exist. Backplates hide misaligned holes, wood glue and toothpicks fix stripped screws, and threaded inserts correct oversized openings. None of these repairs require professional help or expensive tools.
Now that your pulls are installed, step back and admire the transformation. That simple hardware swap delivers a fresh, polished look that elevates your entire space. Enjoy your updated cabinets and the satisfaction of a job done right.


