
Tired of your dated kitchen but dreading the mess and effort of painting cabinets? You’re not alone. Many homeowners love the solid construction of their existing cabinetry but want a fresh, modern look without picking up a paintbrush. The good news is you can completely transform your kitchen without painting a single cabinet.
By focusing on strategic upgrades that work with your current setup, you can achieve a high-impact refresh that feels brand new. From swapping hardware to replacing countertops and adding open shelving, this guide walks you through proven, budget-friendly methods to modernize your space. Whether you’re dealing with 1990s oak cabinets or just want to elevate tired wood tones, these techniques will help you create a warm, inviting kitchen that reflects your style, no primer required.
Replace Cabinet Doors and Drawer Fronts
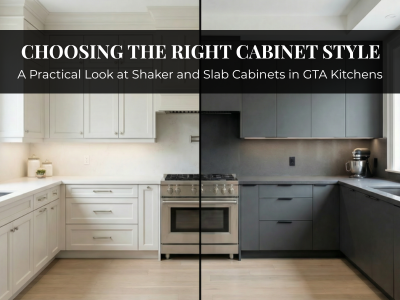
Upgrading your cabinet doors and drawer fronts is one of the most effective ways to change your kitchen’s look without altering the underlying boxes. This approach preserves the structural integrity of your existing cabinetry while giving you full control over style, color, and finish.
Choose Modern Door Styles
Swap out dated panel designs for clean, contemporary options like shaker-style or slab doors, which instantly modernize the space. Shaker doors offer timeless appeal with their simple recessed panels, while flat-slab styles deliver a sleek, minimalist look. Consider contrasting wood tones or even painted finishes on new doors to create visual interest, even if you’re not painting the originals.
Match Doors to Your Design Theme
For a modern rustic vibe, opt for warm wood species like walnut or hickory in matte or hand-rubbed stains. If you prefer a crisp contrast, install white or charcoal-gray doors that pop against your original wood cabinetry. Just ensure the new doors are pre-drilled to match your existing hinge placement, or plan to update hinges as part of the project.
DIY vs. Professional Installation
While door replacement is a common DIY project, precision matters. Misaligned doors can ruin the look. If your cabinet boxes aren’t perfectly square or you’re installing European-style hinges, professional help may be worth the investment. Budget for $100 to $250 per door depending on material and craftsmanship, with potential savings through semi-custom suppliers.
Flip Cabinets to Reveal Lighter Interiors
An innovative, paint-free trick for dated oak cabinets is flipping them around so the less-orange interior surfaces become the new exterior. This clever technique leverages the fact that inside cabinet panels often have a milder, more natural finish than the heavily stained exteriors.
How Cabinet Flipping Works
Remove each door, flip it 180 degrees, and reattach it so the former inside faces outward. Since interior wood was protected from UV exposure and wear, it typically appears less faded and less orange, a subtle but noticeable upgrade. This method works best when combined with exposed hardware.
Use Rustic Hinges to Hide Old Holes
Flipping doors means old hinge screw holes will now be visible on the front. Solve this by installing rustic-style barn hinges or wrought iron pulls, which cover imperfections while adding character. These vintage-inspired elements double as decorative features, turning a limitation into a design win.
Limitations and Tips
Not all cabinets are symmetrical, so test one door first. Also, ensure the interior side is smooth and undamaged. This method is ideal for DIYers and costs next to nothing beyond new hardware, making it a smart choice for tight budgets.
Upgrade Cabinet Hardware

Swapping out outdated knobs and pulls is one of the fastest, cheapest ways to refresh your kitchen. New hardware can shift the entire aesthetic from 90s builder-grade to modern rustic in under an hour.
Select High-Impact Finishes
Choose matte black, aged brass, or wrought iron finishes to add warmth and sophistication. These tones pair beautifully with brown-based cabinetry and coordinate seamlessly with modern appliances like matte black fridges. Avoid shiny chrome or brass, which can emphasize dated features.
Coordinate Hardware with Fixtures
Match your new hardware to other metal elements in the kitchen: faucet, light fixtures, and appliance handles. Consistent finishes create cohesion and make the space feel intentionally designed. For example, aged brass hardware paired with a matching faucet adds elegance without overpowering warm wood tones.
Budget-Friendly DIY Project
Hardware replacement costs $200 to $600 for a full kitchen and requires only a screwdriver. It’s an ideal first step, offering instant gratification before tackling larger projects.
Install New Countertops
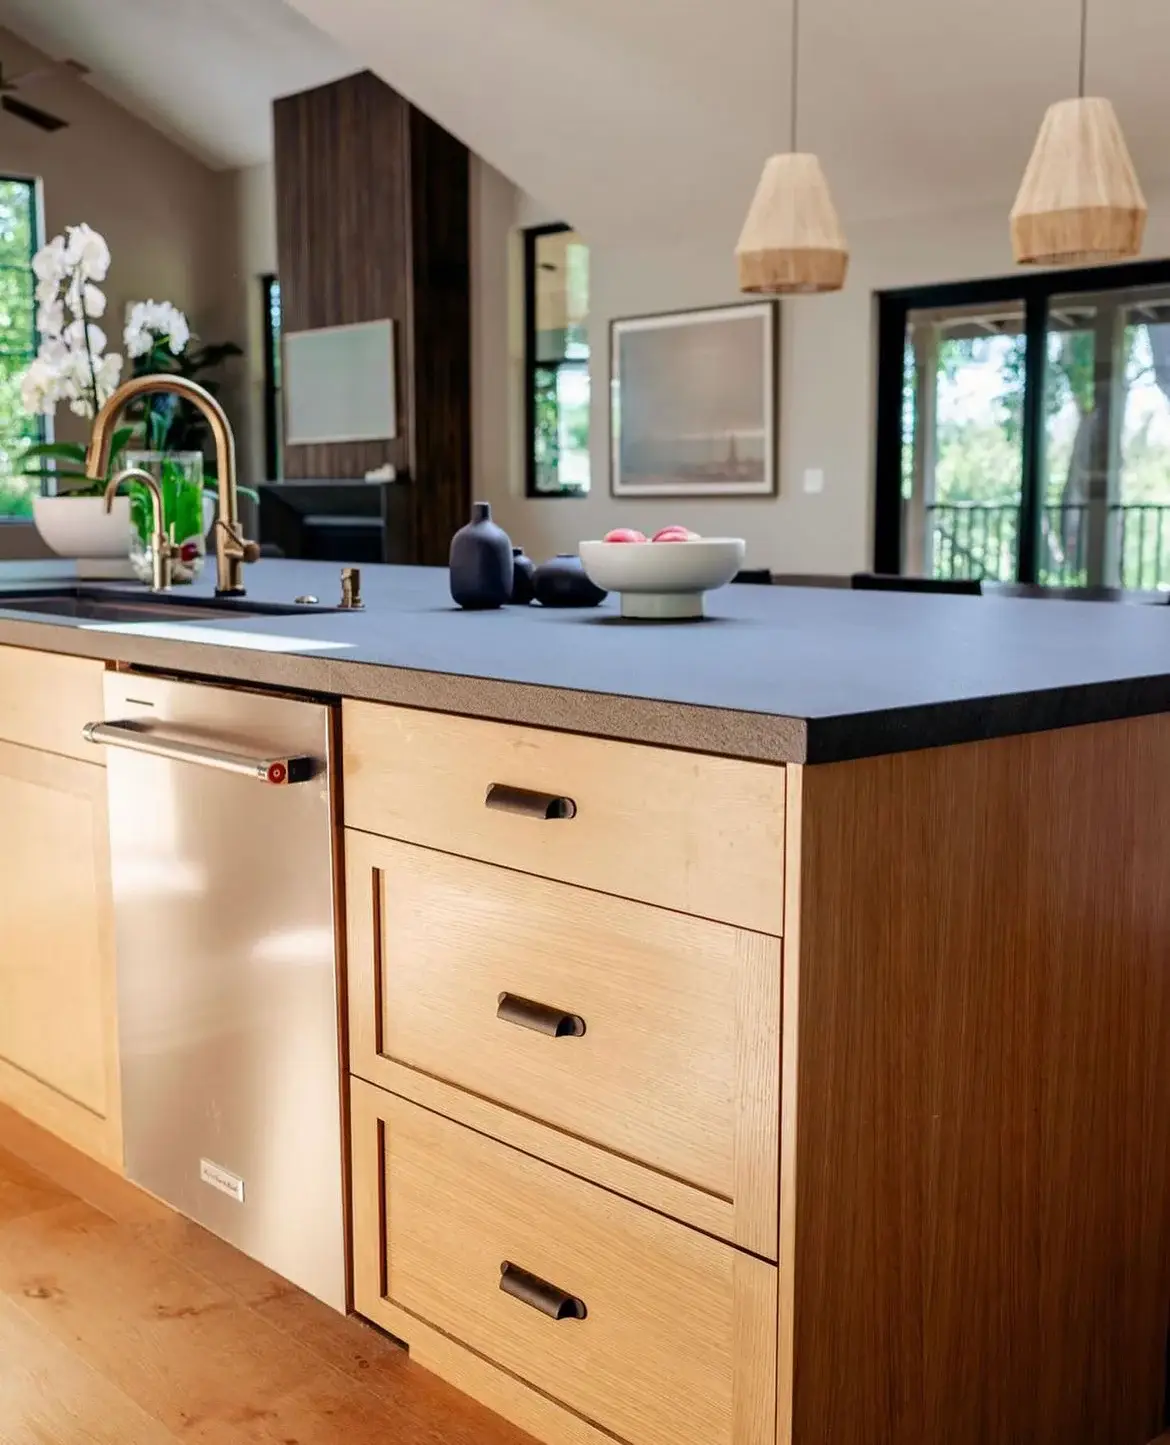
Countertops dominate the visual field in any kitchen. Replacing them draws attention away from cabinetry and instantly elevates the entire room.
Choose Dark, Textured Granite
Opt for honed or leathered Absolute Black granite, a top recommendation from designers. Its matte, non-reflective surface mimics the look of soapstone, adding depth and luxury. Unlike glossy finishes, it hides smudges and complements both wood cabinets and matte black appliances.
Alternative Countertop Materials
- Butcher block: Adds warmth and works well with rustic kitchens. Seal regularly to prevent staining.
- Quartz: Low-maintenance and available in wood-like or concrete-look patterns.
- Marble: Elegant but requires sealing; best for low-spill areas.
Visual Impact and Cost
Countertop replacement typically costs $1,500 to $4,000, depending on size and material. Even at the higher end, it’s less than full cabinet replacement, and the payoff is enormous. A dark countertop contrasts beautifully with medium-toned cabinets, creating a balanced, modern composition.
Add a Stylish Backsplash
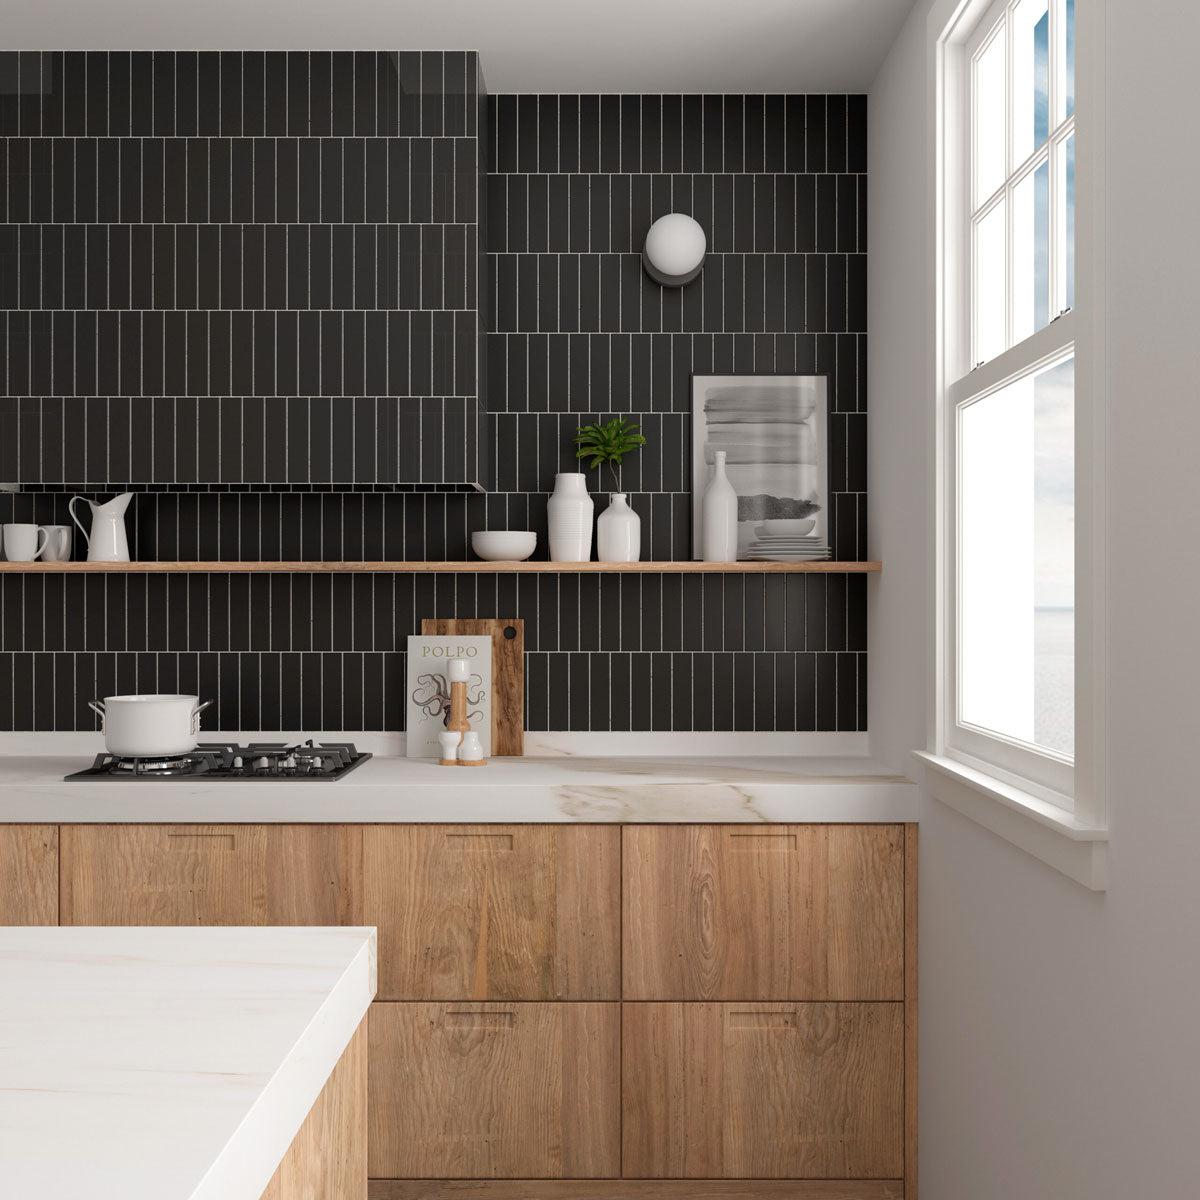
A well-chosen backsplash acts as a focal point, pulling the eye upward and away from older cabinetry. It’s also one of the most DIY-friendly upgrades.
Pick Bold or Textured Tile
Avoid plain white subway tile, as it can make a warm-toned kitchen feel disjointed. Instead, go for dark or medium-gray subway tiles with a matte or textured finish. These add depth without creating a sterile, clinical look. For more character, consider glass mosaic or natural stone tiles.
Coordinate Backsplash with Countertops
Match your backsplash to the countertop’s tone and texture. A honed black granite pairs perfectly with charcoal-gray matte tile, creating a cohesive, grounded feel. Use the same grout color as the tile to minimize grout lines and enhance continuity.
Easy Installation, Big Results
Backsplash installation averages $500 to $1,000 in materials. With basic tiling skills, you can complete it in a weekend. The result is a polished, intentional look that masks outdated cabinetry.
Update Lighting Fixtures

Lighting transforms both function and mood. Outdated ceiling fixtures or dim lighting can make even a clean kitchen feel tired.
Hang Statement Pendants
Install modern pendant lights over islands or sinks. Choose finishes like black metal, copper, or wrought iron to complement your hardware. Pendants serve as jewelry for your kitchen, drawing the eye upward and adding architectural interest.
Add Under-Cabinet LED Strips
These provide practical task lighting while highlighting new countertops and backsplashes. Opt for warm white LEDs (2700K to 3000K) to maintain a cozy atmosphere. The soft glow enhances wood tones and makes the space feel welcoming at night.
Budget Allocation for Lighting
Plan to spend $300 to $800 on lighting. Under-cabinet strips cost as little as $50 for a full run, while statement pendants range from $100 to $300 each. Even modest upgrades make a dramatic difference.
Integrate Open Shelving
Replacing a few upper cabinet doors with open shelves breaks up the boxy look of traditional cabinetry and introduces a modern, airy feel.
Select Strategic Locations
Convert one or two cabinets, typically above the sink or near the cooking zone, into open shelves. Avoid overcrowding; too many open shelves can make the kitchen feel cluttered. Keep frequently used items in closed cabinets and reserve shelves for display-worthy dishes or cookware.
Style Shelves for Warmth and Personality
Style shelves with neutral dishware, wooden cutting boards, ceramic jars, and indoor plants. Use woven baskets or linen bins to hide less attractive items. This curated look adds texture and life, making the kitchen feel lived-in and personal.
Installation Tips
Remove doors and hinges, then sand and seal the exposed interior if needed. Install floating shelves using heavy-duty brackets. For a seamless look, use wood that matches or complements your existing cabinetry.
Add a Kitchen Island or Cart
Introducing a freestanding island or rolling cart creates a new focal point and shifts attention away from original cabinets.
Choose a Contrasting Finish
Select a white, black, or metal-framed island to stand out against wood cabinetry. A butcher block top adds warmth, while a dark base grounds the space. This contrast makes the island the star, distracting from older elements.
Benefits of Rolling Carts
If a built-in island isn’t feasible, a rolling kitchen cart offers flexibility. Use it for prep space, extra storage, or even as a breakfast bar. Look for models with open shelving, baskets, and metal accents to enhance the modern rustic aesthetic.
Budget and Impact
Islands range from $800 to $2,500, while quality carts start at $300. Even a modest addition significantly boosts both function and style.
Upgrade Flooring
Outdated or worn flooring can drag down the entire kitchen. Replacing it ties the space together and complements other updates.
Install Warm-Tone LVT Planks
Luxury vinyl tile (LVT) with a wood plank look is durable, water-resistant, and easy to install. Choose warm brown or honey oak tones to harmonize with existing cabinetry and dining furniture. Avoid cool grays, as they clash with brown-based palettes.
DIY-Friendly with Lasting Results
LVT clicks together like laminate and doesn’t require glue in most cases. With basic tools, you can finish a 10×12 kitchen in a weekend. Budget $1,200 for materials, underlayment, and tools, a fraction of hardwood replacement cost.
Coordinate with Overall Palette
Ensure the new floor complements your countertop, backsplash, and cabinet colors. A warm floor unifies the space and prevents the kitchen from feeling disjointed.
Style with Decorative Accents
Final touches bring personality and polish. These small changes have outsized impact.
Refresh Fixtures and Appliances
Swap out an old faucet for a matte black or aged brass model. If budget allows, add a stainless steel or black sink. These updates tie in with new hardware and lighting, creating a cohesive design story.
Add Plants, Rugs, and Art
- Plants: Snake plants, pothos, or herbs in ceramic pots add life.
- Rugs: A flat-weave jute or vintage-style rug defines zones and softens hard surfaces.
- Artwork: Hang framed prints or a small shelf with decorative objects.
Declutter and Organize
Clear countertops of unnecessary items. Store appliances in cabinets or on open shelves in matching baskets. A clean, organized kitchen feels larger and more intentional.
Follow a Smart Budget Plan
Even with multiple upgrades, you can stay within a $4,000 budget by prioritizing high-impact changes and doing some work yourself.
Sample Budget Breakdown
| Category | Allocation | Key Items |
|---|---|---|
| Flooring | $1,200 | LVT planks, underlayment, tools |
| Lighting | $800 | Pendants, under-cabinet LEDs |
| Hardware | $600 | Pulls, knobs, hinges |
| Countertop & Backsplash | $1,000 | Granite, tile, installation supplies |
| Decor & Misc. | $400 | Plants, rugs, baskets, sink/faucet |
Cost-Saving Strategies
- DIY where possible: Flooring, hardware, lighting, and backsplash are all DIY-friendly.
- Phase projects: Start with hardware and lighting, then tackle flooring and countertops later.
- Shop sales: Look for end-of-season deals on tile and lighting.
Design for Warmth and Cohesion
The key to a successful no-paint cabinet update is creating a unified, warm, and inviting space.
Stick to Earth Tones
Use deep browns, charcoal, and warm grays throughout. These colors respect existing brown tones in your home and prevent the kitchen from feeling cold or generic.
Build Around Focal Points
If you have a matte black refrigerator or rustic dining table, use it as a design anchor. Choose countertops, hardware, and accessories that complement these pieces.
Avoid Over-Modernizing
Skip stark white cabinets, glossy finishes, or industrial elements if they clash with your home’s character. Instead, aim for modern rustic, a balanced blend of clean lines and natural materials.
Frequently Asked Questions About Updating Kitchen Cabinets Without Painting
Can I update my kitchen cabinets without painting them?
Yes, absolutely. You can replace cabinet doors and drawer fronts, flip doors to reveal less dated interiors, upgrade hardware, install new countertops and backsplashes, add open shelving, and introduce islands or carts. These methods preserve your original cabinetry while transforming the overall look.
What is the cheapest way to update kitchen cabinets without painting?
Swapping cabinet hardware is the most budget-friendly option, costing $200 to $600 for a full kitchen. Cabinet flipping is nearly free, requiring only new hinges and pulls. Both projects are DIY-friendly and deliver immediate visual impact.
How do I update oak cabinets without painting?
For oak cabinets, consider flipping doors so the less-orange interior surfaces face outward. Pair this with rustic hinges and wrought iron hardware to cover old screw holes. Adding dark granite countertops and warm-toned flooring also helps modernize the space.
What countertop material looks best with wood cabinets without painting?
Honed or leathered Absolute Black granite is a top recommendation. Its matte, soapstone-like appearance contrasts beautifully with warm wood tones and coordinates with matte black appliances. Butcher block and quartz are also excellent alternatives.
Is it worth replacing cabinet doors instead of painting?
Yes, replacing doors and drawer fronts gives you complete control over style and finish while preserving your existing cabinet boxes. This approach costs less than full cabinet replacement and delivers a dramatic transformation.
How much does it cost to update a kitchen without painting cabinets?
A comprehensive update can be done for around $4,000. This budget covers new flooring ($1,200), lighting ($800), hardware ($600), countertop and backsplash ($1,000), and decorative accents ($400). Phasing projects can reduce upfront costs.
Key Takeaways for Updating Kitchen Cabinets Without Painting
You don’t need to paint your kitchen cabinets to give them a stunning makeover. By replacing doors, upgrading hardware, installing new countertops and backsplashes, and enhancing lighting and flooring, you can achieve a completely transformed space on a reasonable budget and without the hassle of sanding and priming.
Focus on cohesive design, warm materials, and strategic distractions to draw the eye away from dated finishes. Start with the highest-impact, lowest-effort changes like hardware and lighting, then work your way up to larger projects. With these proven techniques, your kitchen will feel fresh, functional, and uniquely yours, no paint required.


